I figured making a healthy snack that actually tastes good and keeps you full would take some complicated recipe with expensive protein powder and weird ingredients I’d have to order online. It took about one afternoon of staring into my pantry, feeling hangry, for that assumption to fall apart completely. I just wanted something I could grab between work calls and school pickup that didn’t taste like cardboard and wasn’t a sad rice cake.
Honestly, these high-protein peanut butter energy balls started as a desperate experiment. I had a jar of peanut butter that was almost empty, some old-fashioned oats I bought for a recipe I never made, and a bag of chocolate chips staring at me from the shelf. I figured I’d just mash it all together and hope for the best. What came out of that bowl was so much better than I expected—chewy, sweet, salty, and surprisingly filling. They didn’t even last the day in my fridge.
What gets me every time is how something this simple can be so satisfying. You don’t need a food processor, you don’t need to turn on the oven, and you don’t need a list of exotic ingredients. It’s just a handful of pantry staples that somehow turn into a snack that feels like a treat. These little guys have saved me from countless vending machine trips and afternoon slumps. I think that’s why they’ve stuck around in my kitchen rotation for years now—they’re honest food that actually works.
Why You’ll Love This Recipe
Let’s be real—we all need snacks that do more than just fill a gap. These energy balls are the kind of recipe that makes you feel like you’ve got your act together, even on chaotic days. I’ve tested this exact combination more times than I can count, and it’s the one that always delivers. Here’s why you’re going to love them:
- Quick & Easy: You can whip up a batch in under 15 minutes. No baking, no waiting, no complicated steps. Just mix, roll, and eat.
- Simple Ingredients: You probably have everything in your pantry right now. Oats, peanut butter, honey, chocolate chips—no fancy health food store trips required.
- Perfect for Busy Days: These are my go-to for everything from pre-workout fuel to afternoon pick-me-ups. They’re also great for lunchboxes, road trips, or just keeping the hangry monster at bay.
- Crowd-Pleaser: My kids love them. My husband loves them. Even my mom, who is suspicious of anything “healthy,” asks me to make them. They just taste like a peanut butter cookie in ball form.
- Unbelievably Satisfying: With a solid dose of protein and fiber, these actually keep you full. No more reaching for another snack twenty minutes later.
What makes these different from every other energy ball recipe out there? It’s the texture, honestly. I’ve found the perfect ratio of wet to dry ingredients so they aren’t too sticky or too crumbly. They hold together beautifully, roll out perfectly, and have that soft, chewy bite that makes you forget they’re actually good for you. I’ve tried versions that were dry and fell apart, and versions that were so sticky they were impossible to roll. This one hits the sweet spot.
This recipe isn’t just good—it’s the kind of snack that makes you close your eyes after the first bite. It’s comfort food reimagined: healthier, faster, but with the same soul-soothing satisfaction. Perfect for impressing yourself without any stress, or turning a simple afternoon into something a little more manageable.
What Ingredients You Will Need
This recipe uses simple, wholesome ingredients to deliver bold flavor and satisfying texture without the fuss. Most of these are pantry staples you probably already have, which is exactly why I love this recipe. Let’s break down what you’ll need and why each one matters.
- 1 cup creamy peanut butter (natural or regular—I prefer Skippy or Jif for best texture, but any brand works. If using natural, make sure to stir it well and use one that isn’t too oily, or your balls might be greasy.)
- 1 cup old-fashioned rolled oats (not quick oats—they get mushy. Old-fashioned oats give the best chewy texture. If you’re gluten-sensitive, make sure to grab certified gluten-free oats.)
- ⅓ cup honey (or maple syrup for a vegan option. Honey adds a subtle floral sweetness that I personally love, but maple syrup works beautifully too.)
- ½ cup mini chocolate chips (semi-sweet or dark—I’m partial to Ghirardelli or Enjoy Life for dairy-free. The mini ones distribute better so you get chocolate in every bite.)
- ¼ cup ground flaxseed (this is my secret ingredient for extra fiber and omega-3s. You can’t taste it, I promise. It also helps bind everything together.)
- ½ teaspoon vanilla extract (pure vanilla, not imitation, if you have it. It rounds out the flavor and makes them taste more like a treat.)
- Pinch of sea salt (just a tiny pinch—peanut butter is already salty, but this little extra makes the flavors pop. If you’re using salted peanut butter, you can skip this.)
That’s it. Seven ingredients, and you probably have six of them right now. The flaxseed might be the only one you need to pick up, and it’s worth it for the texture boost alone. I’ve also made these with almond butter and sunflower seed butter for friends with peanut allergies, and they work great—just expect a slightly different flavor profile.
Equipment Needed
You don’t need much for this recipe, which is part of its charm. Here’s what I use:
- Large mixing bowl—any size works, but you want enough room to get your hands in there.
- Measuring cups and spoons—standard set will do.
- Rubber spatula or wooden spoon—for the initial mixing before you get messy.
- Baking sheet or large plate—to hold the rolled balls while you finish the batch.
- Parchment paper or wax paper—optional but helpful so the balls don’t stick to your tray.
- Cookie scoop (optional)—I use a small 1-tablespoon scoop for even, consistent balls. It makes the process faster and less sticky. But honestly, your hands work just fine.
If you don’t have a cookie scoop, just use a regular spoon and roll with your palms. I’ve done it both ways, and the results are identical—the scoop just saves you a few minutes. I got mine for like five bucks at a kitchen supply store, and it’s one of those tools I use way more than I expected.
Preparation Method
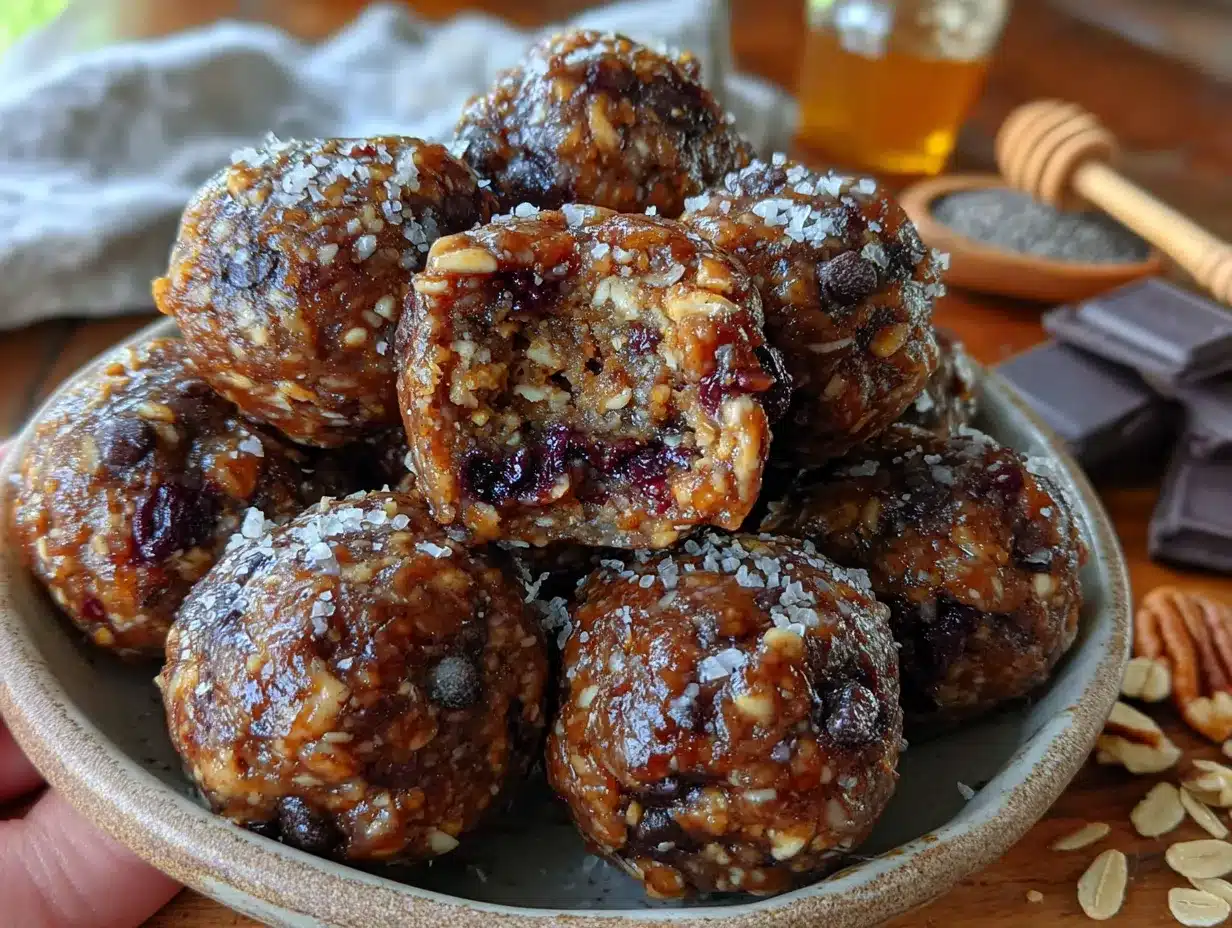
Alright, let’s get rolling—literally. This is where the magic happens. Follow these steps, and you’ll have a batch of energy balls in no time.
- Combine the dry ingredients. In your large mixing bowl, add the rolled oats, ground flaxseed, and a pinch of sea salt. Give it a quick stir with your spatula to distribute the flaxseed evenly. You don’t want clumps of it hiding in there.
- Add the wet ingredients. Spoon in the peanut butter, drizzle the honey, and add the vanilla extract. Don’t add the chocolate chips yet—we’ll fold those in later so they don’t get crushed.
- Mix it all together. Start stirring with your spatula. At first, it will look like a crumbly mess, and you’ll wonder if you did something wrong. Keep going. The peanut butter and honey will slowly work their way through the oats. Once it starts coming together, switch to using your hands. I know it’s messy, but it’s the best way to make sure everything is fully incorporated. Squeeze and knead the mixture for about a minute until it holds together when pressed. If it feels too dry, add a teaspoon of honey or a splash of water. If it feels too sticky, add a tablespoon of oats.
- Fold in the chocolate chips. Once your mixture is uniform and holds together, add the mini chocolate chips. Use your hands to gently knead them in, making sure they’re evenly distributed. You don’t want one ball to get all the chocolate chips while another gets none.
- Chill the mixture (optional but recommended). Pop the bowl in the fridge for 15-20 minutes. This firms up the mixture and makes the rolling step way less sticky. I know you’re impatient—I am too. But trust me, this short chill makes a big difference. If you’re in a hurry, you can skip it, but your hands will get a little messier.
- Roll into balls. Line your baking sheet or plate with parchment paper. Scoop out about 1 tablespoon of the mixture (or use your cookie scoop) and roll it between your palms to form a smooth ball. Place it on the prepared sheet. Repeat until all the mixture is used. You should get about 20-24 balls, depending on how big you roll them.
- Final chill. Place the tray of rolled balls in the fridge for at least 30 minutes to set. This helps them hold their shape. If you can wait an hour, even better. I’ve definitely eaten them right after rolling, and they’re still delicious—just a little softer.
One thing I learned the hard way: don’t over-roll. If you keep rolling and rolling, the heat from your hands can make the mixture greasy. Just a few gentle rolls until they’re round, and you’re done.
Cooking Tips & Techniques
I’ve made these energy balls more times than I can count, and I’ve definitely learned a few things along the way. Here are my best tips to make sure yours turn out perfect every time.
The texture test. Before you start rolling, grab a small handful of the mixture and squeeze it in your fist. If it holds together without crumbling, you’re good. If it falls apart, it needs more moisture—add a little honey or a splash of milk (dairy or plant-based). If it’s too sticky and wet, add more oats, one tablespoon at a time. This is the most important step, and it’s saved me more than once.
Use room temperature peanut butter. If your peanut butter is straight from the fridge, it will be hard to mix and won’t incorporate as smoothly. Let it sit out for 15-20 minutes before you start. Or, if you’re like me and forget, just microwave it for 10-15 seconds to soften it up.
Don’t skip the flaxseed. I know it seems like an optional add-in, but it really helps with texture and binding. Without it, the balls can be a little too soft and prone to falling apart. Plus, you get that extra fiber boost, which is never a bad thing.
Keep your hands slightly damp. If the mixture is sticking to your palms while rolling, lightly wet your hands with a little water. It creates a barrier and makes the process much smoother. I figured this out after a particularly sticky batch, and it was a game-changer.
Batch consistency matters. Use a cookie scoop or measure your first ball to get a sense of size, then try to make them all similar. This ensures they all chill and set at the same rate. Nobody wants one giant ball and a bunch of tiny ones.
Variations & Adaptations
One of the best things about this recipe is how flexible it is. I’ve tried so many variations, and they’ve all been delicious in their own way. Here are some of my favorites:
- Chocolate Lover’s Version: Swap the mini chocolate chips for chopped dark chocolate chunks and add a tablespoon of cocoa powder to the dry ingredients. It’s like eating a healthy brownie bite.
- Vegan & Dairy-Free: Use maple syrup instead of honey, and make sure your chocolate chips are dairy-free. I use Enjoy Life brand, and they work perfectly. The texture is slightly different—a little softer—but still amazing.
- Nut-Free Option: Substitute the peanut butter with sunflower seed butter or tahini. Keep in mind that sunflower seed butter can react with baking soda (not an issue here since we’re not baking) but it might turn a little green over time. It’s still safe to eat, just not as pretty.
- Add Some Crunch: Mix in ¼ cup of chopped peanuts or almonds for extra texture. I love doing this when I want something a little more substantial.
- Fruity Twist: Add ¼ cup of dried cranberries, chopped dried apricots, or raisins along with the chocolate chips. The tartness of dried fruit pairs beautifully with the sweet peanut butter.
- Protein Boost: Add a scoop of your favorite vanilla or chocolate protein powder. You’ll need to add an extra tablespoon or two of liquid (milk or water) to balance the dryness. I’ve done this with collagen peptides too, and it works great.
- Spiced Version: Add ½ teaspoon of cinnamon and a pinch of nutmeg to the dry ingredients. It gives them a cozy, almost oatmeal-cookie vibe. Perfect for fall.
I once made a batch with coconut flakes and dark chocolate chunks, and they disappeared in two days. My kids called them “cookies without the oven,” which is basically the highest compliment.
Serving & Storage Suggestions
These energy balls are incredibly versatile when it comes to serving. I love them straight from the fridge—cold, firm, and satisfying. They’re perfect for grabbing on your way out the door, tossing in a lunchbox, or packing for a hike. I’ve also served them at room temperature for parties and brunches, and they’re always a hit.
For a pretty presentation, arrange them on a plate with a few fresh berries or sliced apples. They look beautiful on a snack board alongside cheese, nuts, and fruit. I’ve even crumbled them over yogurt or oatmeal for a quick breakfast boost.
Storage: Keep your energy balls in an airtight container in the refrigerator. They’ll stay fresh for up to 2 weeks—though in my house, they rarely last that long. You can also layer them between sheets of parchment paper if you’re stacking them.
Freezing: These freeze beautifully. Place the rolled balls on a baking sheet and freeze until solid (about 1-2 hours), then transfer them to a freezer-safe bag or container. They’ll keep for up to 3 months. I love having a stash in the freezer for busy mornings or last-minute snack emergencies. Just let them thaw in the fridge for a few minutes, or eat them straight from the freezer—they’re actually delicious frozen, like little peanut butter ice cream bites.
Reheating: There’s no need to reheat these, but if you want a softer texture, let them sit at room temperature for 10-15 minutes before eating. I’ve also microwaved one for about 10 seconds to soften it up on a cold day. It’s not necessary, but it’s nice.
One thing I’ve noticed: the flavors actually get better after a day or two in the fridge. The oats soften slightly, the peanut butter melds with the honey, and everything just comes together. So if you can resist eating them all on day one, you’re in for a treat on day two.
Nutritional Information & Benefits
Here’s an approximate nutritional breakdown for one energy ball (based on 22 balls, using standard ingredients):
| Nutrient | Amount per ball |
|---|---|
| Calories | 145 |
| Protein | 5g |
| Fat | 8g |
| Carbohydrates | 15g |
| Fiber | 2g |
| Sugar | 8g |
These numbers will vary depending on your exact ingredients, but they give you a good idea. The protein comes primarily from the peanut butter and oats, while the flaxseed adds healthy omega-3 fatty acids and extra fiber. This combination makes them a great option for sustained energy without the crash you get from processed snacks.
They’re naturally gluten-free if you use certified oats, and easily made vegan with a simple swap. The only potential allergen to watch for is peanuts, but as I mentioned, you can easily substitute with sunflower seed butter or another nut butter. I love that these are a snack I can feel good about giving my kids—they’re getting protein, fiber, and healthy fats, and they think they’re eating dessert.
Conclusion
These high-protein peanut butter energy balls have become a staple in my kitchen for a reason. They’re quick, they’re easy, and they actually taste like a treat. No weird ingredients, no complicated steps, no oven required. Just a handful of pantry staples that come together in minutes to create something genuinely satisfying.
I love that I can customize them based on what I’m craving or what I have on hand. Feeling fancy? Add some coconut flakes. Need extra protein? Throw in a scoop of powder. Want a peanut butter banana version? Mash in half a ripe banana and reduce the honey slightly. The possibilities are endless, and that’s what makes this recipe so fun.
If you give these a try, I’d love to hear how they turn out. Drop a comment below and let me know your favorite variation, or tag me in your photos if you share them online. And if you’re looking for more easy, healthy snacks, you might also love these hidden veggie chocolate chip muffins or this cottage cheese flatbread pizza for another protein-packed option. Happy snacking!
Frequently Asked Questions
Can I use quick oats instead of old-fashioned oats?
You can, but I don’t recommend it. Quick oats are more finely processed and will make your energy balls mushy rather than chewy. Old-fashioned rolled oats give the best texture. If quick oats are all you have, expect a softer, less satisfying result.
How long do these energy balls last at room temperature?
They’re best kept in the fridge, but they can sit at room temperature for a few hours without issue. I wouldn’t leave them out overnight, though, especially if you’re using natural peanut butter that can go rancid. For food safety and best texture, stick to the fridge.
Can I make these without honey?
Absolutely. Maple syrup is the best substitute—it’s a 1:1 swap and works beautifully. Agave nectar or brown rice syrup will also work, though they’ll change the flavor slightly. If you’re trying to reduce sugar, you can use a sugar-free maple syrup, but the texture might be a little drier.
My mixture is too dry. What did I do wrong?
This usually happens if your peanut butter is a little on the thick side, or if you measured your oats generously. The fix is simple: add a tablespoon of honey, maple syrup, or even a splash of milk (dairy or plant-based) and mix again. Keep adding until the mixture holds together when squeezed.
Can I double this recipe?
Yes, and I do it all the time. This recipe doubles perfectly. Just make sure you have a big enough bowl to mix everything, and be prepared for a longer rolling session. I usually double it and freeze half—that way I always have a batch ready to go.
Pin This Recipe!
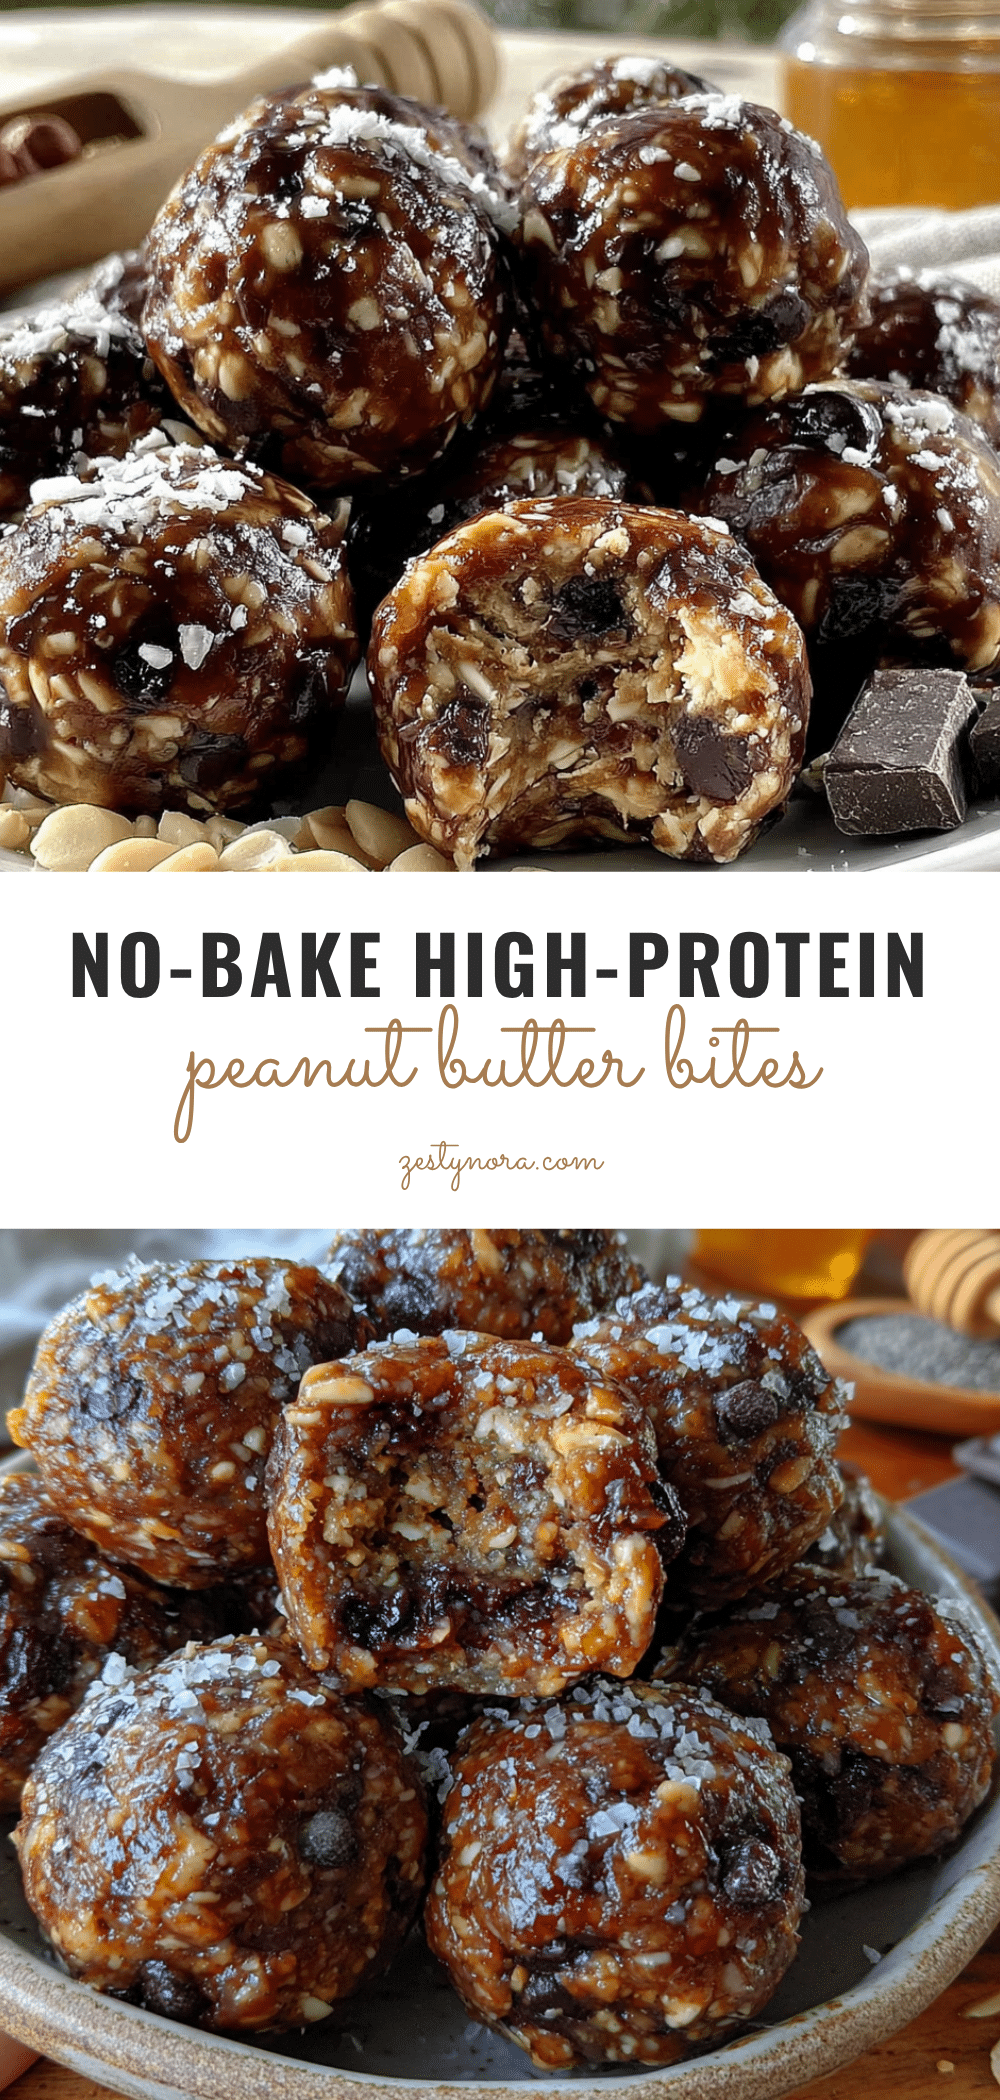
Best High-Protein Peanut Butter Energy Balls (No-Bake)
These no-bake peanut butter energy balls are a quick, healthy snack made with simple pantry staples. They’re chewy, sweet, salty, and surprisingly filling—perfect for busy days, pre-workout fuel, or lunchboxes.
- Prep Time: 15 minutes
- Cook Time: 0 minutes
- Total Time: 45 minutes (includes chilling time)
- Yield: 20-24 balls 1x
- Category: Snack
- Cuisine: American
Ingredients
- 1 cup creamy peanut butter (natural or regular, e.g., Skippy or Jif)
- 1 cup old-fashioned rolled oats (not quick oats; use certified gluten-free if needed)
- ⅓ cup honey (or maple syrup for vegan)
- ½ cup mini chocolate chips (semi-sweet or dark; dairy-free if needed)
- ¼ cup ground flaxseed
- ½ teaspoon vanilla extract (pure vanilla preferred)
- Pinch of sea salt (omit if using salted peanut butter)
Instructions
- Combine the dry ingredients: In a large mixing bowl, add the rolled oats, ground flaxseed, and a pinch of sea salt. Stir to distribute the flaxseed evenly.
- Add the wet ingredients: Spoon in the peanut butter, drizzle the honey, and add the vanilla extract. Do not add the chocolate chips yet.
- Mix it all together: Start stirring with a spatula. Once it starts coming together, switch to using your hands. Squeeze and knead the mixture for about a minute until it holds together when pressed. If too dry, add a teaspoon of honey or a splash of water. If too sticky, add a tablespoon of oats.
- Fold in the chocolate chips: Once the mixture is uniform, add the mini chocolate chips and gently knead them in until evenly distributed.
- Chill the mixture (optional but recommended): Refrigerate the bowl for 15-20 minutes to firm up the mixture for easier rolling.
- Roll into balls: Line a baking sheet or plate with parchment paper. Scoop about 1 tablespoon of the mixture and roll it between your palms to form a smooth ball. Place on the prepared sheet. Repeat until all mixture is used (about 20-24 balls).
- Final chill: Refrigerate the tray of rolled balls for at least 30 minutes to set. For best results, chill for 1 hour.
Notes
For best texture, use room temperature peanut butter. If mixture is too sticky, lightly wet your hands with water while rolling. The flavors improve after a day in the fridge. Store in an airtight container in the refrigerator for up to 2 weeks, or freeze for up to 3 months.
Nutrition
- Serving Size: 1 ball
- Calories: 145
- Sugar: 8
- Sodium: 50
- Fat: 8
- Saturated Fat: 2
- Carbohydrates: 15
- Fiber: 2
- Protein: 5
Keywords: peanut butter energy balls, no-bake energy balls, high-protein snack, healthy snack, gluten-free snack, vegan energy balls, easy snack recipe


