My husband did not trust ground turkey in meatball form. For years, he’d politely push them around his plate, eat the sauce-soaked bread, and leave the actual meatballs behind. I couldn’t blame him, honestly. Most turkey meatballs I’d tried were either dry as sawdust or so aggressively seasoned you could taste the desperation. So when a friend dropped off a freezer bag of these mini subs after I had my second kid, I accepted them with a smile and zero expectations. I thawed them on a desperate Tuesday when the baby hadn’t napped and the toddler was eating crayons for lunch. And that first bite? I actually stopped chewing for a second. The meatballs were tender, juicy, and somehow not dry at all. The bread had stayed soft, the cheese melted into all the right corners, and the whole thing tasted like someone had put actual thought into it.
I called her immediately. “What did you do to the turkey?” She laughed and said the trick was simpler than I thought. I spent the next month tweaking her method, making batch after batch until I got the proportions exactly right. These Easy Freezer-Friendly Mini Turkey Meatball Subs are now a permanent resident in my deep freezer, right next to the frozen peas and that bag of ice I keep for no good reason. They’ve saved dinner more times than I can count, and yes, my husband now asks for them by name. That’s the kind of recipe you hold onto.
Why You’ll Love This Recipe
Let me tell you why these subs earn their spot in your weekly rotation. I’ve tested this recipe more times than I care to admit, and here’s what makes it genuinely different from the rest.
- Quick & Easy: From freezer to table in under 20 minutes. No thawing required. That’s faster than takeout and twice as satisfying.
- Simple Ingredients: You probably have most of these in your kitchen right now. Ground turkey, breadcrumbs, an egg, basic seasonings, marinara, and slider buns. Nothing fancy, nothing hard to find.
- Perfect for Meal Prep: Make a double batch on Sunday and you’ve got lunches or dinners for weeks. They freeze beautifully and taste just as good on day thirty as they did on day one.
- Crowd-Pleaser: Kids devour them. Adults don’t feel like they’re eating “diet food.” Even turkey skeptics (like my husband) come back for seconds.
- Unbelievably Delicious: The secret is in the moisture. A little grated onion, a touch of olive oil, and the right breadcrumb ratio keep these meatballs tender instead of tough. The mini size means more crispy edges per bite, and that’s a hill I’ll die on.
What makes this recipe different from every other turkey meatball sub out there? It’s the technique. Most recipes tell you to use lean ground turkey and then wonder why the meatballs turn out dry. I use 93/7 turkey (not the super lean stuff) and add a grated onion that releases moisture as it cooks. The meatballs stay tender even after freezing and reheating. Plus, assembling the subs before freezing means you can grab one, microwave it for a minute, and have a hot meal with zero cleanup. This isn’t just another version—it’s my best version, born from a week of trial and error and a very patient family who ate a lot of meatballs.
What Ingredients You Will Need
This recipe uses simple, mostly pantry-stable ingredients to deliver bold flavor and satisfying texture without the fuss. Here’s what you’ll need to gather.
For the Turkey Meatballs
- 1 pound ground turkey (93/7 blend preferred – not 99% lean, which dries out)
- 1/2 cup plain breadcrumbs (panko works great too, just add an extra tablespoon)
- 1 large egg, lightly beaten
- 1/4 cup grated yellow onion (use a box grater – this adds moisture without chunks)
- 2 cloves garlic, minced
- 1/4 cup freshly grated Parmesan cheese (the green can stuff works, but fresh melts better)
- 1 tablespoon olive oil
- 1 teaspoon dried oregano
- 1/2 teaspoon salt
- 1/4 teaspoon black pepper
- 1/4 teaspoon red pepper flakes (optional, but I love the little warmth)
For Assembly
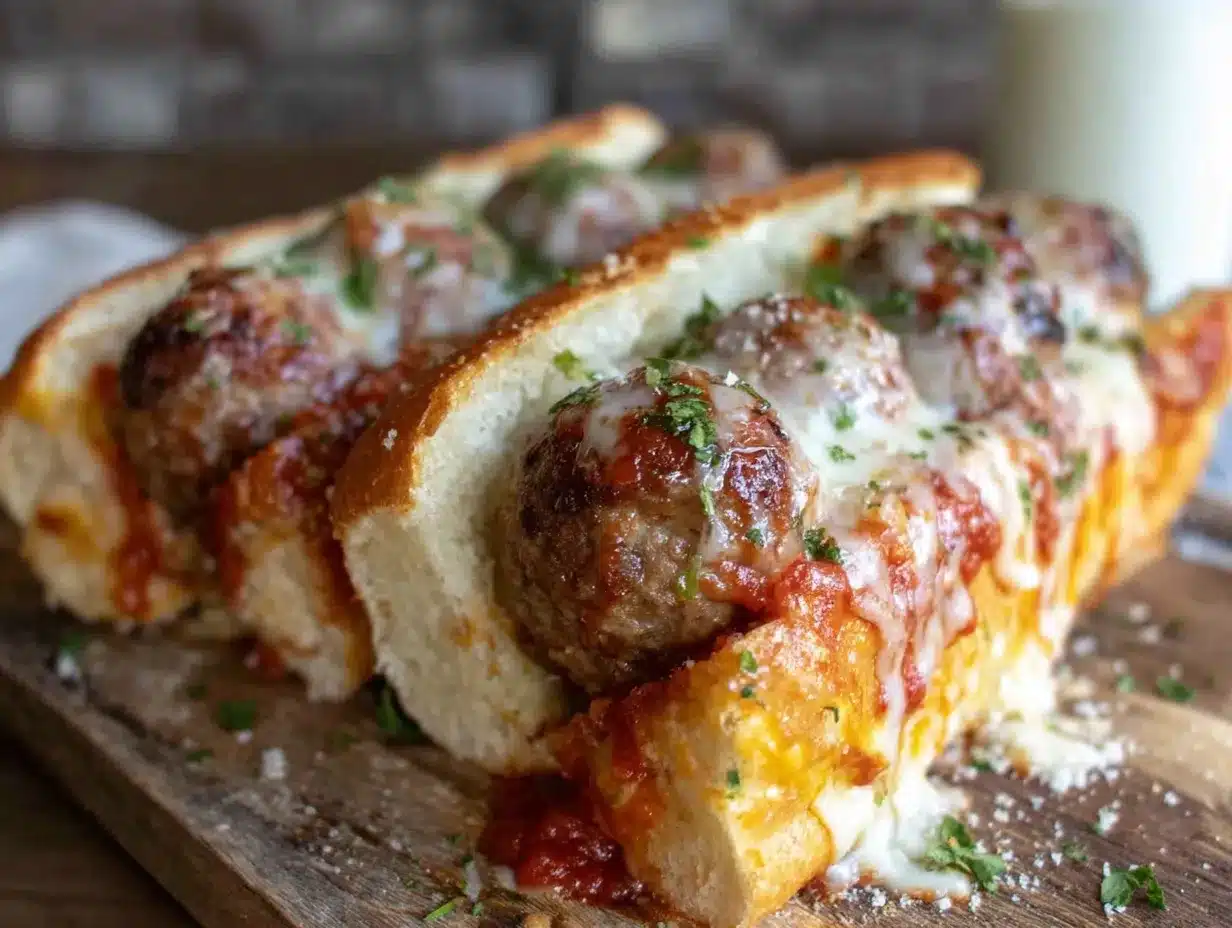
- 12 slider buns (I prefer Martin’s potato rolls – they hold up to freezing and reheating beautifully)
- 1 cup marinara sauce (use your favorite jarred kind or homemade)
- 6 slices provolone cheese, cut in half (or 12 small slices of mozzarella)
- 2 tablespoons melted butter (for brushing the tops, optional but recommended)
- 1/2 teaspoon garlic powder (to mix with the butter)
Ingredient Selection Tips: For the best texture, look for ground turkey that’s not labeled “extra lean.” The 93/7 blend has just enough fat to keep the meatballs moist. If you only have 99% lean, add an extra tablespoon of olive oil to the mixture. I’ve tested this with both, and the extra fat makes a real difference. For the breadcrumbs, I use plain Italian-style because they already have herbs mixed in, but plain works just fine. If you need a gluten-free option, use almond flour or gluten-free breadcrumbs – just note the texture will be slightly more delicate.
Substitution Guidance: No Parmesan? Use pecorino or skip it entirely. No fresh garlic? Half a teaspoon of garlic powder works. You can swap the provolone for mozzarella, fontina, or even a sharp cheddar if that’s what you have. For a dairy-free version, use nutritional yeast in the meatballs and dairy-free cheese slices.
Equipment Needed
You don’t need a fancy kitchen to make these subs. Here’s what you’ll actually use.
- Large mixing bowl – for combining the meatball ingredients
- Box grater – for grating the onion (a microplane works too, but a box grater is faster)
- Baking sheet – lined with parchment paper or foil for easy cleanup
- Cookie scoop or tablespoon – for uniform meatball sizes (I use a #60 scoop, about 1 tablespoon)
- Baking dish or 9×13 pan – for assembling the subs before freezing
- Freezer-safe zip-top bags or airtight container – for storing the assembled subs
- Toaster oven or microwave – for reheating (toaster oven gives better texture)
If you don’t have a cookie scoop, just wet your hands slightly and roll the meatballs between your palms. They won’t be perfectly uniform, but they’ll taste the same. I actually prefer hand-rolling sometimes—it feels more personal, you know? For the baking dish, any oven-safe pan that fits your buns works. I use a 9×13 because it holds 12 sliders perfectly.
Preparation Method
Let’s get cooking. This method breaks down into three phases: making the meatballs, assembling the subs, and freezing them for later. Each step includes the little details I learned the hard way.
Phase 1: Make the Meatballs
- Preheat your oven to 400°F (200°C). Line a baking sheet with parchment paper or foil. Don’t skip the lining—trust me, cleanup is so much easier.
- Grate the onion. Use the large holes of a box grater and grate about 1/4 of a yellow onion. You want 1/4 cup of grated onion with all its juice. This is the moisture secret. Don’t drain the liquid. Let it sit in the bowl while you prep everything else.
- Combine the meatball ingredients. In a large mixing bowl, add the ground turkey, breadcrumbs, beaten egg, grated onion (with its juice), minced garlic, Parmesan, olive oil, oregano, salt, pepper, and red pepper flakes. Use your hands to mix gently. Overmixing makes tough meatballs, so stop as soon as everything is combined. You should see no streaks of raw egg or dry breadcrumbs.
- Shape the meatballs. Using a cookie scoop or your hands, form the mixture into 36 mini meatballs, each about 1 tablespoon in size. Place them on the prepared baking sheet, spacing them about an inch apart. They won’t spread much, so you can fit all 36 on one sheet if you’re strategic.
- Bake the meatballs. Bake for 12-15 minutes, or until the meatballs are cooked through and lightly browned on the outside. The internal temperature should reach 165°F (74°C). Let them cool on the baking sheet for 5 minutes. They’ll firm up as they cool.
Pro tip from my first failed batch: Don’t skip the cooling step. If you try to assemble the subs while the meatballs are piping hot, the buns get soggy and the cheese slides off. Patience pays off here.
Phase 2: Assemble the Subs
- Slice the slider buns in half. Keep them connected if they’re the pull-apart kind, or separate them if they’re individual. I prefer keeping them connected for easier assembly.
- Add the sauce. Spread about 1 tablespoon of marinara on the bottom half of each bun. Don’t drown them—you want the bread to stay sturdy, not turn into a sponge.
- Place the meatballs. Arrange 3 mini meatballs on each bun bottom. Press them gently into the sauce so they stay put.
- Add more sauce. Spoon another tablespoon of marinara over the meatballs. Again, don’t overdo it. You want every bite to have sauce, but you don’t want it pooling.
- Top with cheese. Place half a slice of provolone (or a small mozzarella slice) on top of the meatballs. The cheese acts as a lid, holding everything together.
- Close the buns. Place the top bun halves on. If you’re planning to freeze them, stop here. If you’re eating them now, brush the tops with the melted butter mixed with garlic powder and bake at 375°F (190°C) for 8-10 minutes until the cheese is bubbly and the tops are golden.
Phase 3: Freeze for Later
- Flash freeze the assembled subs. Place the assembled subs (unbaked) on a baking sheet lined with parchment paper, making sure they’re not touching. Pop the sheet in the freezer for 1-2 hours, or until the subs are solid. This prevents them from sticking together in the bag.
- Wrap and store. Once frozen solid, wrap each sub individually in plastic wrap or aluminum foil, then place them in a freezer-safe zip-top bag. Squeeze out as much air as possible before sealing. Label the bag with the date and contents. They’ll keep for up to 3 months.
- To reheat from frozen: Unwrap the sub and microwave it for 60-90 seconds, or until the meatballs are hot and the cheese is melted. For a crispier bun, pop it in a toaster oven at 350°F (175°C) for 5-7 minutes after microwaving.
Cooking Tips & Techniques
I’ve made these subs probably forty times by now, and I’ve learned a few things the hard way. Here’s what I wish someone had told me.
Don’t overmix the meatball mixture. This is the number one mistake people make with turkey meatballs. The more you mix, the more the proteins bind, and the tougher the meatballs get. Mix just until everything comes together, then stop. I use my hands because I can feel when the ingredients are incorporated. It takes about 30 seconds of gentle mixing.
Use a cookie scoop for uniform meatballs. I know I said hand-rolling is fine, but for freezing, uniform size matters. Smaller meatballs freeze and reheat more evenly than larger ones. Plus, three mini meatballs per sub is the perfect ratio. If you make them too big, they don’t fit nicely on the bun and the cooking time changes.
Grate the onion, don’t chop it. This was the game-changer for me. Grated onion releases its juice, which keeps the meatballs moist without adding chunks that some people (like my kids) might pick out. The onion essentially disappears into the meatball, leaving only flavor and moisture behind.
Let the meatballs cool before assembling. I learned this one the messy way. Hot meatballs make the buns soggy, and soggy buns don’t freeze well. Give them five minutes on the baking sheet. Use that time to slice your buns and get the sauce ready.
Don’t skip the flash freeze. If you put assembled subs directly into a bag without flash freezing them first, they’ll stick together into one giant sub blob. Flash freezing keeps them individual so you can grab one or two at a time. It takes an extra hour, but it’s worth it.
For best texture, reheat in a toaster oven. Microwaving works in a pinch (and honestly, that’s what I do on busy nights), but a toaster oven gives you that slightly crispy bun and bubbly cheese. If you have five extra minutes, it’s worth the wait.
Variations & Adaptations
One of the best things about this recipe is how adaptable it is. Here are some variations I’ve tried and loved.
Spicy Southwest Version: Add 1/4 cup chopped cilantro and 1 teaspoon cumin to the meatball mixture. Swap the marinara for enchilada sauce or salsa verde. Top with pepper jack cheese and a slice of pickled jalapeño before freezing. This is my personal favorite for game day snacks.
Italian Herb Version: Add 1 tablespoon fresh chopped basil and 1 teaspoon fennel seeds to the meatball mixture. Use a good-quality marinara (I like Rao’s) and top with fresh mozzarella. Sprinkle dried oregano on the buns before baking. This version tastes like it came from a deli.
Kid-Friendly Version: Omit the red pepper flakes and garlic (or use half the garlic). Use a mild marinara like Classico or Prego. Top with American cheese instead of provolone—kids love the creamy texture. My toddler eats these without complaint, and that’s a win in my book.
Low-Carb Version: Skip the buns entirely. Serve the meatballs and sauce over zucchini noodles or cauliflower rice. The meatball recipe itself is already low-carb, so this is an easy swap. You can also use large lettuce leaves as wraps for a handheld version.
Air Fryer Variation: If you want to cook the meatballs in an air fryer instead of the oven, set it to 375°F (190°C) and cook for 8-10 minutes, shaking the basket halfway through. The meatballs get extra crispy on the outside. Then assemble the subs and air fry for another 3-4 minutes until the cheese melts.
Serving & Storage Suggestions
These subs are versatile enough for any meal. Here’s how I serve and store them.
Serving Temperature: Serve hot, straight from the oven or toaster oven. The cheese should be melted and bubbly, the buns slightly golden. If you’re reheating from frozen, let them rest for a minute before serving—the filling gets volcanic hot.
Presentation: Arrange the subs on a platter with a small bowl of extra marinara for dipping. Garnish with fresh basil or parsley if you’re feeling fancy. For game day, serve them alongside a crispy garlic parmesan boneless chicken thighs for a full spread. The contrast of flavors is fantastic.
Complementary Dishes: These subs pair beautifully with a simple side salad, roasted vegetables, or a bowl of creamy slow cooker chicken and wild rice soup on a cold day. For a lighter option, serve them with fresh Greek chicken bento box components like cucumber slices and tzatziki. The cool, creamy dip balances the warm, savory subs perfectly.
Storage Instructions: Store assembled, unbaked subs in the freezer for up to 3 months. If you have leftover baked subs, refrigerate them in an airtight container for up to 3 days. Reheat in a toaster oven or microwave. The texture won’t be quite as good as fresh, but they’re still delicious.
How Flavors Develop: The meatballs actually taste better after a day or two in the fridge. The flavors meld together, and the onion and garlic mellow out. If you’re making these for a party, I recommend assembling them a day ahead and refrigerating overnight before baking.
Nutritional Information & Benefits
Here’s the nutritional breakdown per sub (based on 12 subs, using the ingredients listed). These are estimates and will vary based on your specific brands and substitutions.
| Nutrient | Amount Per Sub |
|---|---|
| Calories | 285 |
| Protein | 22g |
| Carbohydrates | 28g |
| Fat | 10g |
| Saturated Fat | 4g |
| Fiber | 3g |
| Sodium | 620mg |
Health Benefits: Ground turkey is a lean protein source that’s lower in saturated fat than beef. It’s rich in B vitamins, selenium, and phosphorus, which support energy metabolism and bone health. The marinara sauce adds lycopene, an antioxidant linked to heart health. Using whole-grain slider buns (if you choose them) adds fiber. This recipe is also a great way to get protein without the heaviness of red meat.
Dietary Considerations: This recipe can be made gluten-free by using gluten-free breadcrumbs and buns. It’s naturally nut-free and egg-free if you omit the egg (use a flax egg instead). For a dairy-free version, skip the Parmesan and use dairy-free cheese. The meatballs are already low-carb if you skip the buns.
Potential Allergens: Contains wheat (buns, breadcrumbs), dairy (cheese, Parmesan), and eggs. Adjust as needed for your dietary needs.
Conclusion
These Easy Freezer-Friendly Mini Turkey Meatball Subs are the kind of recipe that makes your life genuinely easier. They’re quick to assemble, they freeze beautifully, and they taste like you spent way more effort than you actually did. Whether you’re feeding a hungry family, prepping for a busy week, or just want something warm and satisfying without the fuss, these subs deliver.
I love this recipe because it’s proof that freezer food doesn’t have to be sad. It can be tender, flavorful, and actually enjoyable. My husband went from pushing meatballs around his plate to asking, “Are there any more of those subs in the freezer?” That’s the kind of win I’ll take every time.
Now it’s your turn. Make a batch this weekend. Freeze half. And the next time you’re too tired to cook, pull one out, heat it up, and remember that you’ve got this. If you try this recipe, I’d love to hear how it goes. Drop a comment below and let me know your favorite variation, or tag me in your photos. Happy cooking, friends.
Frequently Asked Questions
Can I use ground chicken instead of turkey?
Absolutely. Ground chicken works just as well. Use the same 93/7 ratio for best results. The flavor is slightly milder, so you might want to add an extra pinch of salt and oregano.
How long do these subs last in the freezer?
Properly stored in a freezer-safe bag with all the air squeezed out, they’ll stay fresh for up to 3 months. After that, they’re still safe to eat, but the texture might decline slightly. I recommend labeling the bag with the date so you know when you made them.
Can I bake these subs directly from frozen without microwaving first?
Yes, but you’ll need to adjust the time. Place the frozen sub on a baking sheet and bake at 375°F (190°C) for 15-18 minutes, or until the meatballs are hot and the cheese is melted. The buns will be crispier this way, which I actually prefer.
What if I don’t have slider buns?
No problem. You can use regular hamburger buns cut in half, hoagie rolls cut into smaller sections, or even thick slices of French bread. Just adjust the assembly so the bread-to-meatball ratio stays balanced. I’ve also used Hawaiian rolls for a sweeter version.
Can I make the meatballs ahead of time and freeze them separately?
Definitely. Bake the meatballs, let them cool completely, then freeze them in a single layer on a baking sheet. Once frozen, transfer them to a freezer bag. When you’re ready to make subs, just thaw the meatballs in the fridge overnight and assemble as directed. This is a great option if you want to use different sauces or cheeses each time.
Pin This Recipe!
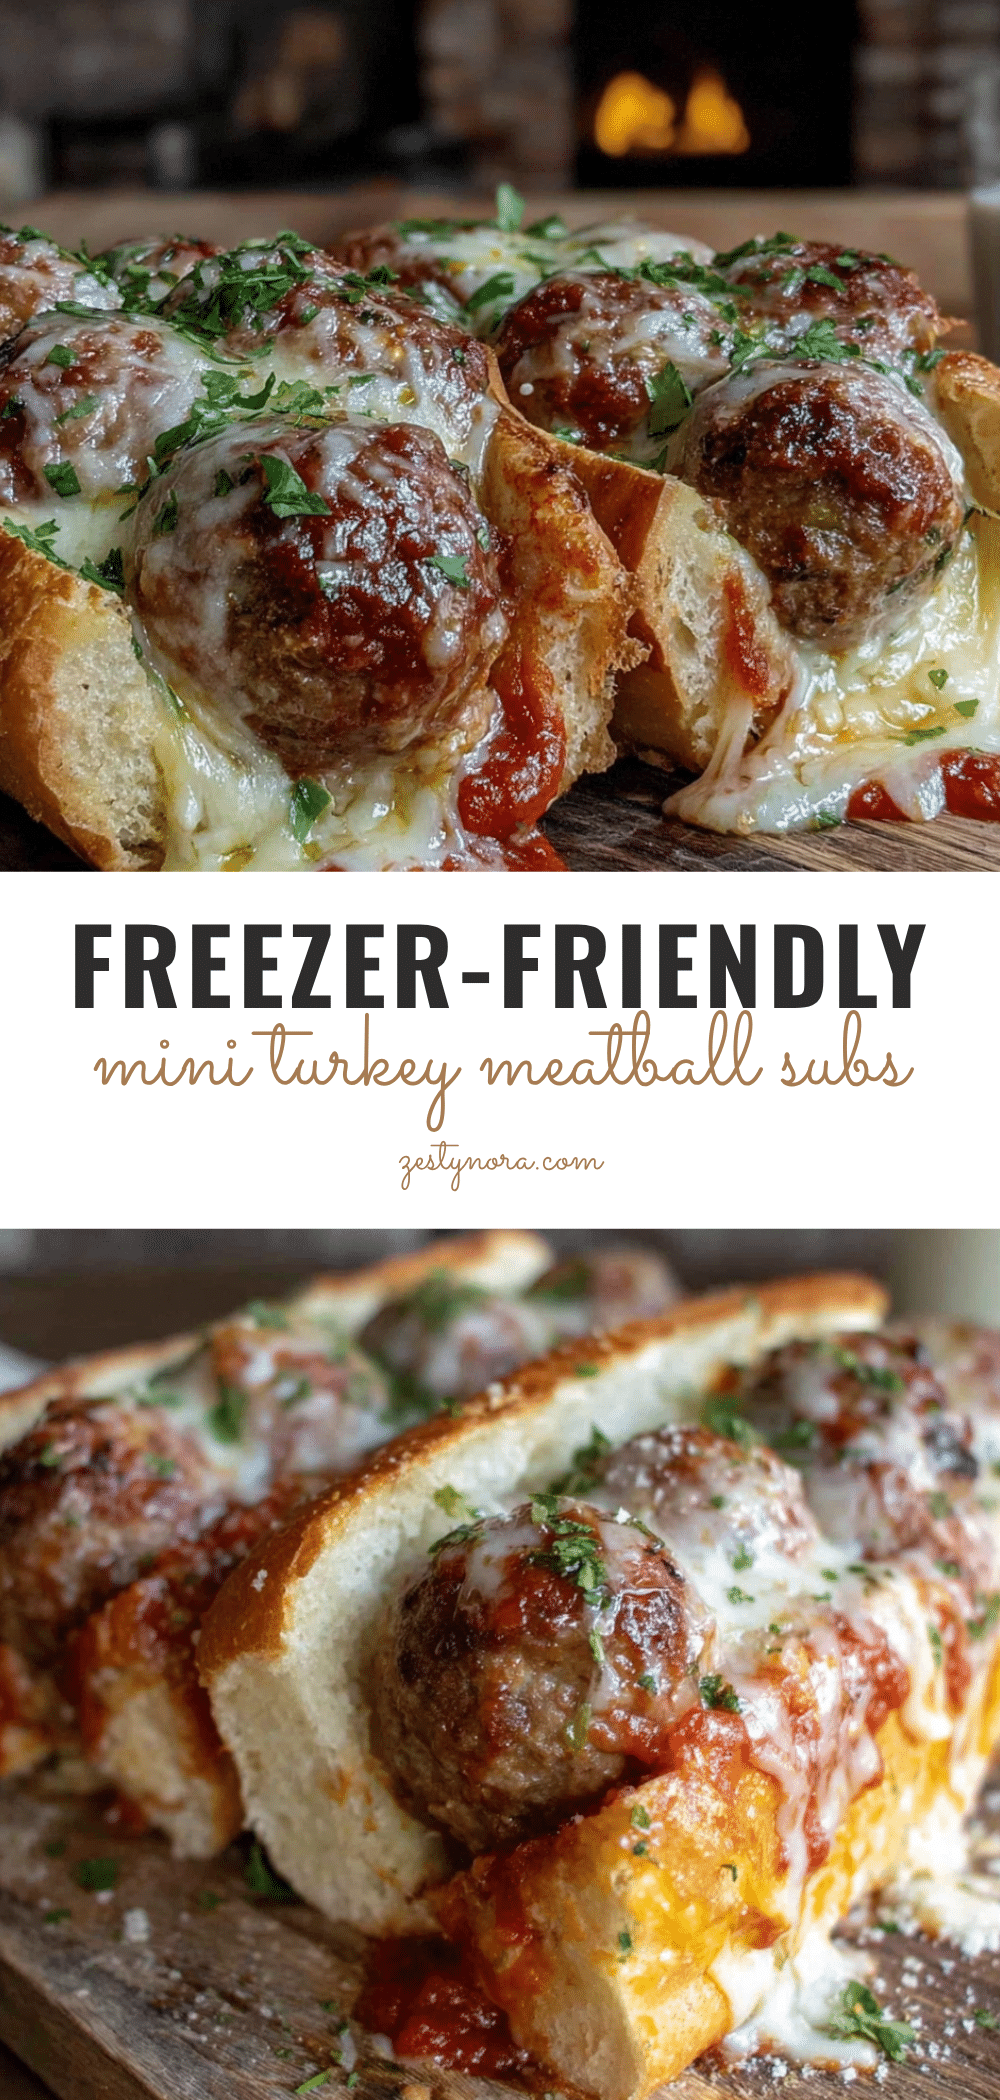
Best Easy Freezer-Friendly Mini Turkey Meatball Subs

These mini turkey meatball subs are tender, juicy, and freezer-friendly. Perfect for meal prep, they go from freezer to table in under 20 minutes and are a crowd-pleaser that even turkey skeptics will love.
- Prep Time: 20 minutes
- Cook Time: 15 minutes
- Total Time: 35 minutes (plus freezing time)
- Yield: 12 subs 1x
- Category: Main Course
- Cuisine: American
Ingredients
- 1 pound ground turkey (93/7 blend preferred)
- 1/2 cup plain breadcrumbs (panko works, add extra tablespoon)
- 1 large egg, lightly beaten
- 1/4 cup grated yellow onion (with juice)
- 2 cloves garlic, minced
- 1/4 cup freshly grated Parmesan cheese
- 1 tablespoon olive oil
- 1 teaspoon dried oregano
- 1/2 teaspoon salt
- 1/4 teaspoon black pepper
- 1/4 teaspoon red pepper flakes (optional)
- 12 slider buns (e.g., Martin’s potato rolls)
- 1 cup marinara sauce
- 6 slices provolone cheese, cut in half (or 12 small slices mozzarella)
- 2 tablespoons melted butter (optional, for brushing tops)
- 1/2 teaspoon garlic powder (to mix with butter)
Instructions
- Preheat oven to 400°F (200°C). Line a baking sheet with parchment paper or foil.
- Grate 1/4 cup of yellow onion using a box grater, including the juice. Do not drain.
- In a large bowl, combine ground turkey, breadcrumbs, beaten egg, grated onion with juice, minced garlic, Parmesan, olive oil, oregano, salt, pepper, and red pepper flakes. Mix gently with hands until just combined.
- Shape mixture into 36 mini meatballs (about 1 tablespoon each) and place on prepared baking sheet, spaced about 1 inch apart.
- Bake for 12-15 minutes until cooked through (internal temperature 165°F/74°C) and lightly browned. Let cool on sheet for 5 minutes.
- Slice slider buns in half (keep connected if pull-apart style). Spread about 1 tablespoon marinara on each bottom half.
- Place 3 mini meatballs on each bun bottom, pressing gently into sauce. Spoon another tablespoon of marinara over meatballs.
- Top each with half a slice of provolone (or small mozzarella slice). Place top bun halves on.
- For immediate serving: Brush tops with melted butter mixed with garlic powder. Bake at 375°F (190°C) for 8-10 minutes until cheese is bubbly and tops are golden.
- For freezing: Place assembled subs (unbaked) on a parchment-lined baking sheet, not touching. Freeze for 1-2 hours until solid. Wrap individually in plastic wrap or foil, then place in a freezer-safe zip-top bag, removing air. Freeze for up to 3 months.
- To reheat from frozen: Unwrap sub and microwave for 60-90 seconds until hot and cheese melted. For crispier bun, toast in toaster oven at 350°F (175°C) for 5-7 minutes after microwaving.
Notes
Use 93/7 ground turkey for moisture. Grate onion instead of chopping to add moisture without chunks. Let meatballs cool before assembling to prevent soggy buns. Flash freeze subs individually before bagging to prevent sticking. For best texture, reheat in a toaster oven.
Nutrition
- Serving Size: 1 sub
- Calories: 285
- Sodium: 620
- Fat: 10
- Saturated Fat: 4
- Carbohydrates: 28
- Fiber: 3
- Protein: 22
Keywords: turkey meatball subs, freezer-friendly, mini subs, meal prep, ground turkey, slider buns, easy dinner