The first time I made these, the power flickered. Not kidding. I was standing in my kitchen last October, a bowl of black cocoa powder in one hand and a whisk in the other, when the lights dimmed for a second. My neighbor across the hall, a retired pastry chef named Gloria, had mentioned she was bringing her famous red velvet cupcakes to the building’s Halloween party. I told her I wanted to make something that felt like a dark mirror of that—something that looked like it had crawled out of a haunted house but tasted like pure comfort. She watched me struggle with getting the color right, then finally knocked on my door. “You’re overthinking it,” she said, handing me a bag of black cocoa. “Let the ingredients do the work. You just have to trust them.” That conversation—standing in my dim kitchen, talking about the difference between black cocoa and regular cocoa—is what these Spooky Black Velvet Spider Web Cupcakes are all about. They’re not complicated. They’re not fussy. They’re just honest, dark, and a little bit spooky. Honestly, I’ve made them every Halloween since. Maybe you’ve been there—wanting something that steals the show without stealing your whole afternoon. Let me tell you, these cupcakes are it.
Why You’ll Love This Recipe
I’ve tested this recipe more times than I care to admit. The first batch was too dry. The second was too flat. But the third? That was the one. And every batch since has been just as good. Here’s why I keep coming back to these Spooky Black Velvet Spider Web Cupcakes for Halloween.
- Quick & Easy: From start to finish, you’re looking at about 45 minutes. That includes cooling time. Perfect for those last-minute Halloween cravings or when you realize the party is tomorrow.
- Simple Ingredients: No fancy grocery trips. Black cocoa powder is the only special item, and you can find it online or at most baking stores. Everything else is probably in your pantry right now.
- Perfect for Halloween: These aren’t just cupcakes—they’re a centerpiece. The spider web design is impressive enough to make people think you spent hours on it. You didn’t. But they don’t need to know that.
- Crowd-Pleaser: Kids love the spooky look. Adults love the rich, deep chocolate flavor. I’ve watched people take three of these at a party. Three.
- Unbelievably Delicious: The black velvet cake is moist, tender, and has this subtle dark chocolate flavor that regular cocoa just can’t match. Paired with a creamy vanilla buttercream, it’s the kind of combination that makes you close your eyes after the first bite.
What makes this recipe different from the rest? It’s the black cocoa. That’s the secret. It gives the cupcakes a deep, almost mysterious color and a flavor that’s slightly smoky, slightly earthy. Not every version out there uses it, and honestly, you can taste the difference. This isn’t just another Halloween cupcake—it’s the one people will ask you for year after year.
What Ingredients You Will Need
This recipe uses simple, wholesome ingredients to deliver bold flavor and satisfying texture without the fuss. Most of these are pantry staples, but the black cocoa powder is the star here. I recommend getting a good brand like King Arthur Flour or Savory Spice for the best results.
For the Black Velvet Cupcakes
- 1 ½ cups all-purpose flour (190g) — spoon and level for accuracy
- ½ cup black cocoa powder (50g) — this is what gives the cupcakes their dark color and rich flavor
- 1 teaspoon baking soda — helps the cupcakes rise and stay tender
- ½ teaspoon salt — balances the sweetness
- 1 cup granulated sugar (200g) — adds sweetness and structure
- ½ cup unsalted butter (113g), softened — I prefer Kerrygold for its rich taste
- 2 large eggs, room temperature — cold eggs can seize the batter
- 1 teaspoon vanilla extract — pure, not imitation
- 1 cup buttermilk (240ml) — adds moisture and activates the baking soda (see substitution below)
- 1 tablespoon white vinegar — reacts with the baking soda for extra lift
For the Vanilla Buttercream Frosting
- 1 cup unsalted butter (226g), softened
- 3 ½ cups powdered sugar (420g), sifted
- 2-3 tablespoons heavy cream (30-45ml) — adjust for consistency
- 1 teaspoon vanilla extract
- Pinch of salt
- Black gel food coloring (optional, for the spider web design)
Substitution Notes
If you don’t have buttermilk, you can make your own: add 1 tablespoon of lemon juice or vinegar to 1 cup of milk and let it sit for 5 minutes. Use almond flour for a gluten-free option? I wouldn’t recommend it for this recipe—the texture changes too much. Stick with all-purpose or a good gluten-free baking blend if you need to.
Equipment Needed
You don’t need a professional kitchen to pull these off. Here’s what you’ll need:
- 12-cup muffin tin — standard size works best
- Paper cupcake liners — black or white both work, but black adds to the spooky vibe
- Mixing bowls — one large, one medium
- Electric hand mixer or stand mixer — you can do this by hand, but a mixer makes the buttercream much easier
- Measuring cups and spoons — precise measurements matter here
- Whisk — for dry ingredients
- Rubber spatula — for folding and scraping
- Piping bag with a round tip — or a zip-top bag with the corner snipped off
- Toothpick or small skewer — for creating the spider web design
- Cooling rack — wire racks are best for even cooling
I’ve used cheap piping bags before, and they burst at the worst moment. Spend a few extra dollars on reusable ones—they’re worth it. And if you don’t have a piping tip, a zip-top bag works fine. Just don’t skip the cooling rack; letting cupcakes cool in the pan makes them soggy.
Preparation Method
Step 1: Preheat and Prepare
Preheat your oven to 350°F (175°C). Line your muffin tin with paper liners. This recipe makes exactly 12 cupcakes, so don’t overfill the cups.
Step 2: Mix the Dry Ingredients
In a medium bowl, whisk together the all-purpose flour, black cocoa powder, baking soda, and salt. Make sure there are no lumps—black cocoa can be clumpy. I’ve made the mistake of skipping this step and ended up with bitter pockets of cocoa in the finished cupcakes. Not good.
Step 3: Cream the Butter and Sugar
In a large bowl, beat the softened butter and granulated sugar together with an electric mixer on medium speed until light and fluffy, about 3-4 minutes. Scrape down the sides of the bowl halfway through. The mixture should look pale and airy.
Step 4: Add the Eggs and Vanilla
Add the eggs one at a time, beating well after each addition. Then mix in the vanilla extract. The batter might look a little curdled at this point—that’s normal. Don’t panic.
Step 5: Alternate Dry Ingredients and Buttermilk
With the mixer on low speed, add about one-third of the dry ingredients to the butter mixture, mixing until just combined. Then add half of the buttermilk, mixing again. Repeat with another third of dry ingredients, the remaining buttermilk, and finally the last of the dry ingredients. Stop mixing as soon as the flour disappears. Overmixing makes tough cupcakes.
Step 6: Add the Vinegar
Stir in the white vinegar by hand with a rubber spatula. This reacts with the baking soda to give the cupcakes extra lift. You’ll see a few bubbles—that’s good.
Step 7: Fill and Bake
Divide the batter evenly among the 12 liners, filling each about two-thirds full. Bake for 18-22 minutes, or until a toothpick inserted into the center comes out clean. The tops should spring back when lightly touched. Let the cupcakes cool in the pan for 5 minutes, then transfer them to a wire rack to cool completely. Don’t frost warm cupcakes—the buttercream will melt into a puddle.
Step 8: Make the Buttercream
While the cupcakes cool, make the frosting. Beat the softened butter on medium speed until smooth and creamy, about 2 minutes. Gradually add the sifted powdered sugar, one cup at a time, beating on low speed. Add the heavy cream and vanilla extract, then increase the speed to medium-high and beat for 3-4 minutes until light and fluffy. Add a pinch of salt to balance the sweetness.
Step 9: Frost the Cupcakes
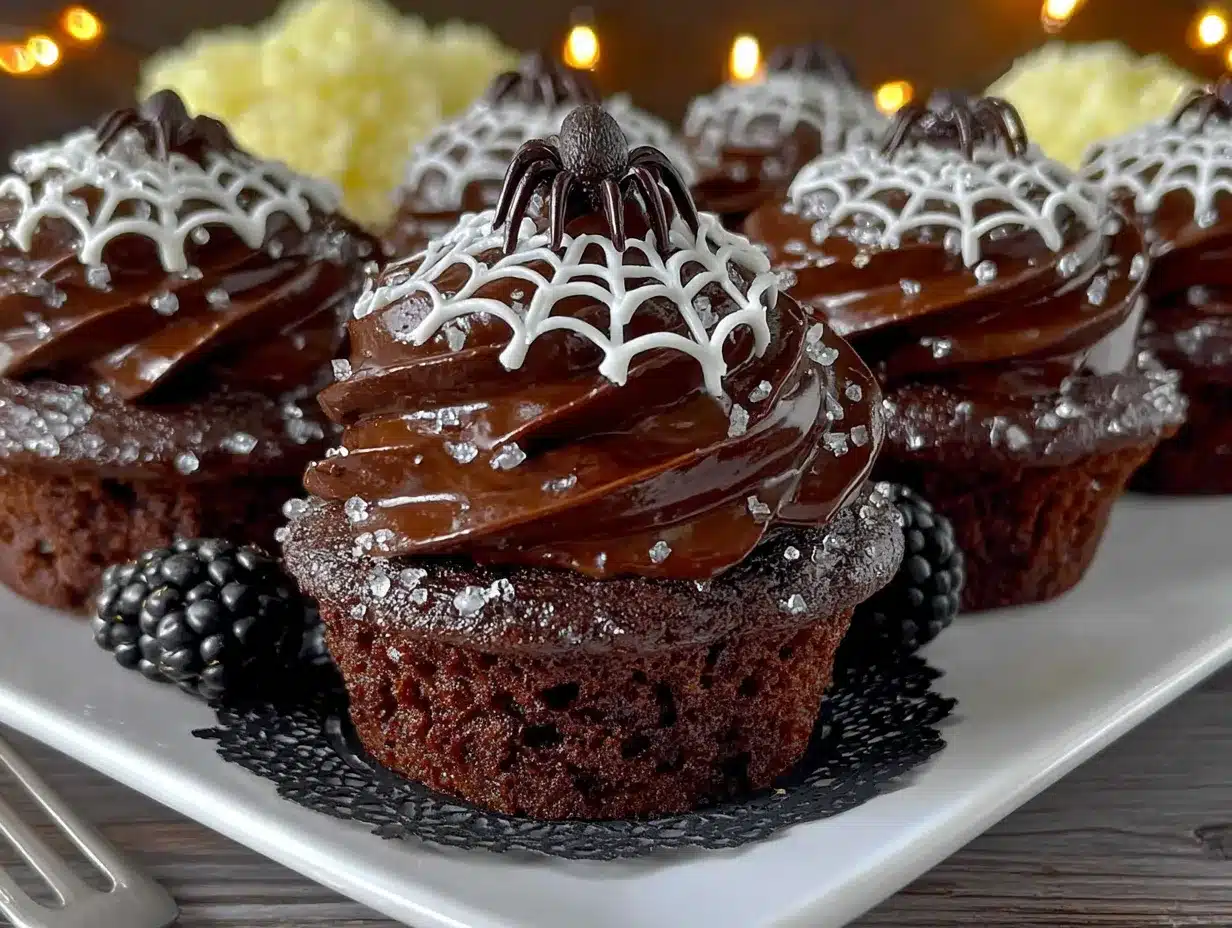
Once the cupcakes are completely cool, pipe a generous swirl of buttercream on top. I use a round tip and start from the outside, working inward in a spiral. Leave a small circle in the center unfrosted—that’s where the spider web design goes.
Step 10: Create the Spider Web
To make the spider web design, you’ll need a small amount of black gel food coloring mixed with a teaspoon of water. Dip a toothpick into the mixture and draw a small circle in the center of each cupcake. From that circle, draw 4-6 straight lines radiating outward like spokes on a wheel. Then, working from the center outward, drag the toothpick through the lines to create curved arches that connect them. It sounds complicated, but it’s actually very forgiving. The first one might look messy, but by the third, you’ll have the hang of it.
Cooking Tips & Techniques
I’ve learned a few things the hard way so you don’t have to. Here’s what I wish someone had told me before my first batch.
- Don’t overmix the batter: I know I said this already, but it’s worth repeating. Overmixing develops gluten, which makes the cupcakes dense and tough. Mix until the flour just disappears, then stop.
- Use room temperature ingredients: Cold eggs and cold butter don’t emulsify properly. Set them out on the counter about 30 minutes before you start baking. If you forget, place the eggs in a bowl of warm water for 5 minutes.
- The vinegar trick works: I was skeptical the first time Gloria told me about adding vinegar, but it really does make a difference. It reacts with the baking soda to create a lighter, more tender crumb.
- Black cocoa stains everything: Wear an apron. Use a dark-colored bowl if you have one. Black cocoa powder gets everywhere, and it will stain your clothes, your counter, and your fingernails. Trust me on this.
- Practice the spider web on parchment first: Before you attempt it on the actual cupcakes, try the design on a piece of parchment paper. It gives you a feel for the pressure and movement without ruining a cupcake.
Variations & Adaptations
One of the best things about this recipe is how flexible it is. Here are a few ways to make it your own.
- Gluten-Free Version: Substitute the all-purpose flour with a 1:1 gluten-free baking blend that contains xanthan gum. I’ve used Bob’s Red Mill with good results. The texture is slightly different—a bit more crumbly—but the flavor is still fantastic.
- Dairy-Free Version: Use vegan butter and replace the buttermilk with 1 cup of unsweetened almond milk mixed with 1 tablespoon of lemon juice. For the frosting, use vegan butter and a dairy-free creamer or just extra almond milk.
- Chocolate Buttercream: If you want to double down on the chocolate, add ¼ cup of black cocoa powder to the buttercream. Sift it with the powdered sugar to avoid lumps.
- Mini Cupcakes: This recipe makes about 36 mini cupcakes. Bake them for 10-12 minutes instead of 18-22. The spider web design is trickier on a smaller surface, but it’s doable with a steady hand.
- Spider Decoration: For an extra spooky touch, place a plastic spider on top of each finished cupcake. I found a bag of 12 at a party supply store for three dollars. It takes the presentation from “nice” to “wow” instantly.
Serving & Storage Suggestions
These Spooky Black Velvet Spider Web Cupcakes for Halloween are best served at room temperature. The buttercream softens slightly, and the cake is perfectly tender. Arrange them on a black or orange platter for maximum Halloween effect.
They pair beautifully with a glass of cold milk or a hot cup of coffee. If you’re serving them at a party, I like to put them out alongside a batch of crispy garlic chicken wings for a sweet-and-savory spread that keeps everyone happy.
For storage, keep the cupcakes in an airtight container at room temperature for up to 3 days. If you need to stack them, place a sheet of parchment paper between layers to protect the spider web design. Do not refrigerate them—the cold air dries out the cake and makes the buttercream stiff.
You can freeze the unfrosted cupcakes for up to 3 months. Wrap each one tightly in plastic wrap, then place them in a freezer-safe bag. Thaw at room temperature before frosting and decorating. The spider web design should be added fresh, as the gel color can bleed during freezing.
The flavors actually develop a bit overnight. I’ve made these a day ahead for parties, and they tasted even better the next day. Just don’t add the spider web design until a few hours before serving, or the lines can blur.
Nutritional Information & Benefits
Let’s be honest—these are a treat, not a health food. But here’s the estimated breakdown per cupcake (with frosting):
| Nutrient | Amount |
|---|---|
| Calories | 380 |
| Total Fat | 22g |
| Saturated Fat | 14g |
| Cholesterol | 85mg |
| Sodium | 210mg |
| Total Carbohydrates | 45g |
| Dietary Fiber | 2g |
| Sugars | 32g |
| Protein | 4g |
Black cocoa powder actually contains antioxidants called flavonoids, which are linked to heart health. It also has less sugar than regular cocoa, which is a nice bonus. The buttermilk adds calcium and probiotics, though the amounts are small. If you’re watching your sugar intake, you can reduce the sugar in the frosting by ¼ cup—it will still be plenty sweet.
These cupcakes are not gluten-free or dairy-free in their standard form, but the variations above can accommodate those dietary needs. They do contain eggs and dairy, so keep that in mind for allergies.
I believe in enjoying treats in moderation. Halloween comes once a year. Have a cupcake. Don’t feel guilty about it. Life’s too short for that.
Conclusion
These Spooky Black Velvet Spider Web Cupcakes for Halloween are everything I want in a holiday recipe: impressive, delicious, and surprisingly easy. They’re the kind of thing that makes people stop and say, “Wait, you made these?” And when you tell them yes, you get to see that look of genuine surprise and admiration. It’s a great feeling.
I love how adaptable they are, too. Whether you’re making them for a kid’s Halloween party, a grown-up costume gathering, or just a cozy night in with a scary movie, they fit the occasion perfectly. And the spider web design? It’s easier than it looks. I promise.
I hope you give these a try. And when you do, I’d love to hear about it. Leave a comment below and tell me how they turned out, or share a photo on social media. Did you add plastic spiders? Did you try the chocolate buttercream? Did your power flicker while you were baking? (Mine did. It felt like a sign.)
Happy Halloween, friends. Go make something spooky.
Frequently Asked Questions
Can I use regular cocoa powder instead of black cocoa?
You can, but the color won’t be as dark and the flavor will be different. Black cocoa has a unique, almost Oreo-like taste that regular cocoa just can’t replicate. If you’re set on using regular cocoa, add 2 tablespoons of black gel food coloring to the batter to deepen the color.
How do I get the spider web design to look clean?
The key is using a thin, consistent line of gel color. Mix a small amount of black gel food coloring with a few drops of water until it’s the consistency of ink. Use a toothpick or a fine-tipped brush. Practice on parchment paper first—it really helps.
Can I make these cupcakes ahead of time?
Absolutely. Bake the cupcakes up to 2 days in advance and store them in an airtight container at room temperature. Frost and decorate them the day you plan to serve them. The spider web design looks best when it’s fresh.
Why did my cupcakes turn out dry?
Two possible reasons: overbaking or overmixing. Check your oven temperature with an oven thermometer—many run hot. And mix the batter only until the flour disappears. If you’re still having trouble, try adding an extra tablespoon of buttermilk to the batter.
How do I store leftover cupcakes?
Keep them in an airtight container at room temperature for up to 3 days. Don’t refrigerate them—it dries out the cake. If you need to keep them longer, freeze the unfrosted cupcakes for up to 3 months and frost them fresh.
Pin This Recipe!
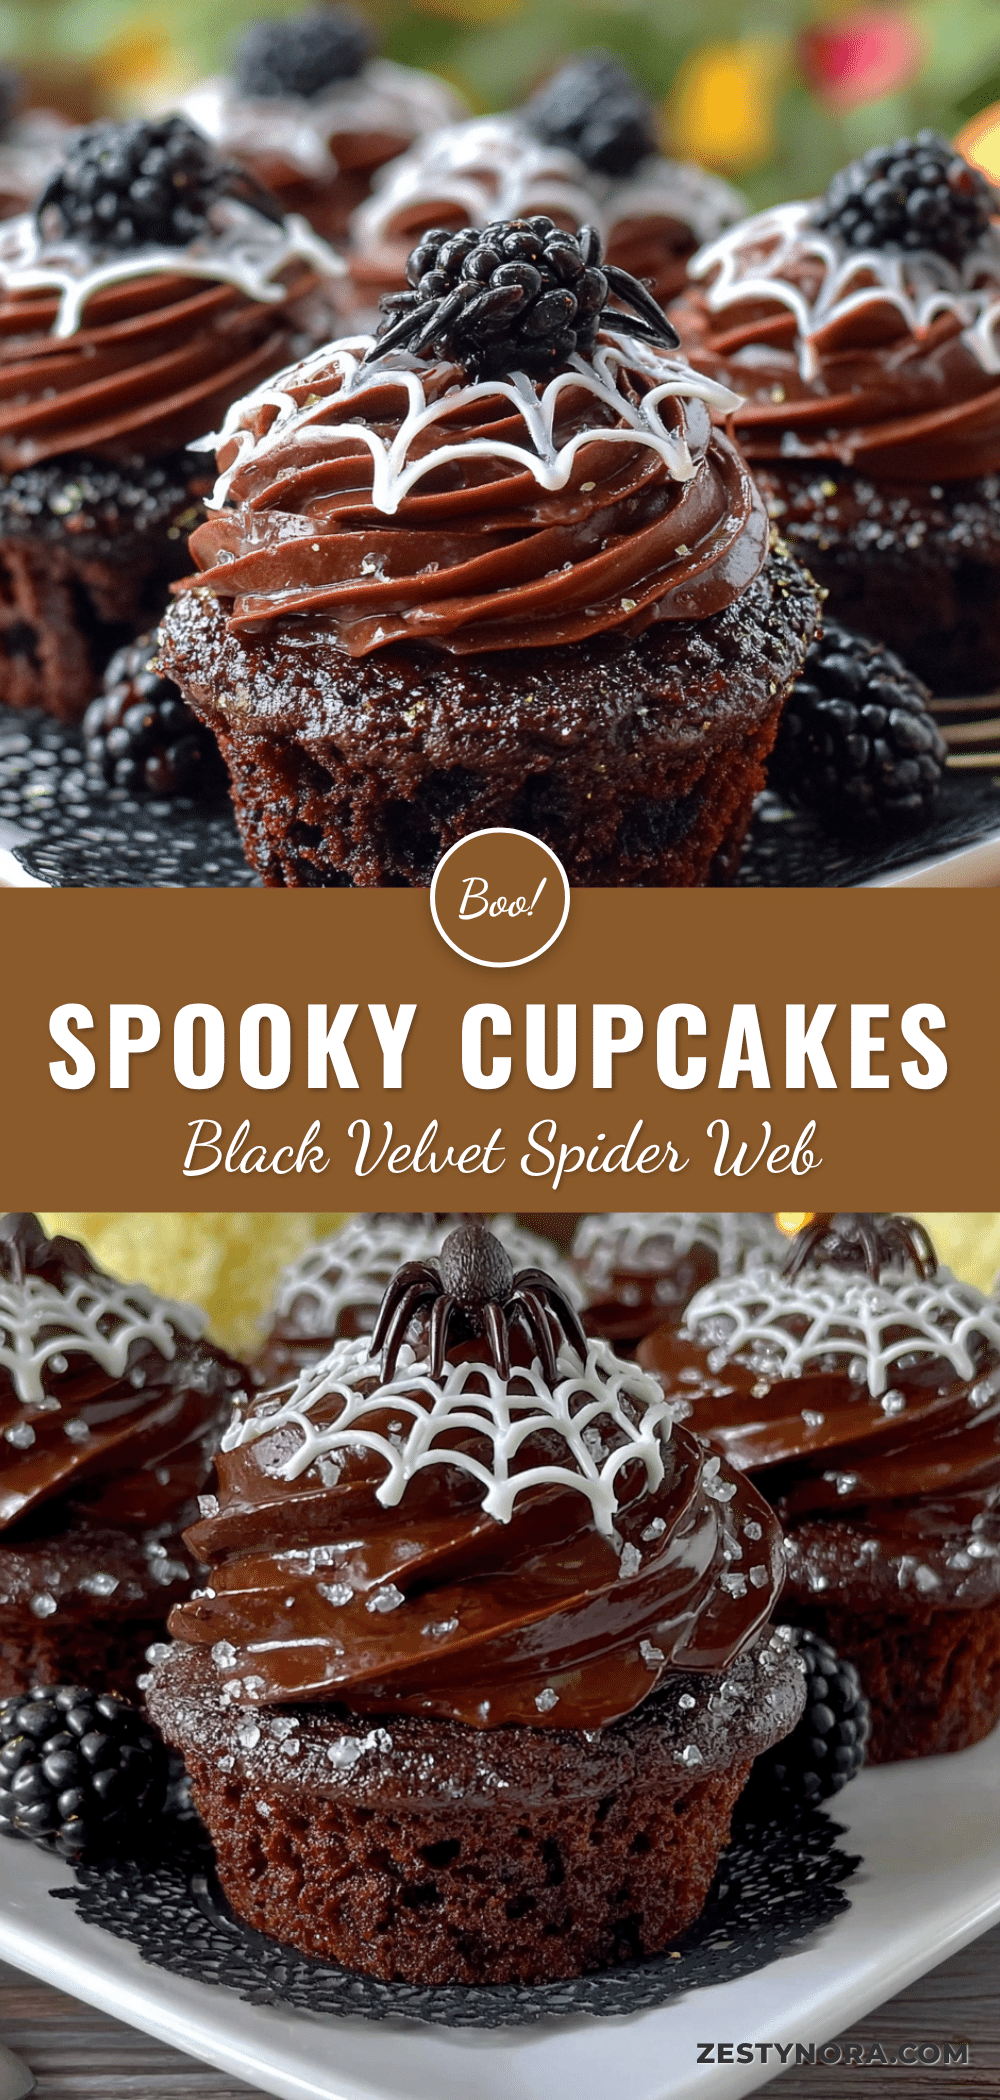
Best Easy Black Velvet Spider Web Cupcakes for Halloween
These spooky black velvet cupcakes feature a rich, dark cocoa flavor and a stunning spider web design that’s easier than it looks. Perfect for Halloween parties, they’re moist, tender, and topped with creamy vanilla buttercream.
- Prep Time: 15 minutes
- Cook Time: 20 minutes
- Total Time: 45 minutes
- Yield: 12 servings 1x
- Category: Dessert
- Cuisine: American
Ingredients
- 1 ½ cups all-purpose flour (190g)
- ½ cup black cocoa powder (50g)
- 1 teaspoon baking soda
- ½ teaspoon salt
- 1 cup granulated sugar (200g)
- ½ cup unsalted butter (113g), softened
- 2 large eggs, room temperature
- 1 teaspoon vanilla extract
- 1 cup buttermilk (240ml)
- 1 tablespoon white vinegar
- 1 cup unsalted butter (226g), softened (for frosting)
- 3 ½ cups powdered sugar (420g), sifted (for frosting)
- 2–3 tablespoons heavy cream (30-45ml) (for frosting)
- 1 teaspoon vanilla extract (for frosting)
- Pinch of salt (for frosting)
- Black gel food coloring (optional, for spider web design)
Instructions
- Preheat oven to 350°F (175°C). Line a 12-cup muffin tin with paper liners.
- In a medium bowl, whisk together flour, black cocoa powder, baking soda, and salt until no lumps remain.
- In a large bowl, beat softened butter and granulated sugar with an electric mixer on medium speed until light and fluffy, about 3-4 minutes. Scrape down sides halfway through.
- Add eggs one at a time, beating well after each addition. Mix in vanilla extract. Batter may look curdled; this is normal.
- With mixer on low speed, add one-third of dry ingredients, mixing until just combined. Add half of buttermilk, mixing again. Repeat with another third of dry ingredients, remaining buttermilk, and final third of dry ingredients. Stop mixing as soon as flour disappears.
- Stir in white vinegar by hand with a rubber spatula until just combined. Batter will show a few bubbles.
- Divide batter evenly among 12 liners, filling each about two-thirds full. Bake for 18-22 minutes, or until a toothpick inserted into center comes out clean. Tops should spring back when lightly touched.
- Let cupcakes cool in pan for 5 minutes, then transfer to a wire rack to cool completely.
- For buttercream: Beat softened butter on medium speed until smooth and creamy, about 2 minutes. Gradually add sifted powdered sugar, one cup at a time, beating on low speed. Add heavy cream and vanilla extract, then increase speed to medium-high and beat for 3-4 minutes until light and fluffy. Add a pinch of salt.
- Once cupcakes are completely cool, pipe a generous swirl of buttercream on top using a round tip, starting from outside and working inward in a spiral. Leave a small circle in center unfrosted.
- For spider web design: Mix a small amount of black gel food coloring with 1 teaspoon of water. Dip a toothpick into mixture and draw a small circle in center of each cupcake. From that circle, draw 4-6 straight lines radiating outward like spokes. Working from center outward, drag toothpick through lines to create curved arches connecting them.
Notes
Don’t overmix the batter to avoid tough cupcakes. Use room temperature ingredients for best results. Black cocoa stains everything, so wear an apron. Practice spider web design on parchment paper first. Cupcakes can be made 2 days ahead; frost and decorate day of serving. Store in airtight container at room temperature for up to 3 days. Do not refrigerate.
Nutrition
- Serving Size: 1 cupcake with frost
- Calories: 380
- Sugar: 32
- Sodium: 210
- Fat: 22
- Saturated Fat: 14
- Carbohydrates: 45
- Fiber: 2
- Protein: 4
Keywords: Halloween cupcakes, black velvet cupcakes, spider web cupcakes, easy Halloween dessert, black cocoa cupcakes


