My husband had sworn off venison jerky for a solid decade. Ten years. He claimed it was always too dry, too gamey, or so tough it felt like chewing on a leather boot. I’d tried store-bought stuff and even a few homemade batches from well-meaning hunting buddies, and honestly, I couldn’t really argue with him. Most of it was pretty bad. Then, last fall, my freezer started overflowing with ground venison from my brother-in-law’s annual hunting trip. I needed a plan, and fast. I decided to make a small test batch of teriyaki jerky, fully expecting to eat it all myself. I left it cooling on a wire rack on the counter, went to answer the phone, and came back ten minutes later to find my husband standing there, mid-chew, with a guilty look on his face. He didn’t even say anything. He just pointed at the rack and held out his hand for more.
That moment, right there, is why I keep making this recipe. It completely changed his mind, and honestly, it changed mine too. I always thought making jerky at home was this big, complicated process. You know, the kind of thing that requires a smoker and a degree in meat science. Let me tell you, it’s not. This budget-friendly teriyaki venison jerky is about as simple as it gets. It uses pantry staple ingredients you probably already have, and you can make it in either your oven or a dehydrator. No fancy gadgets required, just a little bit of patience and a sharp knife.
Maybe you’ve been in the same boat. Maybe you have a freezer full of venison and no idea what to do with it that doesn’t involve another pot of chili. Or maybe you’re just looking for a high-protein, portable snack that won’t break the bank. This recipe is for you. It’s the one that turned a skeptic into a believer, and it’s the only jerky recipe I’ve made for the last three years. It stays because it works, every single time.
Why You’ll Love This Recipe
This isn’t just another jerky recipe. I’ve tested this specific combination of ingredients and techniques more times than I can count, tweaking the marinade and the drying time until it was just right. It’s been tasted by picky kids, skeptical in-laws, and a few hungry neighbors, and it has never let me down. Here is why this one is different.
- Budget-Friendly: Using venison you already have on hand makes this incredibly affordable. The marinade uses simple, cheap ingredients like soy sauce, brown sugar, and ginger. No expensive specialty items required.
- Simple Ingredients: You likely have everything for the teriyaki marinade in your pantry and fridge right now. No need for a special trip to an Asian market or a health food store.
- Two Cooking Methods: Whether you own a dehydrator or just a standard oven, you can make this jerky perfectly. I’ll walk you through both methods step by step.
- Crowd-Pleaser: This jerky has a sweet and savory teriyaki flavor that even people who claim to “not like venison” absolutely devour. It’s a fantastic way to use up your harvest without anyone complaining.
- Perfect for On-the-Go: It’s a high-protein, shelf-stable snack that’s perfect for hiking, road trips, lunchboxes, or just a quick energy boost during the workday.
What really makes this recipe stand out is the marinade. It’s not overly salty or sweet. The balance of soy sauce, brown sugar, and a touch of pineapple juice (my secret ingredient) tenderizes the meat and gives it that classic teriyaki flavor without being overpowering. It’s the kind of jerky that makes you close your eyes after the first bite, just a little bit, because it’s that satisfying. It’s comfort food, reimagined as a portable, protein-packed snack that feels like a treat, not a chore.
What Ingredients You Will Need
This recipe relies on a handful of simple, everyday ingredients to create a deeply flavorful marinade. The magic is in the balance of sweet, salty, and savory. Here is everything you need, along with a few notes on why I chose each one.
- 2 pounds venison roast or steak: This is the star of the show. Use any large cut of venison, like a top round, bottom round, or sirloin tip. Trim off any visible silver skin or fat, as fat can cause the jerky to spoil faster. Partially freezing the meat for about an hour makes it much easier to slice thinly and evenly.
- 1/2 cup low-sodium soy sauce: This is the base of the teriyaki flavor. I recommend using low-sodium soy sauce so you have more control over the saltiness. If you are gluten-free, you can easily swap this for tamari or coconut aminos.
- 1/4 cup brown sugar, packed: This adds sweetness and helps create that beautiful, slightly sticky glaze on the jerky. Dark brown sugar will give a deeper, more molasses-like flavor, while light brown sugar is a bit milder. Both work great.
- 1/4 cup pineapple juice: This is my little trick. The natural enzymes in pineapple juice help tenderize the venison, making it incredibly tender even after drying. It also adds a subtle fruity note that rounds out the teriyaki flavor. Canned or fresh juice works fine.
- 2 tablespoons rice vinegar: Adds a gentle tang that balances the sweetness of the brown sugar. You can substitute apple cider vinegar or even white wine vinegar in a pinch.
- 1 tablespoon sesame oil: This gives the jerky that classic, nutty Asian flavor. A little goes a long way. Toasted sesame oil is best for its stronger flavor profile.
- 2 cloves garlic, minced: Fresh garlic is non-negotiable here. It adds a pungent, savory depth that powdered garlic just can’t replicate.
- 1 tablespoon freshly grated ginger: Again, fresh is best. The spicy, warm kick of fresh ginger is essential for a good teriyaki marinade. Use a microplane or the small side of a box grater.
- 1/2 teaspoon black pepper: Adds a touch of heat and earthiness. Feel free to increase this or add a pinch of red pepper flakes if you want a spicier jerky.
- 1/4 teaspoon onion powder: A subtle background flavor that rounds everything out.
Equipment Needed
You don’t need a lot of fancy equipment to make excellent jerky at home. Here is the basic gear you’ll need, along with a few tips from my own kitchen.
- Sharp Chef’s Knife or Meat Slicer: A very sharp knife is crucial for slicing the venison into thin, even strips. A meat slicer is a fantastic investment if you make jerky regularly, but a good chef’s knife works perfectly. I’ve used the same old, slightly beat-up chef’s knife for years, and it does the job just fine.
- Cutting Board: A large, sturdy cutting board is essential. I prefer a plastic or bamboo board for raw meat, as it’s easier to sanitize.
- Large Mixing Bowl or Resealable Plastic Bag: For combining the marinade ingredients and the venison strips. A large glass bowl or a gallon-sized zip-top bag works perfectly. I usually use a bowl because I feel like I get better coverage.
- Dehydrator or Oven: This is the main piece of equipment. A dehydrator is more energy-efficient and gives you more consistent results, but a standard oven works just as well. I’ve made this recipe dozens of times in my old, basic oven, and it turns out fantastic every time.
- Oven-Safe Cooling Racks: If you are using an oven, you will need wire cooling racks that fit inside your baking sheets. This allows air to circulate around the meat for even drying. If you don’t have these, you can carefully place the strips directly on the oven grates, but place a baking sheet on the lower rack to catch any drips.
- Baking Sheets: Needed to catch any drips from the jerky while it dries in the oven.
- Paper Towels: For patting the meat dry after marinating.
- Air-Tight Container or Vacuum Sealer: For storing the finished jerky. An airtight jar or a vacuum-sealed bag will keep it fresh for weeks.
Preparation Method
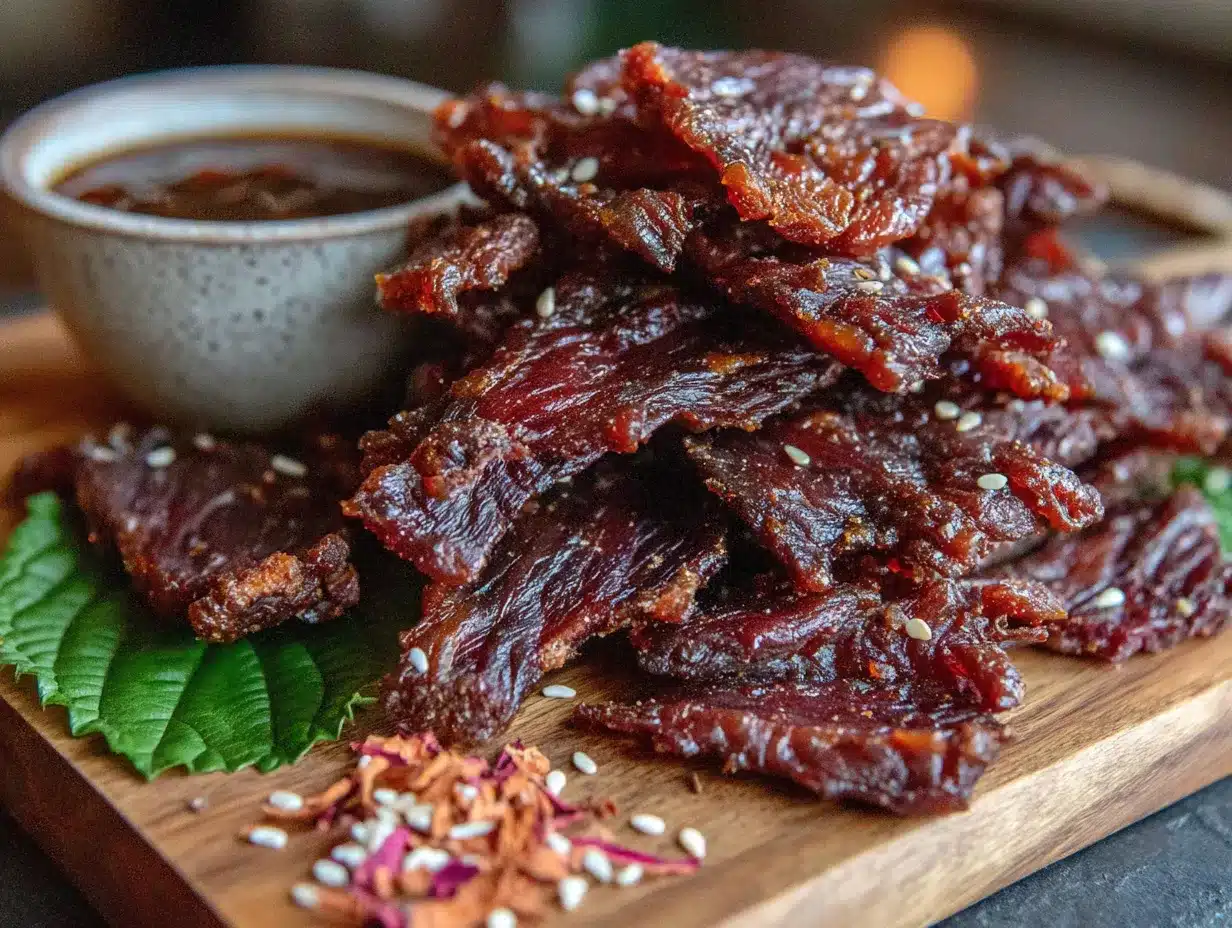
Making this teriyaki venison jerky is a straightforward process, but a few key steps make all the difference. Follow these instructions carefully for the best results, whether you are using an oven or a dehydrator.
- Prepare the Venison: Start by placing your 2-pound venison roast in the freezer for about 45 minutes to 1 hour. You want it to be firm but not frozen solid. This makes it infinitely easier to slice into thin, even strips. While the meat chills, make the marinade.
- Make the Marinade: In a medium bowl, whisk together the 1/2 cup low-sodium soy sauce, 1/4 cup packed brown sugar, 1/4 cup pineapple juice, 2 tablespoons rice vinegar, 1 tablespoon sesame oil, 2 minced garlic cloves, 1 tablespoon freshly grated ginger, 1/2 teaspoon black pepper, and 1/4 teaspoon onion powder. Whisk until the sugar is completely dissolved. Take a taste. It should be a perfect balance of sweet, salty, and tangy.
- Slice the Meat: Remove the partially frozen venison from the freezer. Using your sharpest knife, slice the meat against the grain into strips that are about 1/4-inch thick. Slicing against the grain is crucial for tender jerky. If you slice with the grain, the jerky will be tough and chewy. The strips should be roughly 1 to 2 inches wide and as long as the cut of meat allows. I usually end up with strips that are about 4 to 6 inches long.
- Marinate the Meat: Place the sliced venison strips into a large bowl or a gallon-sized zip-top bag. Pour the prepared marinade over the meat, making sure every strip is well coated. Use your hands to massage the marinade into the meat for a minute or two. This helps the flavor penetrate. Seal the bag or cover the bowl and place it in the refrigerator. Let it marinate for at least 4 hours, but overnight (8-12 hours) is best for maximum flavor. Don’t go much longer than 24 hours, or the pineapple juice can start to make the meat mushy.
- Prepare for Drying (Oven Method): When you are ready to dry the jerky, preheat your oven to its lowest setting. For most ovens, this is around 170°F (75°C). If your oven doesn’t go that low, prop the door open a crack with a wooden spoon handle to let heat escape. Line your baking sheets with aluminum foil for easy cleanup, then place your oven-safe cooling racks on top of the lined sheets.
- Prepare for Drying (Dehydrator Method): If using a dehydrator, simply set it to 160°F (70°C). No other prep is needed for the trays.
- Drain and Arrange the Meat: Remove the venison strips from the marinade. Do not rinse them. Pat each strip dry with a paper towel to remove excess moisture. This step is important for preventing a sticky, overly wet jerky. Arrange the strips in a single layer on your dehydrator trays or on the wire cooling racks in the oven. Make sure the strips are not touching or overlapping, as this will prevent even drying.
- Dry the Jerky: Place the trays in the oven or dehydrator. For the oven: dry for 3 to 5 hours, checking for doneness after 3 hours. For the dehydrator: dry for 4 to 6 hours, checking after 4 hours. The exact time will depend on the thickness of your strips, the humidity in your kitchen, and your specific appliance. You want the jerky to be dry to the touch, but still pliable. It should bend and crack, but not snap in half. A good test is to take a piece out, let it cool for a minute, and then bend it. If it cracks but doesn’t break, it’s done.
- Cool and Check: Once the jerky is done, remove it from the oven or dehydrator and let it cool completely on the racks. This is an important step. The jerky will firm up as it cools. Don’t be afraid if it seems a tiny bit soft when it’s warm; it will stiffen up.
- Store: Once completely cool, store the jerky in an airtight container or a vacuum-sealed bag. It will keep at room temperature for up to 2 weeks, in the refrigerator for up to a month, and in the freezer for up to 6 months. Good luck having it last that long, though!
Cooking Tips & Techniques
After making this recipe more times than I can count, I’ve picked up a few tricks that make the process smoother and the final product even better. Here are my best tips for perfect jerky every time.
- The Goldilocks Slice: The thickness of your slices is the single most important factor for consistent drying. Too thick, and the outside will be dry while the inside is still raw. Too thin, and you’ll have brittle, crunchy jerky. Aim for a consistent 1/4-inch thickness. If you have a meat slicer, this is where it really shines. If you are using a knife, take your time.
- Pat It Dry: Don’t skip the step of patting the marinated strips dry with paper towels. Excess marinade on the surface of the meat will create a sticky, gooey jerky that takes forever to dry. You want the flavor inside the meat, not just sitting on top.
- Don’t Overcrowd: This is a common mistake. Airflow is everything when it comes to drying meat. If your strips are touching or overlapping, they will steam instead of dry, leading to an uneven texture and a longer drying time. Give them some breathing room.
- Rotate Your Trays: If you have an oven or dehydrator with hot spots, rotate your trays halfway through the drying time. This ensures all the strips dry evenly. I learned this the hard way after one batch came out with some pieces perfect and others still damp.
- Trust the Bend Test: Forget the exact time. Your oven and dehydrator are different from mine. The bend test is the only true test for doneness. Let a piece cool for a minute, then bend it. It should crack on the surface but not break in half. If it bends like a wet noodle, it needs more time. If it snaps, you’ve gone too far.
- The Drip Pan Hack: When using the oven method, a lot of marinade can drip off the meat and burn on the bottom of your oven. Placing a foil-lined baking sheet on the rack below the jerky catches all those drips and makes cleanup a breeze.
Variations & Adaptations
This basic teriyaki recipe is a fantastic starting point, but feel free to make it your own. Here are a few variations I’ve tried and loved.
- Spicy Teriyaki Jerky: Add 1-2 teaspoons of sriracha, sambal oelek, or red pepper flakes to the marinade for a nice kick of heat. I sometimes add a finely chopped habanero pepper for a truly fiery version, but that’s definitely not for everyone.
- Smoky Teriyaki Jerky: Add 1 teaspoon of liquid smoke to the marinade. This gives the jerky a wonderful campfire flavor that mimics the taste of traditionally smoked jerky, even if you are using an oven. It’s one of my favorite variations.
- Garlic-Ginger Teriyaki Jerky: Double the amount of fresh garlic and ginger in the marinade. This creates an intensely aromatic and flavorful jerky that is incredibly savory. I did this once when I had a cold, and it was the only thing I could taste, but it was so good.
- Low-Sugar Version: Replace the brown sugar with a sugar substitute like Swerve or monk fruit sweetener. You can also reduce the amount of pineapple juice and replace it with water or more soy sauce. The texture might be slightly different, but the flavor will still be great.
- Beef Jerky: This marinade works perfectly for beef jerky too. Use a lean cut like top round, bottom round, or flank steak. Follow the exact same instructions. It’s a fantastic way to use beef when it’s on sale.
Serving & Storage Suggestions
This jerky is incredibly versatile. Here are my favorite ways to serve and store it.
- Serving Temperature: Jerky is best served at room temperature. It’s a perfect grab-and-go snack. I always keep a bag in my car for long drives or hikes.
- Presentation: For a fun snack board, arrange the jerky strips on a wooden platter with some sharp cheddar cheese cubes, whole grain crackers, and a handful of dried apricots or figs. It’s an unexpected but delicious combination.
- Complementary Dishes: This jerky is fantastic on its own, but it can also be chopped up and added to fried rice, salads, or ramen for a protein boost. I love adding it to a simple Asian-style coleslaw for extra texture.
- Storage: Store your completely cooled jerky in an airtight container. A glass jar with a tight-fitting lid is perfect. For longer storage, a vacuum-sealed bag is the best option. Properly stored, it will keep at room temperature for 2 weeks, in the refrigerator for a month, and in the freezer for up to 6 months.
- Reheating: You don’t need to reheat jerky. In fact, it’s best not to. If your jerky has been stored for a while and seems a little soft, you can pop it in a 170°F oven or dehydrator for 15-20 minutes to re-crisp it. Let it cool completely before storing it again.
- Flavor Development: The flavor of the jerky actually improves over the first day or two after it’s made. The flavors meld together and mellow out. It’s always a little bit better on day two than it is on day one, if you can manage to wait that long.
Nutritional Information & Benefits
While I’m not a nutritionist, I can share some general information about this recipe. It’s a fantastic source of lean protein with a relatively low carbohydrate count.
- Estimated Nutritional Values (per 1-ounce serving): Calories: 85, Protein: 15g, Fat: 1.5g, Carbohydrates: 4g, Sugar: 3g. These are estimates and will vary based on the exact ingredients and the amount of marinade absorbed.
- High in Protein: Venison is an incredibly lean, high-quality protein source. This makes the jerky a perfect post-workout snack or a satisfying, energy-sustaining option for hiking or long days.
- Low in Fat: Compared to beef jerky, venison jerky is much lower in fat, making it a healthier choice for those watching their fat intake.
- Rich in Iron: Venison is a fantastic source of heme iron, which is easily absorbed by the body. Iron is essential for carrying oxygen in your blood and preventing fatigue.
- Dietary Considerations: This recipe can be made gluten-free by using tamari or coconut aminos instead of soy sauce. It is naturally low-carb and keto-friendly if you use a sugar substitute. The main allergens to be aware of are soy and sesame.
Conclusion
This budget-friendly teriyaki venison jerky has become a staple in our house for a reason. It’s the recipe that finally proved to my husband (and to me) that homemade jerky doesn’t have to be a disappointment. It’s simple, it’s incredibly flavorful, and it turns a freezer full of game meat into a snack that everyone actually fights over. I love that I can make a huge batch in one afternoon and have healthy, protein-packed snacks ready for weeks.
I really hope you give this recipe a try, whether you are a seasoned hunter with a full freezer or just someone looking for a delicious, affordable snack. Don’t be afraid to play with the spices and make it your own. That’s the best part of cooking at home. I would love to hear how it turns out for you! Drop a comment below and let me know if you used the oven or the dehydrator, and if you added any fun twists to the marinade. Happy snacking!
Frequently Asked Questions
Can I use a different type of meat for this recipe?
Absolutely! This teriyaki marinade works beautifully with beef, using lean cuts like top round or flank steak. You can also use elk or moose meat following the exact same instructions. Just make sure any meat you use is lean and trimmed of fat for the best shelf life.
How do I know when the jerky is fully dried?
The best way to test for doneness is the bend test. Take a piece of jerky out of the oven or dehydrator, let it cool for about a minute, and then bend it. It should crack slightly on the surface but not break in half. If it bends easily without cracking, it needs more time. If it snaps cleanly, it’s overdried.
Can I make this jerky without a dehydrator?
Yes, absolutely! This recipe includes instructions for both a dehydrator and a standard oven. Using an oven at its lowest setting (usually around 170°F) works perfectly. Just make sure to prop the oven door open slightly with a wooden spoon handle if your oven doesn’t go that low, to allow moisture to escape.
Why is my jerky so tough and chewy?
There are two main reasons for tough jerky. First, you might have sliced the meat with the grain instead of against it. Slicing against the grain breaks up the muscle fibers, making the jerky easier to chew. Second, you may have dried it for too long. Always rely on the bend test rather than the clock.
How long does homemade venison jerky last?
Properly stored in an airtight container at room temperature, this jerky will last for about 2 weeks. In the refrigerator, it will stay fresh for up to a month. For the longest storage, vacuum-seal and freeze it, where it will keep for up to 6 months. The key is making sure the jerky is completely dry before storing it.
Pin This Recipe!
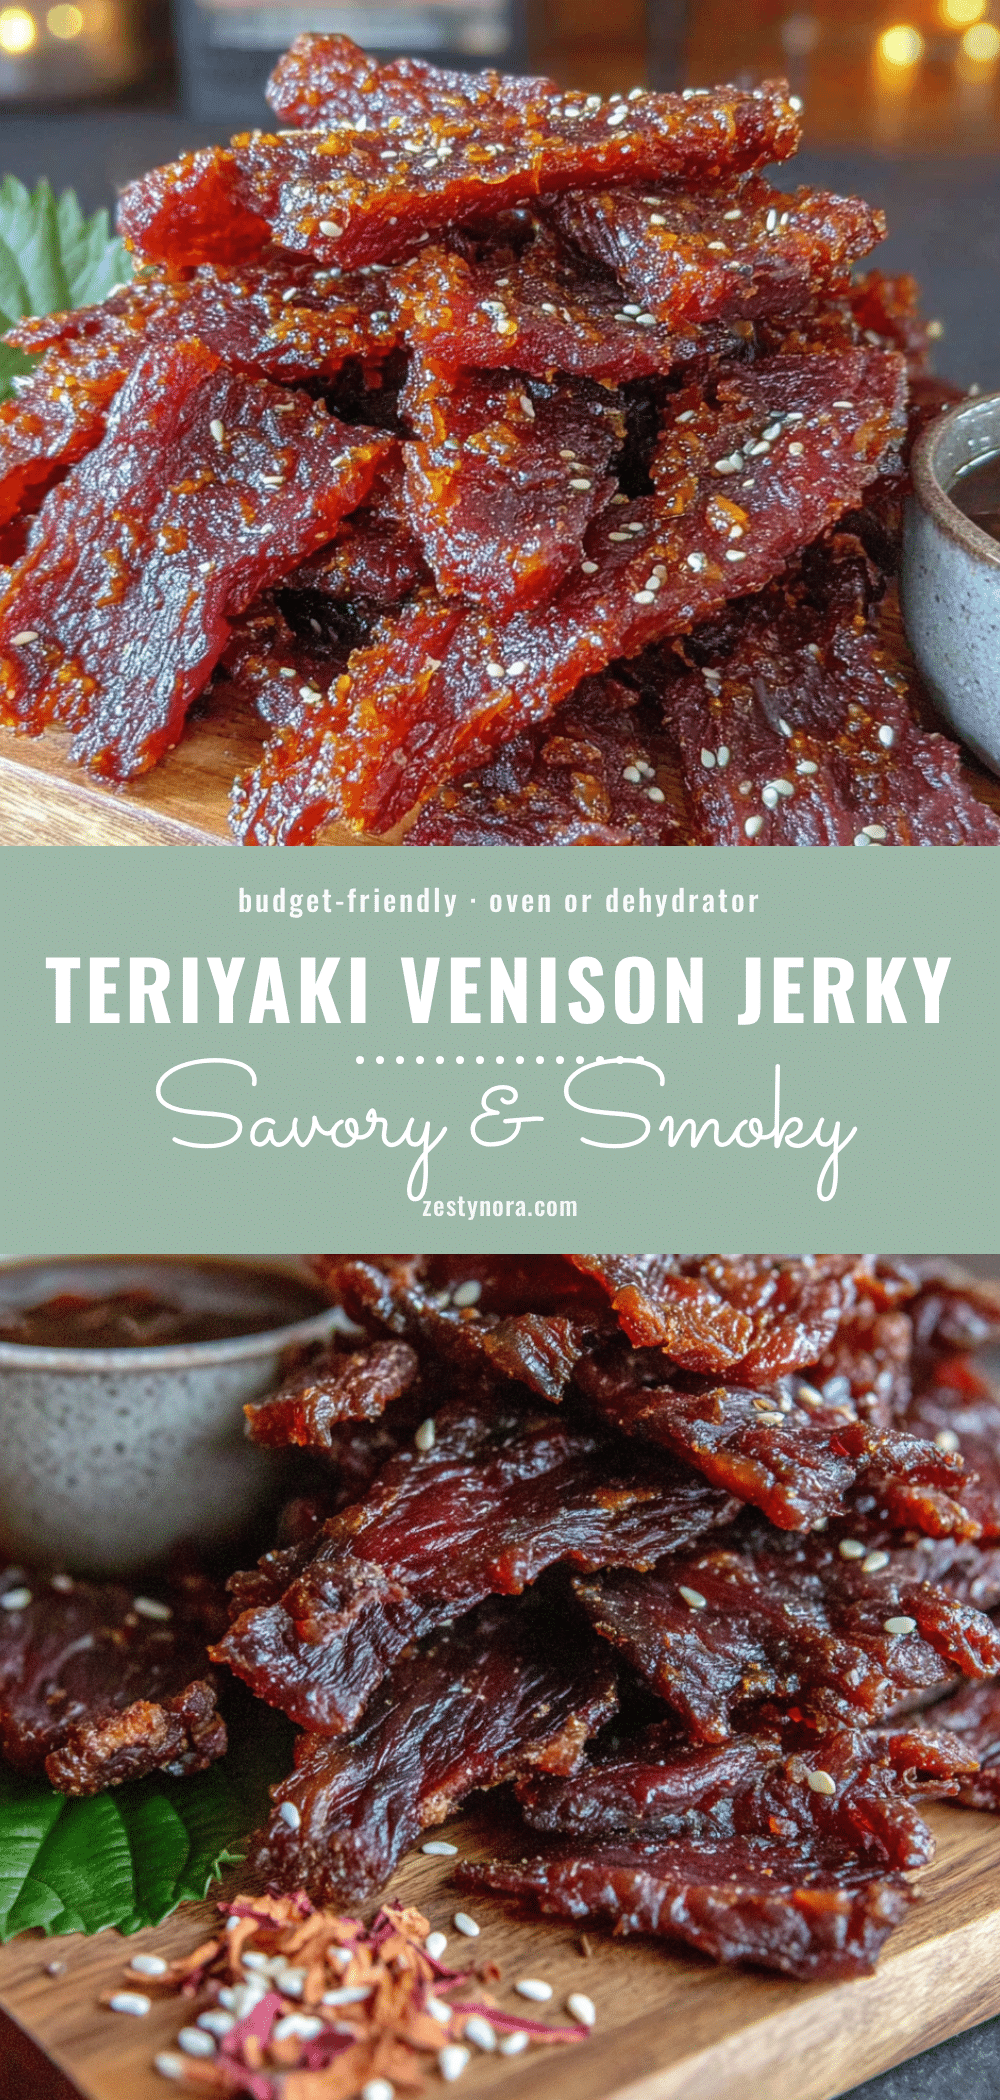
Budget-Friendly Teriyaki Venison Jerky: Easy Oven or Dehydrator Recipe
This budget-friendly teriyaki venison jerky is simple to make with pantry staple ingredients, using either an oven or dehydrator. It’s a crowd-pleasing, high-protein snack that turns even venison skeptics into believers.
- Prep Time: 15 minutes
- Cook Time: 3-5 hours (oven) or 4-6 hours (dehydrator)
- Total Time: 3 hours 15 minutes to 6 hours 15 minutes (plus marinating time)
- Yield: 4 servings 1x
- Category: Snack
- Cuisine: Asian-inspired
Ingredients
- 2 pounds venison roast or steak
- 1/2 cup low-sodium soy sauce
- 1/4 cup brown sugar, packed
- 1/4 cup pineapple juice
- 2 tablespoons rice vinegar
- 1 tablespoon sesame oil
- 2 cloves garlic, minced
- 1 tablespoon freshly grated ginger
- 1/2 teaspoon black pepper
- 1/4 teaspoon onion powder
Instructions
- Place the 2-pound venison roast in the freezer for about 45 minutes to 1 hour until firm but not frozen solid.
- In a medium bowl, whisk together the soy sauce, brown sugar, pineapple juice, rice vinegar, sesame oil, minced garlic, grated ginger, black pepper, and onion powder until the sugar is dissolved.
- Remove the venison from the freezer and slice against the grain into 1/4-inch thick strips, about 1 to 2 inches wide and 4 to 6 inches long.
- Place the venison strips in a large bowl or gallon-sized zip-top bag. Pour the marinade over the meat, ensuring all strips are coated. Massage the marinade into the meat for 1-2 minutes. Cover and refrigerate for at least 4 hours, preferably overnight (8-12 hours), but no more than 24 hours.
- When ready to dry, preheat the oven to its lowest setting (around 170°F / 75°C). If the oven doesn’t go that low, prop the door open slightly with a wooden spoon handle. Line baking sheets with aluminum foil and place oven-safe cooling racks on top. For a dehydrator, set it to 160°F (70°C).
- Remove the venison strips from the marinade (do not rinse) and pat each strip dry with paper towels to remove excess moisture.
- Arrange the strips in a single layer on the dehydrator trays or on the wire cooling racks in the oven, ensuring they do not touch or overlap.
- For the oven: dry for 3 to 5 hours, checking for doneness after 3 hours. For the dehydrator: dry for 4 to 6 hours, checking after 4 hours. The jerky is done when it is dry to the touch but still pliable; it should bend and crack but not snap in half.
- Remove the jerky from the oven or dehydrator and let it cool completely on the racks. It will firm up as it cools.
- Store the completely cooled jerky in an airtight container or vacuum-sealed bag. It will keep at room temperature for up to 2 weeks, in the refrigerator for up to a month, and in the freezer for up to 6 months.
Notes
Slice the meat against the grain for tender jerky. Pat the marinated strips dry to avoid sticky jerky. Do not overcrowd the trays; ensure good airflow. Use the bend test to check doneness: a piece should crack but not break. The flavor improves after a day or two.
Nutrition
- Serving Size: 1 ounce
- Calories: 85
- Sugar: 3
- Sodium: 400
- Fat: 1.5
- Saturated Fat: 0.5
- Carbohydrates: 4
- Protein: 15
Keywords: venison jerky, teriyaki jerky, homemade jerky, oven jerky, dehydrator jerky, budget-friendly jerky, high-protein snack