It is 6:45 PM on a Tuesday. My brain is already mush, and the fridge light is the only thing guiding me. I have a piece of meat in there that needs to become dinner, but honestly, I don’t have the energy for a complicated marinade or a twenty-step prep routine. I just want something hot, salty, and crispy. You know that feeling when you order pork chops at a restaurant and they come out with this golden, parmesan-like crust that shatters when you bite it? That is the goal. Not soggy. Not rubbery. Just a proper, crunchy, savory coat that makes you forget you are eating a weekday weeknight meal.
So here I am, staring at a rack of bone-in chops, thinking about how easy it would be to just throw them in the oven and hope for the best. But hope isn’t a cooking method. I need a plan. A plan that involves breadcrumbs, cheese, and a little bit of butter, but baked, not fried, because who has time to stand over a hot skillet splattering oil all over the counter? This recipe came to me because I was tired of dry chicken breasts and wanted to try that same logic on pork. It just makes sense. The fat in the pork loves the fat in the cheese. It is a match made in heaven, really.
I tried this last week and my kids actually asked for seconds. That is the highest praise you can get in my house. The crust stays on, the meat stays juicy, and I didn’t have to do a single dish afterward except the baking sheet. It is that kind of dinner that feels like a treat but fits right into a normal schedule. I am sticking with this one because it works. Every time. No excuses.
Why You’ll Love This Recipe
Let’s be honest for a second. Cooking dinner every single night can feel like a second job. You want food that tastes like it came from a nice bistro, but you need it on the table in the time it takes to watch one episode of a show. This Crispy Baked Parmesan Crusted Pork Chops recipe hits that sweet spot. It is not just another breaded meat dish; it is the result of testing half a dozen methods until I found the one that actually works. I have burned breadcrumbs. I have had cheese slide off entirely. I have had pork that tasted like cardboard. This version? It is the winner.
- Quick & Easy: From the moment you pull the meat out of the fridge to the moment it hits the oven, you are looking at about 15 minutes of prep. The rest is passive cooking time. This is perfect for busy weeknights when you are running on fumes.
- Simple Ingredients: You do not need a specialty grocery store for this. I am talking about items you likely already have in your pantry and fridge. Panko, parmesan, garlic powder, paprika, and butter. That is it. No fancy sauces or obscure spices.
- Perfect for Family Dinners: This is a crowd-pleaser that works for kids and adults. The crunch factor is huge for picky eaters who usually turn their noses up at “plain” pork. It feels like comfort food, but it is leaner than fried options.
- Unbelievably Delicious: The texture is the star here. The combination of panko breadcrumbs and finely grated parmesan creates a crust that is golden brown and shatteringly crisp. It contrasts perfectly with the tender, juicy meat inside. It is next-level comfort food without the guilt of deep frying.
- One Pan Wonder: Cleanup is minimal. This matters more than you think. When you are tired, the promise of washing fewer dishes is a major selling point. Just line your baking sheet and you are done.
What makes this different from other baked pork chop recipes? Most people skip the butter brush at the end, which is a mistake. That extra layer of fat helps the breading brown evenly and adds that rich, savory flavor profile that makes you close your eyes after the first bite. It is comfort food reimagined—healthier, faster, but with the same soul-soothing satisfaction. Whether you are feeding a hungry family or just want a solid meal for yourself, this recipe delivers every single time.
What Ingredients You Will Need
This recipe relies on a few key components to build that signature crunch and flavor. The beauty of it is how simple it is, but the quality of the ingredients matters. You do not need anything exotic, but you do need to pay attention to a few details to get the texture right. Here is what you will need to gather before you start.
- Pork Chops: I recommend using bone-in, center-cut chops. They are about 1 inch thick. Bone-in chops retain moisture better during baking than boneless ones. If you must use boneless, just keep an eye on the oven because they cook faster. Look for chops that are pink and firm to the touch.
- Panko Breadcrumbs: Do not skip the panko. Regular breadcrumbs are too fine and dense; they will get soggy. Panko is flaky and airy, creating that shattering crunch we want. I prefer the brand Seymour’s or any standard Japanese-style panko you find in the Asian aisle.
- Grated Parmesan Cheese: Freshly grated is best. The pre-shredded kind in the bag has anti-caking agents that prevent it from melting properly into the crust. Buy a wedge and grate it yourself with a microplane. It melts into the breadcrumbs like magic.
- Garlic Powder: This adds a savory backbone to the crust. It is different from fresh garlic, which can burn in the oven. Garlic powder distributes evenly and stays sweet.
- Smoked Paprika: A little bit of color and a hint of smokiness. It makes the crust look appetizing and adds depth without overpowering the pork. If you don’t have smoked paprika, regular paprika works, but the flavor profile will be flatter.
- Unsalted Butter: Melted butter is the binder for the breadcrumbs and the key to browning. It helps the cheese and crumbs stick to the meat. Use real butter, not margarine, for the best flavor.
- Sea Salt and Black Pepper: To season the meat itself. Use kosher salt if you have it, as it adheres better to the surface.
- Optional: Dried Parsley: For a pop of green color and a fresh herbal note. It is not strictly necessary, but it makes the dish look more finished.
Substitution note: If you need a gluten-free option, you can swap the panko for gluten-free breadcrumbs or crushed pork rinds. The texture will be slightly different, but still crunchy. For a dairy-free version, you can use nutritional yeast instead of parmesan, though the flavor will be less rich. I also recommend using a high-quality olive oil spray if you want to reduce the butter content slightly, but the butter is really where the flavor lives.
Equipment Needed
You do not need a fancy kitchen to make this work. In fact, keeping it simple is part of the charm. Here is what you will need to have ready before you preheat the oven.
- Baking Sheet: A standard half-sheet pan is perfect. I prefer the one with a lip so the juices don’t spill over. If you have a rimmed baking sheet, that works too. Make sure it is clean and dry.
- Parchment Paper or Silicone Mat: This is your best friend for cleanup. Lining your baking sheet prevents the cheese from sticking and burning to the metal. It saves you from scrubbing later. I use parchment paper because I can just crumple it up and toss it.
- Shallow Dish: You will need a wide, shallow bowl or pie plate for the breadcrumb mixture. A pie plate is ideal because the low sides make it easy to dredge the chops.
- Whisk or Fork: For mixing the dry ingredients together. You want them evenly distributed so every bite has flavor.
- Pastry Brush: To brush the melted butter over the breaded chops. A silicone brush is easier to clean than a bristle one. If you don’t have one, you can use a spoon, but a brush gives you better control.
- Cutting Board: For patting the pork chops dry. Moisture is the enemy of crispiness, so having a dedicated surface for this step is important.
If you do not have a baking sheet, you can use a cast-iron skillet, but you will need to move it to the oven if your skillet is oven-safe. However, the baking sheet method is more hands-off and less likely to splatter. Budget-friendly tip: You do not need expensive tools. A simple glass pie dish works fine for the breading station. The most important thing is having a reliable oven thermometer to ensure your oven is actually at the right temperature, as many home ovens run hot or cold.
Preparation Method
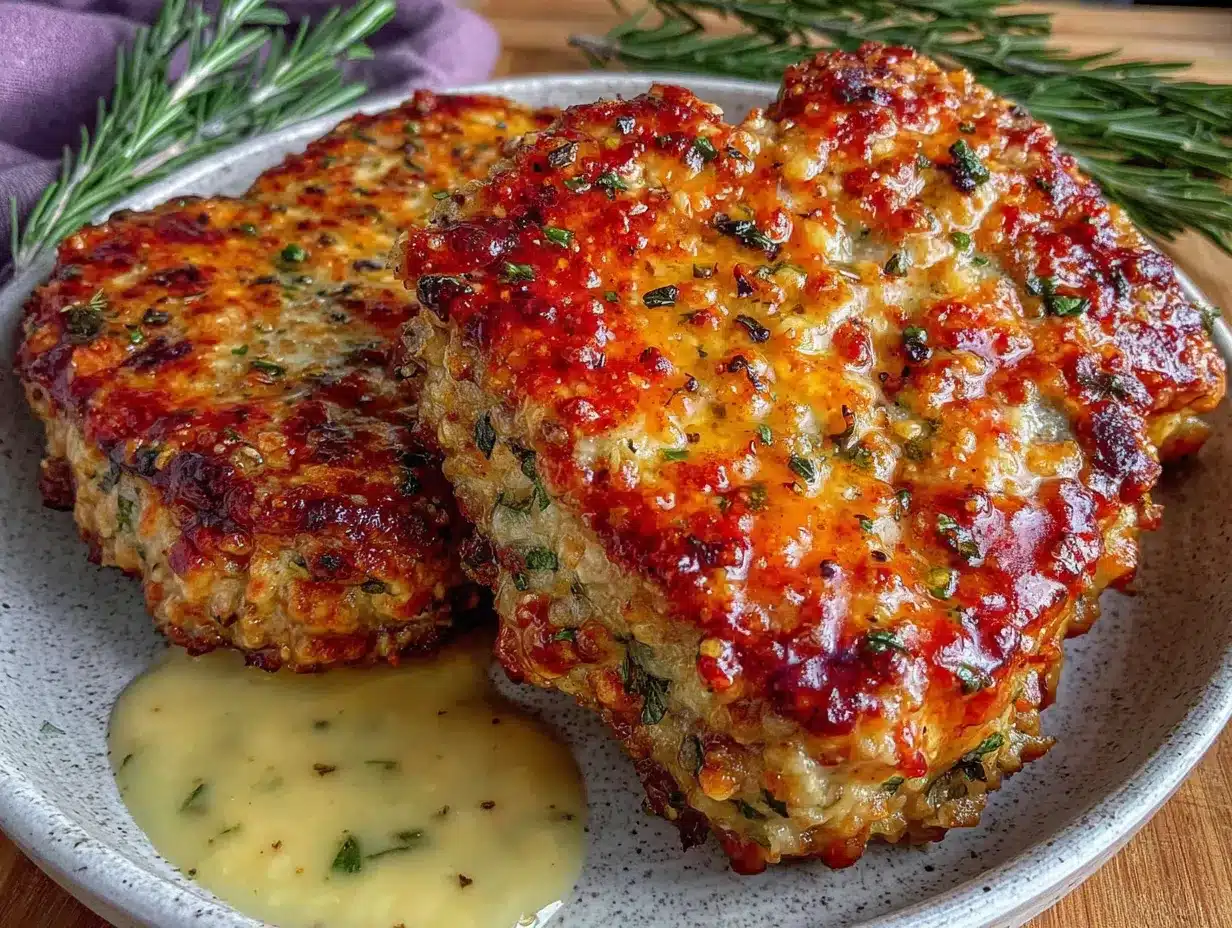
- Preheat and Prep: Start by preheating your oven to 400°F (200°C). This is a relatively high heat, which is necessary to crisp up the breadcrumbs without drying out the meat. While the oven heats, line your baking sheet with parchment paper. Set it aside. Take the pork chops out of the fridge and let them sit for 10 minutes. Cold meat goes into a hot oven and cooks unevenly. Letting it come to room temperature helps it cook more uniformly.
- Pat Dry: This step is non-negotiable. Take paper towels and pat each chop dry on both sides. You want to remove as much surface moisture as possible. If the meat is wet, the breading will slide off or get soggy. Be thorough here. It takes about two minutes, but it makes a huge difference in the final texture.
- Season the Meat: Sprinkle both sides of the pork chops with salt and black pepper. Use about ½ teaspoon of salt per chop, depending on size. Rub it in gently. This seasons the meat itself, not just the crust. You want flavor all the way through.
- Mix the Breading: In your shallow dish or pie plate, combine 1 cup of panko breadcrumbs, ½ cup of grated parmesan cheese, 1 teaspoon of garlic powder, 1 teaspoon of smoked paprika, and ¼ teaspoon of dried parsley if using. Whisk these together with a fork. You want the cheese and spices evenly distributed throughout the panko. If you clump the cheese, you will get uneven browning.
- Press the Chops: Take a seasoned pork chop and press it firmly into the breadcrumb mixture. Do not just dust it; press it. Use your hand to pack the crumbs onto the surface of the meat. Flip it over and press the other side. You want a thick, even coat. Shake off any loose crumbs. These loose crumbs can burn on the pan, so give them a good shake.
- Place on Pan: Place the breaded chops on the prepared baking sheet. Make sure they are not touching each other. Air needs to circulate around them to crisp up the sides. If you have a small oven, you might need to do this in two batches.
- Butter Brush: Melt 3 tablespoons of unsalted butter in a small microwave-safe bowl or saucepan. Let it cool for a minute so it is not boiling hot. Use your pastry brush to lightly brush the top of each chop with the melted butter. This helps the crust turn golden brown. You do not need to soak them; just a light coat is enough. If you want extra crispiness, you can spray them lightly with cooking spray after brushing.
- Bake: Place the baking sheet in the center rack of the preheated oven. Bake for 12 to 15 minutes. Do not open the oven door too early, as the temperature drop can affect the rising of the crust. After 12 minutes, check the chops. They should be golden brown and the crumbs should look crisp.
- Check Temperature: Pork is safe to eat at 145°F (63°C). Use an instant-read thermometer to check the thickest part of the chop, avoiding the bone. If it is below 145°F, give it another 2-3 minutes. If it hits 150°F, take it out immediately. Overcooked pork is dry pork, and we want juicy chops.
- Rest: Remove the chops from the oven and let them rest on the pan for 5 minutes. This allows the juices to redistribute throughout the meat. If you cut into them immediately, all the juice will run out onto the plate, leaving you with dry meat. Resting is crucial for tenderness.
Cooking Tips & Techniques
Getting the crust right is the hardest part of this recipe, but a few tricks can save you from disappointment. First, never skip the pat-dry step. I learned this the hard way when I was in a hurry and ended up with a soupy breadcrumb mess that slid off in the oven. Dry meat grabs onto the breading. It is physics.
Another common mistake is using too much heat. If your oven runs hot, your breadcrumbs will burn before the pork is cooked. That is why using an oven thermometer is a good idea. You want a steady 400°F, not 425°F. If your oven is notorious for hot spots, rotate the baking sheet halfway through the cooking time. This ensures even browning on all sides.
Do not overcrowd the pan. When I first made this, I tried to fit six chops on one sheet, and they steamed each other instead of baking. The result was a soggy, pale crust. Give each chop some space. If you have to use two pans, do it. Two pans in the oven is better than one crowded pan.
For extra crispiness, some people add a little olive oil to the breadcrumb mixture before pressing. I find that the butter brush on top is sufficient, but if you are worried about dryness, a teaspoon of oil in the crumbs can help. Also, let the butter cool slightly before brushing. If it is too hot, it can melt the cheese too quickly and cause it to separate. You want it to emulsify into the crumbs, not pool at the bottom.
Finally, trust your thermometer. Visual cues are good, but a thermometer is reliable. Pork chops vary in thickness, so time is just a guideline. Temperature is the truth. If your chop is 1.5 inches thick, it will take longer than a 1-inch chop. Adjust accordingly. This technique ensures consistent results every time, whether you are a novice cook or a seasoned pro.
Variations & Adaptations
One of the best things about this recipe is how adaptable it is. Once you master the basic method, you can tweak it to suit your taste or dietary needs. Here are a few variations I have tried that work well.
Spicy Kick: If you like heat, add ½ teaspoon of cayenne pepper or red pepper flakes to the breadcrumb mixture. It adds a nice background warmth that cuts through the richness of the cheese. I like this version with a spicy honey drizzle after cooking.
Herb Garden: Swap the dried parsley for a mix of dried thyme, oregano, and basil. This gives the crust a more Italian-inspired flavor profile. It pairs beautifully with a side of roasted vegetables or a simple green salad.
Gluten-Free: As mentioned earlier, you can use gluten-free panko or crushed pork rinds. Pork rinds add a fantastic crunch and are completely carb-free. Just mix them with the parmesan and spices for a keto-friendly version that still feels indulgent.
Dairy-Free: For a dairy-free version, skip the parmesan and use nutritional yeast for that savory, cheesy flavor. You can use olive oil instead of butter for the brush. The crust will be slightly less rich, but still crispy and flavorful.
Seasonal Twist: In the fall, I like to add a pinch of sage to the breadcrumbs. It pairs wonderfully with pork and gives it a cozy, autumnal vibe. In the summer, fresh lemon zest added to the crumbs brightens up the dish and makes it feel lighter.
I also tried using crushed crackers instead of panko once. It worked, but the texture was denser. Panko is still the king of crunch for baked breadings. However, if you are out of panko, crushed cornflakes can work in a pinch for a sweet-savory twist, though it changes the flavor profile significantly.
Serving & Storage Suggestions
These chops are best served immediately while the crust is still crisp. I like to plate them with a side of steamed broccoli or roasted asparagus. The crunch of the pork contrasts nicely with the soft vegetables. A simple side salad with a vinaigrette also works well to cut through the richness. For a more complete meal, serve them with garlic mashed potatoes or crusty bread to soak up any juices.
If you have leftovers, store them in an airtight container in the refrigerator for up to 3 days. The crust will soften in the fridge, which is unavoidable. To reheat, do not use the microwave. It will make the crust soggy. Instead, place the chops on a baking sheet and reheat them in a 375°F oven for 10-12 minutes. This will help restore some of the crispiness. You can also reheat them in an air fryer at 350°F for 3-4 minutes for a quicker crisp.
Do not freeze the breaded chops before cooking. The texture of the breadcrumbs will suffer. If you must freeze, bake them first, let them cool, and then freeze. Reheat from frozen in the oven at 400°F until heated through. The flavors tend to meld and become more savory over time, so leftovers often taste great the next day, especially if you slice them up and use them in a sandwich or salad.
Nutritional Information & Benefits
This recipe is a solid source of protein, which is essential for muscle repair and satiety. A typical serving of one pork chop with the crust contains approximately 350-400 calories, depending on the size of the chop and the amount of butter used. It is relatively low in carbohydrates, making it suitable for low-carb or keto diets if you watch the breadcrumb amount. Pork is also a good source of thiamine (Vitamin B1), which helps convert food into energy.
Using baked preparation instead of frying reduces the overall fat content significantly. While the parmesan and butter add flavor and fat, they are used in moderation. The panko breadcrumbs add some carbs, but you can control the portion size. For those with gluten sensitivities, the gluten-free adaptation makes this dish accessible. It is a balanced meal option that does not feel restrictive. I enjoy this recipe because it satisfies my craving for comfort food without leaving me feeling heavy or sluggish afterward. It is a wholesome, hearty meal that fuels the body well.
Conclusion
Crispy Baked Parmesan Crusted Pork Chops are the ultimate weeknight winner. They are easy to make, delicious to eat, and impressive enough for guests. I love this recipe because it turns a simple cut of meat into something special with just a few pantry staples. It is reliable, fast, and always a hit. I hope you try it and find it becomes a staple in your own kitchen rotation. Feel free to tweak the spices to match your preferences. I would love to hear how you make it your own in the comments below. Share your variations or just let me know if your family loved it. Happy cooking!
Frequently Asked Questions
Can I use boneless pork chops for this recipe?
Yes, you can. However, boneless chops are thinner and cook faster. Keep a close eye on them in the oven, as they can dry out if overcooked. You may need to reduce the baking time by 2-3 minutes.
Why is my crust falling off the pork chops?
This usually happens if the meat was not dry enough before breading, or if the chops were not pressed firmly into the crumbs. Make sure to pat them dry with paper towels and press the breading on firmly. Also, ensure the butter is applied evenly to help bind the crumbs.
Can I make this in an air fryer?
Absolutely. Preheat your air fryer to 375°F. Place the breaded chops in the basket and cook for 8-10 minutes, flipping halfway through. Check the temperature to ensure they reach 145°F. The air fryer makes the crust even crispier.
What is the best side dish to serve with these chops?
Roasted vegetables like asparagus, broccoli, or green beans work well. Garlic mashed potatoes or a simple Caesar salad are also excellent choices. The versatility of the dish allows it to pair with many different sides.
How do I keep the pork chops juicy?
Do not overcook them. Use a meat thermometer and remove them from the oven at 145°F. Let them rest for 5 minutes after cooking to allow the juices to redistribute. Avoid squeezing the meat when you cut into it.
Pin This Recipe!
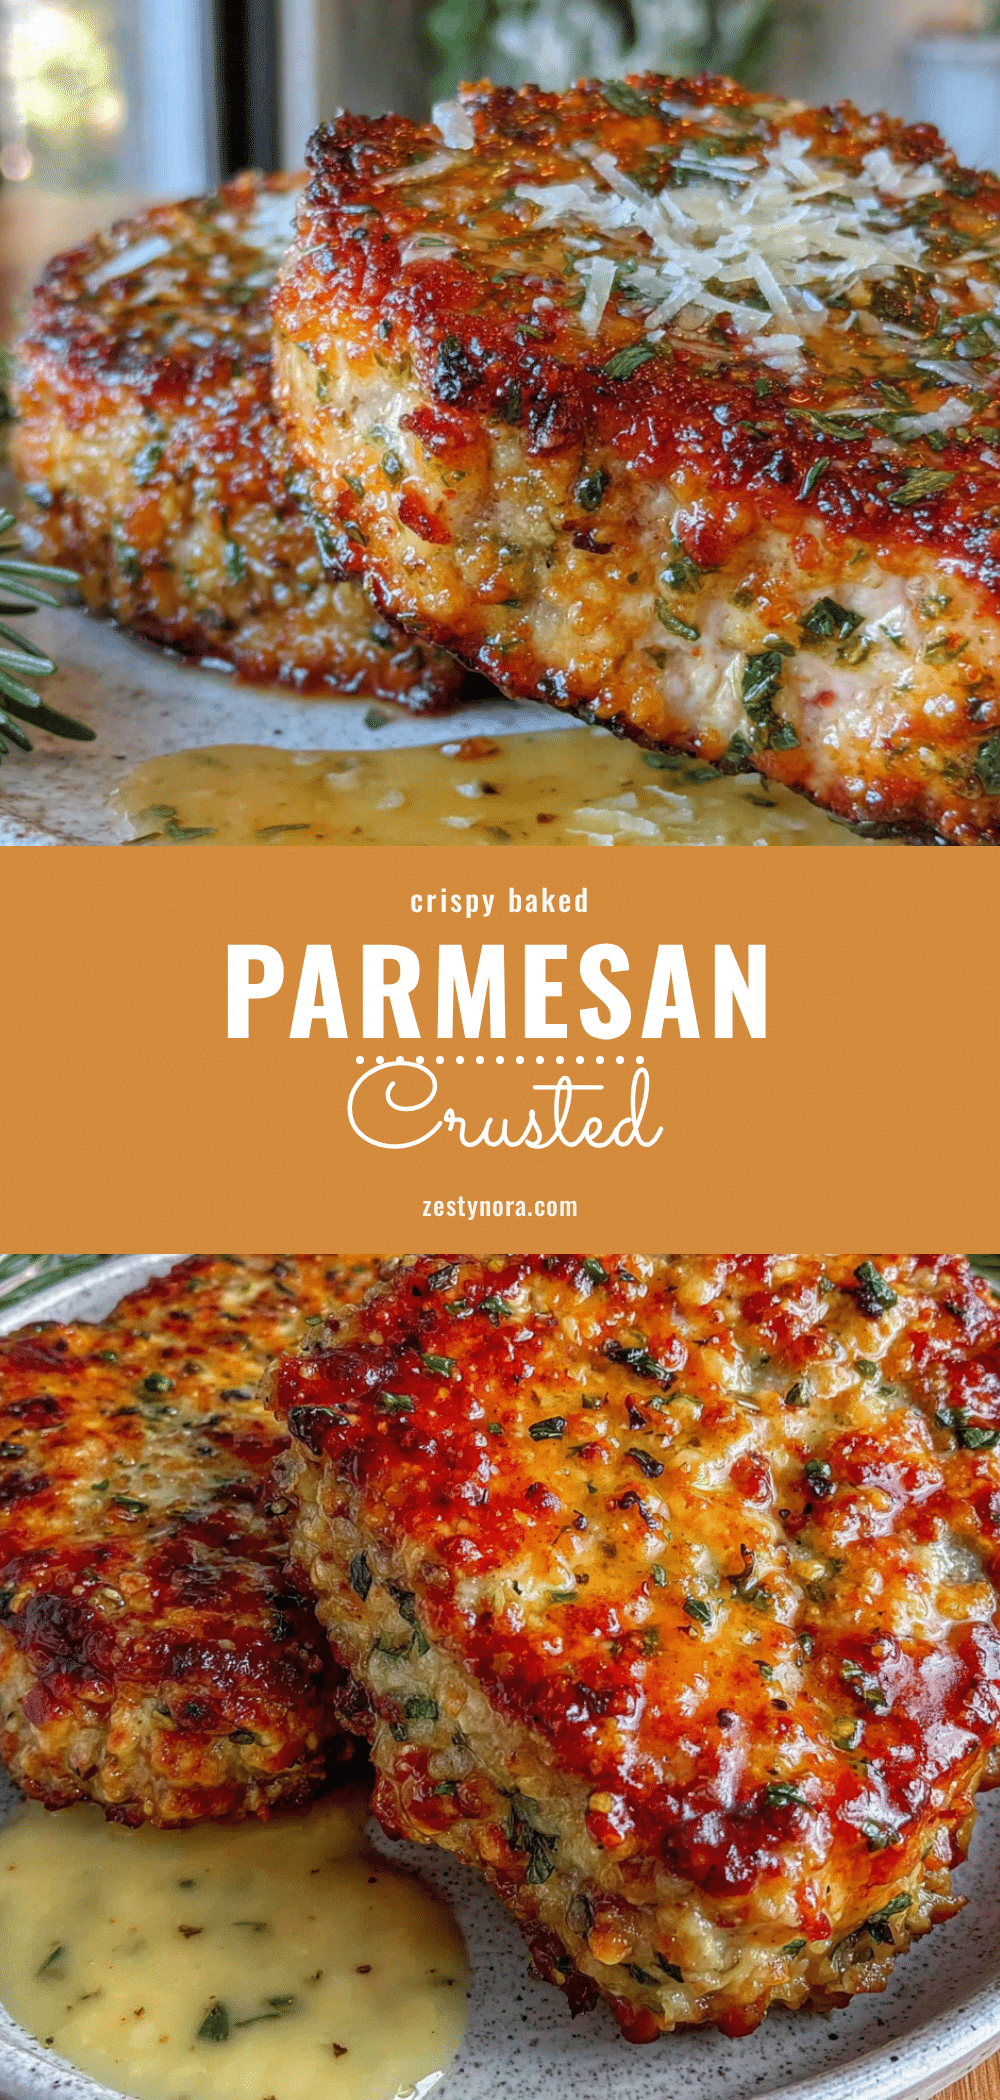
Crispy Baked Parmesan Crusted Pork Chops: 30-Min Easy Dinner
These crispy baked parmesan crusted pork chops are a quick, easy, and delicious weeknight dinner. With a golden, shatteringly crisp crust made from panko and parmesan, they are juicy, flavorful, and ready in about 30 minutes.
- Prep Time: 15 minutes
- Cook Time: 15 minutes
- Total Time: 30 minutes
- Yield: 4 servings 1x
- Category: Main Course
- Cuisine: American
Ingredients
- 4 bone-in, center-cut pork chops (approx. 1 inch thick)
- 1 cup panko breadcrumbs
- 1/2 cup freshly grated parmesan cheese
- 1 teaspoon garlic powder
- 1 teaspoon smoked paprika
- 3 tablespoons unsalted butter, melted
- 1/2 teaspoon sea salt (or kosher salt)
- 1/2 teaspoon black pepper
- 1/4 teaspoon dried parsley (optional)
Instructions
- Preheat oven to 400°F (200°C). Line a baking sheet with parchment paper.
- Remove pork chops from the fridge and let them sit for 10 minutes to come to room temperature.
- Pat the pork chops completely dry on both sides with paper towels.
- Season both sides of the chops with salt and black pepper.
- In a shallow dish, combine panko breadcrumbs, parmesan cheese, garlic powder, smoked paprika, and dried parsley. Whisk to combine.
- Press each pork chop firmly into the breadcrumb mixture, ensuring a thick, even coat on both sides. Shake off excess crumbs.
- Place the breaded chops on the prepared baking sheet, ensuring they are not touching.
- Brush the tops of the chops lightly with the melted butter.
- Bake for 12-15 minutes, or until the crust is golden brown and the internal temperature reaches 145°F (63°C).
- Remove from oven and let rest for 5 minutes before serving.
Notes
For best results, ensure pork chops are patted very dry before breading to prevent the crust from sliding off. Do not overcrowd the baking sheet; air circulation is key for crispiness. If using boneless chops, reduce baking time by 2-3 minutes. For a gluten-free version, swap panko for gluten-free breadcrumbs or crushed pork rinds. For dairy-free, use nutritional yeast instead of parmesan and olive oil instead of butter.
Nutrition
- Serving Size: 1 pork chop
- Calories: 375
- Sugar: 1
- Sodium: 450
- Fat: 22
- Saturated Fat: 10
- Carbohydrates: 12
- Fiber: 1
- Protein: 28
Keywords: pork chops, baked pork chops, parmesan crust, panko breadcrumbs, easy dinner, weeknight meals, crispy pork, family dinner, gluten-free option