“You need to make that gummy stuff again, Mom. The purple one that makes my throat feel better.” That was my six-year-old, mid-cartwheel in the living room, completely unprompted. No fever, no cough, no nothing — just a random Tuesday request for something I whipped up during a particularly nasty cold snap three months prior. And honestly? That moment hit different. Not because he remembered, but because he remembered it as something good, not something medicinal. That’s when I knew these homemade elderberry gummies weren’t just a passing wellness experiment — they had officially earned a permanent spot in our kitchen rotation.
I stumbled into making my own elderberry gummies the way most of us stumble into homemade anything these days — desperation, a questionable ingredient list on a store-bought package, and a sudden burst of “I can probably do this myself” energy. It was February, we were on round two of whatever virus was making the rounds at school, and I was tired of wrestling my kid into taking spoonfuls of dark, syrupy stuff that tasted like someone boiled a forest into a bottle. So I grabbed a bottle of organic elderberry syrup I had stashed in the pantry, some gelatin, and a silicone mold shaped like little bears. I figured, worst case, I end up with a sticky mess and a story to tell. Best case? I never buy another bag of sugar-filled vitamin gummies again.
This recipe is that best case. It’s naturally sweetened, packed with immune-supporting goodness, and so ridiculously easy you’ll wonder why you haven’t been making them all along. There’s something quietly satisfying about watching a pot of deep purple liquid transform into a tray of wiggly, jewel-toned gummies. It feels a little bit like kitchen magic, except the magic is just science doing its thing with gelatin and cold water. And every time I pop one of these little guys, I get that small, warm feeling of knowing exactly what’s in it. No corn syrup. No artificial colors. No mystery ingredients that take up half the label. Just real food, doing what real food does.
Why You’ll Love This Recipe
Let me be real with you for a second — I’ve tested this recipe more times than I care to count. I’ve made it with different sweeteners, different juice ratios, different gelatin brands. I’ve accidentally made gummy soup, gummy rocks, and one particularly sad batch that refused to set at all (don’t ask). So when I tell you this version works, I mean it. These gummies have survived the scrutiny of a picky preschooler, the skepticism of a husband who “doesn’t do wellness stuff,” and my own brutally honest taste-testing. They’re not just good-for-you gummies — they’re genuinely good gummies.
- Quick & Easy : From start to finish, you’re looking at about 15 minutes of active time. The hardest part is waiting for them to set in the fridge, and even that’s just a couple of hours.
- Simple Ingredients : You need exactly five things — elderberry syrup, fruit juice, gelatin, honey, and water. That’s it. No weird additives, no specialty items you’ll use once and forget about.
- Perfect for Sick Season : Whether it’s back-to-school germs, winter sniffles, or just a general immune boost, these gummies are my go-to for keeping the whole family feeling a little more resilient.
- Crowd-Pleaser : Kids think they’re candy. Adults know better. Everyone wins. I’ve brought these to playdates and watched them disappear faster than the actual candy.
- Unbelievably Delicious : The elderberry flavor gets mellowed out by the fruit juice and honey, so you get this bright, slightly tart, gently sweet gummy that doesn’t taste like you’re eating medicine. It tastes like you’re eating a treat that happens to be good for you.
What makes this recipe different from the countless others floating around the internet? It’s the balance. I spent way too much time tweaking the liquid-to-gelatin ratio until I landed on that perfect texture — firm enough to hold its shape, soft enough to be enjoyable, and not at all rubbery or tough. Plus, I figured out how to keep them from getting that weird foam layer on top (spoiler: it’s all about how you stir). This isn’t just another version of elderberry gummies. It’s the version I trust enough to give to my own kid, and honestly, that’s the only endorsement that matters.
These gummies have become a little ritual in our house. On Sunday evenings, I’ll make a fresh batch while listening to a podcast, and by the time I’m done, the kitchen smells faintly of berries and honey. It’s grounding. It’s a small act of care that stretches through the week. And every morning, when I hand my son his little gummy bear, I feel like I’m doing something right — even if the rest of the day goes sideways.
What Ingredients You Will Need
This recipe is built on a short list of wholesome ingredients that work together to create a gummy that’s both effective and enjoyable. Nothing fancy, nothing fussy — just real ingredients doing their job.
- Elderberry Syrup (½ cup / 120 ml) — This is the star of the show. I use a store-bought organic elderberry syrup from a brand I trust, but you can absolutely use homemade if you have it. Look for one that’s already sweetened with honey or has minimal added sugar. The syrup provides that deep, dark purple color and all the immune-supporting properties elderberries are known for.
- Fruit Juice (½ cup / 120 ml) — This is where you get to play. I usually go with 100% pomegranate juice for its tartness and antioxidant boost, but tart cherry, grape, or even a good quality apple juice work beautifully. The juice helps balance out the earthy flavor of elderberry and adds natural sweetness. Just make sure it’s real juice, not a juice cocktail with added sugars.
- Gelatin (3 tablespoons / about 28 grams) — This is what gives the gummies their signature bounce. I recommend using grass-fed beef gelatin from a brand like Vital Proteins or Great Lakes. It’s important to use regular powdered gelatin, not collagen peptides — collagen won’t set the same way and you’ll end up with a liquid mess. Trust me on this one.
- Honey (2 tablespoons / 30 ml) — A little extra sweetness and some natural antibacterial properties to boot. You can adjust this up or down depending on how sweet you like your gummies. If you’re making these for kids under one year old, swap the honey for maple syrup or a pinch of stevia.
- Cold Water (¼ cup / 60 ml) — This is for blooming the gelatin. It needs to be cold, not warm, or the gelatin will start setting before you’re ready. I keep a small bowl of cold water on the counter before I even start measuring anything else.
That’s it. Five ingredients, no hidden surprises. The beauty of this recipe is how adaptable it is — you can tweak the juice, adjust the sweetness, or even add a splash of lemon juice for brightness. I’ve made versions with a drop of orange essential oil (food-grade, obviously) and once added a pinch of ginger powder for warmth. Both were excellent. The base recipe is forgiving enough that you can make it your own without worrying about messing it up.
One thing I’ll note about the elderberry syrup — not all syrups are created equal. Some are thinner, some are thicker, some are more concentrated. If your syrup is on the thinner side, you might need to add an extra teaspoon of gelatin to get the right texture. If it’s thick and almost jammy, you can back off the gelatin slightly. I learned this the hard way after a batch that refused to set because my syrup was way too watery. Now I always give the bottle a good shake and check the consistency before I start.
Equipment Needed
You don’t need a fancy kitchen setup for these gummies, which is part of why I love making them. A few basic tools and you’re good to go.
- Small Saucepan — Any small pot will do. You’re just heating liquids, nothing complicated. I use a 1-quart saucepan and it’s the perfect size.
- Silicone Gummy Molds — This is the one specialized item, but they’re cheap and widely available. I have a set of bear-shaped molds and a set of fruit-shaped ones. You can also use a small baking dish and cut the set gelatin into squares, but the molds make them way more fun for kids.
- Whisk or Fork — For stirring the gelatin into the liquid. A small whisk works best to prevent clumps, but a fork will do in a pinch.
- Small Bowl — For blooming the gelatin in cold water. Any small bowl or measuring cup works.
- Dropper or Small Measuring Cup with Spout — For filling the molds. A glass dropper is my favorite because it gives me control, but a small measuring cup with a pour spout works too. You can also use a squeeze bottle if you have one.
- Refrigerator Space — You need a flat spot in the fridge where the molds can sit undisturbed for at least 2 hours. I usually clear a shelf and put a small cutting board under the molds for stability.
If you don’t have silicone molds, don’t let that stop you. I’ve made these in a small glass dish, let the mixture set, and then cut them into little squares with a sharp knife. They won’t look as cute, but they’ll taste exactly the same. Also, if you’re using a dropper, rinse it immediately after use — dried gelatin is a nightmare to clean out of small openings. Ask me how I know.
Preparation Method
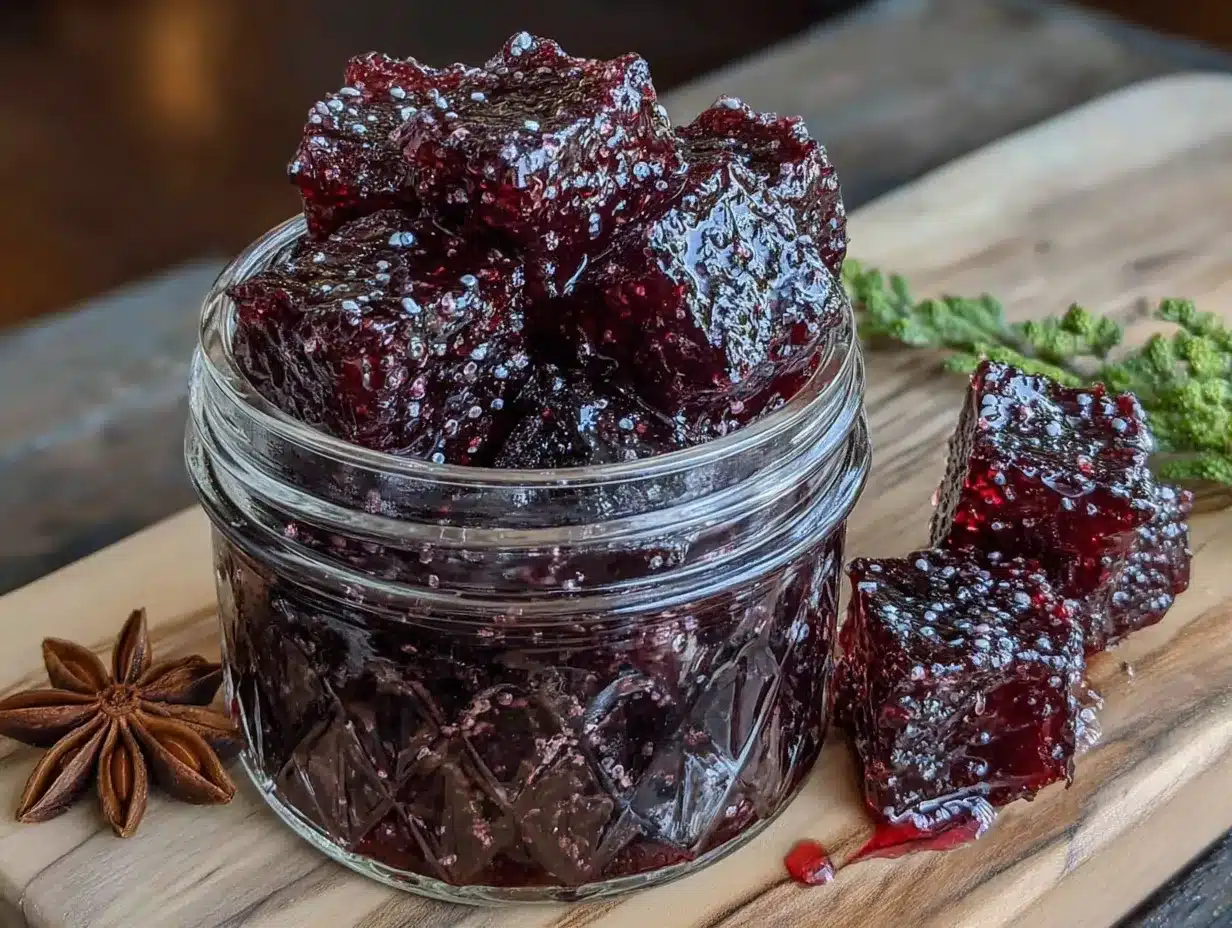
Alright, let’s make some gummies. I’ll walk you through every step so you don’t end up with the sticky disaster I created on my first attempt.
- Bloom the gelatin. In a small bowl, pour the ¼ cup of cold water and sprinkle the 3 tablespoons of gelatin evenly over the top. Don’t stir yet — just let it sit. Let it sit for about 5 minutes. You’ll see it turn into a thick, spongy mass. That’s exactly what you want. This step is crucial because it hydrates the gelatin evenly, which prevents lumps later. If you skip this or rush it, you’ll end up with grainy gummies.
- Heat the liquids. While the gelatin is blooming, combine the elderberry syrup, fruit juice, and honey in your small saucepan. Heat over medium-low heat, stirring occasionally. You’re not trying to boil it — just warm it enough to dissolve the honey and make everything easy to mix. I aim for warm to the touch, about 100-110°F (38-43°C). If it gets too hot, it can weaken the gelatin’s setting power.
- Combine everything. Remove the saucepan from the heat. Take your bloomed gelatin and scoop it into the warm liquid. Whisk gently but thoroughly until the gelatin is completely dissolved. This usually takes about 1-2 minutes. You should see a smooth, uniform liquid with no lumps or stringy bits. If you see foam forming on top, skim it off with a spoon — this will give you clearer gummies.
- Fill the molds. Using your dropper or small measuring cup, carefully fill each cavity of your silicone molds. Work quickly but steadily — the mixture will start to thicken as it cools. If it gets too thick to pour easily, you can briefly reheat it on low heat for 30 seconds. Fill each mold almost to the top, but not overflowing. A tiny bit of space at the top is fine.
- Let them set. Place the filled molds on a flat tray or cutting board and carefully transfer them to the refrigerator. Let them set for at least 2 hours, but overnight is even better. The longer they set, the firmer and more stable they’ll be. I’ve made the mistake of pulling them out after an hour and ended up with gummies that fell apart when I tried to pop them out.
- Remove from molds. Once set, gently press the back of each cavity to pop the gummy out. Silicone molds make this super easy — they should release with minimal effort. If a gummy sticks, try placing the mold in the freezer for 5 minutes, then try again.
- Store properly. Place the gummies in an airtight container. I layer them between pieces of parchment paper to prevent sticking. Store them in the refrigerator — they’ll keep for about 2-3 weeks, though they rarely last that long in my house.
A few things I’ve learned along the way: If your mixture starts to foam while whisking, you’re probably stirring too vigorously. Slow down and use a gentle hand. Also, if you’re making a double batch, don’t try to do it all at once — make one batch, fill the molds, then start the second batch. The mixture cools too quickly if you’re trying to do too much at once.
Cooking Tips & Techniques
After making these gummies more times than I can count, I’ve picked up a few tricks that make the process smoother and the results more consistent. Let me share what I’ve learned so you don’t have to make the same mistakes I did.
Temperature is everything. This is the biggest lesson I learned. If your liquid mixture is too hot when you add the bloomed gelatin, it can break down the gelatin’s structure and your gummies won’t set properly. If it’s too cold, the gelatin won’t dissolve evenly and you’ll get lumps. Aim for warm, not hot — think bath water temperature, not soup temperature. I use my finger to test it, which is very scientific, I know.
Don’t skip the skimming. That foam that forms on top of your mixture? It’s air bubbles trapped in the gelatin, and if you pour it into the molds, your gummies will have cloudy spots and an uneven texture. Take 30 seconds to skim it off with a spoon. Your gummies will look so much more professional, and honestly, it’s oddly satisfying.
Work in batches if needed. If you only have one or two small molds, don’t try to fill them all at once with a huge batch of liquid. The mixture will start to set in your pouring vessel, and you’ll end up with half-filled molds and a sticky mess. Make smaller batches of the liquid mixture, or have a helper ready to fill molds while you keep the remaining liquid warm on the stove.
The freezer trick. If you accidentally overfill a mold or spill some on the counter, don’t panic. Gelatin sets when cold, so if you need to clean up a spill, use cold water and a cloth. Warm water will just make it stickier. And if your gummies won’t release from the mold, a quick 5-minute freeze usually does the trick.
Consistency check. Before you pour the mixture into the molds, do a quick test. Dip a spoon into the mixture and let it cool for a few seconds. If it feels like thin syrup, you’re good. If it’s already starting to thicken noticeably, you might need to add a splash more juice to thin it out. The perfect consistency is somewhere between heavy cream and thin honey.
I once made a batch where I got distracted and let the mixture boil. The gummies turned out rubbery and weird, and they had this strange texture that nobody liked. Now I set a timer on my phone for every step, even if I think I’ll remember. It’s saved me more times than I care to admit.
Variations & Adaptations
One of the best things about this recipe is how easy it is to customize. Over the months, I’ve experimented with different flavor combinations and dietary adaptations, and here are some of my favorites.
Citrus Immune Boost: Swap half the fruit juice for fresh-squeezed orange juice and add a tablespoon of lemon juice. The citrus adds brightness and extra vitamin C, and it cuts through the earthiness of the elderberry beautifully. I make this version during the height of cold season, and it feels like a little ray of sunshine in gummy form.
Herbal Infusion: Before adding the gelatin, steep a bag of echinacea or ginger tea in the warm juice mixture for 5 minutes, then remove the bag. This adds an extra layer of immune support without changing the texture. I’ve also added a pinch of turmeric powder for its anti-inflammatory properties — just be aware it’ll turn the gummies a slightly different shade of orange-purple.
Low-Sugar Version: If you’re watching your sugar intake, you can reduce or omit the honey entirely. The elderberry syrup and fruit juice provide enough sweetness for most palates. I’ve made them with just a teaspoon of honey and they were still plenty tasty. You can also use a monk fruit sweetener or stevia if you prefer, but start with a small amount and taste as you go.
Vegan Option: Traditional gelatin is not vegan, but you can substitute agar agar powder. The texture will be different — firmer and less bouncy — but it works. Use about 2 tablespoons of agar agar powder and follow the package instructions for blooming and heating. I’ve only tried this once, and while the texture wasn’t the same, the flavor was still great.
Gummy Pops: If you have a set of gummy pop molds (the ones with sticks), these make fantastic treats for kids. Just insert the sticks halfway through the setting time, when the gummies are firm enough to hold them but soft enough to accept the stick. My son loves the pops version, and they’re perfect for lunchboxes or after-school snacks.
I once made a batch with pomegranate juice and a splash of rose water, and it was so unexpectedly elegant that I served them at a small gathering. Everyone thought they were fancy candies from a boutique store. I didn’t correct them.
Serving & Storage Suggestions
These gummies are best served cold, straight from the fridge. The chill gives them that satisfying firmness and makes them extra refreshing. I usually serve them in a small bowl or on a little plate, and for kids, I’ll sometimes arrange them in a fun pattern or shape.
For adults: I like to serve them as a little after-dinner treat or as a mid-afternoon pick-me-up. They’re also great for travel — I pack them in a small container when we’re flying or on road trips, and they hold up surprisingly well. Just keep them cool with an ice pack if you’re going to be out for more than a few hours.
For kids: My son gets one gummy in the morning with breakfast and one in the evening. I treat them like a special snack, not a medicine, and he’s never once complained. They’re also perfect for lunchboxes — just make sure to pack them with a small ice pack to keep them from getting too warm.
Storage: Keep your gummies in an airtight container in the refrigerator. They’ll stay fresh for about 2-3 weeks, though the texture is best within the first week. I layer them between sheets of parchment paper to prevent sticking, and I’ve found that glass containers work better than plastic for keeping them from absorbing fridge odors.
Freezing: You can freeze these gummies for up to 3 months. Place them in a single layer on a baking sheet, freeze until solid, then transfer to a freezer-safe bag or container. To thaw, just move them to the refrigerator overnight. The texture will be slightly softer after freezing, but they’re still delicious.
Reheating: Don’t. These are meant to be eaten cold. If they get too warm, they’ll start to soften and lose their shape. If you accidentally leave them out too long, just pop them back in the fridge for an hour and they’ll firm up again.
One thing I love about these gummies is how the flavors meld together over time. The first day, they taste mostly of elderberry and juice. By day three, the honey and fruit flavors have woven together into something more complex and rounded. They’re good fresh, but they’re even better after a couple of days in the fridge.
Nutritional Information & Benefits
Let’s talk about what’s actually in these little gummies and why they’re worth making. While I’m not a nutritionist, I’ve done my research and I feel good about what I’m feeding my family.
Estimated per serving (1 gummy, based on a batch of 30): Calories: 15-20, Carbohydrates: 3-4g, Sugars: 2-3g, Protein: 1-2g. These numbers will vary slightly depending on your juice and sweetener choices, but they’re generally very low in calories and sugar compared to store-bought gummy vitamins.
Key benefits: Elderberries are packed with antioxidants and flavonoids that support immune function. They’ve been used for centuries in traditional medicine, and modern research is starting to catch up with what our grandmothers already knew. The gelatin provides collagen and protein, which supports skin, joint, and gut health. And the fruit juice adds a dose of vitamins, especially if you choose a juice like pomegranate or tart cherry.
Dietary considerations: This recipe is naturally gluten-free and dairy-free. If you use honey, it’s not suitable for children under one year old — swap for maple syrup in that case. For a low-sugar option, reduce the honey. For a vegan version, use agar agar instead of gelatin.
Allergens: The only potential allergen here is the gelatin, which is derived from animal products. If you have a sensitivity to beef or pork, look for kosher gelatin or use agar agar. Everything else is generally safe for most people.
I personally love that these gummies let me sneak a little extra nutrition into our daily routine without anyone feeling like they’re being “healthy.” They’re just a tasty treat that happens to do something good for you. And in a world where so much of what we eat feels complicated, there’s something beautiful about that simplicity.
Conclusion
These homemade elderberry gummies have become more than just a recipe in our house — they’re a small act of care that I can offer my family every single day. They’re the thing I make on a quiet Sunday afternoon when I want to feel prepared for whatever the week might throw at us. They’re the thing I pack in lunchboxes and pull out at the first sign of a sniffle. And honestly, they’re just really good.
What I love most about this recipe is how accessible it is. You don’t need to be a wellness expert or a master chef to make these. You just need a few simple ingredients, a little bit of patience, and the desire to feed yourself and your people something real. The gummies won’t cure everything, and I’m not here to make wild health claims. But they will give you a moment of comfort, a little boost of something good, and the satisfaction of knowing exactly what went into them.
I’d love to hear how your batch turns out. Did you try a different juice combination? Add a spice? Make them with your kids? Drop a comment below and let me know — I read every single one, and your ideas might just inspire my next batch. And if you’re looking for more ways to bring a little wellness into your kitchen, you might enjoy this no-bake peanut butter banana energy bites recipe for another quick and healthy snack option. Or if you’re in the mood for something savory, this creamy lemon garlic shrimp pasta is a weeknight favorite that comes together in under 30 minutes.
Until next time, keep your kitchen full of good smells and your family full of good food. You’ve got this.
Frequently Asked Questions
Can I use homemade elderberry syrup instead of store-bought?
Absolutely. Homemade elderberry syrup works perfectly in this recipe. Just keep in mind that homemade syrups can vary in thickness and sweetness, so you might need to adjust the gelatin slightly. If your syrup is thin, add an extra teaspoon of gelatin. If it’s thick and concentrated, you can use a little less.
Why did my gummies turn out too soft or too hard?
Texture issues usually come down to the gelatin-to-liquid ratio or the temperature of your mixture. If your gummies are too soft, you probably used too much liquid or your mixture wasn’t warm enough to fully dissolve the gelatin. If they’re too hard or rubbery, you may have overheated the mixture or used too much gelatin. Stick to the measurements in the recipe and use a kitchen thermometer if you want to be precise.
Can I make these without a gummy mold?
Yes! Pour the mixture into a small glass dish lined with parchment paper, let it set, and then cut it into small squares with a sharp knife. They won’t look as cute, but they’ll taste exactly the same. You can also use ice cube trays or candy molds if you have them.
How long do these gummies last at room temperature?
Not long. Gelatin-based gummies will start to soften and lose their shape after about an hour at room temperature, especially in warm weather. Always store them in the refrigerator and only take out what you’re going to eat right away. If you’re packing them for lunch, use a small ice pack to keep them cool.
Can adults take these too?
Of course! I make these for the whole family, myself included. Adults can take 2-3 gummies per day as a tasty immune boost. They’re especially great during cold season or when you feel like you need a little extra support. Just remember they’re a supplement, not a replacement for a balanced diet and good sleep.
Pin This Recipe!
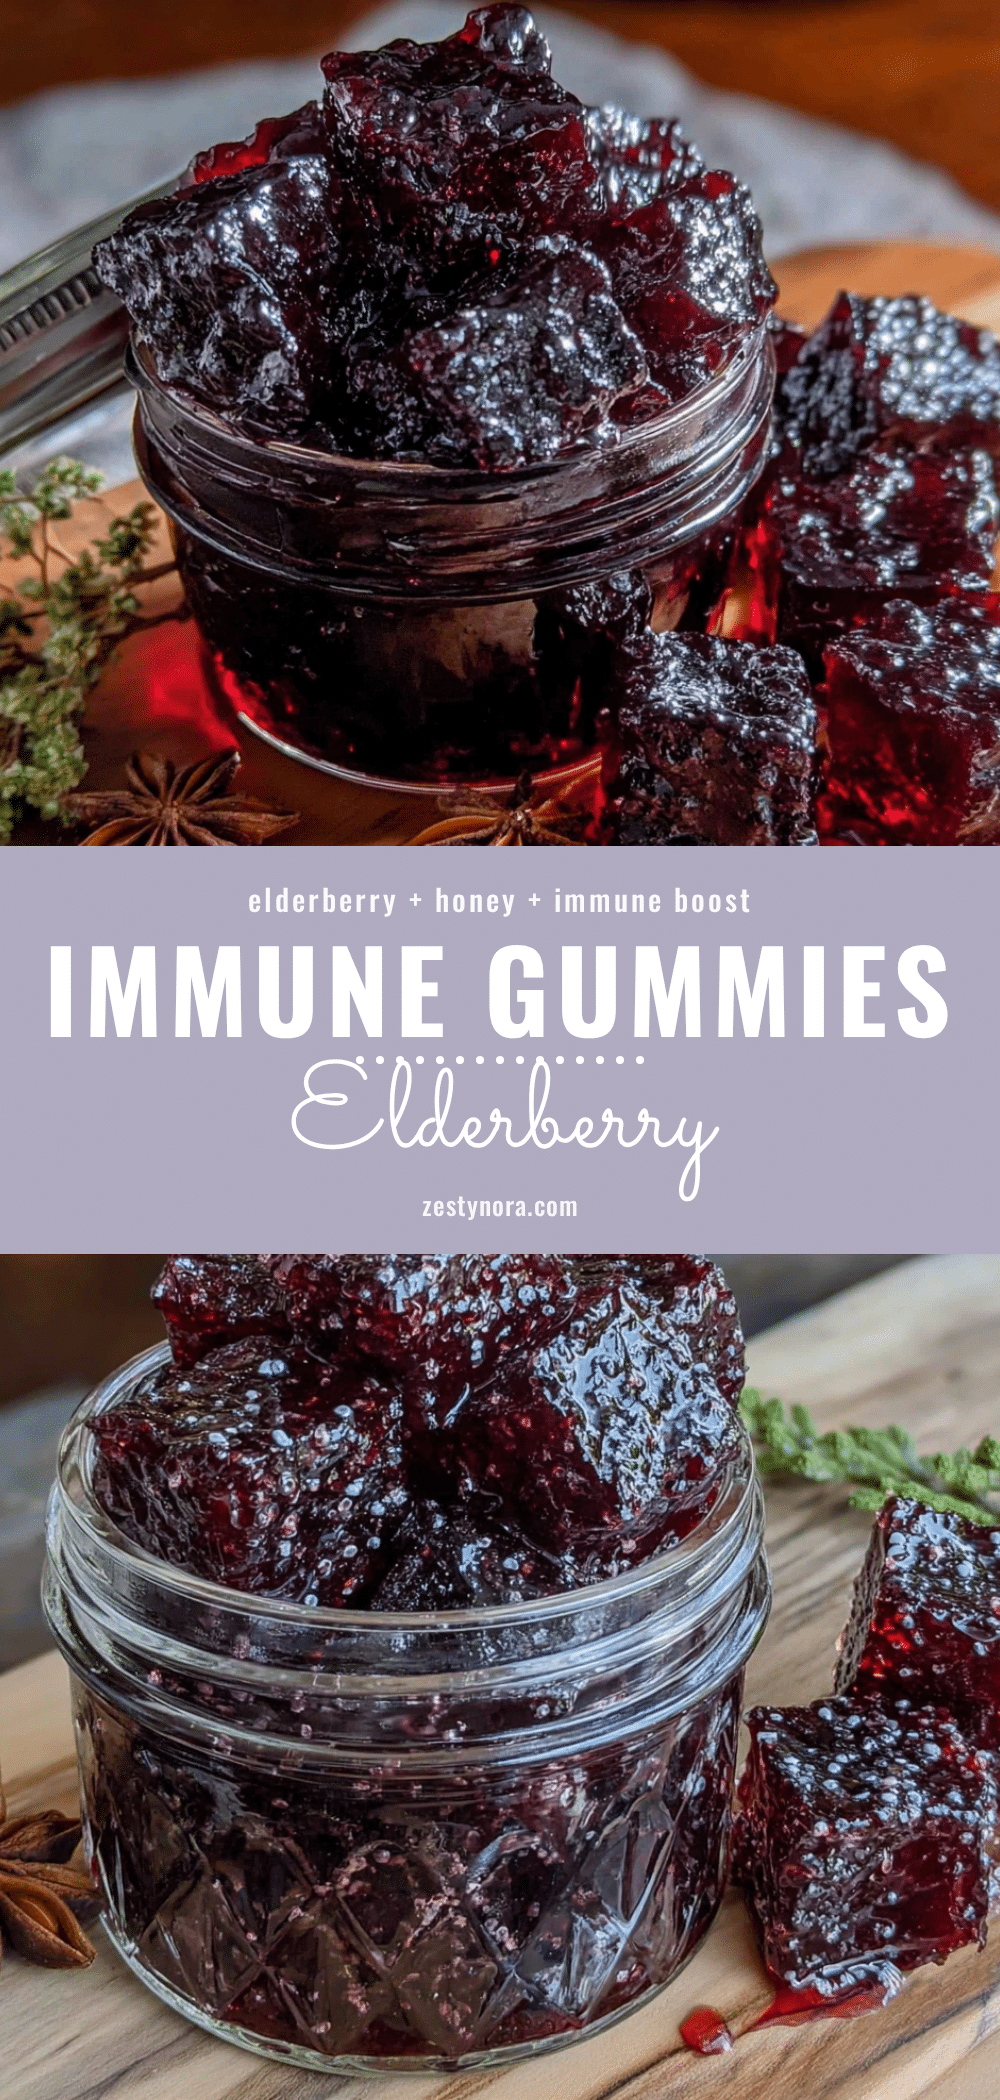
Homemade Elderberry Gummies: Easy Immune-Boosting Recipe
These homemade elderberry gummies are naturally sweetened, packed with immune-supporting goodness, and so easy to make. They’re a kid-friendly treat that tastes like candy but supports wellness.
- Prep Time: 15 minutes
- Cook Time: 5 minutes
- Total Time: 2 hours 20 minutes (including setting time)
- Yield: 30 gummies 1x
- Category: Snack
- Cuisine: American
Ingredients
- ½ cup (120 ml) elderberry syrup
- ½ cup (120 ml) fruit juice (e.g., pomegranate, tart cherry, grape, or apple)
- 3 tablespoons (about 28 grams) gelatin (grass-fed beef gelatin recommended)
- 2 tablespoons (30 ml) honey (or maple syrup for children under 1 year)
- ¼ cup (60 ml) cold water
Instructions
- Bloom the gelatin: In a small bowl, pour the cold water and sprinkle the gelatin evenly over the top. Let it sit for about 5 minutes until it becomes a thick, spongy mass.
- Heat the liquids: In a small saucepan, combine the elderberry syrup, fruit juice, and honey. Heat over medium-low heat, stirring occasionally, until warm (about 100-110°F / 38-43°C). Do not boil.
- Combine everything: Remove the saucepan from heat. Add the bloomed gelatin to the warm liquid and whisk gently until completely dissolved (1-2 minutes). Skim off any foam that forms on top.
- Fill the molds: Using a dropper or small measuring cup with a spout, carefully fill each cavity of silicone gummy molds. Work quickly as the mixture thickens as it cools.
- Let them set: Place the filled molds on a flat tray and refrigerate for at least 2 hours, or overnight for best results.
- Remove from molds: Gently press the back of each cavity to pop the gummies out. If they stick, place the mold in the freezer for 5 minutes.
- Store properly: Place gummies in an airtight container, layered between pieces of parchment paper. Store in the refrigerator for up to 2-3 weeks.
Notes
Temperature is crucial: do not overheat the liquid mixture or it may weaken the gelatin. If the mixture foams, skim it off for clearer gummies. For a vegan version, substitute agar agar powder (about 2 tablespoons) and follow package instructions. For children under 1 year, replace honey with maple syrup.
Nutrition
- Serving Size: 1 gummy
- Calories: 1520
- Sugar: 23
- Carbohydrates: 34
- Protein: 12
Keywords: elderberry gummies, homemade gummies, immune-boosting, healthy snacks, kid-friendly, gelatin gummies, elderberry recipe


