The first time I made these, it was 11:37 PM on a Tuesday. I was standing over a flour-dusted counter, cream cheese softening under my fingertips, wondering if sleep was really that important anyway. It was Teacher Appreciation Week, and I had signed up to bring lunch for my son’s entire third-grade team — six women who, frankly, deserved a gold medal, not a turkey wrap. But a gold medal doesn’t fit in a lunchbox, you know? So I rolled. And rolled. And somewhere around the third pinwheel, I realized I wasn’t just making lunch. I was making a tiny, edible thank-you note. And honestly? That feels better than sleep.
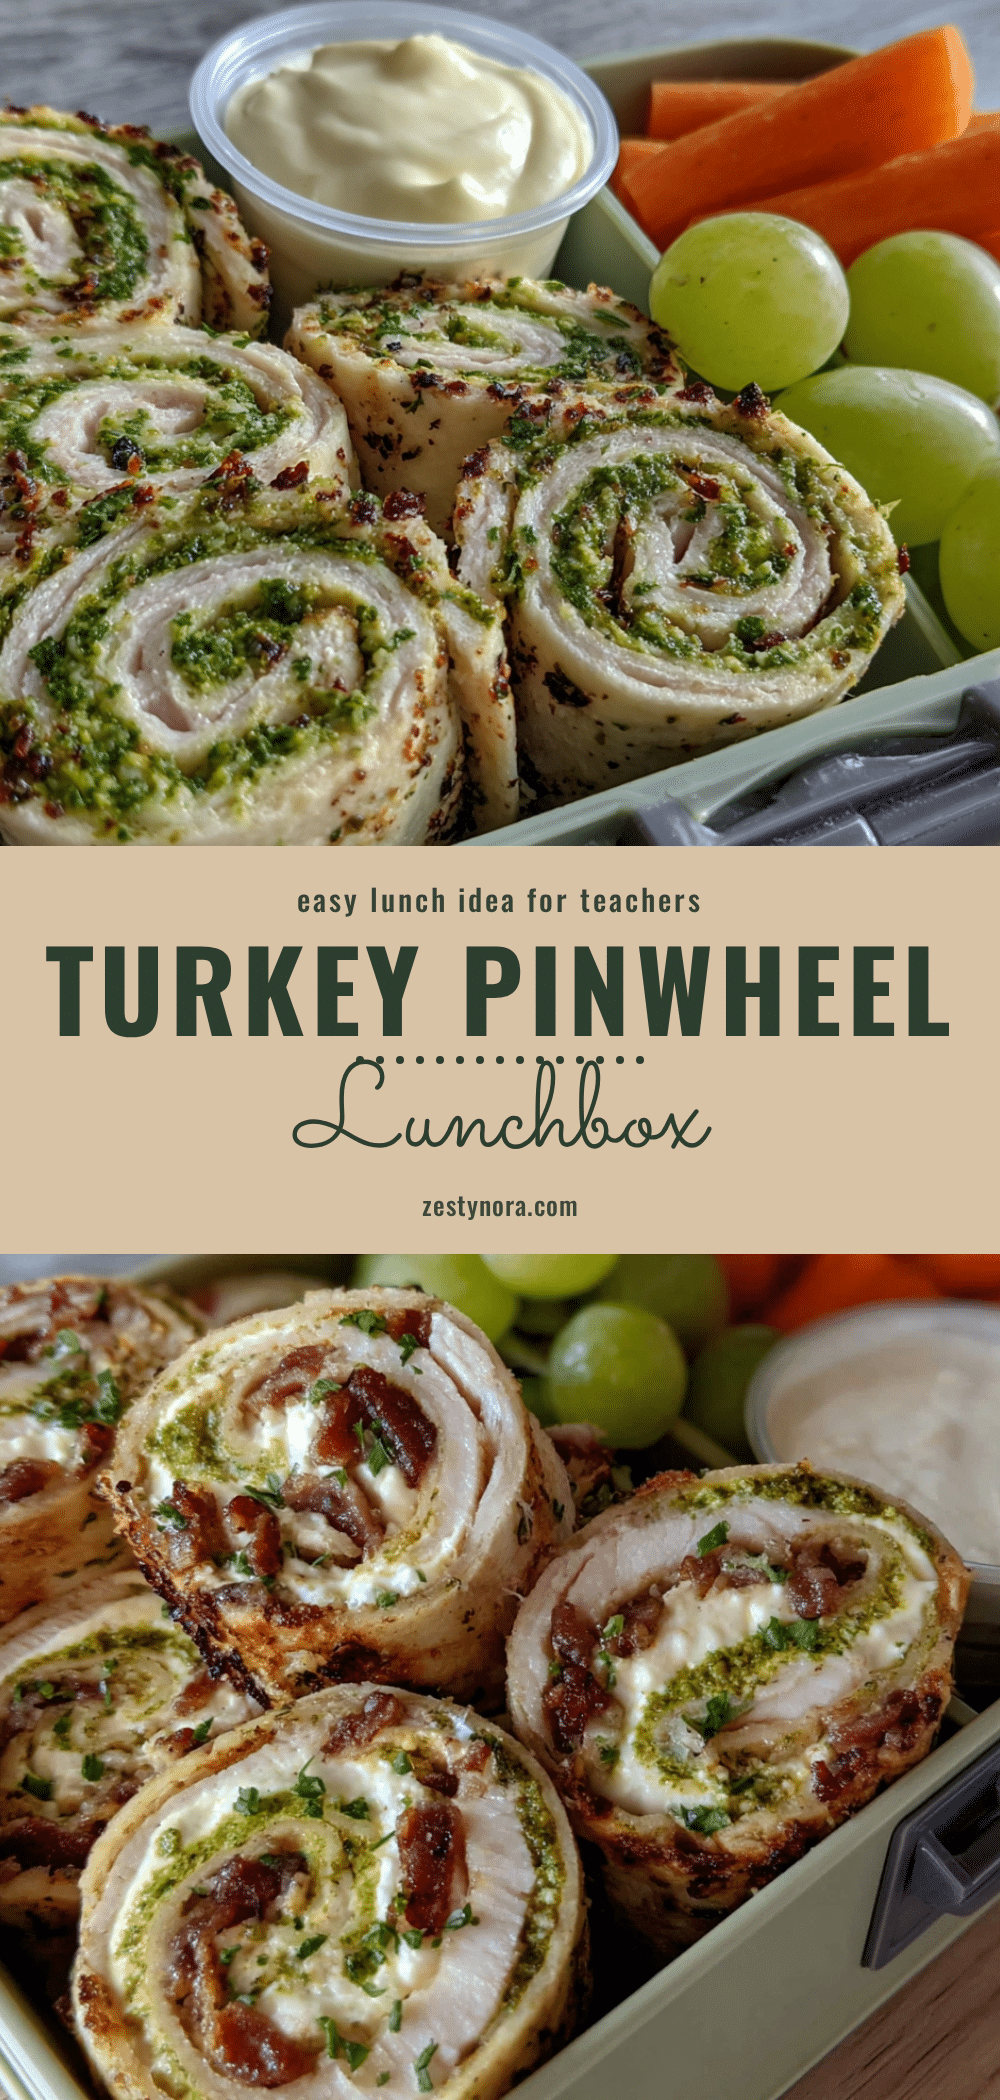
This Easy Turkey Pinwheel Lunchbox for Teachers is exactly what it sounds like — a fast, no-cook, beautifully portable little bundle of savory goodness that looks like you tried way harder than you actually did. It’s the kind of recipe that makes you look like a kitchen hero on zero sleep and a prayer. And for teachers? It’s a lunch that doesn’t need a microwave, doesn’t get soggy by noon, and doesn’t taste like cafeteria regret. Let’s make some.
Why You’ll Love This Recipe
Let’s be real — teachers don’t have time for a complicated lunch. They’re wrangling twenty-five kids, grading papers during their “break,” and probably surviving on cold coffee and granola bars. This pinwheel lunchbox changes that. It’s a complete meal in a roll — protein, veggies, carbs, and a little bit of creamy magic — all packed into something you can eat with one hand while untangling a glue stick disaster.
- Quick & Easy: These come together in under 15 minutes. No cooking. No fancy skills. Just roll, slice, and pack.
- Simple Ingredients: You probably have most of this in your fridge right now. Cream cheese, lunch meat, a tortilla, and some veggies. That’s it.
- Perfect for Lunchboxes: They hold up beautifully in a bento box or a simple container. No leaks, no mess, no sad sandwich bread.
- Crowd-Pleaser: Kids love them. Adults love them. Picky eaters? They’ll eat three. I’ve seen it happen.
- Unbelievably Delicious: The combo of cool, creamy spread, savory turkey, and crunchy veggies is just… perfect. It’s comfort food that doesn’t weigh you down.
What makes this version different from every other pinwheel recipe out there? It’s the spread. I use a blend of cream cheese and a little Greek yogurt (trust me on this) that gives it a tangy, lighter texture. And I add a pinch of everything bagel seasoning — because teachers deserve a little pizzazz in their lunch. This isn’t just a turkey wrap. It’s a moment.
What Ingredients You Will Need
This recipe uses simple, wholesome ingredients that you can find at any grocery store. The beauty is in the balance — creamy, savory, crunchy, and a little bit tangy. No weird stuff, I promise.
- Large flour tortillas (10-inch) — Burrito-sized works best. You need enough surface area to get a good roll. Gluten-free tortillas work too, just warm them slightly so they don’t crack.
- 8 oz cream cheese, softened — Full-fat gives the best flavor and texture, but reduced-fat works in a pinch. Let it sit out for 15 minutes so it spreads like a dream.
- 1/4 cup plain Greek yogurt — This is my secret weapon. It lightens the spread and adds a little tang. Use dairy-free yogurt if needed.
- 1/2 teaspoon garlic powder — Just a whisper of savory depth.
- 1/2 teaspoon everything bagel seasoning — Optional, but highly recommended. It adds that salty, seedy crunch that makes everything better.
- 8-10 slices deli turkey breast — Oven-roasted or smoked, your call. I like a thick slice for texture. If you’re using lower-sodium, it’s even better for lunchboxes.
- 4 slices provolone or Swiss cheese — Provolone is mild and melty-adjacent. Swiss adds a little nuttiness. Use what you love.
- 1/2 cup shredded carrots — Adds color, crunch, and a little sweetness. You can buy pre-shredded to save time.
- 1/2 cup baby spinach or arugula — Spinach is mild. Arugula gives a peppery kick. Both work beautifully.
- 1/4 cup thinly sliced red bell pepper — For color and a little crunch. Skip if you’re not a fan, or use cucumber instead.
- Salt and black pepper to taste — Just a pinch in the cream cheese mixture.
Pro tip from my kitchen: I love using Boar’s Head or Applegate turkey for these. The flavor is cleaner, and they slice thick enough that the pinwheels hold their shape. And for the cream cheese — Philadelphia is my go-to. It’s just consistent, you know?
Equipment Needed
You don’t need much for this recipe. That’s the whole point. But a few key tools make the process smoother.
- A sharp chef’s knife — A dull knife will squish your pinwheels. A sharp one gives you clean, beautiful slices.
- A cutting board — Preferably one with a little grip so it doesn’t slide around.
- A small mixing bowl — For the cream cheese spread.
- A rubber spatula — For mixing and spreading. A butter knife works too, but the spatula is easier.
- Plastic wrap — This is the real MVP. Wrapping the rolled tortillas tightly helps them hold their shape when you slice them.
- A lunchbox or bento box — For packing. I love the ones with compartments so the pinwheels don’t get squished.
If you don’t have plastic wrap, you can use a damp paper towel wrapped around the roll, then put it in a sealed container. It works, but the plastic wrap is better for keeping things tight. And if you’re making these for a crowd, a serrated knife can also work — just use a gentle sawing motion instead of pressing down.
Preparation Method

Let’s get rolling. I mean that literally. This is one of those recipes that feels almost too easy, but the results are so satisfying. Follow these steps, and you’ll have a lunchbox that makes any teacher feel like a VIP.
- Make the cream cheese spread. In a small bowl, combine the softened cream cheese, Greek yogurt, garlic powder, everything bagel seasoning (if using), and a pinch of salt and pepper. Mix with a spatula until smooth and creamy. Taste it. Adjust the seasoning if you want. It should be tangy, savory, and just a little bit irresistible.
- Prepare your tortillas. Lay one flour tortilla flat on your cutting board. If it’s a little stiff, microwave it for 10 seconds to make it more pliable. You don’t want it hot — just warm enough to roll without cracking.
- Spread the cream cheese mixture. Using your spatula, spread a generous, even layer of the cream cheese mixture over the entire surface of the tortilla. Leave about a half-inch border around the edges so it doesn’t squish out when you roll. You want it thick enough to taste, but not so thick that it oozes everywhere.
- Layer the turkey. Place 2-3 slices of turkey over the cream cheese, overlapping them slightly. Make sure the turkey covers the whole tortilla, edge to edge. This ensures every bite has meat in it.
- Add the cheese. Lay 1-2 slices of provolone or Swiss over the turkey. Tear them if needed to fit. The cheese adds a creamy, melty-adjacent texture that holds everything together.
- Add the veggies. Sprinkle a handful of shredded carrots over the cheese. Add a layer of spinach or arugula, and then a few slices of red bell pepper. Don’t overstuff — you want to be able to roll it tightly without everything falling out. Think of it as a thin, even layer of goodness.
- Roll it up tight. Starting from one end, carefully roll the tortilla away from you, keeping it as tight as you can without tearing it. Use your fingers to tuck in any loose ingredients as you go. The goal is a snug, uniform log. When you reach the end, press down gently to seal.
- Wrap in plastic wrap. Take a piece of plastic wrap and wrap the rolled tortilla tightly. Twist the ends like a candy wrapper to secure it. This step is crucial — it helps the pinwheels hold their shape and makes slicing much cleaner. Repeat with the remaining tortillas.
- Chill for at least 30 minutes. Pop the wrapped rolls in the fridge. This allows the cream cheese to firm up and the flavors to meld. If you’re in a hurry, 15 minutes will do, but 30 is better. You can even make these the night before — they actually taste better the next day.
- Slice into pinwheels. When you’re ready to serve, unwrap the rolls and place them on a cutting board. Using a sharp chef’s knife, slice each roll into 1-inch thick rounds. Use a gentle sawing motion — don’t press down hard or you’ll squish them. You should get about 6-8 pinwheels per tortilla.
- Pack and serve. Arrange the pinwheels in a lunchbox or container. They’re best served cold or at room temperature. Add a few extra veggies, some fruit, or a small dip on the side if you’re feeling fancy.
My personal tip: I always slice the ends off first — they’re usually a little uneven and make for a great chef’s snack. You earned it. And if you’re packing these for a teacher, consider adding a handwritten note. Trust me, it makes the whole thing even better.
Cooking Tips & Techniques
I’ve made these pinwheels more times than I can count, and I’ve definitely learned a few things the hard way. Here’s what I wish someone had told me the first time.
Don’t overfill. I know it’s tempting to pile on the turkey and veggies, but a stuffed tortilla is a disaster waiting to happen. You’ll end up with a messy roll and pinwheels that fall apart. Less is more. Aim for a thin, even layer of each ingredient.
Room temperature cream cheese is non-negotiable. Cold cream cheese is like trying to spread a brick. It will tear your tortilla and give you a lumpy, uneven layer. Let it sit out for 15-20 minutes before you start. If you forgot, you can microwave it for 10-15 seconds — just watch it so it doesn’t melt.
The chill time matters. I once tried to slice a roll immediately after making it. It was a squishy, sad mess. The cream cheese needs time to firm up so the pinwheels hold their shape. Thirty minutes in the fridge is the minimum. Overnight is even better — the flavors get all cozy together.
Use a sharp knife. This is the number one mistake people make. A dull knife will compress the pinwheels and squish out the filling. A sharp chef’s knife gives you clean, beautiful slices. If you don’t have a sharp knife, a serrated knife with a gentle sawing motion can work.
Toast the tortillas (optional). If you want a little extra texture, you can toast the tortillas in a dry skillet for about 30 seconds per side before assembling. It gives them a slight char and makes them more sturdy. Just let them cool before you spread the cream cheese.
I once made these for a school event and forgot to chill them. I sliced them anyway, and they looked like a crime scene. Cream cheese everywhere. Turkey hanging out. It was a mess. I learned my lesson — patience is a virtue, especially when cream cheese is involved.
Variations & Adaptations
This recipe is incredibly flexible. Once you have the basic technique down, you can swap ingredients to suit any taste or dietary need. Here are a few of my favorite variations.
- Vegetarian Version: Skip the turkey and load up on roasted red peppers, sliced cucumber, and avocado. Add a layer of hummus or pesto under the cream cheese for extra flavor. It’s just as satisfying and perfect for Meatless Mondays.
- Spicy Southwest: Swap the turkey for sliced chicken breast or chorizo. Add a smear of chipotle mayo or a sprinkle of chili powder to the cream cheese. Throw in some black beans, corn, and a little shredded cheddar. It’s a fiesta in a roll.
- Low-Carb / Keto: Use large lettuce leaves or low-carb tortillas instead of flour tortillas. Fill with extra turkey, cheese, and avocado. Skip the carrots and bell pepper if you’re watching carbs. It’s light, fresh, and still delicious.
- Gluten-Free: Use your favorite gluten-free tortillas. They can be a little fragile, so warm them slightly before rolling. Corn tortillas are a bit small, but they work for mini pinwheels — perfect for a kid’s lunch.
- Everything Bagel Pinwheels: This is my personal favorite. Mix everything bagel seasoning directly into the cream cheese spread. Use smoked salmon instead of turkey, and add capers and thinly sliced red onion. It’s like a bagel, but portable. I’ve made these for brunch and they disappeared in minutes.
I tried a version with pesto and sun-dried tomatoes once, and it was incredible. The basil flavor paired so well with the cream cheese. It reminded me of a sun-dried tomato pesto pasta salad I make in the summer — all those bright, tangy flavors. Don’t be afraid to experiment. That’s half the fun.
Serving & Storage Suggestions
These pinwheels are best served cold or at room temperature, which makes them perfect for lunchboxes, picnics, and potlucks. They’re sturdy enough to travel without falling apart, which is a huge win in my book.
For lunchboxes: Pack the pinwheels in a container with a tight-fitting lid. Add a small ice pack if they’ll be sitting out for a while. I like to include a few cherry tomatoes, cucumber slices, or a handful of grapes on the side. A little peanut butter oat energy ball makes a great dessert.
For a party platter: Arrange the pinwheels on a large plate, cut-side up. Garnish with fresh herbs like parsley or dill. Serve with a small bowl of ranch dressing, honey mustard, or even a little balsamic glaze for dipping. They look really impressive with very little effort.
Storage: Store leftover pinwheels in an airtight container in the refrigerator for up to 3 days. The flavors actually get better as they sit — the cream cheese absorbs the seasonings and everything melds together. Just note that the tortillas can get a little soft after a day or two. If you want them to stay firmer, store the rolled log (unsliced) in the fridge and slice just before serving.
Freezing: You can freeze the rolled logs for up to a month. Wrap them tightly in plastic wrap and then in foil. Thaw in the fridge overnight before slicing. The texture won’t be quite as perfect as fresh, but it’s still pretty darn good. I wouldn’t freeze them after slicing — the pinwheels can get a little weepy.
Reheating: These are meant to be served cold, so no reheating needed. But if you want a warm version, you can pop the sliced pinwheels in a 350°F oven for 5-7 minutes. The cream cheese gets melty and the tortillas get a little crispy on the edges. It’s a different experience, but a delicious one.
Flavor development is a real thing with these. I’ve made them the night before and they were even better the next day. The cream cheese spreads its love everywhere, and the veggies soften just a little. It’s like the pinwheels get a chance to become friends before they hit your lunchbox.
Nutritional Information & Benefits
These pinwheels are a balanced little meal. Each serving (about 4-5 pinwheels) provides a good mix of protein, healthy fats, and carbs. Here’s a rough estimate:
- Calories: Approximately 320-380 per serving
- Protein: 20-25 grams (thanks to the turkey and Greek yogurt)
- Carbohydrates: 25-30 grams (mostly from the tortilla)
- Fat: 15-20 grams (from cream cheese and cheese)
- Fiber: 3-4 grams (from the veggies)
Health benefits: Turkey is a lean protein that keeps you full and focused — perfect for a long school day. The Greek yogurt adds probiotics for gut health, and the veggies provide vitamins A and C. The spinach or arugula gives you iron and antioxidants. It’s a lunch that fuels your body without weighing you down.
Dietary considerations: This recipe can easily be made gluten-free, low-carb, or vegetarian. It’s naturally nut-free, which is great for school lunchboxes. If you’re watching sodium, use low-sodium turkey and skip the everything bagel seasoning.
Potential allergens: Dairy (cream cheese, cheese, Greek yogurt), gluten (tortillas). Check your tortilla labels if you’re avoiding specific allergens.
I love that this recipe feels indulgent but is actually pretty balanced. It’s comfort food that doesn’t leave you in a food coma. And for teachers who need to stay sharp all afternoon, that’s a win.
Conclusion
These Easy Turkey Pinwheel Lunchbox for Teachers are more than just a recipe. They’re a way to say “I see you” without saying a word. They’re a tiny, delicious gesture that fits in a lunchbox and feels like a hug. And honestly? They’re so simple that you can make them on a Tuesday night after a long day, and still feel like you’ve done something good.
I love this recipe because it’s forgiving. You can swap ingredients, adjust the seasoning, make it your own. It’s not precious or fussy. It’s just good food that makes people happy. And when you see a teacher’s face light up at lunchtime, you’ll know exactly what I mean.
So go ahead — grab some tortillas, soften that cream cheese, and roll your way to a lunchbox that’s anything but ordinary. And when you do, I’d love to hear about it. Drop a comment below and tell me how you made these your own. Did you add something unexpected? Did they save your Teacher Appreciation Week? I’m all ears. Share this recipe with a friend who needs a lunchbox win, and let’s make lunch a little more delicious for everyone.
Happy rolling, friends. You’ve got this.
Frequently Asked Questions
Can I make these turkey pinwheels the night before?
Absolutely! In fact, I recommend it. Making them the night before gives the flavors time to meld and the cream cheese time to firm up. Just wrap the rolled logs tightly in plastic wrap and store them in the fridge. Slice them in the morning before packing. They’ll be perfect.
How do I keep the pinwheels from getting soggy?
The key is to not overfill with wet ingredients. Pat dry any veggies like bell peppers or cucumbers before adding them. The cream cheese spread also acts as a barrier that helps prevent the tortilla from getting soggy. And always chill the rolls before slicing — it helps everything stay in place.
What can I use instead of cream cheese?
If you’re not a fan of cream cheese, you can use hummus, pesto, or a flavored cream cheese spread. For a lighter option, try mashed avocado with a squeeze of lime juice. Just keep in mind that the texture will be different, and you may need to adjust the rolling technique.
Can I freeze turkey pinwheels?
Yes, you can freeze the rolled logs (unsliced) for up to a month. Wrap them tightly in plastic wrap and then in foil. Thaw in the fridge overnight before slicing. I don’t recommend freezing them after slicing, as the texture can get a little watery.
How long do these pinwheels last in the fridge?
Stored in an airtight container, they’ll stay good for up to 3 days. The tortillas will soften a little over time, but the flavor actually improves. If you’re packing them for a lunchbox, they’ll be fine for a few hours at room temperature with an ice pack.
Pin This Recipe!
Easy Turkey Pinwheel Lunchbox for Teachers

A fast, no-cook, beautifully portable little bundle of savory goodness that looks like you tried way harder than you actually did. It’s the kind of recipe that makes you look like a kitchen hero on zero sleep and a prayer.
- Prep Time: 15 minutes
- Cook Time: 0 minutes
- Total Time: 45 minutes (includes 30 minutes chilling time)
- Yield: 4 servings 1x
- Category: Lunch
- Cuisine: American
Ingredients
- 4 large flour tortillas (10-inch)
- 8 oz cream cheese, softened
- 1/4 cup plain Greek yogurt
- 1/2 teaspoon garlic powder
- 1/2 teaspoon everything bagel seasoning
- 8–10 slices deli turkey breast
- 4 slices provolone or Swiss cheese
- 1/2 cup shredded carrots
- 1/2 cup baby spinach or arugula
- 1/4 cup thinly sliced red bell pepper
- Salt and black pepper to taste
Instructions
- Make the cream cheese spread. In a small bowl, combine the softened cream cheese, Greek yogurt, garlic powder, everything bagel seasoning (if using), and a pinch of salt and pepper. Mix with a spatula until smooth and creamy.
- Prepare your tortillas. Lay one flour tortilla flat on your cutting board. If it’s a little stiff, microwave it for 10 seconds to make it more pliable.
- Spread the cream cheese mixture. Using your spatula, spread a generous, even layer of the cream cheese mixture over the entire surface of the tortilla, leaving about a half-inch border around the edges.
- Layer the turkey. Place 2-3 slices of turkey over the cream cheese, overlapping them slightly, covering the whole tortilla edge to edge.
- Add the cheese. Lay 1-2 slices of provolone or Swiss over the turkey, tearing them if needed to fit.
- Add the veggies. Sprinkle a handful of shredded carrots over the cheese. Add a layer of spinach or arugula, and then a few slices of red bell pepper. Don’t overstuff.
- Roll it up tight. Starting from one end, carefully roll the tortilla away from you, keeping it as tight as you can without tearing it. Use your fingers to tuck in any loose ingredients as you go. When you reach the end, press down gently to seal.
- Wrap in plastic wrap. Take a piece of plastic wrap and wrap the rolled tortilla tightly. Twist the ends like a candy wrapper to secure it. Repeat with the remaining tortillas.
- Chill for at least 30 minutes. Pop the wrapped rolls in the fridge to allow the cream cheese to firm up and the flavors to meld.
- Slice into pinwheels. When ready to serve, unwrap the rolls and place them on a cutting board. Using a sharp chef’s knife, slice each roll into 1-inch thick rounds using a gentle sawing motion. You should get about 6-8 pinwheels per tortilla.
- Pack and serve. Arrange the pinwheels in a lunchbox or container. They’re best served cold or at room temperature.
Notes
Don’t overfill the tortillas. Room temperature cream cheese is non-negotiable. The chill time matters for clean slicing. Use a sharp knife for best results. Can be made the night before for better flavor. Store in an airtight container in the refrigerator for up to 3 days. Rolled logs can be frozen for up to a month.
Nutrition
- Serving Size: 4-5 pinwheels
- Calories: 320380
- Sugar: 45
- Sodium: 600800
- Fat: 1520
- Saturated Fat: 810
- Carbohydrates: 2530
- Fiber: 34
- Protein: 2025
Keywords: turkey pinwheels, lunchbox recipe, teacher appreciation, easy lunch, no-cook lunch, bento box, turkey wrap, pinwheel sandwiches


