There used to be a tiny bakery tucked behind a laundromat on 14th Street that made the most incredible peanut butter cookies I have ever tasted. They were chewy, deeply peanutty, and somehow completely flourless — though I didn’t realize that last part until years later. When they closed — suddenly, with a handwritten sign taped to the window that just said “Gone Baking Elsewhere” — I honestly felt a little lost. I mean, I had walked past that place every Tuesday for two years, and their cookies were my little midweek reward.
After maybe eleven tries — some were crumbly disasters, others were too greasy, and one batch actually looked like sad little pancakes — I finally got it. And let me tell you, the secret was way simpler than I thought. It turns out you don’t need a laundry list of ingredients or any fancy techniques. You just need the right ratio of peanut butter to sugar and a little patience. The version I landed on makes exactly two cookies, which feels perfect for those evenings when you want something sweet but don’t need a whole batch staring at you from the counter.
Maybe you have been there — craving that perfect peanut butter cookie, but you don’t want to commit to making two dozen. Or maybe you have a jar of peanut butter and a sweet tooth, and you are wondering if that’s enough. Trust me, it is. These cookies come together in about 15 minutes, and they taste like the ones from that little bakery that stole my heart. I keep making them because they remind me that sometimes the best things really are the simplest.
Why You’ll Love This Recipe
Let’s be honest — most cookie recipes are designed for a crowd. But what about when you just want two perfect cookies without the leftovers calling your name for days? That is exactly where this recipe shines. These flourless peanut butter cookies are everything you want in a dessert: quick, simple, and ridiculously satisfying.
- Quick & Easy : From start to finish, you are looking at about 15 minutes. Mix, scoop, bake, done. Perfect for those sudden sweet cravings that strike after dinner.
- Simple Ingredients : You probably have everything in your kitchen right now. No flour, no butter, no eggs if you use the right peanut butter. Just three or four pantry staples.
- Perfect for Two : This recipe is scaled exactly for two cookies. No math, no halving, no waste. Just a little treat for you and someone special — or just you, no judgment here.
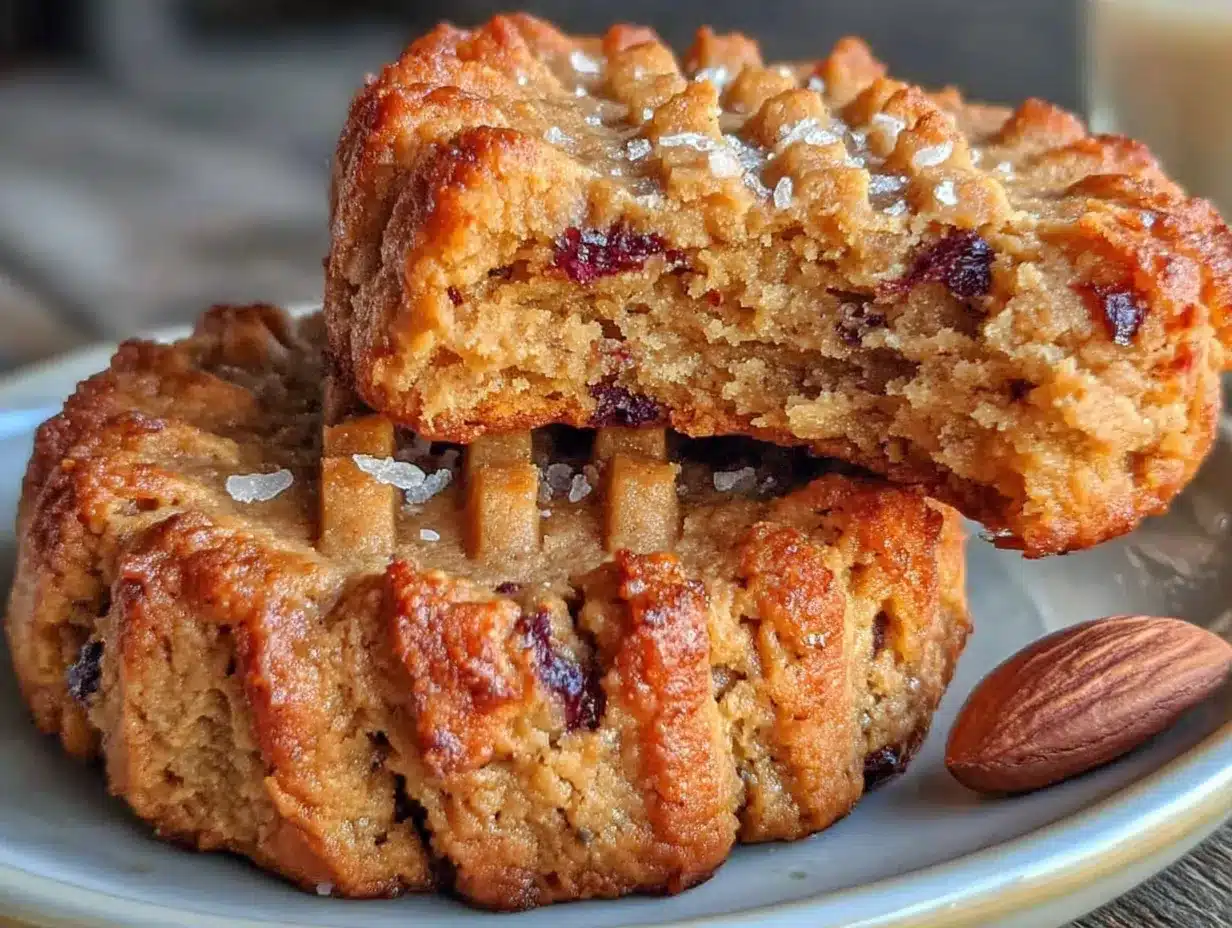
- Crowd-Pleaser : Despite the tiny batch, these cookies deliver big flavor. The texture is chewy on the inside with those classic crisscross marks on top. Everyone who tries them asks for the recipe.
- Naturally Gluten-Free : Since there is no flour involved, these are safe for gluten-sensitive friends and family. You can serve them with confidence at any gathering.
What makes this recipe different from all the other peanut butter cookie recipes out there? It is the texture, honestly. By using the right peanut butter — one that is not too oily — and letting the dough rest for just a few minutes, you get cookies that are perfectly chewy without being dry or crumbly. I have tested this with different brands and consistencies, and I can tell you exactly what works so you don’t have to guess.
This is the kind of cookie that makes you close your eyes after the first bite. It is comfort food at its simplest — warm, peanutty, and just sweet enough. Whether you are making these for a quiet night in or as a little surprise for a friend, they deliver every single time.
What Ingredients You Will Need
This recipe uses just a handful of simple ingredients to create something truly special. The beauty of flourless peanut butter cookies is that every component plays a crucial role, and there is nowhere to hide. Here is what you will need and why each ingredient matters.
- ½ cup creamy peanut butter (use a brand like Jif or Skippy — natural peanut butter that separates can make the cookies too oily and they will spread too much. Look for one with a little added sugar and salt for the best texture)
- ¼ cup granulated sugar (plus a little extra for rolling. This is not just for sweetness — sugar helps create that crackly top and chewy texture. You can reduce it slightly if you prefer less sweet cookies, but do not go below 3 tablespoons)
- 1 large egg yolk (the yolk adds richness and helps bind the dough without making it too wet. Save the white for another use, like a quick scramble or an omelet)
- ½ teaspoon vanilla extract (pure vanilla makes a difference here. It rounds out the peanut flavor and adds warmth. Imitation vanilla works in a pinch, but use a little less)
- ¼ teaspoon baking soda (this is what gives the cookies a little lift and helps them spread just enough. Do not skip it — your cookies will be dense and flat without it)
- Pinch of salt (unless your peanut butter is already salted. If you are using unsalted peanut butter, definitely add a small pinch to balance the sweetness)
Ingredient Selection Tips: I have tested this recipe with several peanut butter brands, and I personally prefer using Jif or Skippy for the most consistent results. Natural peanut butter that requires stirring can work, but you need to make sure it is very well mixed and not too oily. If your natural peanut butter has a layer of oil on top, stir it thoroughly and even blot a little oil off with a paper towel before measuring. Trust me on this — I learned the hard way after a batch of cookies that spread into one giant peanut butter pancake.
Substitution Guidance: If you need to make these egg-free, you can substitute the egg yolk with 1 tablespoon of aquafaba (the liquid from a can of chickpeas) or 1 tablespoon of unsweetened applesauce. The texture will be slightly different — a little more cakey than chewy — but they will still be delicious. For a sugar-free version, you can use monk fruit sweetener or erythritol, but note that the cookies will not brown as much and the texture will be a bit different. I have tried both, and the monk fruit version is my preferred alternative.
Equipment Needed
You do not need much for this recipe, which is part of why I love it so much. Here is what you will need:
- Small mixing bowl (any medium bowl will do, but a smaller one makes it easier to mix the small amount of dough)
- Fork (for mixing and for making those classic crisscross marks on top. A dinner fork works perfectly)
- Baking sheet (a small baking sheet or even a quarter sheet pan works great. If you only have a large one, that is fine too)
- Parchment paper or silicone baking mat (this prevents sticking and makes cleanup a breeze. You can use a greased baking sheet in a pinch, but parchment is better)
- Measuring cups and spoons (accurate measurements are important here since the batch is so small. Use proper measuring spoons, not your regular eating spoons)
- Cooling rack (optional but helpful for letting the cookies cool evenly. A plate works too)
If you do not have a baking sheet, you can use a small cast iron skillet or even a toaster oven tray. I have made these in a toaster oven many times, and they turn out just as good. Just reduce the baking time by a minute or two since toaster ovens tend to run hotter. Also, if you are using a dark-colored baking sheet, keep an eye on the cookies — dark pans absorb more heat and can cause the bottoms to brown too quickly.
Preparation Method
Making these cookies is almost embarrassingly easy. Here is how to do it step by step, with all the little details I have learned from making this recipe probably fifty times by now.
- Preheat your oven to 350°F (175°C). Line a small baking sheet with parchment paper or a silicone mat. If you are using a larger sheet, just place the cookies on one side — they only need a small space. Give the oven a full 10 minutes to come to temperature so the heat is steady.
- In a small mixing bowl, combine the peanut butter and sugar. Use your fork to stir them together until they are completely incorporated. The mixture will look thick and a little crumbly at first — that is normal. Keep stirring and pressing the mixture against the side of the bowl until it comes together into a uniform dough. This usually takes about 30 seconds of vigorous mixing.
- Add the egg yolk, vanilla extract, baking soda, and salt. Stir everything together with your fork until the dough is smooth and evenly mixed. The dough will be soft and a little sticky, but it should hold together when pressed. If it seems too dry, add a tiny splash of water — like, literally a drop — and mix again. If it seems too wet, add a teaspoon of sugar and mix.
- Let the dough rest for 2-3 minutes. This is a step I learned through trial and error. Giving the dough a short rest allows the sugar to dissolve a little and the peanut butter to absorb the moisture. The result is a cookie that holds its shape better and has a more even texture. Do not skip this — your cookies will thank you.
- Divide the dough into two equal portions. Using your hands, roll each portion into a smooth ball. The balls should be about 1.5 inches in diameter. Place them on the prepared baking sheet, spacing them at least 3 inches apart. They will spread during baking, so give them room.
- Roll each dough ball in a small dish of extra sugar. This step is optional but highly recommended. The sugar coating creates a slightly crunchy exterior that contrasts beautifully with the chewy inside. Just roll the ball gently in the sugar until lightly coated, then place it back on the baking sheet.
- Use a fork to make the classic crisscross pattern. Dip the fork tines in a little sugar (to prevent sticking), then press down gently on each dough ball. Press once in one direction, then press again perpendicular to create the crosshatch pattern. Press firmly enough to flatten the cookies to about ½ inch thick. The edges will crack slightly — that is exactly what you want.
- Bake for 8-10 minutes. The cookies are done when the edges are lightly golden and the tops look set but still soft. They will look slightly underbaked in the center — that is perfect. Remember, they continue to cook on the hot baking sheet after you take them out. For a chewier cookie, bake for 8 minutes. For a slightly firmer cookie, go for 10 minutes. I usually aim for 9 minutes.
- Let the cookies cool on the baking sheet for 5 minutes. This is crucial. The cookies are very fragile when they first come out of the oven. Letting them rest on the hot sheet allows them to firm up enough to handle. After 5 minutes, transfer them to a cooling rack or a plate to cool completely. If you try to move them too soon, they will fall apart — I have made that mistake more than once.
- Enjoy warm or at room temperature. These cookies are amazing warm, when the peanut butter is still a little melty and the edges are crisp. But they are also fantastic once fully cooled. Store any extras (if there are any) in an airtight container at room temperature for up to 3 days.
Cooking Tips & Techniques
After making these cookies more times than I care to count, I have picked up a few tricks that make a real difference. Here are the things I wish someone had told me when I first started.
Use room temperature ingredients. Cold egg yolk straight from the fridge will make the dough stiff and harder to mix. Let your egg come to room temperature for about 15 minutes before you start. If you are in a hurry, place the egg in a bowl of warm water for 5 minutes. It makes a noticeable difference in how easily the dough comes together.
Do not overmix the dough. Once you add the egg yolk, mix just until everything is combined. Overmixing can make the cookies tough and dense. You want to see a uniform dough, but you do not need to beat it into submission. A few strokes with the fork is all it takes.
Watch the baking time closely. Because these cookies are small, they can go from perfectly baked to overdone in less than a minute. Set your timer for 8 minutes and check them. If the edges are golden and the centers look set but soft, they are done. Remember, they will continue to cook on the hot baking sheet after you pull them out. It is better to underbake slightly than to overbake.
One of my biggest failures happened when I tried to double the recipe and bake all four cookies on one sheet. They spread into each other and became one giant cookie. Not the worst outcome, honestly, but not what I was going for. So learn from my mistake — give them space. Even if you are only making two cookies, place them far apart on the sheet.
If your cookies spread too much, it is usually because the peanut butter was too oily or the dough was too warm. Chill the dough balls in the fridge for 10 minutes before baking to help them hold their shape. This is a great trick for hot summer days when your kitchen is warm.
Variations & Adaptations
One of the best things about this recipe is how easy it is to customize. Here are some variations I have tried and loved.
Chocolate Peanut Butter Cookies: Add 1 tablespoon of unsweetened cocoa powder to the dough along with the other dry ingredients. You may need to add a tiny splash of water to bring the dough together. The result is a rich, chocolatey cookie with that same chewy texture. I made these for a friend who claimed she did not like peanut butter cookies, and she ate both of them before I could get one.
Crunchy Peanut Butter Version: Use crunchy peanut butter instead of creamy for little bits of peanut in every bite. This adds a nice texture contrast and makes the cookies feel a little more substantial. Just make sure the crunchy peanut butter is not too chunky — you want small pieces, not whole peanuts.
Vegan Adaptation: Replace the egg yolk with 1 tablespoon of aquafaba (the liquid from a can of chickpeas) or 1 tablespoon of unsweetened applesauce. The texture will be slightly different — a bit more cakey and less chewy — but they are still delicious. I have made the aquafaba version several times, and it works surprisingly well. Just make sure to whip the aquafaba lightly before adding it to the dough.
Flavor Twists: Add ¼ teaspoon of cinnamon or a pinch of nutmeg to the dough for a warm, spiced flavor. You can also stir in 1 tablespoon of mini chocolate chips, chopped peanuts, or shredded coconut after the dough is mixed. I love adding a pinch of flaky sea salt on top right after baking — that sweet-salty combo is irresistible.
Low-Sugar Option: Replace the granulated sugar with a monk fruit sweetener or erythritol. The cookies will not brown as much, and the texture will be slightly different, but they are still tasty. I have tested this with monk fruit sweetener, and while the cookies are a little paler, the flavor is still great.
Serving & Storage Suggestions
These cookies are best enjoyed warm, when the peanut butter is still soft and the edges are slightly crisp. But they are also fantastic at room temperature — the texture actually improves as they cool, becoming perfectly chewy.
Serving Ideas: Serve these cookies with a cold glass of milk for the classic combo. They are also wonderful crumbled over vanilla ice cream for a quick dessert sundae. For a more indulgent treat, sandwich a scoop of vanilla ice cream between two cookies for an instant ice cream sandwich. I have also been known to crumble one over a bowl of yogurt for a quick breakfast treat — no judgment here, it is delicious.
What to Serve Alongside: These cookies are perfect on their own, but they pair beautifully with a cup of coffee or a tall glass of cold brew. For a dessert board, arrange them alongside fresh berries, dark chocolate squares, and a few slices of sharp cheddar cheese — the sweet-salty combination is amazing.
Storage Instructions: Store any leftover cookies in an airtight container at room temperature for up to 3 days. They will stay soft and chewy. If you live in a humid climate, add a piece of bread to the container — the cookies will absorb moisture from the bread and stay softer longer. Do not refrigerate them, as the cold can make them dry and hard.
Freezing Instructions: You can freeze the baked cookies for up to 2 months. Wrap each cookie individually in plastic wrap, then place them in a freezer bag. To thaw, let them sit at room temperature for about 15 minutes. You can also freeze the dough balls before baking — just place them on a baking sheet, freeze until solid, then transfer to a freezer bag. Bake from frozen, adding 1-2 minutes to the baking time.
How Flavors Develop: These cookies are actually even better the next day. The flavors meld together, and the texture becomes perfectly chewy. I often make them the night before I plan to serve them, just so they have time to rest. If you can resist eating them right away, you will be rewarded.
Nutritional Information & Benefits
Here is the approximate nutritional breakdown for one cookie (based on the recipe as written):
- Calories: 220
- Fat: 14g
- Carbohydrates: 20g
- Protein: 8g
- Fiber: 2g
- Sugar: 16g
These numbers are estimates and will vary based on the exact ingredients you use. The peanut butter provides a good amount of protein and healthy fats, which makes these cookies more satisfying than your average sweet treat. Peanut butter is also a source of vitamin E, magnesium, and potassium, so you are getting a little nutritional boost along with your dessert.
Dietary Considerations: This recipe is naturally gluten-free and can be made vegan with a simple substitution. It is also relatively low in carbohydrates compared to traditional cookies that use flour. However, it is not low in calories or sugar, so enjoy in moderation. The portion control is built right in — two cookies is the perfect serving size for a satisfying dessert.
Potential Allergens: This recipe contains peanuts and eggs. If you have a peanut allergy, you can substitute sunflower seed butter or almond butter, though the texture will be slightly different. Sunflower seed butter can react with baking soda and turn green — do not worry, it is safe to eat, just not the prettiest. For egg allergies, use the vegan substitution mentioned earlier.
Conclusion
These flourless peanut butter cookies for two are proof that you do not need a long ingredient list or complicated techniques to make something truly wonderful. They are quick, simple, and absolutely delicious — the kind of recipe that becomes a regular in your rotation because it just works.
I love that this recipe is scaled perfectly for two people. It feels intentional and special, like you are making something just for the moment. No leftovers to tempt you, no waste, just two perfect cookies that taste like they came from a bakery. Whether you are making them for yourself on a quiet evening or surprising someone you care about, these cookies deliver every single time.
I encourage you to make this recipe your own. Try the chocolate version, add some sea salt, or experiment with different nut butters. The base recipe is forgiving and versatile, so do not be afraid to play around. And when you make them — because I hope you will — come back and let me know how they turned out. Did you add anything? What did you serve them with? I would love to hear about your version.
Go ahead, grab that jar of peanut butter, and treat yourself. You deserve it.
Frequently Asked Questions
Can I use natural peanut butter for this recipe?
You can, but you need to be careful. Natural peanut butter that separates often has too much oil, which can cause the cookies to spread too much and become greasy. If you use natural peanut butter, stir it very well and blot off any excess oil with a paper towel before measuring. For the most consistent results, I recommend using a brand like Jif or Skippy.
Why did my cookies spread into one big cookie?
This usually happens for one of three reasons: the peanut butter was too oily, the dough was too warm, or you did not space them far enough apart. Make sure to use a peanut butter with a stable consistency, chill the dough balls for 10 minutes if your kitchen is warm, and place them at least 3 inches apart on the baking sheet.
Can I double this recipe?
Absolutely. Simply double all the ingredients and follow the same instructions. You will get four cookies instead of two. Just make sure to use a larger bowl and give the cookies plenty of space on the baking sheet. You may need to bake them in two batches if your sheet is not large enough.
How do I know when the cookies are done baking?
The cookies are done when the edges are lightly golden and the tops look set but still soft. They will look slightly underbaked in the center — that is exactly what you want. Remember, they continue to cook on the hot baking sheet after you take them out, so do not wait until they look fully baked in the oven.
Can I make these cookies without sugar?
You can substitute granulated sugar with a monk fruit sweetener or erythritol, but the texture and appearance will be different. The cookies will not brown as much, and they will be a bit less chewy. I have tested this, and while they are still tasty, they are not quite the same as the original. If you are looking for a lower-sugar option, try reducing the sugar to 3 tablespoons instead of ¼ cup.
Pin This Recipe!
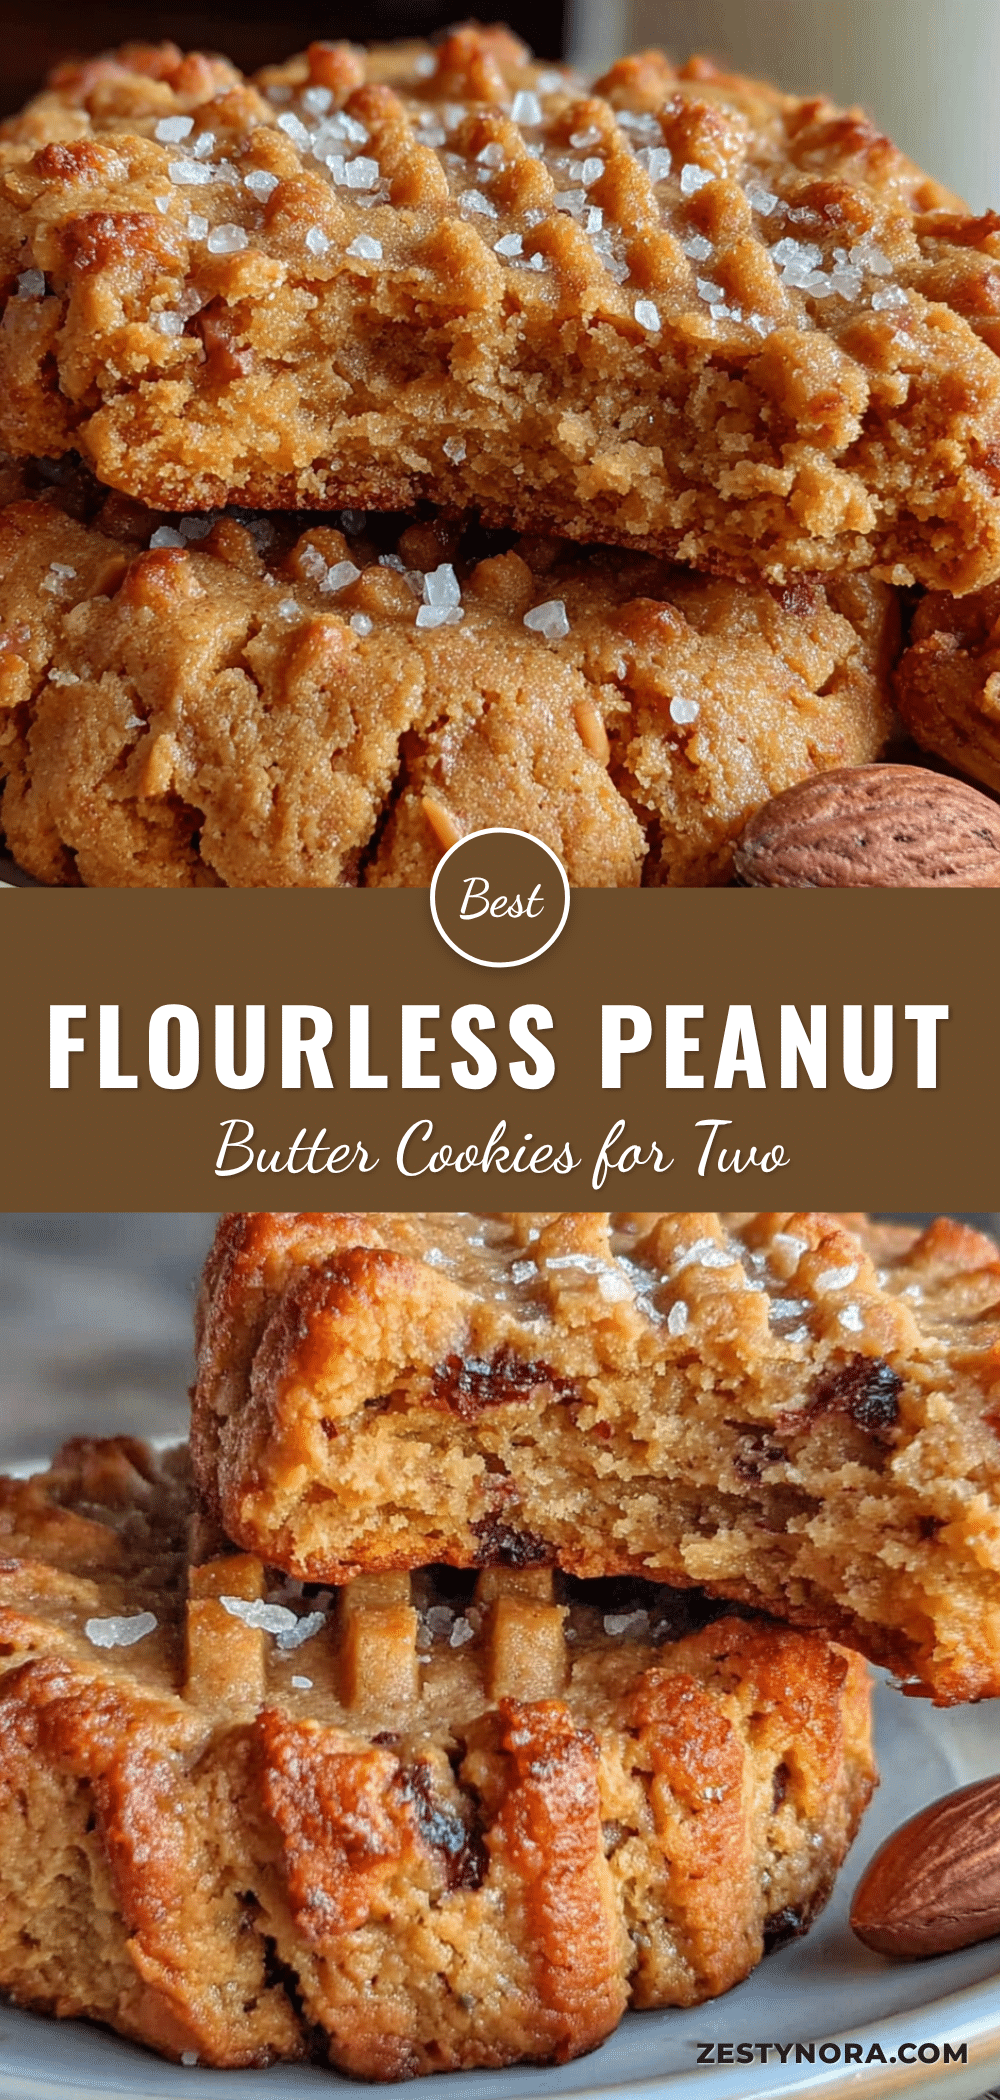
Best Flourless Peanut Butter Cookies for Two Easy Dessert
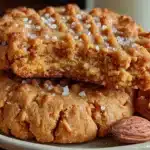
These flourless peanut butter cookies are quick, simple, and ridiculously satisfying. Made with just a few pantry staples, they deliver a chewy, deeply peanutty flavor in a perfect two-cookie batch.
- Prep Time: 10 minutes
- Cook Time: 8-10 minutes
- Total Time: 18-20 minutes
- Yield: 2 cookies 1x
- Category: Dessert
- Cuisine: American
Ingredients
- ½ cup creamy peanut butter (like Jif or Skippy)
- ¼ cup granulated sugar (plus extra for rolling)
- 1 large egg yolk
- ½ teaspoon vanilla extract
- ¼ teaspoon baking soda
- Pinch of salt (if peanut butter is unsalted)
Instructions
- Preheat oven to 350°F (175°C). Line a small baking sheet with parchment paper or a silicone mat.
- In a small mixing bowl, combine peanut butter and sugar. Stir with a fork until completely incorporated and the mixture forms a uniform dough (about 30 seconds).
- Add egg yolk, vanilla extract, baking soda, and salt. Stir until smooth and evenly mixed. Dough should be soft and slightly sticky.
- Let the dough rest for 2-3 minutes to allow sugar to dissolve and peanut butter to absorb moisture.
- Divide dough into two equal portions. Roll each into a smooth ball about 1.5 inches in diameter. Place on prepared baking sheet, spacing at least 3 inches apart.
- Optional: Roll each dough ball in a small dish of extra sugar to create a crunchy exterior.
- Dip fork tines in sugar, then press down gently on each dough ball to flatten to about ½ inch thick, creating a crisscross pattern. Edges may crack slightly.
- Bake for 8-10 minutes, until edges are lightly golden and tops look set but still soft. For chewier cookies, bake 8 minutes; for firmer, bake 10 minutes.
- Let cookies cool on baking sheet for 5 minutes (they are fragile when hot). Then transfer to a cooling rack or plate to cool completely.
- Enjoy warm or at room temperature. Store leftovers in an airtight container at room temperature for up to 3 days.
Notes
Use room temperature ingredients for best results. Do not overmix the dough. Watch baking time closely as cookies can overbake quickly. If cookies spread too much, chill dough balls for 10 minutes before baking. For vegan version, substitute egg yolk with 1 tablespoon aquafaba or unsweetened applesauce.
Nutrition
- Serving Size: 1 cookie
- Calories: 220
- Sugar: 16
- Sodium: 150
- Fat: 14
- Saturated Fat: 3
- Carbohydrates: 20
- Fiber: 2
- Protein: 8
Keywords: flourless peanut butter cookies, cookies for two, easy dessert, gluten-free cookies, small batch cookies