My neighbor asked why I couldn’t just use brown butter in the marshmallow mixture instead of browning it separately and adding it later. I started to explain why that wouldn’t work—then stopped. Honestly, I had no good reason. It was just the way I’d always done it.
Let me tell you, I was wrong. Completely, delightfully wrong. That Tuesday evening, standing in my kitchen with a half-melted stick of butter and a skeptical expression, I decided to let her try it her way. The result? These Quick Brown Butter Sugar Cookie Rice Krispie Treats were born, and I haven’t made them the old way since.
You know that feeling when a recipe you’ve made a hundred times suddenly gets better? That’s what happened here. The brown butter adds this nutty, almost caramel-like depth that pairs perfectly with the sweet, buttery flavor of sugar cookies. And because we’re browning the butter right in the marshmallow mixture, it saves you a whole extra step—and a dirty pan.
I mean, who doesn’t love a recipe that cuts down on dishes? Maybe you’ve been there, staring at a sink full of pots and wondering if it was really worth it. Well, these treats are worth it, and the cleanup is a breeze. They’ve become my go-to for weeknight cravings, last-minute potlucks, and honestly, any day that needs a little extra sweetness.
Why You’ll Love This Recipe
These aren’t your average rice krispie treats. The combination of brown butter and sugar cookie flavor takes them to a whole new level, and the best part? They come together in about 15 minutes. Let’s break down why this recipe is a game-changer.
- Quick & Easy: From start to finish, you’re looking at about 15 minutes of active time. Perfect for those evenings when you need a dessert fast.
- Simple Ingredients: You probably already have butter, marshmallows, rice krispies, and a box of sugar cookie mix in your pantry. No fancy grocery store trips required.
- Perfect for Weeknights: This is the kind of treat you can whip up after dinner while the kids are doing homework. It’s fast, foolproof, and guaranteed to make everyone smile.
- Crowd-Pleaser: I’ve brought these to work parties, family gatherings, and neighborhood cookouts. They disappear every single time.
- Unbelievably Delicious: The brown butter adds a nutty richness that you just don’t get from regular butter. Combined with the sugar cookie flavor, it’s next-level comfort food.
What makes this recipe different from the rest is the technique. By browning the butter directly with the marshmallows, you infuse every single bite with that deep, toasty flavor. It’s not just another version of rice krispie treats—it’s the best version. Trust me, after one bite, you’ll close your eyes and wonder why you haven’t been making them this way all along.
What Ingredients You Will Need
This recipe uses simple, wholesome ingredients to deliver bold flavor and satisfying texture without the fuss. Most of these are pantry staples, so you can whip up a batch whenever the craving strikes.
- Unsalted butter – 6 tablespoons (85 grams). I prefer using unsalted so I can control the salt level. If you only have salted butter, just skip the flaky salt at the end.
- Marshmallows – 1 standard bag (10 ounces or 283 grams). Mini marshmallows melt faster and more evenly, but large ones work too. Just give them a little extra time.
- Rice krispies cereal – 6 cups (180 grams). Make sure they’re fresh and crunchy. Stale cereal will give you soggy treats.
- Sugar cookie mix – 1/2 cup (about 60 grams) of the dry mix from a standard 17.5-ounce box. I recommend Betty Crocker or Pillsbury—they both work great. You don’t need the other ingredients listed on the box, just the dry mix.
- Vanilla extract – 1 teaspoon. Pure vanilla extract adds the best flavor, but imitation works in a pinch.
- Flaky sea salt – Optional, but highly recommended. A little sprinkle on top balances the sweetness and adds a lovely crunch.
For the sugar cookie mix, I’ve tried this with both name-brand and store-brand versions. The name-brand mixes tend to have a stronger vanilla flavor, which really shines here. If you’re using a store brand, you might want to add an extra 1/2 teaspoon of vanilla extract to compensate.
One thing I’ve learned the hard way—don’t skip the flaky salt. I know it sounds fancy and optional, but it genuinely transforms these treats. The salt cuts through the sweetness and makes the brown butter flavor pop. If you don’t have flaky sea salt, you can crush some pretzels and sprinkle those on top instead. It’s not quite the same, but it adds a nice salty crunch.
Equipment Needed
You don’t need a lot of fancy equipment for this recipe, which is part of its charm. Here’s what you’ll need:
- Large pot or Dutch oven – You need something big enough to hold all the marshmallows and cereal. A 5-quart pot works perfectly. I use my trusty Le Creuset, but any heavy-bottomed pot will do.
- Wooden spoon or silicone spatula – For stirring the marshmallows and cereal. A wooden spoon is great because it doesn’t scratch your pot, but a silicone spatula works just as well.
- 9×13-inch baking dish – This is the standard size for rice krispie treats. If you don’t have one, you can use a 9×9-inch dish for thicker treats—just adjust the cooking time slightly.
- Parchment paper – Line your baking dish with parchment paper, leaving some overhang on the sides. This makes it incredibly easy to lift the treats out and cut them cleanly.
- Sharp knife – For cutting the treats. A serrated knife works best for clean cuts without squishing them.
If you don’t have a 9×13-inch dish, you can use a large rimmed baking sheet. The treats will be thinner, but they’ll still taste amazing. Just keep an eye on them as they set—they’ll firm up faster in a thinner layer.
Preparation Method
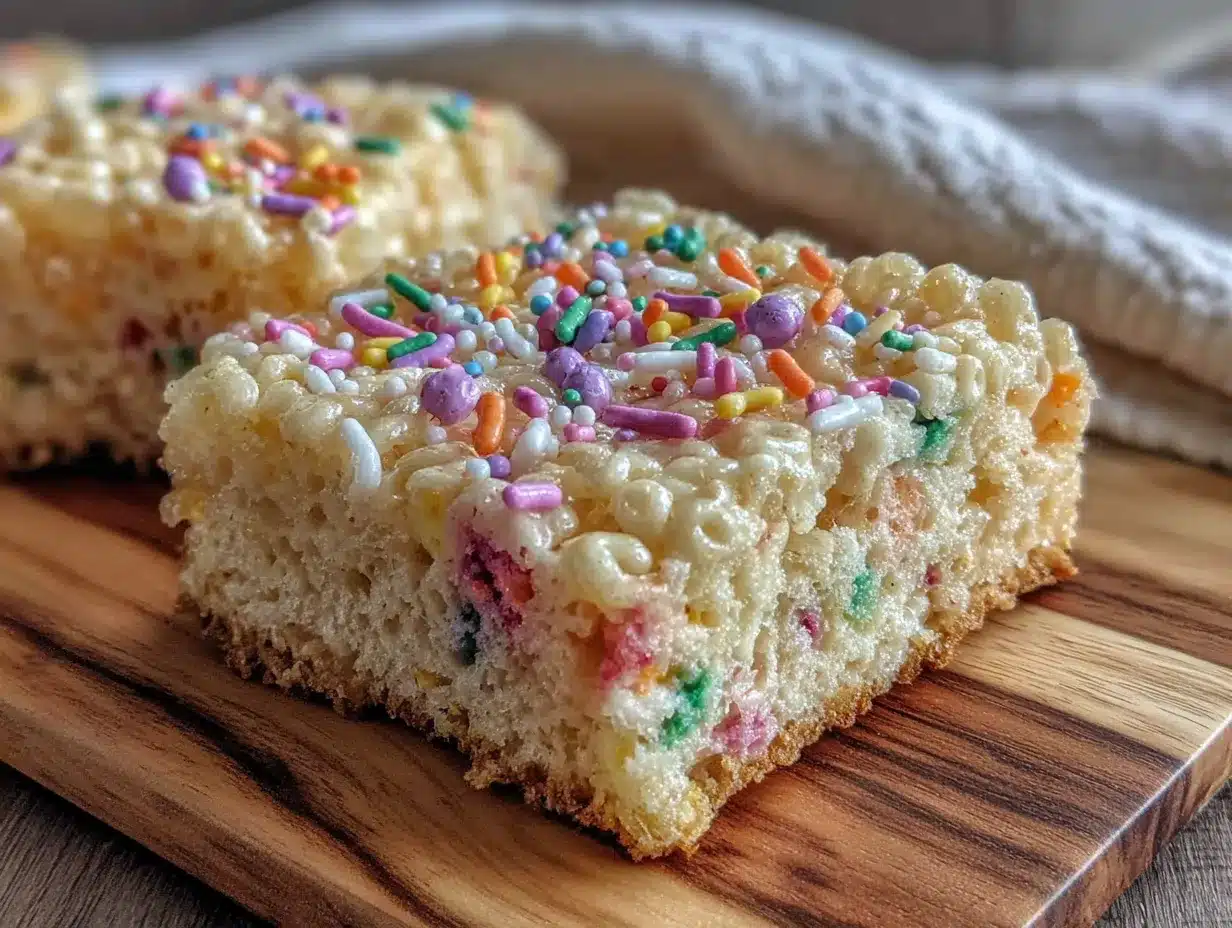
Alright, let’s get cooking. This recipe moves fast, so have all your ingredients measured and ready to go before you start. Trust me, you don’t want to be scrambling for the cereal while your butter is browning.
- Prepare your baking dish. Line a 9×13-inch baking dish with parchment paper, leaving about 2 inches of overhang on two opposite sides. This will act as handles to lift the treats out later. Lightly spray the parchment with nonstick cooking spray to prevent sticking.
- Melt the butter. Place 6 tablespoons of unsalted butter in a large pot or Dutch oven over medium heat. Stir occasionally as it melts. The butter will foam up, then start to turn golden. Keep a close eye on it—brown butter can go from perfect to burnt in seconds. Once you see brown specks forming at the bottom of the pot and smell a nutty aroma, it’s ready. This usually takes about 4-5 minutes.
- Add the marshmallows. Immediately add the entire bag of marshmallows to the pot. Stir constantly with a wooden spoon or silicone spatula until the marshmallows are completely melted and smooth. This should take about 2-3 minutes. The mixture will be very hot, so be careful.
- Mix in the sugar cookie dry mix. Sprinkle 1/2 cup of the sugar cookie mix over the melted marshmallow mixture. Stir until it’s fully incorporated and no dry streaks remain. The mixture will thicken slightly. Add 1 teaspoon of vanilla extract and stir to combine.
- Add the cereal. Remove the pot from the heat. Add 6 cups of rice krispies cereal and stir gently until all the cereal is evenly coated with the marshmallow mixture. Be careful not to crush the cereal—you want those crispy bits intact.
- Press into the pan. Transfer the mixture to your prepared baking dish. Use a spatula or a piece of parchment paper to press it into an even layer. Don’t press too hard, or the treats will be dense and hard. Just gently coax them into place.
- Sprinkle with flaky salt. While the treats are still warm, sprinkle a generous pinch of flaky sea salt over the top. This is optional, but I promise you’ll thank me later.
- Let them set. Allow the treats to cool at room temperature for at least 30 minutes before cutting. If you’re in a hurry, you can pop them in the fridge for 15 minutes. Once set, use the parchment paper handles to lift the block out of the pan and transfer to a cutting board. Use a sharp knife to cut into squares or rectangles.
One thing I’ve learned the hard way—don’t let the marshmallow mixture sit too long before adding the cereal. It starts to stiffen up, making it harder to mix evenly. Work quickly but gently, and you’ll get perfect treats every time.
Cooking Tips & Techniques
Let me share some of the lessons I’ve learned from making these treats more times than I can count. First off, browning butter can be intimidating, but it’s actually pretty simple once you know what to look for. The key is to keep stirring and watch for those brown specks. If you see them, you’re there. If you smell a nutty aroma, you’re there. If you see smoke, you’ve gone too far—start over.
Another common mistake is pressing the mixture too firmly into the pan. I know it’s tempting to really pack it down, but that’s what makes rice krispie treats hard and chewy in a bad way. Use a light hand and just gently smooth the top. The treats will hold together perfectly without being tough.
I once made a batch where I forgot to add the sugar cookie mix until after the cereal was already in. Let me tell you, that was a mess. The dry mix didn’t incorporate evenly, and some bites were super sweet while others were just plain. So trust me on this—add the mix while the marshmallows are still hot and liquidy.
For timing, I like to get the butter melting while I measure out the cereal and line the pan. That way, everything is ready to go when the butter is browned. Multitasking is your friend here, but don’t walk away from the butter. It needs your full attention for those last few minutes.
Variations & Adaptations
One of the best things about this recipe is how easy it is to customize. Here are a few variations I’ve tried and loved:
- Chocolate Chip Version: After pressing the treats into the pan, sprinkle 1/2 cup of mini chocolate chips over the top. Press them in gently with a spatula. The chocolate melts slightly from the warmth and creates these amazing pockets of gooey goodness.
- Peanut Butter Twist: Stir 1/4 cup of creamy peanut butter into the marshmallow mixture along with the sugar cookie mix. It adds a rich, nutty flavor that pairs beautifully with the brown butter.
- Holiday Sprinkle Treats: Fold in 1/4 cup of festive sprinkles right before pressing the mixture into the pan. These are perfect for birthday parties, holidays, or any occasion that calls for a little extra cheer.
- Gluten-Free Option: Use a gluten-free sugar cookie mix and certified gluten-free rice krispies. The texture will be slightly different, but the flavor is just as amazing.
- Vegan Adaptation: Substitute the butter with vegan butter (I like Miyoko’s), use vegan marshmallows (Dandies are my favorite), and check that your sugar cookie mix is vegan-friendly. The flavor won’t be exactly the same, but it’s still delicious.
I once tried a version with crushed Oreos folded in, and it was incredible. Just crush about 10 Oreos into chunks and stir them in with the cereal. It adds a chocolatey crunch that takes these treats over the top.
Serving & Storage Suggestions
These treats are best served at room temperature, right after they’ve set. That first bite, when the marshmallow is still slightly soft and the cereal is perfectly crunchy—that’s the sweet spot. If you’re serving them at a party, I recommend cutting them into squares and arranging them on a platter. A light dusting of powdered sugar or a drizzle of melted white chocolate makes them look extra special.
For storage, place the treats in an airtight container at room temperature. They’ll stay fresh for up to 3 days. If you stack them, put a piece of parchment paper between layers to prevent sticking. Do not refrigerate them—the cold air makes the marshmallows hard and ruins the texture.
You can also freeze these treats for up to 2 months. Wrap each square individually in plastic wrap, then place them in a freezer-safe bag. When you’re ready to enjoy one, let it thaw at room temperature for about 30 minutes. The texture won’t be quite as perfect as fresh, but it’s still pretty darn good.
One thing I love about these treats is that the flavor actually improves after a day. The brown butter flavor deepens and melds with the sugar cookie mix, making them even more delicious on day two. That is, if they last that long.
Nutritional Information & Benefits
Let’s be real—these are a treat, not a health food. But here’s the estimated nutritional breakdown per serving (assuming 12 servings):
- Calories: Approximately 280
- Fat: 12 grams
- Carbohydrates: 42 grams
- Protein: 2 grams
- Sugar: 24 grams
That said, there are a few redeeming qualities. The brown butter adds a depth of flavor that means you’re satisfied with just one serving—no need to go back for seconds and thirds. And if you use the flaky salt, you’re getting a little bit of sodium to balance out the sweetness.
For dietary considerations, this recipe is not gluten-free unless you use certified gluten-free ingredients. It also contains dairy from the butter. If you’re watching your sugar intake, you could try reducing the sugar cookie mix by a couple of tablespoons, but honestly, it’s a treat. Sometimes you just need to enjoy something sweet without overthinking it.
Conclusion
These Quick Brown Butter Sugar Cookie Rice Krispie Treats are proof that sometimes the best recipes come from being willing to try something new—even when you’re sure it won’t work. They’re fast, easy, and absolutely delicious. The brown butter adds a nutty richness that transforms a childhood classic into something truly special.
I hope you give this recipe a try and make it your own. Maybe you’ll add chocolate chips, or peanut butter, or even a drizzle of caramel. Whatever you do, don’t forget the flaky salt. And if you come up with a variation you love, I’d love to hear about it. Drop a comment below or tag me in your photos—I’m always looking for new ideas.
Happy cooking, and here’s to being delightfully wrong every once in a while.
Frequently Asked Questions
Can I use salted butter instead of unsalted?
Yes, you can. Just skip the flaky salt on top, or use a lighter hand. The treats will still be delicious, but they might be a touch saltier.
How do I know when the butter is properly browned?
Look for brown specks forming at the bottom of the pot and listen for a nutty aroma. The butter will also turn a golden-brown color. It happens fast, so don’t walk away.
Can I make these treats ahead of time?
Absolutely. They stay fresh in an airtight container at room temperature for up to 3 days. You can also freeze them for up to 2 months.
Why are my rice krispie treats hard?
You probably pressed the mixture too firmly into the pan. Use a gentle hand and just smooth the top. Over-pressing compresses the cereal and makes the treats dense and hard.
Can I use a different cereal?
Yes, you can experiment with other crispy rice cereals or even puffed rice. Just keep in mind that different cereals have different textures, so the results may vary. I’ve tried it with cocoa rice cereal, and it was amazing.
Pin This Recipe!
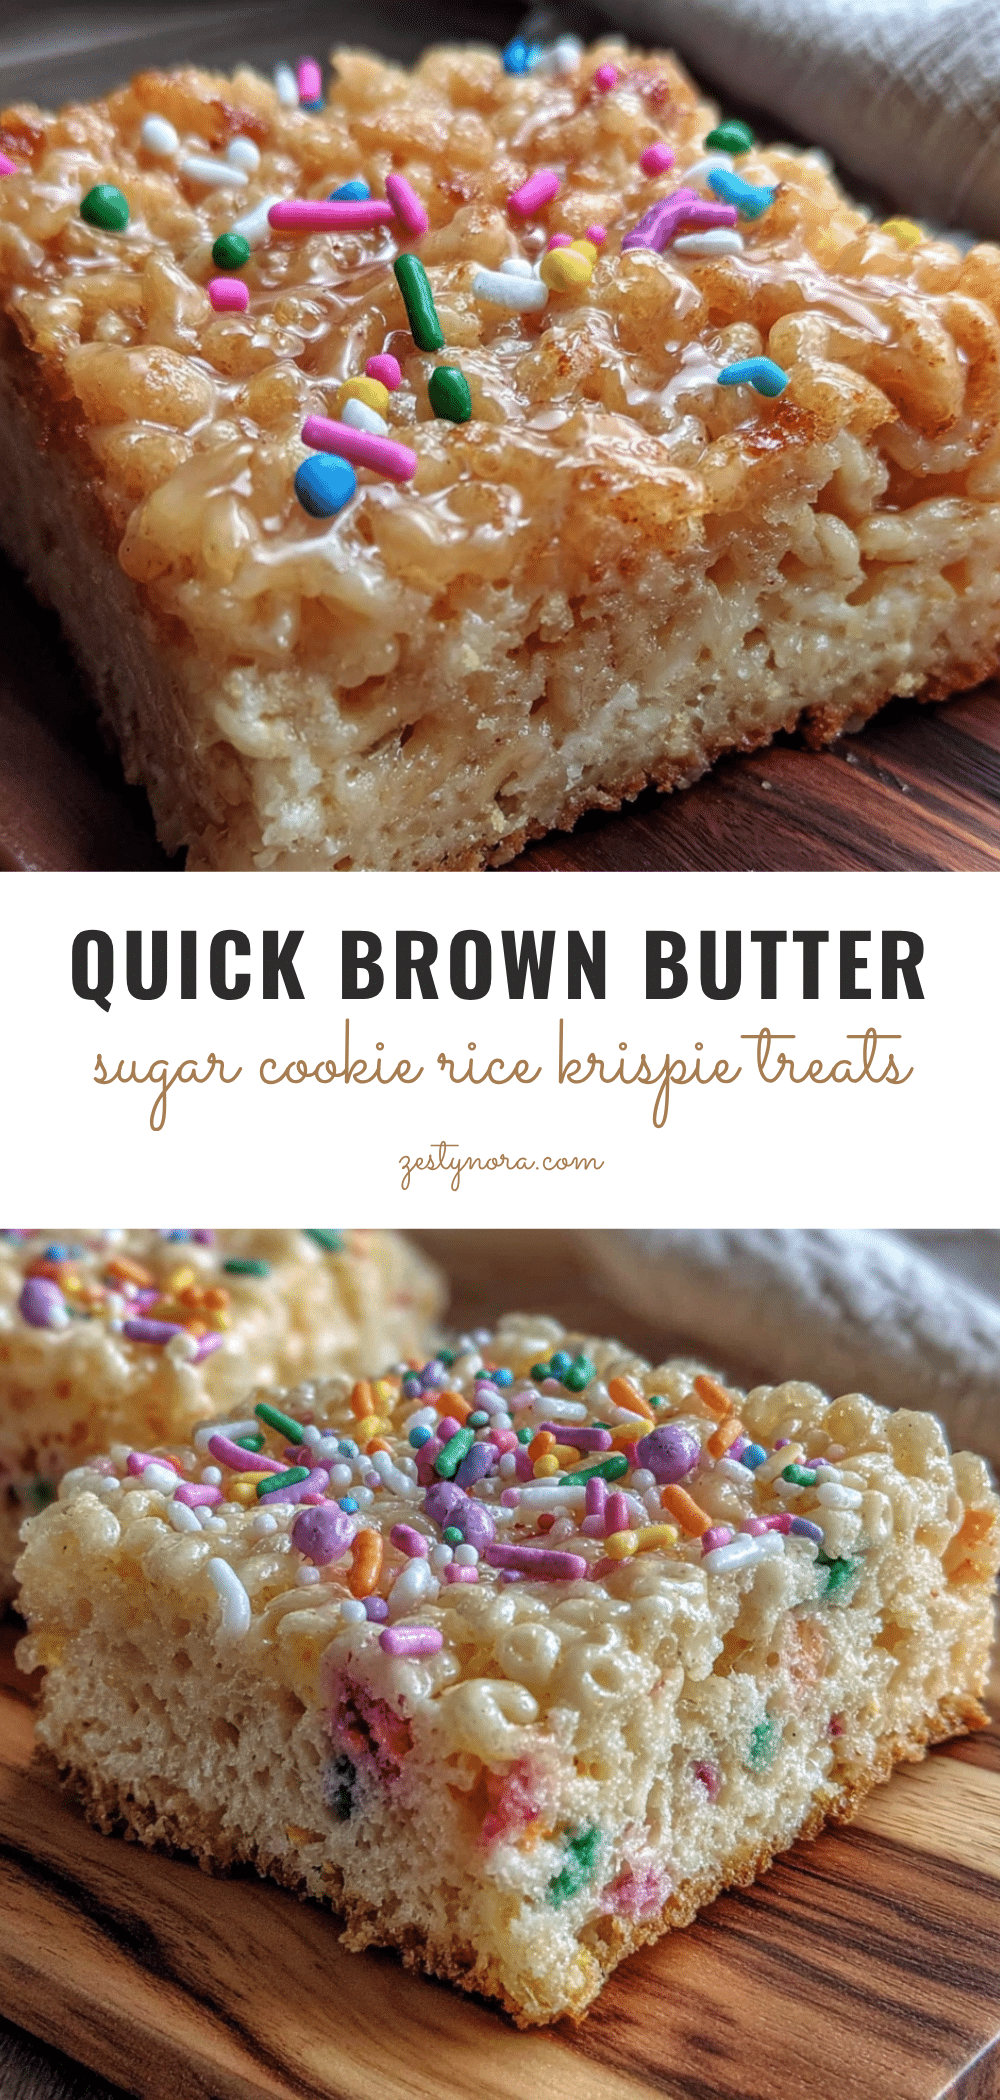
Best Quick Brown Butter Sugar Cookie Rice Krispie Treats
These quick and easy rice krispie treats are elevated with nutty brown butter and sugar cookie mix, creating a deliciously rich and crispy dessert that comes together in about 15 minutes.
- Prep Time: 15 minutes
- Cook Time: 5 minutes
- Total Time: 20 minutes
- Yield: 12 servings 1x
- Category: Dessert
- Cuisine: American
Ingredients
- 6 tablespoons (85 grams) unsalted butter
- 1 standard bag (10 ounces or 283 grams) marshmallows (mini preferred)
- 6 cups (180 grams) rice krispies cereal
- 1/2 cup (about 60 grams) dry sugar cookie mix (from a 17.5-ounce box, e.g., Betty Crocker or Pillsbury)
- 1 teaspoon vanilla extract
- Flaky sea salt (optional, for topping)
Instructions
- Line a 9×13-inch baking dish with parchment paper, leaving about 2 inches of overhang on two opposite sides. Lightly spray the parchment with nonstick cooking spray.
- Place 6 tablespoons of unsalted butter in a large pot or Dutch oven over medium heat. Stir occasionally as it melts. The butter will foam, then turn golden. Once brown specks form at the bottom and a nutty aroma is present (about 4-5 minutes), it’s ready.
- Immediately add the entire bag of marshmallows to the pot. Stir constantly until completely melted and smooth (about 2-3 minutes).
- Sprinkle 1/2 cup of sugar cookie dry mix over the melted marshmallow mixture. Stir until fully incorporated and no dry streaks remain. Add 1 teaspoon of vanilla extract and stir to combine.
- Remove the pot from the heat. Add 6 cups of rice krispies cereal and stir gently until all cereal is evenly coated. Be careful not to crush the cereal.
- Transfer the mixture to the prepared baking dish. Use a spatula or piece of parchment paper to gently press it into an even layer. Do not press too hard.
- While still warm, sprinkle a generous pinch of flaky sea salt over the top (optional).
- Let the treats cool at room temperature for at least 30 minutes (or 15 minutes in the fridge) before cutting. Use the parchment handles to lift the block out, then cut into squares or rectangles with a sharp knife.
Notes
For best results, have all ingredients measured and ready before starting. Do not let the marshmallow mixture sit too long before adding the cereal. Use a light hand when pressing the mixture into the pan to avoid dense treats. The flaky salt is highly recommended to balance sweetness and enhance the brown butter flavor. Treats can be stored in an airtight container at room temperature for up to 3 days, or frozen for up to 2 months.
Nutrition
- Serving Size: 1 square
- Calories: 280
- Sugar: 24
- Sodium: 180
- Fat: 12
- Saturated Fat: 7
- Carbohydrates: 42
- Protein: 2
Keywords: brown butter, sugar cookie, rice krispie treats, quick dessert, easy dessert, no-bake, marshmallow treats