The woman at the next stall watched me hover over her cookie display for a good three minutes before she finally spoke. “You keep picking them up and putting them back,” she said, not unkindly. I was at the holiday market downtown, the one that pops up every December in the old train station, and her table was piled high with all sorts of baked goods. But my eyes kept landing on the same ones—little round cookies with a chocolate kiss pressed right into the center. She laughed and handed me one on a napkin. “Just take it. You’re making me nervous.”
That cookie changed everything. I mean, I’d had peanut butter blossoms before—who hasn’t?—but this one was different. The cookie part was pillowy soft, almost tender, and the chocolate kiss on top wasn’t just decoration. It was the whole point. I asked her what her secret was, and she shrugged, saying something about not overworking the dough and using real butter, not margarine. She didn’t give me a recipe, just a few pointers and a knowing smile. I went home and spent the next two weeks trying to recreate that exact texture. Let me tell you, there were some crumbly disasters along the way. But eventually, I cracked it.
This soft peanut butter blossom cookies recipe is the result of all those trials. It’s the kind of cookie that makes you close your eyes after the first bite—you know that feeling when something tastes exactly like it should? That’s this. The peanut butter flavor is rich but not overwhelming, the cookie stays soft for days (if they last that long), and that chocolate kiss on top? It melts just slightly in the warmth of the dough, creating this perfect little puddle of chocolate. Honestly, I make these for every holiday gathering now, and they disappear faster than anything else on the table. It’s the recipe that woman at the market probably makes without even thinking, and now it’s the one I can’t stop making either.
Why You’ll Love This Recipe
Let’s be real for a second. There are about a million peanut butter cookie recipes out there. Some are crispy, some are cakey, and some are just… meh. But these soft peanut butter blossom cookies? They’re in a league of their own. Here is why this version stands out from the crowd:
- Incredibly Soft Texture: The secret is in the ratio of butter to peanut butter and a little trick with the sugar. These cookies stay tender and melt-in-your-mouth soft, even the next day. No dry, crumbly cookies here.
- Simple Pantry Ingredients: You probably have everything you need already. Butter, sugar, peanut butter, an egg, flour, baking soda, and vanilla. That’s it. No fancy extracts or hard-to-find items.
- Perfect for Holiday Baking: These are the star of any cookie swap, Christmas platter, or Valentine’s Day treat. The chocolate kiss on top makes them look festive without any fancy decorating skills.
- Crowd-Pleasing Favorite: Kids love them, adults love them, and even people who say they’re “not big on sweets” will grab two. They’re just that good.
- Foolproof for Beginners: If you’re new to baking, this is a great recipe to start with. The dough is forgiving, the steps are straightforward, and the results are consistently impressive.
What makes this recipe different from all the others? It’s the texture. Most peanut butter blossom cookies turn out a bit dense or dry. I tested this version over and over until I got that soft, almost cloud-like crumb. The trick is using a combination of granulated and brown sugar—the brown sugar adds moisture and a hint of molasses flavor that pairs beautifully with the peanut butter. Plus, I chill the dough just enough to make it easy to handle without making it rock hard. It’s a small tweak, but it makes all the difference.
This isn’t just another cookie recipe. It’s the one you’ll come back to year after year. It’s comfort food reimagined—familiar but somehow better than you remember. Perfect for impressing guests without any stress, or turning an ordinary Tuesday into something a little more special.
What Ingredients You Will Need
This recipe uses simple, wholesome ingredients to deliver that signature soft texture and rich peanut butter flavor. Most of these are pantry staples, which makes these cookies perfect for spontaneous baking cravings.
For the Cookie Dough
- 1/2 cup (113g) unsalted butter, softened – I prefer using unsalted butter so I can control the salt level. Let it sit at room temperature for about 30 minutes before starting.
- 1/2 cup (100g) granulated sugar – This adds sweetness and helps with spreading. I’ve tried using organic cane sugar and it works fine too.
- 1/2 cup (100g) packed light brown sugar – This is the secret to soft cookies. The molasses in brown sugar keeps them tender. I recommend Domino or C&H brand for consistent results.
- 1/2 cup (130g) creamy peanut butter – Use a standard brand like Jif or Skippy for the best texture. Natural peanut butter that separates can make the cookies greasy and crumbly. If you want to use natural, make sure it’s well-stirred and not too oily.
- 1 large egg, room temperature – A room-temperature egg blends more evenly into the dough. If you’re in a hurry, place the egg in a bowl of warm water for 5 minutes.
- 1 teaspoon vanilla extract – Pure vanilla extract gives the best flavor, but imitation vanilla works in a pinch.
- 1 1/2 cups (190g) all-purpose flour – Spoon and level your flour for accurate measuring. Scooping directly from the bag can pack in too much flour and make cookies dry.
- 1 teaspoon baking soda – This helps the cookies spread and become tender. Make sure it’s fresh—test it by dropping a little in vinegar; it should fizz.
- 1/2 teaspoon salt – If you use salted butter, reduce this to 1/4 teaspoon.
For the Topping
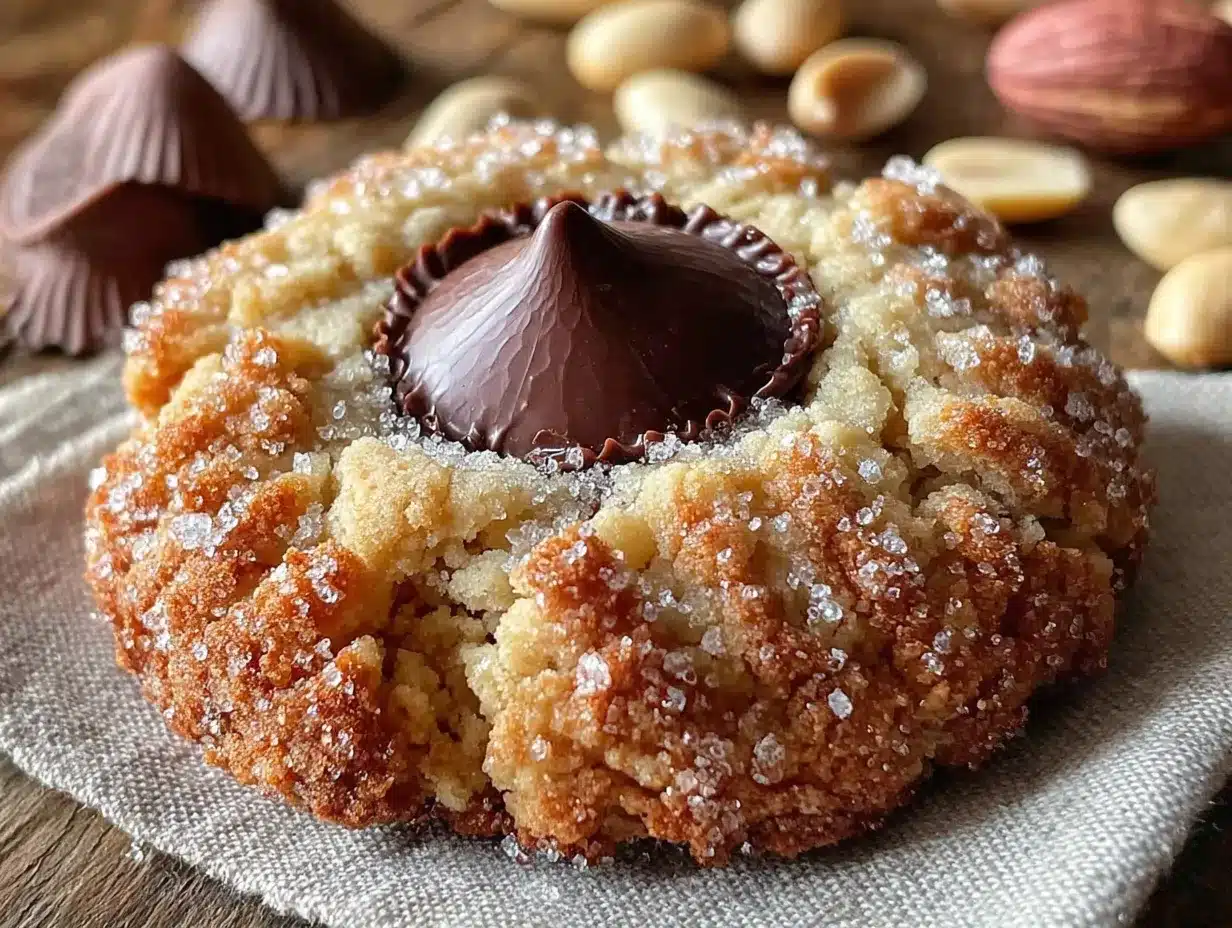
- About 36 chocolate kiss candies, unwrapped – Hershey’s Kisses are the classic choice. You can use milk chocolate, dark chocolate, or even white chocolate kisses. For a fun twist, try the candy cane flavored ones during the holidays.
- Extra granulated sugar for rolling – About 1/4 cup. This gives the cookies that signature crackly, sugary exterior.
Ingredient Selection Tips: For the best results, use a peanut butter that has some sugar and stabilizers. The natural ones tend to separate and can cause the cookies to spread too much. I’ve tested this with both, and the standard creamy peanut butter wins every time. If you’re looking for a lower sugar option, you can reduce the granulated sugar by 2 tablespoons, but the cookies won’t be quite as soft.
Equipment Needed
You don’t need any fancy gadgets for these soft peanut butter blossom cookies. Here’s what you’ll need:
- Electric mixer – A stand mixer with a paddle attachment or a hand mixer works great. You can mix by hand with a wooden spoon, but it takes some elbow grease to get the peanut butter fully incorporated.
- Large mixing bowl – Any medium-to-large bowl will do. I use a glass bowl because it’s easy to see when everything is combined.
- Measuring cups and spoons – Accurate measurements matter in baking. Use dry measuring cups for flour and sugar, and liquid measuring cups for vanilla.
- Baking sheets – Two standard half-sheet pans work well. If you only have one, let it cool completely between batches to prevent the cookies from spreading too much.
- Parchment paper or silicone baking mats – These prevent sticking and make cleanup a breeze. I prefer parchment paper because it’s disposable and gives a slightly crisper bottom.
- Cooling rack – A wire rack allows air to circulate around the cookies so they cool evenly. If you don’t have one, you can transfer them to a plate, but they might get a bit soggy on the bottom.
- Small bowl for sugar – For rolling the dough balls. A shallow bowl or plate works fine.
Budget-Friendly Tip: If you don’t have an electric mixer, you can cream the butter and sugars by hand. It takes about 5 minutes of vigorous stirring, but it’s totally doable. Just make sure your butter is really soft to start.
Preparation Method
Follow these steps carefully, and you’ll have the softest, most delicious peanut butter blossom cookies you’ve ever tasted. The key is not to rush—especially when it comes to chilling the dough.
- Preheat your oven to 350°F (175°C). Position the racks in the upper and lower thirds of the oven. Line two baking sheets with parchment paper or silicone mats.
- Cream the butter and sugars. In a large mixing bowl, beat the softened butter, granulated sugar, and brown sugar together on medium speed until light and fluffy, about 2-3 minutes. Scrape down the sides of the bowl halfway through. The mixture should look pale and slightly increased in volume.
- Add the peanut butter. Beat in the creamy peanut butter until fully combined, about 1 minute. The mixture will look smooth and cohesive at this point.
- Add the egg and vanilla. Crack the egg into the bowl and add the vanilla extract. Beat on low speed until just combined. Don’t overmix here—you don’t want to incorporate too much air.
- Mix the dry ingredients separately. In a small bowl, whisk together the flour, baking soda, and salt. This ensures the baking soda is evenly distributed throughout the flour.
- Combine wet and dry ingredients. Gradually add the flour mixture to the wet ingredients, mixing on low speed. Stop as soon as the flour disappears. A few streaks of flour are fine—you’ll finish incorporating them by hand. Overmixing at this stage develops gluten and makes cookies tough.
- Chill the dough. This is the most important step. Cover the bowl with plastic wrap and refrigerate for at least 1 hour. Chilling prevents the cookies from spreading too much and helps them stay thick and soft. I’ve skipped this step before and ended up with flat, sad cookies. Trust me on this one.
- Shape the cookies. Once the dough is chilled, use a cookie scoop or your hands to form 1-inch balls (about 1 tablespoon of dough each). Roll each ball between your palms until smooth.
- Roll in sugar. Place the extra granulated sugar in a small bowl. Roll each dough ball in the sugar until completely coated. This creates that beautiful crackly exterior.
- Place on baking sheets. Arrange the sugar-coated dough balls on the prepared baking sheets, spacing them about 2 inches apart. They will spread slightly during baking.
- Bake. Bake for 10-12 minutes, or until the cookies are set around the edges but still soft and slightly puffy in the center. They will look underdone in the middle—that’s exactly what you want. For softer cookies, bake for 10 minutes. For slightly firmer cookies, go to 12 minutes.
- Add the chocolate kisses immediately. As soon as the cookies come out of the oven, gently press a chocolate kiss into the center of each one. Do this while the cookies are still hot—the warmth will soften the chocolate just enough to create that perfect seal. Don’t push too hard or the cookie might crack.
- Cool on the baking sheet. Let the cookies rest on the baking sheet for 5 minutes. This allows them to set up without breaking. Then transfer them to a wire rack to cool completely.
- Repeat with remaining dough. If you’re using the same baking sheet, let it cool completely before placing the next batch. A hot pan will cause the dough to spread too much.
Sensory Cues: When the cookies are done, the edges should be lightly golden and the centers should look puffy and slightly cracked. The kitchen will smell like warm peanut butter and vanilla—heavenly. When you press the kiss in, you should feel a slight resistance as the chocolate softens but doesn’t completely melt.
Cooking Tips & Techniques
After making these soft peanut butter blossom cookies more times than I can count, I’ve learned a few things the hard way. Here are my best tips to ensure success every time:
Don’t skip the chilling step. I know it’s tempting to skip it when you’re craving cookies, but trust me—chilled dough is the difference between a thick, soft cookie and a flat, greasy one. If you’re in a rush, you can pop the dough in the freezer for 20 minutes instead of the fridge for an hour. It works in a pinch.
Use a cookie scoop for uniform size. This ensures all your cookies bake evenly. I use a #60 scoop, which holds about 1 tablespoon of dough. If you don’t have one, just eyeball it—but try to make them all roughly the same size.
Press the kisses in while the cookies are hot. This is non-negotiable. If you wait too long, the cookies will cool and the chocolate won’t stick. I unwrap all the kisses while the cookies are baking so I’m ready to go the second they come out of the oven. It’s a small prep step that saves a lot of scrambling.
Don’t overbake. This is the most common mistake people make. Peanut butter cookies continue to bake on the hot pan even after you take them out of the oven. If they look perfectly done in the oven, they’ll be overdone by the time they cool. Pull them out when the centers still look soft and slightly underdone.
Let the cookies cool on the pan. I made the mistake of transferring them too early once, and the chocolate kisses slid right off. Give them those 5 minutes on the baking sheet—it’s worth it.
Room temperature ingredients matter. Cold butter doesn’t cream properly, and a cold egg can seize the dough. Let everything sit out for about 30 minutes before you start. It makes a noticeable difference in the texture.
One more thing: If your cookies spread too much, your butter was probably too soft or your dough wasn’t chilled enough. Next time, try chilling the shaped dough balls on the baking sheet for 10 minutes before baking. It’s a simple fix that works wonders.
Variations & Adaptations
One of the best things about this soft peanut butter blossom cookies recipe is how versatile it is. Here are some variations I’ve tried and loved:
Chocolate Variations
Instead of milk chocolate kisses, try dark chocolate kisses for a richer flavor. The slight bitterness of dark chocolate balances the sweetness of the cookie perfectly. During the holidays, I love using the candy cane kisses—they add a nice minty crunch. White chocolate kisses work well too, especially if you’re making these for a birthday party.
Peanut Butter Swaps
If you’re a fan of chunky peanut butter, go ahead and use it. The texture will be a little different, but the flavor is still amazing. Just note that chunky peanut butter can make the cookies slightly more crumbly. For a nut-free version, use sunflower seed butter or WowButter. The cookies will be a bit darker in color, but they taste great.
Dietary Adaptations
To make these gluten-free, substitute the all-purpose flour with a 1:1 gluten-free baking flour blend. I’ve had good luck with Bob’s Red Mill and King Arthur brands. For a lower sugar option, you can reduce the granulated sugar to 1/3 cup and the brown sugar to 1/3 cup. The cookies won’t be as sweet, but they’ll still be soft and delicious.
Flavor Twists
Add 1/2 teaspoon of cinnamon to the flour mixture for a warm, spiced flavor. Or stir in 1/2 cup of mini chocolate chips along with the flour for double chocolate goodness. I once made a batch with a pinch of cayenne pepper in the dough—sounds weird, but the heat pairs beautifully with the chocolate.
Serving & Storage Suggestions
These soft peanut butter blossom cookies are best served at room temperature. The chocolate kiss should be firm but not hard, and the cookie should yield slightly when you bite into it. Here’s how to serve and store them:
Serving Temperature: Let the cookies cool completely on a wire rack before serving. If you serve them too warm, the chocolate will smear everywhere. Room temperature is perfect—the cookie is soft and the chocolate is set but still creamy.
Presentation Ideas: Arrange them on a festive platter for holiday parties. A dusting of powdered sugar over the top adds a nice snowy effect. For a cookie exchange, stack them in a decorative tin with parchment paper between layers. They look beautiful on a three-tiered stand alongside other holiday treats.
Storage Instructions: Store the cookies in an airtight container at room temperature for up to 5 days. Place a piece of bread in the container to keep them extra soft—the cookies will absorb the moisture from the bread. Change the bread every other day. Do not refrigerate them, as the cold air will dry them out.
Freezing Instructions: These cookies freeze beautifully. Place the cooled cookies in a single layer on a baking sheet and freeze for 1 hour. Then transfer them to a freezer-safe bag or container. They’ll keep for up to 3 months. To thaw, let them sit at room temperature for about 30 minutes. You can also freeze the unbaked dough balls—just roll them in sugar, place them on a baking sheet, freeze until solid, then transfer to a bag. Bake from frozen, adding 2-3 minutes to the baking time.
How Flavors Develop: Honestly, these cookies taste even better the next day. The peanut butter flavor deepens, and the cookie becomes even softer. If you can resist eating them all on day one, you’re in for a treat on day two.
Nutritional Information & Benefits
While these are definitely a treat, they’re not as indulgent as you might think. Here’s the estimated nutritional breakdown per cookie (based on 36 cookies):
- Calories: 145
- Total Fat: 8g
- Saturated Fat: 4g
- Cholesterol: 15mg
- Sodium: 95mg
- Total Carbohydrates: 17g
- Sugars: 11g
- Protein: 3g
Health Benefits of Key Ingredients: Peanut butter provides protein and healthy fats that help keep you full. It also contains vitamin E, magnesium, and potassium. The brown sugar adds a small amount of molasses, which contains iron and calcium. While these aren’t health food, they’re a more balanced treat than many store-bought cookies.
Dietary Considerations: This recipe contains peanuts, gluten, dairy, and eggs. For a nut-free version, use sunflower seed butter. For a dairy-free version, use vegan butter and ensure your chocolate kisses are dairy-free (many dark chocolate varieties are).
Personal Wellness Perspective: I believe in enjoying treats in moderation. These cookies are perfect for special occasions or when you need a little comfort. One cookie satisfies that sweet craving without going overboard. Pair it with a glass of milk or a cup of coffee, and you’ve got a perfect little moment of joy.
Conclusion
These soft peanut butter blossom cookies are more than just a recipe—they’re a little piece of baking magic. The combination of tender, peanut buttery cookie and that perfect chocolate kiss on top is simply irresistible. Whether you’re making them for a holiday cookie exchange, a birthday party, or just because it’s Tuesday, they never disappoint.
I’ve made these cookies for countless gatherings, and they always get the same reaction: a surprised “wow” followed by a reach for a second one. That woman at the holiday market probably has no idea that her offhand advice led to this, but I’m grateful she shared that moment with me. It’s a reminder that the best recipes often come from the most unexpected places.
Now it’s your turn. Give this recipe a try, and don’t be afraid to make it your own. Swap in your favorite chocolate, add a pinch of cinnamon, or double the batch because trust me, one batch won’t be enough. I’d love to hear how they turn out—leave a comment below and let me know your favorite variation. Happy baking!
Frequently Asked Questions
Can I use natural peanut butter in this recipe?
You can, but the texture will be different. Natural peanut butter that separates can make the cookies greasier and more prone to spreading. If you use it, make sure to stir it very well before measuring. For the best results, stick with a standard creamy peanut butter like Jif or Skippy.
Why did my cookies spread too much?
This usually happens for one of three reasons: the butter was too soft, the dough wasn’t chilled long enough, or too much sugar was used. Make sure your butter is softened but not melted, and chill the dough for at least 1 hour. Also, measure your flour accurately by spooning and leveling it.
Can I make the dough ahead of time?
Absolutely. You can refrigerate the dough for up to 3 days. Just wrap it tightly in plastic wrap so it doesn’t dry out. You can also freeze the shaped dough balls for up to 3 months. Bake from frozen, adding 2-3 minutes to the baking time.
How do I keep the chocolate kisses from falling off?
Press the kisses into the cookies while they’re still hot from the oven. The warmth of the cookie softens the chocolate just enough to create a seal. Let the cookies cool on the baking sheet for 5 minutes before moving them. If you transfer them too early, the chocolate can slide off.
Can I use a different type of chocolate?
Yes! Hershey’s Kisses come in many varieties—dark chocolate, white chocolate, caramel-filled, and even seasonal flavors like candy cane or pumpkin spice. You can also use chocolate stars or even a small chocolate square. Just make sure the chocolate is similar in size so it fits nicely in the center of the cookie.
Pin This Recipe!
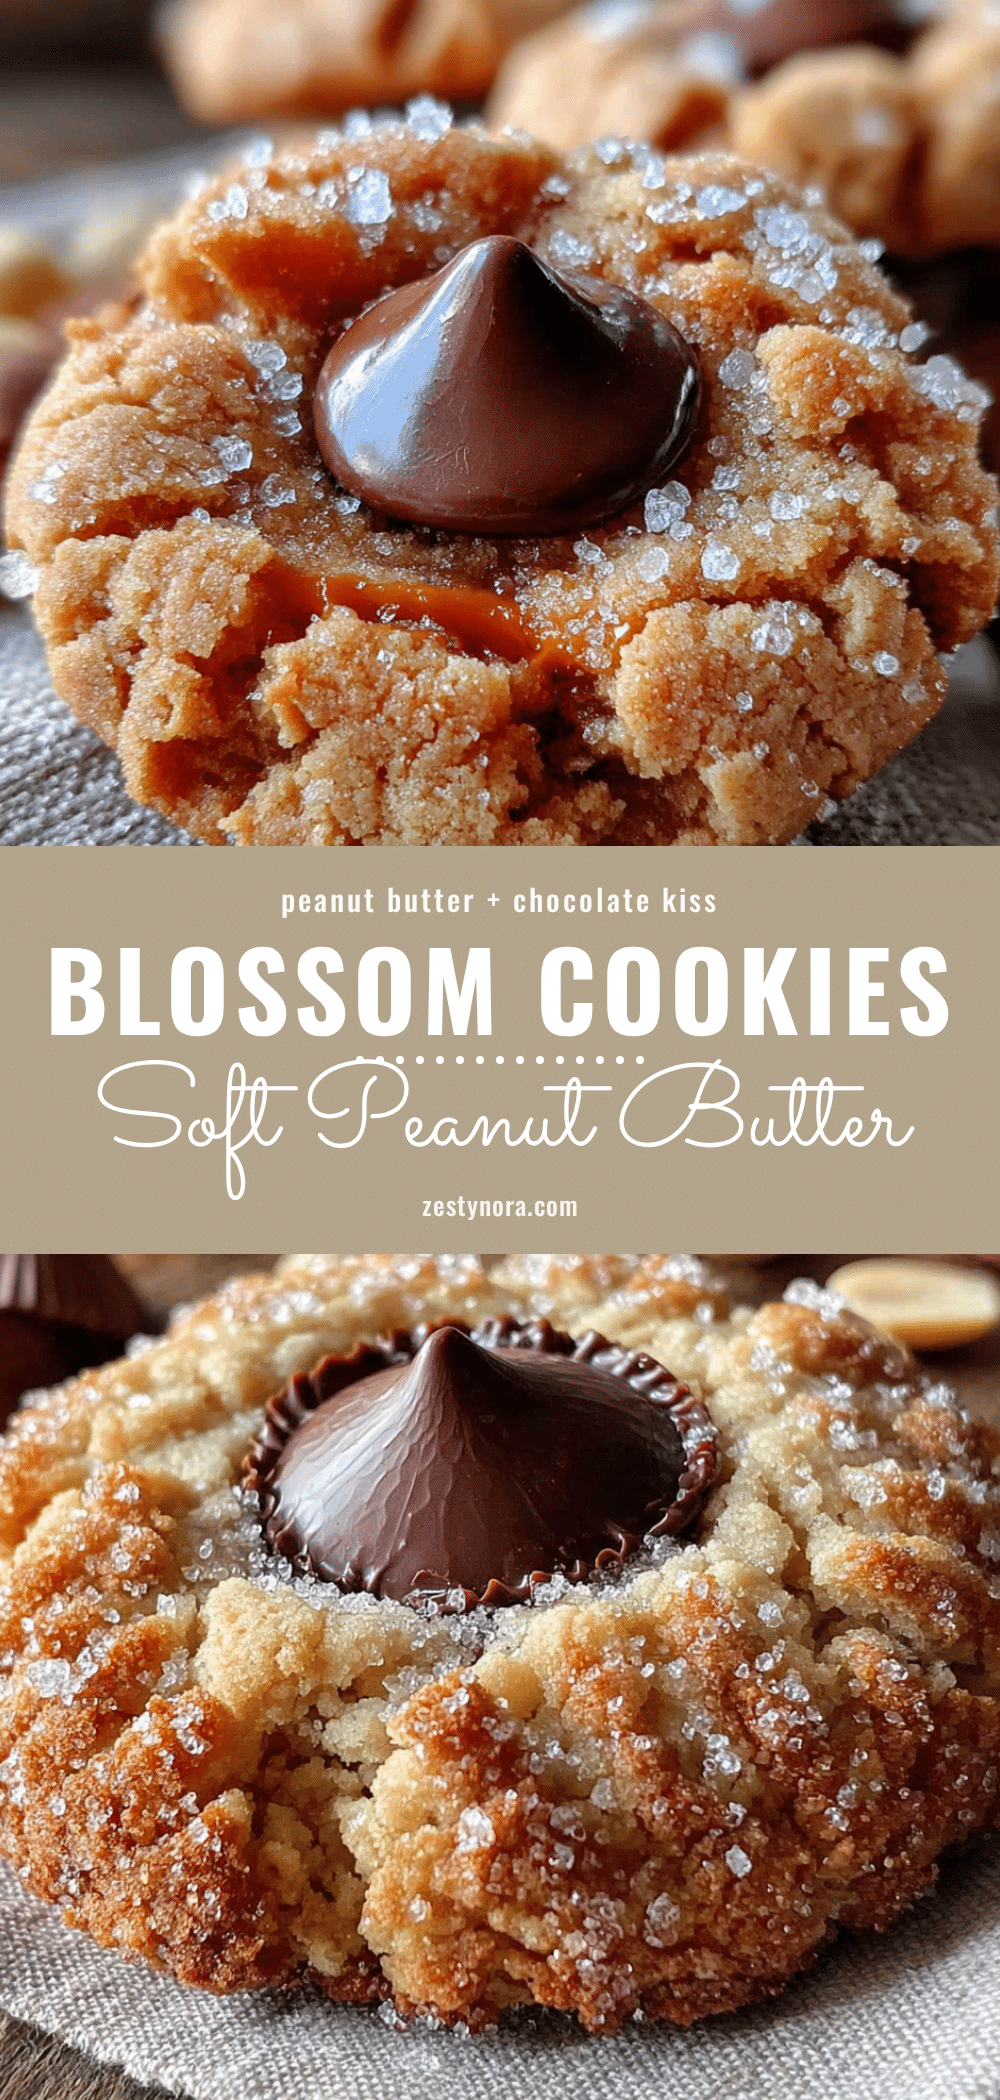
Soft Peanut Butter Blossom Cookies: The Best Easy Cookie Recipe

These soft peanut butter blossom cookies are pillowy, tender, and topped with a chocolate kiss that melts perfectly into the center. A foolproof recipe for holiday baking or any occasion.
- Prep Time: 15 minutes
- Cook Time: 10 minutes
- Total Time: 1 hour 25 minutes
- Yield: 36 cookies 1x
- Category: Dessert
- Cuisine: American
Ingredients
- 1/2 cup (113g) unsalted butter, softened
- 1/2 cup (100g) granulated sugar
- 1/2 cup (100g) packed light brown sugar
- 1/2 cup (130g) creamy peanut butter (e.g., Jif or Skippy)
- 1 large egg, room temperature
- 1 teaspoon vanilla extract
- 1 1/2 cups (190g) all-purpose flour
- 1 teaspoon baking soda
- 1/2 teaspoon salt
- About 36 chocolate kiss candies, unwrapped
- Extra granulated sugar for rolling (about 1/4 cup)
Instructions
- Preheat your oven to 350°F (175°C). Position racks in the upper and lower thirds of the oven. Line two baking sheets with parchment paper or silicone mats.
- In a large mixing bowl, beat the softened butter, granulated sugar, and brown sugar together on medium speed until light and fluffy, about 2-3 minutes. Scrape down the sides halfway through.
- Beat in the creamy peanut butter until fully combined, about 1 minute.
- Add the egg and vanilla extract. Beat on low speed until just combined.
- In a small bowl, whisk together the flour, baking soda, and salt.
- Gradually add the flour mixture to the wet ingredients, mixing on low speed until just combined. Do not overmix.
- Cover the bowl with plastic wrap and refrigerate for at least 1 hour.
- Once chilled, form 1-inch balls (about 1 tablespoon each) and roll them smooth.
- Roll each dough ball in extra granulated sugar until completely coated.
- Place the sugar-coated dough balls on the prepared baking sheets, spacing them about 2 inches apart.
- Bake for 10-12 minutes, until edges are set but centers are still soft and puffy.
- Immediately after removing from the oven, gently press a chocolate kiss into the center of each cookie.
- Let the cookies rest on the baking sheet for 5 minutes, then transfer to a wire rack to cool completely.
- Repeat with remaining dough, letting the baking sheet cool completely between batches.
Notes
Chill the dough for at least 1 hour to prevent spreading. Press kisses in while cookies are hot. For softer cookies, bake 10 minutes; for firmer, 12 minutes. Store in an airtight container at room temperature for up to 5 days. Freeze baked cookies for up to 3 months.
Nutrition
- Serving Size: 1 cookie
- Calories: 145
- Sugar: 11
- Sodium: 95
- Fat: 8
- Saturated Fat: 4
- Carbohydrates: 17
- Protein: 3
Keywords: peanut butter blossom cookies, soft peanut butter cookies, chocolate kiss cookies, holiday cookies, easy cookie recipe