I used to think spinach artichoke dip was a restaurant-only thing. You know, the kind of appetizer you order when you’re out with friends, scooping up that warm, creamy goodness with tortilla chips, and wondering why it never tastes the same when you try to make it at home. But then my kids discovered it at a little café downtown—the one with the mismatched chairs and the chalkboard menu that changes daily. They called it “the green dip,” and they couldn’t get enough of it.
That café closed last spring. Just like that. One day it was there, the next day it was a smoothie shop. My youngest, who’s seven and takes her food very seriously, asked me every week for months if we could go back for “the green dip.” I tried making it at home, but honestly? The first few attempts were disasters. Too watery, not cheesy enough, or just plain bland. I mean, I’m a decent cook, but recreating that specific café experience felt impossible.
After seven tries—seven, I’m not kidding—I finally figured it out. And then I took it one step further. Instead of serving it as a dip, I turned it into a pull-apart bread. A soft, fluffy loaf stuffed with that same creamy spinach artichoke mixture, loaded with three kinds of cheese, and baked until golden and gooey. The first time I pulled it out of the oven, my kids literally gasped. My daughter said it was better than the café version. That’s when I knew I had something special.
This kid-approved cheesy spinach artichoke pull-apart bread is the kind of recipe that makes you feel like a kitchen rockstar without actually having to do anything complicated. It’s forgiving, it’s flexible, and it’s the kind of thing that disappears before you even sit down. Maybe you’ve been there—trying to recreate a memory from a place that no longer exists, just wanting to capture that one perfect bite. This bread is that bite.
Why You’ll Love This Recipe
Let me tell you why this recipe works so well, especially for busy families who need meals that actually deliver. I’ve tested this version more times than I care to admit, and it’s finally at the point where I’m proud to share it with you.
- Quick & Easy: This comes together in about 45 minutes from start to finish. Most of that is hands-off baking time, which means you can get other things done while dinner prep handles itself.
- Simple Ingredients: You probably already have most of these in your kitchen. Cream cheese, mozzarella, Parmesan, frozen spinach, canned artichokes, and a loaf of bread. No fancy grocery trips needed.
- Perfect for Family Dinners: This is the kind of side dish that makes everyone at the table happy. It’s cheesy, it’s fun to pull apart, and it’s packed with veggies that even picky eaters will devour without a second thought.
- Crowd-Pleaser: I’ve brought this to potlucks and family gatherings, and it’s always the first thing to go. Kids love the interactive pulling-apart part, and adults love the flavor.
- Unbelievably Delicious: The combination of creamy cheese, tender spinach, tangy artichokes, and crusty bread is next-level comfort food. It’s the kind of dish that makes you close your eyes after the first bite.
What makes this recipe different from the rest is the technique. Instead of just mixing everything together and spreading it on bread, I create a creamy cheese base that holds everything together perfectly. The bread gets toasted on the outside while staying soft and pull-apart tender on the inside. It’s not just another cheesy bread recipe—it’s the best version I’ve ever made.
This recipe isnt just good—it is the kind that makes you feel like you’ve actually accomplished something in the kitchen. It’s comfort food reimagined, faster and simpler, but with the same soul-soothing satisfaction that makes you want to make it again the next day.
What Ingredients You Will Need
This recipe uses simple, everyday ingredients to deliver bold flavor and satisfying texture without the fuss. Most of these are pantry staples or easy to find at any grocery store.
For the Cheese Mixture
- 8 oz cream cheese, softened (adds richness and creaminess)
- 1 cup shredded mozzarella cheese (I recommend whole milk mozzarella for best melt)
- 1/2 cup grated Parmesan cheese (adds salty, nutty flavor)
- 1/4 cup sour cream (adds tanginess and helps with texture)
- 1 clove garlic, minced (or 1/2 teaspoon garlic powder if you’re in a hurry)
- 1/4 teaspoon salt
- 1/4 teaspoon black pepper
- 1/4 teaspoon red pepper flakes (optional, for a tiny kick—kids usually don’t notice it)
For the Spinach Artichoke Filling
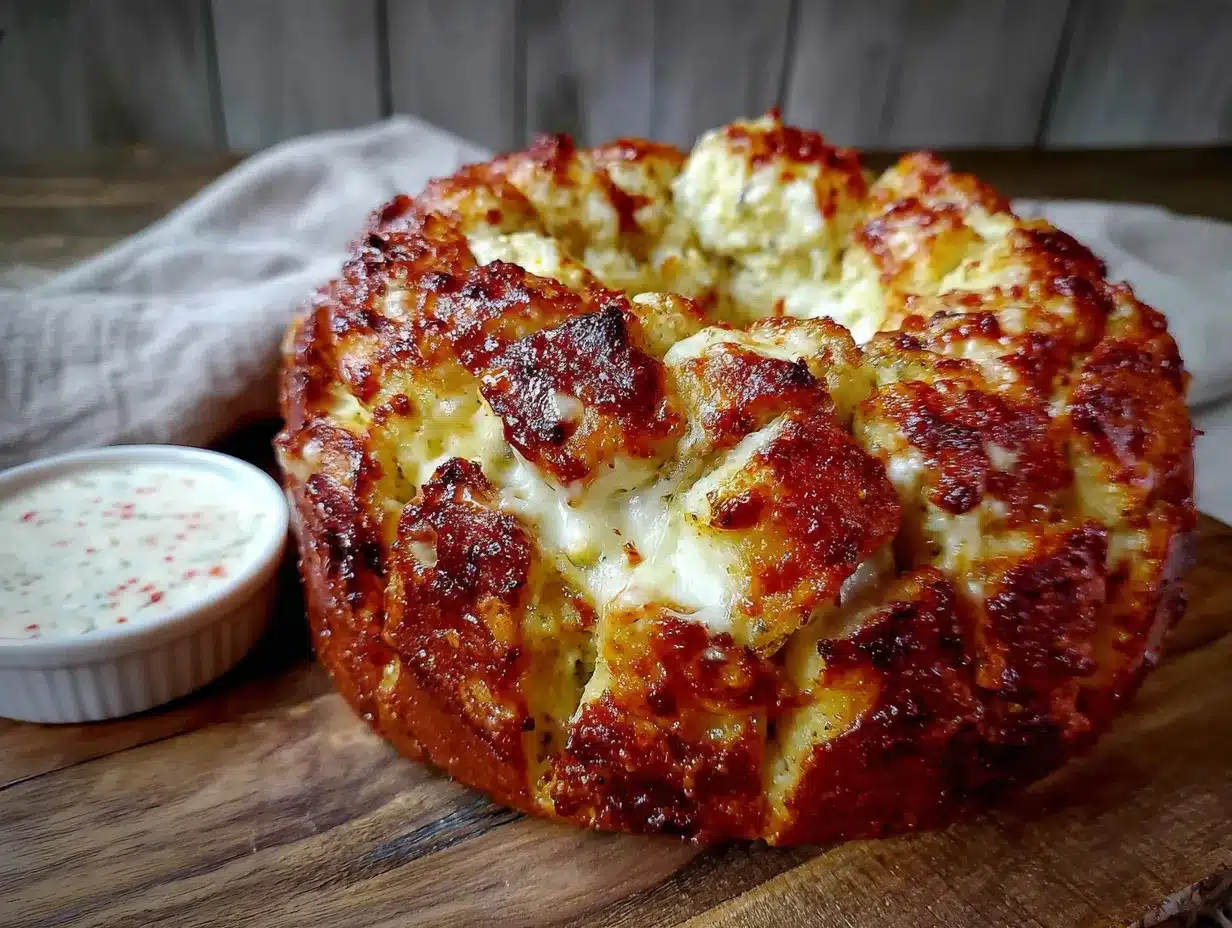
- 1 cup frozen chopped spinach, thawed and squeezed dry (important: squeeze out as much water as possible)
- 1 can (14 oz) artichoke hearts, drained and chopped (look for ones packed in water, not oil, for best texture)
- 1/2 cup shredded mozzarella cheese (extra for layering)
- 1/4 cup grated Parmesan cheese (extra for layering)
For the Bread
- 1 large loaf of sourdough bread or French bread (about 12-16 oz, round or oval shape works best)
- 3 tablespoons unsalted butter, melted
- 1/2 teaspoon garlic powder
- 1 tablespoon fresh parsley, chopped (optional, for garnish)
I like to use a good-quality sourdough from the bakery section because it holds up well to the filling without getting soggy. If you prefer French bread, that works too—just look for a loaf that’s sturdy and crusty. For the cream cheese, I’ve tried both full-fat and reduced-fat versions, and honestly, full-fat gives you that extra creamy texture that makes this recipe shine. If you’re dairy-free, you can substitute with vegan cream cheese and dairy-free mozzarella, but the texture will be slightly different.
For the spinach, make sure you thaw it completely and squeeze out every drop of water. I use paper towels or a clean kitchen towel to press out the moisture. This is one of those small steps that makes a big difference—too much water will make your filling runny. And for the artichokes, drain them well and give them a rough chop. You want pieces, not a paste.
Equipment Needed
You don’t need anything fancy for this recipe, which is part of what makes it so great. Here’s what you’ll need:
- A large mixing bowl (any size works, but bigger is easier for mixing)
- A small bowl for mixing the melted butter and garlic powder
- A sharp knife for cutting the bread
- A cutting board
- A baking sheet or cast iron skillet (I use a 10-inch cast iron skillet for even heating, but a baking sheet works perfectly too)
- Parchment paper or aluminum foil (for easy cleanup)
- Measuring cups and spoons
- A rubber spatula or wooden spoon for mixing
- Paper towels or a clean kitchen towel for squeezing spinach dry
If you don’t have a cast iron skillet, don’t worry. A regular baking sheet lined with parchment paper works just as well. The key is to make sure your bread has enough space to expand as it bakes. I’ve also made this in a round cake pan, and it turned out great—just keep an eye on the cooking time because it might bake a little faster.
For the knife, a serrated bread knife works best for cutting the bread without squishing it. But if you don’t have one, a regular chef’s knife will do the job—just be gentle and use a sawing motion. And honestly, if you’re in a pinch, you can even tear the bread into pieces with your hands. It’s not pretty, but it works.
Preparation Method
Let’s walk through this step by step. I’ve broken it down so it’s easy to follow, even if you’re multitasking with kids running around.
- Preheat your oven to 375°F (190°C). While it’s heating up, line your baking sheet with parchment paper or lightly grease your cast iron skillet. This makes cleanup so much easier—trust me on this.
- Prepare your spinach. If you’re using frozen spinach, thaw it in the microwave or by running it under warm water. Then grab a handful at a time and squeeze it over the sink to remove as much liquid as possible. You want it almost dry. Place the squeezed spinach in a small bowl and set aside. This step takes about 5 minutes, but it’s worth every second.
- Make the cheese base. In a large mixing bowl, combine the softened cream cheese, 1 cup mozzarella, 1/2 cup Parmesan, sour cream, minced garlic, salt, pepper, and red pepper flakes if using. Mix everything together with a rubber spatula until it’s smooth and well combined. The cream cheese should be soft enough that it blends easily—if it’s still cold, microwave it for 10-15 seconds to soften it up.
- Add the spinach and artichokes. Fold the squeezed spinach and chopped artichokes into the cheese mixture. Stir until everything is evenly distributed. Take a moment to taste it—yes, it’s safe to eat at this point since everything is cooked or pasteurized. Adjust the salt and pepper if needed. I like to add a little extra Parmesan here because I’m a cheese fanatic.
- Prepare the bread. Place your loaf of bread on the cutting board. Using a serrated knife, make cuts about 1 inch apart across the top of the bread, cutting about three-quarters of the way down—don’t cut all the way through. You want the bread to stay connected at the bottom. Then make similar cuts in the opposite direction, creating a grid pattern. This is what creates the pull-apart pieces.
- Stuff the bread. This is the fun part. Take small spoonfuls of the cheese and spinach mixture and carefully push them into the cuts you made in the bread. Don’t be shy—really pack it in there. Use your fingers to press the filling deep into the crevices. Some filling will spill out onto the surface, and that’s totally fine. In fact, it’s better that way because it creates those crispy, cheesy edges.
- Top with extra cheese. Sprinkle the remaining 1/2 cup mozzarella and 1/4 cup Parmesan over the top of the stuffed bread. Really go for it—cover every exposed surface. This is what gives you that beautiful golden crust.
- Make the garlic butter. In a small bowl, mix the melted butter with the garlic powder. Brush this mixture all over the top and sides of the bread. The butter helps the bread get crispy and golden while adding that irresistible garlic flavor.
- Bake. Place the stuffed bread on your prepared baking sheet or in your cast iron skillet. Bake for 20-25 minutes, until the cheese is melted and bubbly and the bread is golden brown on the edges. If you want extra browning, you can broil it for the last 2 minutes—just watch it closely so it doesn’t burn.
- Rest and serve. Let the bread cool for 5 minutes before serving. This is important because the filling will be extremely hot right out of the oven. Garnish with fresh parsley if you like, then let everyone pull apart their own pieces. Watch it disappear.
A few things to watch for: If the bread starts browning too quickly on top but the inside isn’t hot yet, tent it loosely with aluminum foil for the last 10 minutes of baking. And if you’re using a smaller loaf, check it at 18 minutes—it might be done sooner.
Cooking Tips & Techniques
I’ve made this recipe enough times to have a few tricks up my sleeve. Here’s what I’ve learned the hard way so you don’t have to.
Don’t skip squeezing the spinach. I know I’ve said this already, but it’s that important. The first time I made this, I was in a hurry and barely squeezed the spinach. The result was a watery, soupy mess that leaked all over the baking sheet. Take the extra 2 minutes to really press that moisture out. Your future self will thank you.
Use room temperature cream cheese. Cold cream cheese is impossible to mix smoothly. You’ll end up with lumps that never quite melt into the filling. Let it sit on the counter for 20 minutes before you start, or give it a quick 10-second spin in the microwave. The texture will be so much better.
Cut the bread carefully. I’ve ruined a few loaves by cutting too deep and slicing all the way through. You want to cut about three-quarters of the way down, leaving the bottom intact. If you accidentally cut through, don’t panic—just place the pieces back together on the baking sheet and stuff the filling between them. It’ll still taste amazing.
Multitask wisely. While the bread is baking, you can prep the rest of your meal or clean up the kitchen. The 20-25 minute bake time is perfect for making a quick salad or setting the table. Just don’t wander too far—check on it at the 15-minute mark to see how it’s doing.
Let it rest. I know it’s tempting to dig in right away, but that filling is molten lava straight from the oven. Waiting 5 minutes allows the cheese to set slightly so it doesn’t burn everyone’s mouths. Plus, the bread gets a chance to absorb some of the flavors. Patience pays off here.
Variations & Adaptations
One of the best things about this recipe is how flexible it is. Here are some ways to make it your own.
Make it gluten-free. Use a gluten-free loaf of bread instead of sourdough. Just make sure it’s sturdy enough to hold the filling—some gluten-free breads are too delicate and will fall apart. I’ve had good luck with gluten-free sourdough from the bakery section.
Add some protein. If you want to turn this into a more substantial meal, add 1 cup of cooked, shredded chicken to the cheese mixture. It makes it heartier and adds extra protein. My kids love this version, and it’s a great way to use up leftover rotisserie chicken.
Switch up the cheese. Not a fan of mozzarella? Try using provolone, gouda, or even pepper jack for a little heat. I’ve made it with smoked gouda before, and the smoky flavor paired beautifully with the spinach and artichokes. Just keep the cream cheese base the same—it’s what makes everything creamy.
Go dairy-free. Use vegan cream cheese, dairy-free mozzarella, and dairy-free butter. The texture will be slightly different—less gooey, but still delicious. I’ve tested this with my dairy-free sister-in-law, and she gave it two thumbs up.
Try different breads. Sourdough is my go-to, but ciabatta, French bread, or even Hawaiian rolls work great. If you use smaller rolls, just cut them in half and stuff the filling between the halves, then bake as directed. Mini pull-apart breads are perfect for parties or lunchboxes.
Serving & Storage Suggestions
This bread is best served warm, right out of the oven. The cheese is stretchy, the bread is crispy on the outside and soft on the inside, and every bite is pure comfort. I like to serve it on a large wooden board or a platter so everyone can grab their own pieces.
For a complete meal, pair it with a simple green salad dressed with lemon vinaigrette. The acidity cuts through the richness of the cheese and balances everything out. You can also serve it alongside tomato soup for a cozy, comforting dinner that feels like a hug in a bowl.
If you have leftovers (which is rare in my house), store them in an airtight container in the refrigerator for up to 3 days. To reheat, place the bread on a baking sheet and warm it in a 350°F oven for 10 minutes. The microwave works in a pinch, but the bread will lose its crispy texture. I actually think the flavors get even better overnight—the filling soaks into the bread and becomes even more delicious.
You can also freeze this bread. Wrap it tightly in aluminum foil and place it in a freezer bag. It will keep for up to 2 months. To reheat, thaw it in the refrigerator overnight, then bake at 350°F for 15-20 minutes until heated through. It’s a great make-ahead option for busy weeks or unexpected guests.
Nutritional Information & Benefits
Here’s a rough estimate of the nutritional content per serving (based on 8 servings):
| Nutrient | Amount per Serving |
|---|---|
| Calories | 320 |
| Total Fat | 18g |
| Saturated Fat | 10g |
| Cholesterol | 45mg |
| Sodium | 580mg |
| Total Carbohydrates | 28g |
| Dietary Fiber | 3g |
| Sugars | 3g |
| Protein | 14g |
This recipe is packed with nutrients from the spinach and artichokes. Spinach is loaded with iron, vitamin K, and antioxidants, while artichokes are rich in fiber and vitamin C. The cheese provides calcium and protein, making this a more balanced option than your typical cheesy bread. If you’re watching your sodium, you can use low-sodium cheese and skip the added salt in the filling.
For those with dietary restrictions, this recipe can be made gluten-free and dairy-free with the substitutions mentioned earlier. It’s also vegetarian-friendly as written.
Conclusion
This kid-approved cheesy spinach artichoke pull-apart bread is more than just a recipe—it’s a memory in the making. It’s the kind of dish that brings people together, whether it’s a busy weeknight dinner or a holiday gathering. I love how it turns simple ingredients into something that feels special, and I love even more that my kids ask for it by name.
I hope you give this recipe a try. Don’t be afraid to make it your own—add extra cheese, swap in your favorite bread, or throw in some leftover chicken. The beauty of this recipe is that it’s forgiving and flexible, just like real cooking should be.
When you make it, I’d love to hear how it turns out. Leave a comment below and let me know what variations you tried, or tag me in your photos on social media. Your feedback helps other home cooks feel confident trying new things, and honestly, it just makes my day to see your creations. Happy cooking, friend!
Frequently Asked Questions
Can I use fresh spinach instead of frozen?
Yes, you can. Use about 4 cups of fresh spinach, sauté it in a pan with a little olive oil until wilted, then let it cool and squeeze out the excess moisture. The flavor will be slightly different—fresher and less concentrated—but it works beautifully.
Can I make this ahead of time?
Absolutely. You can assemble the stuffed bread up to 24 hours in advance, cover it tightly with plastic wrap, and store it in the refrigerator. When you’re ready to bake, just add 5-10 minutes to the baking time since you’re starting from cold.
How do I keep the bread from getting soggy?
The key is squeezing the spinach dry and not overloading the bread with filling. Also, using a sturdy bread like sourdough helps. If you’re worried about sogginess, you can toast the bread lightly before stuffing it—just bake it at 350°F for 5 minutes before adding the filling.
Can I use a different type of bread?
Yes! Sourdough is my favorite, but French bread, ciabatta, or even Italian bread work well. Just avoid soft, fluffy breads like brioche or white sandwich bread—they’ll fall apart under the weight of the filling. If you want to use rolls, go for it, but adjust the baking time to 15-18 minutes.
Is this recipe freezer-friendly?
Yes, it freezes beautifully. Bake it, let it cool completely, then wrap it tightly in aluminum foil and place it in a freezer bag. It will keep for up to 2 months. To reheat, thaw in the refrigerator overnight and warm in a 350°F oven for 15-20 minutes. It tastes almost as good as fresh.
Pin This Recipe!
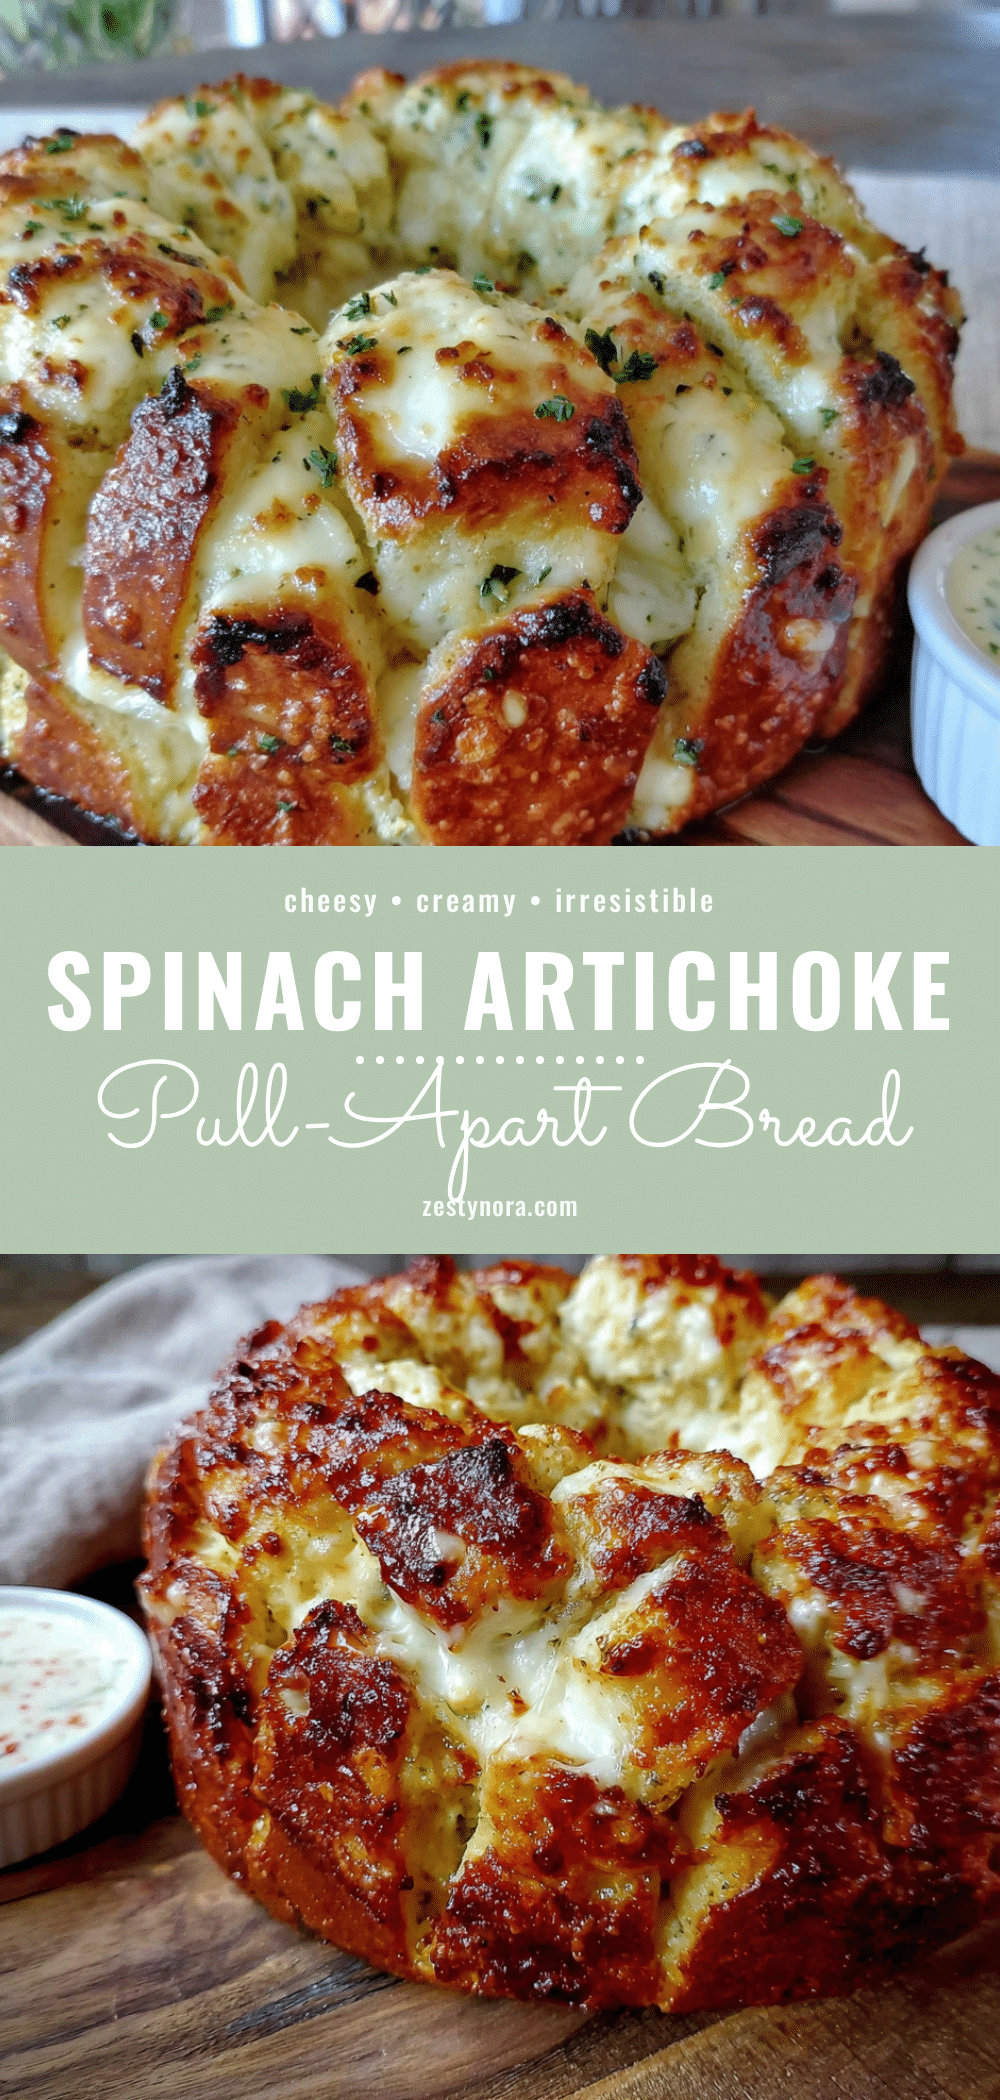
Best Kid-Approved Cheesy Spinach Artichoke Pull-Apart Bread Recipe

A soft, fluffy loaf stuffed with creamy spinach artichoke mixture, loaded with three kinds of cheese, and baked until golden and gooey. This kid-approved pull-apart bread is quick, easy, and perfect for family dinners or potlucks.
- Prep Time: 15 minutes
- Cook Time: 25 minutes
- Total Time: 40 minutes
- Yield: 8 servings 1x
- Category: Appetizer
- Cuisine: American
Ingredients
- 8 oz cream cheese, softened
- 1 cup shredded mozzarella cheese (whole milk recommended)
- 1/2 cup grated Parmesan cheese
- 1/4 cup sour cream
- 1 clove garlic, minced (or 1/2 teaspoon garlic powder)
- 1/4 teaspoon salt
- 1/4 teaspoon black pepper
- 1/4 teaspoon red pepper flakes (optional)
- 1 cup frozen chopped spinach, thawed and squeezed dry
- 1 can (14 oz) artichoke hearts, drained and chopped
- 1/2 cup shredded mozzarella cheese (extra for layering)
- 1/4 cup grated Parmesan cheese (extra for layering)
- 1 large loaf sourdough bread or French bread (12–16 oz)
- 3 tablespoons unsalted butter, melted
- 1/2 teaspoon garlic powder
- 1 tablespoon fresh parsley, chopped (optional, for garnish)
Instructions
- Preheat oven to 375°F (190°C). Line a baking sheet with parchment paper or lightly grease a cast iron skillet.
- Thaw frozen spinach and squeeze out as much liquid as possible using paper towels or a clean kitchen towel. Set aside.
- In a large mixing bowl, combine softened cream cheese, 1 cup mozzarella, 1/2 cup Parmesan, sour cream, minced garlic, salt, pepper, and red pepper flakes (if using). Mix until smooth.
- Fold the squeezed spinach and chopped artichokes into the cheese mixture until evenly distributed. Taste and adjust seasoning if needed.
- Place the bread on a cutting board. Using a serrated knife, make cuts about 1 inch apart across the top, cutting three-quarters of the way down. Then make similar cuts in the opposite direction to create a grid pattern.
- Stuff small spoonfuls of the cheese and spinach mixture into the cuts, pressing it deep into the crevices. Some filling may spill onto the surface.
- Sprinkle the remaining 1/2 cup mozzarella and 1/4 cup Parmesan over the top of the stuffed bread.
- In a small bowl, mix melted butter with garlic powder. Brush this mixture all over the top and sides of the bread.
- Place the stuffed bread on the prepared baking sheet or in the cast iron skillet. Bake for 20-25 minutes, until cheese is melted and bubbly and bread is golden brown. For extra browning, broil for the last 2 minutes.
- Let the bread cool for 5 minutes before serving. Garnish with fresh parsley if desired. Serve warm, pulling apart pieces.
Notes
Don’t skip squeezing the spinach dry to avoid a watery filling. Use room temperature cream cheese for smooth mixing. Cut bread carefully to avoid cutting all the way through. Let the bread rest for 5 minutes after baking to prevent burns. If bread browns too quickly, tent with foil for the last 10 minutes.
Nutrition
- Serving Size: 1 serving (1/8 of lo
- Calories: 320
- Sugar: 3
- Sodium: 580
- Fat: 18
- Saturated Fat: 10
- Carbohydrates: 28
- Fiber: 3
- Protein: 14
Keywords: spinach artichoke, pull-apart bread, cheesy bread, kid-friendly, appetizer, party food, comfort food