It was 11:47 PM on a random Wednesday in October, and I couldn’t sleep. Not because of caffeine or stress, but because I had this sudden, almost ridiculous craving for Thanksgiving dinner. The kind of craving that makes you open the fridge at midnight and just stare, hoping something magical appears. I didn’t have a full turkey—obviously—but I had a lone bone-in turkey breast I’d grabbed on sale, a bottle of maple syrup that was almost empty, and a jar of Dijon mustard with maybe two tablespoons left. And that’s when the idea arrived: what if I spatchcocked this thing and slathered it in a maple-Dijon glaze? I mean, I’d never spatchcocked anything that late at night, but honestly, when has logic ever stopped a determined cook?
Let me tell you, the kitchen was a disaster. I had flour on my counter from earlier baking, a sticky spot where I’d spilled maple syrup, and I was using a pair of kitchen shears that definitely needed sharpening. But something about the odd hours loosened the usual rules. I wasn’t thinking about perfection or presentation. I was thinking about flavor, about that sweet-and-sharp combination hitting crispy skin. Maybe you’ve been there—that moment when you just go for it, even if the recipe isn’t fully formed in your head. I hacked through that breastbone like I’d been doing it for years, mixed the glaze with my fingers (because why dirty another whisk?), and threw it in the oven at 1 AM.
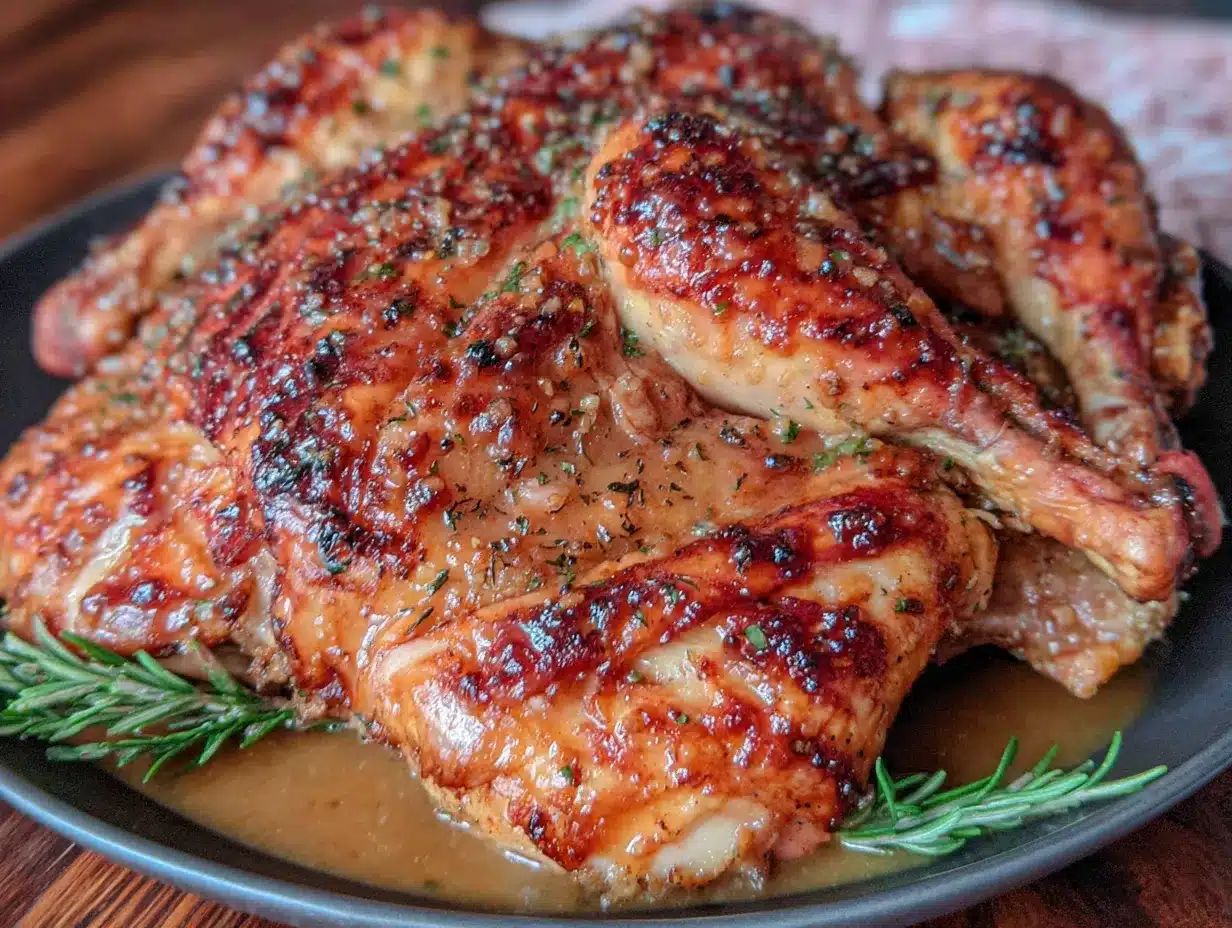
The result? Honestly, it was the best turkey I’d ever made. The skin was crackly and caramelized, the meat was juicy down to the last bite, and that maple-Dijon combo? Pure magic. I stood at the counter eating slices straight off the cutting board at 2:15 AM, and I knew right then this wasn’t just a late-night experiment—it was my new go-to for every fall gathering. This recipe stayed with me because it proved that sometimes the best dishes come from not having all the right ingredients and making it work anyway.
Why You’ll Love This Recipe
This Perfect Maple Dijon Spatchcock Turkey isn’t just another roasted bird—it’s the one that’ll have everyone asking for the recipe before they’ve even finished their first helping. I’ve tested this method at least a dozen times across different ovens and turkey sizes, and it never disappoints. Here’s why this recipe stands out from the crowd:
- Quick & Easy: Spatchcocking cuts roasting time by nearly half. A 12-pound bird is ready in about 90 minutes instead of 3+ hours. Perfect for busy fall weeknights or when you want Thanksgiving without the all-day commitment.
- Simple Ingredients: You likely have maple syrup, Dijon mustard, and basic pantry spices right now. No trips to specialty stores or hunting down obscure ingredients.
- Perfect for Fall Gatherings: Whether it’s Friendsgiving, a cozy Sunday dinner, or the big day itself, this turkey fits right in with autumn’s best flavors. The maple-Dijon glaze screams “October” in the best way.
- Crowd-Pleaser: I’ve served this to picky kids, turkey-hating adults, and my neighbor who swears she’s “not a poultry person.” Every single one went back for seconds. The crispy skin alone converts people.
- Unbelievably Delicious: The texture is next-level comfort food. That crackly, caramelized exterior gives way to impossibly tender, juicy meat. The glaze creates a crust that’s almost like candied bacon—sweet, tangy, and deeply savory.
What makes this different from every other turkey recipe out there? It’s the technique. Spatchcocking ensures even cooking, so white meat stays moist while dark meat reaches perfect doneness. The maple-Dijon glaze isn’t just brushed on top—it’s worked under the skin and into every crevice, so every bite has that sweet-sharp kick. I’ve tried roasting turkeys every way imaginable, and this method produces the most consistent, stress-free results. It’s comfort food reimagined—faster, easier, but with the same soul-soothing satisfaction that makes fall dinners memorable. Perfect for impressing guests without spending all day in the kitchen, or turning a simple Tuesday into something special.
What Ingredients You Will Need
This recipe uses simple, wholesome ingredients to deliver bold flavor and satisfying texture without the fuss. Most of these are pantry staples or easy to find at any grocery store during fall. Let’s break down each component and why it matters.
For the Turkey
- 1 whole turkey (10-14 pounds), thawed if frozen — I prefer a 12-pound bird for the best balance of cooking time and meat-to-skin ratio. Look for a bird that’s not pre-brined if you want to control the salt level. (Pro tip: Butterball or Bell & Evans are my go-to brands for consistent quality.)
- 2 tablespoons kosher salt — Diamond Crystal is my preference because it’s less salty by volume than Morton’s, giving you more control. This is for dry-brining, so don’t skip it.
- 1 teaspoon black pepper, freshly ground — Pre-ground pepper works in a pinch, but fresh makes a noticeable difference in the crust.
- 1 teaspoon garlic powder — Not garlic salt! We’re controlling the salt separately.
- 1 teaspoon onion powder — Adds depth without overpowering the maple-Dijon flavor.
For the Maple Dijon Glaze
- 1/3 cup pure maple syrup — Please use real maple syrup, not pancake syrup. Grade A dark amber works beautifully for a more robust flavor. (I’ve tried Grade B, and while it’s amazing, it can be hard to find.)
- 1/4 cup Dijon mustard — Grey Poupon is my go-to for its smooth, tangy profile. Whole-grain Dijon works too but gives a different texture on the skin.
- 2 tablespoons unsalted butter, melted — Adds richness and helps the glaze adhere to the skin. Use salted butter if that’s what you have, just reduce the added salt slightly.
- 1 tablespoon apple cider vinegar — Brightens the glaze and cuts through the richness. White wine vinegar works as a substitute.
- 2 cloves garlic, minced — Fresh garlic is non-negotiable here. The jarred stuff won’t give you the same punch.
- 1 teaspoon fresh thyme leaves (or 1/2 teaspoon dried) — Thyme and turkey are a classic combo. Rosemary works too, but use half as much since it’s stronger.
- 1/2 teaspoon smoked paprika — Optional but recommended. It adds a subtle smokiness that complements the maple beautifully.
For the Aromatics (Inside the Cavity)
- 1 onion, quartered — Yellow or sweet onion works best.
- 3-4 sprigs fresh thyme — Or rosemary, sage, or a mix. Whatever herbs you have on hand.
- 2 bay leaves — Adds an earthy note that infuses the meat as it roasts.
- 1 lemon, halved — The citrus steam helps keep the meat moist and adds brightness.
Ingredient Selection Tips: For the best results, look for a turkey that’s labeled “natural” or “minimally processed.” Avoid birds that have been pre-brined or injected with broth, as they can throw off the salt balance. If you’re using a frozen turkey, allow 24 hours of thawing time in the fridge for every 4-5 pounds. And please, please don’t use “maple-flavored” syrup—it’s corn syrup with artificial flavoring and will burn in the oven. Your local farmers’ market is a great source for real maple syrup this time of year.
Substitution Guidance: For a gluten-free version, this recipe is naturally gluten-free as written. For a dairy-free option, swap the butter with coconut oil or a plant-based butter—just make sure it’s unsalted. If you’re avoiding sugar, you can use a sugar-free maple syrup alternative, but the caramelization won’t be quite the same. I’ve tried it with honey instead of maple syrup, and while delicious, it gives a different flavor profile—more floral, less woodsy. Stick with maple for the intended result.
Equipment Needed
You don’t need a professional kitchen to pull this off, but a few key tools make the process much smoother. Here’s what you’ll need:
- Sharp kitchen shears — This is the most important tool for spatchcocking. A good pair of heavy-duty shears makes cutting through the backbone feel almost easy. I use OXO Good Grips, and they’ve lasted me years. If you don’t have shears, a sharp chef’s knife works, but it’s trickier.
- Large rimmed baking sheet — A half-sheet pan (18×13 inches) is perfect. The rim catches any juices, preventing oven messes. Line it with foil or parchment for easier cleanup.
- Wire rack that fits inside the baking sheet — This elevates the turkey so air circulates underneath, ensuring crispy skin all around. If you don’t have one, you can use crumpled foil to create a makeshift rack, but it’s not ideal.
- Instant-read thermometer — Trust me, you need this. Guessing doneness leads to dry turkey. A Thermapen is my splurge recommendation, but any reliable digital thermometer works.
- Basting brush — For applying the glaze. A silicone brush is easiest to clean. I’ve used a paper towel in a pinch, and it works, but it’s messy.
- Cutting board — Preferably large and sturdy with a groove to catch juices. Wood or plastic both work fine.
- Small saucepan — For making the glaze. Any small pot works.
Budget-Friendly Options: Don’t have kitchen shears? Ask your butcher to spatchcock the turkey for you—most will do it for free. No wire rack? You can place the turkey directly on vegetables like thick-cut onions or carrots, which also adds flavor to the pan drippings. And if you don’t have an instant-read thermometer, you can check doneness by piercing the thigh—the juices should run clear—but a thermometer is much more reliable.
Maintenance Tip: Keep your shears sharp by hand-washing them and drying immediately. A dull pair will make spatchcocking frustrating and unsafe. I sharpen mine once a year with a handheld sharpener, and it makes a world of difference.
Preparation Method
Alright, let’s get to the good part. I’ve broken this down into clear steps with all the sensory cues and troubleshooting you’ll need. Take your time—rushing leads to mistakes, and we want this turkey to be perfect.
Step 1: Spatchcock the Turkey (15 minutes)
Place the turkey breast-side down on your cutting board. Using your kitchen shears, cut along one side of the backbone from the tail to the neck. You’ll feel resistance—that’s normal. Just keep cutting in a straight line. Repeat on the other side to remove the backbone entirely. Save it for stock if you’re feeling ambitious! Now flip the turkey over and press down firmly on the breastbone with the palms of your hands until you hear a crack. The turkey should lie flat. If it doesn’t, you haven’t cracked it enough—give it another push. You’re looking for a flat, even bird that looks like it’s doing a push-up. (Honestly, the first time I did this, I thought I broke something. That cracking sound is totally normal and means you’ve done it right.)
Step 2: Dry-Brine the Turkey (8-24 hours in advance)
This step is non-negotiable for the juiciest meat and crispiest skin. Pat the turkey completely dry with paper towels—really get in there, especially under the skin and in the cavity. Mix the kosher salt, pepper, garlic powder, and onion powder in a small bowl. Sprinkle this mixture all over the turkey, including under the skin where you can gently loosen it with your fingers. Don’t forget the legs and wings. Place the turkey on your wire rack over the baking sheet and refrigerate uncovered for at least 8 hours, up to 24. The skin will dry out and tighten, which is exactly what we want. I usually do this the morning before or the night before—it’s a game-changer.
Step 3: Make the Maple Dijon Glaze (10 minutes)
About 30 minutes before roasting, make the glaze. In a small saucepan over medium heat, combine the maple syrup, Dijon mustard, melted butter, apple cider vinegar, minced garlic, thyme, and smoked paprika. Whisk until smooth and bring to a gentle simmer. Cook for 2-3 minutes, stirring constantly, until it thickens slightly. Remove from heat and let it cool. The glaze will thicken more as it cools—that’s perfect for brushing. Taste it and adjust: more mustard for tang, more maple for sweetness. Set aside half the glaze for serving.
Step 4: Preheat and Prepare (20 minutes before roasting)
Take the turkey out of the fridge 30 minutes before roasting to take the chill off. Preheat your oven to 425°F (220°C) with the rack in the lower third. While the oven heats, stuff the cavity with the quartered onion, thyme sprigs, bay leaves, and lemon halves. These aromatics infuse the meat with subtle flavor as it roasts. Tuck the wing tips under the turkey to prevent burning.
Step 5: Roast the Turkey (60-90 minutes, depending on size)
Brush the turkey all over with half the glaze—save the rest for later. Place it on the wire rack in the baking sheet and roast for 30 minutes. After 30 minutes, brush with more glaze and rotate the pan. Continue roasting, glazing every 20 minutes, until the thickest part of the breast reaches 155°F (68°C) and the thigh reaches 170°F (77°C). Start checking temperature at the 50-minute mark. A 12-pound turkey typically takes about 75 minutes total. The skin should be deep golden brown and caramelized, almost like it’s been candied. If the skin is browning too quickly, tent loosely with foil.
Step 6: Rest and Serve (20 minutes minimum)
This is the hardest part—waiting. Transfer the turkey to a clean cutting board and let it rest for at least 20 minutes before carving. The internal temperature will continue to rise by about 5-10°F during resting, which is called carryover cooking. Don’t skip this! Resting allows the juices to redistribute, so every slice is moist. While it rests, you can make a quick pan sauce using the drippings. Carve against the grain and serve with the reserved glaze on the side.
Troubleshooting Tips: If your turkey is cooking unevenly, the legs and wings may cook faster than the breast. That’s normal for spatchcocked birds. Just cover the dark meat with small pieces of foil if they’re browning too fast. If the glaze is burning, your oven might run hot—reduce the temperature to 400°F (200°C) after the first 30 minutes. And if you’re nervous about spatchcocking, ask your butcher to do it. No shame in that game!
Cooking Tips & Techniques
Over the years, I’ve learned a few things the hard way so you don’t have to. Here are my best tips for turkey success:
Dry the Skin Thoroughly: Moisture is the enemy of crispy skin. After dry-brining, pat the turkey dry again before glazing. I once skipped this step because I was in a hurry, and the skin came out rubbery. Never again. Use fresh paper towels and really press into the crevices.
Don’t Over-Glaze Early: The maple syrup in the glaze can burn if applied too early or too thickly. Apply a thin layer for the first 30 minutes, then build up layers as it roasts. Think of it like painting—thin coats are better than one thick one. I learned this lesson when my first attempt came out looking like a charcoal briquette. The caramelization happens gradually, and that’s what gives you that beautiful, crackly finish.
Use a Thermometer Religiously: I cannot stress this enough. Turkey is done when it’s done, not when the timer says so. Ovens vary wildly, and a 12-pound bird might take 60 minutes in one oven and 90 in another. The breast should hit 155°F (68°C) and the thigh 170°F (77°C). I check in three places—both breasts and the thickest part of the thigh—to be sure. My first Thanksgiving turkey was so dry it crumbled, all because I trusted the pop-up timer. Never again.
Let It Rest, Really: I know you’re hungry. Everyone is hungry. But carving into a hot turkey immediately releases all those juices onto the cutting board instead of staying in the meat. Twenty minutes feels like an eternity, but it’s worth it. Use that time to make gravy, set the table, or pour yourself a well-deserved glass of wine.
Multitasking Strategy: While the turkey roasts, prep your sides. The oven is occupied, so choose stovetop or no-cook sides like mashed potatoes, roasted vegetables that can go in after the turkey rests, or a simple salad. I usually make a quick cranberry sauce and green beans while the bird is in the oven. Timing is everything, and having a plan reduces stress.
My Biggest Failure: One year, I forgot to take the giblets out before roasting. I know, rookie mistake. The turkey still tasted fine, but I had to fish a plastic bag of organs out of the cavity mid-roast. Not my finest moment. Always check both cavities—neck and main—before you start.
Variations & Adaptations
This recipe is incredibly versatile, and I’ve tried several variations over the years. Here are my favorites:
Herb-Crusted Maple Dijon Turkey: Add 2 tablespoons of fresh chopped herbs (rosemary, sage, and parsley work beautifully) to the glaze before applying. The herbs create a beautiful crust and add another layer of aroma. I did this for a Friendsgiving last year, and everyone thought I’d spent hours on it. Little did they know it was the same recipe with a handful of herbs thrown in.
Spicy Maple Dijon Turkey: If you like heat, add 1-2 teaspoons of sriracha or a pinch of cayenne pepper to the glaze. The heat cuts through the sweetness beautifully and adds a subtle kick that builds as you eat. My brother-in-law, who claims to hate sweet-savory combinations, devoured half the bird when I made this version.
Citrus-Infused Maple Dijon Turkey: Replace the apple cider vinegar with fresh orange juice and add the zest of one orange to the glaze. The citrus brightens the whole dish and pairs wonderfully with fall flavors. I tried this after a trip to Florida where I had too many oranges and not enough ideas. It’s become my second-favorite version.
Dietary Adaptations: For a dairy-free version, use coconut oil or a plant-based butter in the glaze. For a lower-sugar option, reduce the maple syrup to 1/4 cup and add an extra tablespoon of Dijon mustard. The glaze won’t be as sticky, but the flavor will still be excellent. I’ve also made this with a sugar-free maple syrup substitute, and while the caramelization is less dramatic, the taste is surprisingly good.
Cooking Method Variations: If you have an air fryer large enough, you can spatchcock a small turkey (8-10 pounds) and cook it at 375°F (190°C) for about 45-55 minutes. Check temperature early. For a grill version, set up for indirect heat at 375°F (190°C) and cook with the lid closed, glazing every 20 minutes. The smoky flavor from the grill is incredible—I did this for a summer “Thanksgiving in July” and it was a hit.
Serving & Storage Suggestions
This turkey is best served warm, right after resting. The skin is at its crispiest within 30 minutes of coming out of the oven. Here’s how to make the most of it:
Serving Temperature and Presentation: Carve the turkey and arrange it on a large platter. Drizzle with the reserved glaze and garnish with fresh thyme sprigs, orange slices, or pomegranate seeds for a pop of color. The contrast of the dark, caramelized skin against bright garnishes is stunning. I like to serve it family-style, letting everyone grab their favorite pieces.
Complementary Dishes: This turkey pairs beautifully with classic fall sides. Mashed potatoes with gravy (use the pan drippings!), roasted Brussels sprouts with balsamic glaze, cranberry sauce (either canned or homemade), and a simple green salad with vinaigrette. For dessert, a warm apple crisp or pumpkin pie finishes the meal perfectly. The maple-Dijon flavor also works surprisingly well with sweet potato casserole—the sweetness echoes the maple in the turkey.
Beverage Pairings: A crisp white wine like Sauvignon Blanc or a dry Riesling cuts through the richness beautifully. For red wine drinkers, a light Pinot Noir is perfect—it won’t overpower the delicate turkey flavor. If you’re serving beer, a brown ale or amber lager complements the maple notes. And for non-alcoholic options, sparkling apple cider is a festive choice.
Storage Instructions: Leftover turkey should be cooled completely (within 2 hours of cooking) and stored in an airtight container in the refrigerator. It will keep for 3-4 days. For longer storage, wrap the turkey tightly in plastic wrap and then foil, and freeze for up to 3 months. I always make extra on purpose—leftover turkey sandwiches with cranberry sauce and a smear of the reserved glaze are my favorite post-Thanksgiving lunch.
Reheating Methods: The best way to reheat turkey without drying it out is in a low oven. Place slices in a baking dish, add a splash of chicken broth or water, cover with foil, and warm at 300°F (150°C) for 10-15 minutes. For individual portions, the microwave works in a pinch—just cover with a damp paper towel and heat in 30-second bursts. Avoid high heat, which will toughen the meat. The leftover glaze can be reheated gently on the stovetop or in the microwave.
How Flavors Develop: Honestly, the turkey tastes even better the next day. The maple-Dijon flavor seems to deepen overnight, and the meat becomes even more tender. I’ve been known to make this turkey specifically for leftovers—cold turkey sandwiches with a smear of the glaze and some arugula are absolutely divine.
Nutritional Information & Benefits
While this is definitely a celebratory dish, it’s also surprisingly balanced. Here’s what you’re getting in a typical 4-ounce serving of turkey with glaze (without skin):
| Nutrient | Amount Per Serving |
|---|---|
| Calories | 280 |
| Protein | 34g |
| Fat | 12g |
| Saturated Fat | 4g |
| Carbohydrates | 8g |
| Sugar | 6g |
| Sodium | 520mg |
| Fiber | 0g |
Health Benefits of Key Ingredients: Turkey is an excellent source of lean protein, which supports muscle health and keeps you feeling full. It’s also rich in B vitamins, particularly B6 and B12, which are important for energy metabolism. Maple syrup contains antioxidants and minerals like zinc and manganese, though it should still be used in moderation. Dijon mustard is low in calories and adds flavor without much sodium. The garlic in the glaze has been linked to immune support, which is especially welcome during cold and flu season.
Dietary Considerations: This recipe is naturally gluten-free and can be made dairy-free with a simple substitution. It’s also low-carb if you skip the glaze or use a sugar-free alternative. The turkey itself is keto-friendly (about 1g net carbs per serving without the glaze). If you’re watching sodium, reduce the salt in the dry brine and use low-sodium mustard.
Potential Allergens: This recipe contains dairy (butter) and mustard. If you have allergies, the dairy can be easily substituted. Mustard allergies are less common but do exist—you can replace the Dijon with a combination of apple cider vinegar, turmeric, and a pinch of cayenne for a similar tangy kick.
Personal Wellness Perspective: I love that this recipe feels indulgent but is actually quite wholesome. It’s the kind of meal that brings people together without being overly heavy or processed. The turkey is the star, and the simple, real-food ingredients let it shine. I feel good serving this to my family because I know exactly what’s in it—no mystery ingredients or preservatives.
Conclusion
This Perfect Maple Dijon Spatchcock Turkey has become my signature fall dish, and I think it’s because it captures everything I love about autumn cooking. It’s warm, comforting, and just a little bit unexpected. The spatchcocking technique makes it accessible for any home cook, and the maple-Dijon glaze adds a sophistication that feels special without being complicated. Whether you’re hosting Thanksgiving for the first time or just want a showstopper for a Sunday dinner, this recipe delivers every single time.
I’d love for you to make this your own. Play with the herbs, adjust the sweetness, try it on the grill—whatever feels right. Cooking is about intuition and joy, and this turkey is the perfect canvas for your creativity. Honestly, the first time I made this at 1 AM in a messy kitchen, I had no idea it would become this important to me. But that’s the thing about good recipes—they find you when you least expect them, and they stick around because they’re worth sharing.
So go ahead, grab that turkey, and give it a try. And when you do, come back and tell me how it went. Did you add your own twist? Did your family fight over the crispy skin? I want to hear it all. Drop a comment below, share your photos, and let’s keep this conversation going. Happy cooking, friends!
Frequently Asked Questions
Can I use a turkey breast instead of a whole turkey?
Absolutely! If you’re cooking for a smaller group, a bone-in turkey breast works beautifully with this recipe. Spatchcock it the same way, though you’ll only need to remove the backbone on one side. Reduce the roasting time to about 45-60 minutes, and check temperature early. The glaze proportions stay the same for a 3-4 pound breast.
Do I have to dry-brine the turkey overnight?
While 8-24 hours gives the best results, you can still make this recipe without dry-brining. If you’re short on time, just season the turkey generously with salt and pepper before roasting and let it sit at room temperature for 30 minutes. The skin won’t be quite as crispy, and the meat won’t be as seasoned throughout, but it’ll still be delicious. I’ve done this in a pinch, and no one complained.
My turkey is browning too fast—what do I do?
If the skin is getting too dark before the meat is cooked, tent the turkey loosely with aluminum foil. This will slow down browning while allowing the inside to continue cooking. I usually check at the 40-minute mark and foil if needed. Also, make sure your oven temperature is accurate—an oven thermometer is a cheap investment that prevents this issue.
Can I make the glaze ahead of time?
Yes! The glaze can be made up to 3 days in advance and stored in an airtight container in the refrigerator. Let it come to room temperature before using, or gently reheat it on the stovetop. I often double the recipe and keep half in the fridge for leftovers—it’s amazing on sandwiches the next day.
What do I do with the backbone I removed?
Don’t throw it away! The backbone is perfect for making turkey stock. Place it in a freezer bag and save it until you have a few more bones, or use it immediately. Simmer it with onion, carrot, celery, and herbs for about 2 hours, and you’ll have a rich, flavorful stock that’s perfect for soups, gravies, or risotto. It’s one of those little things that makes a big difference.
Pin This Recipe!
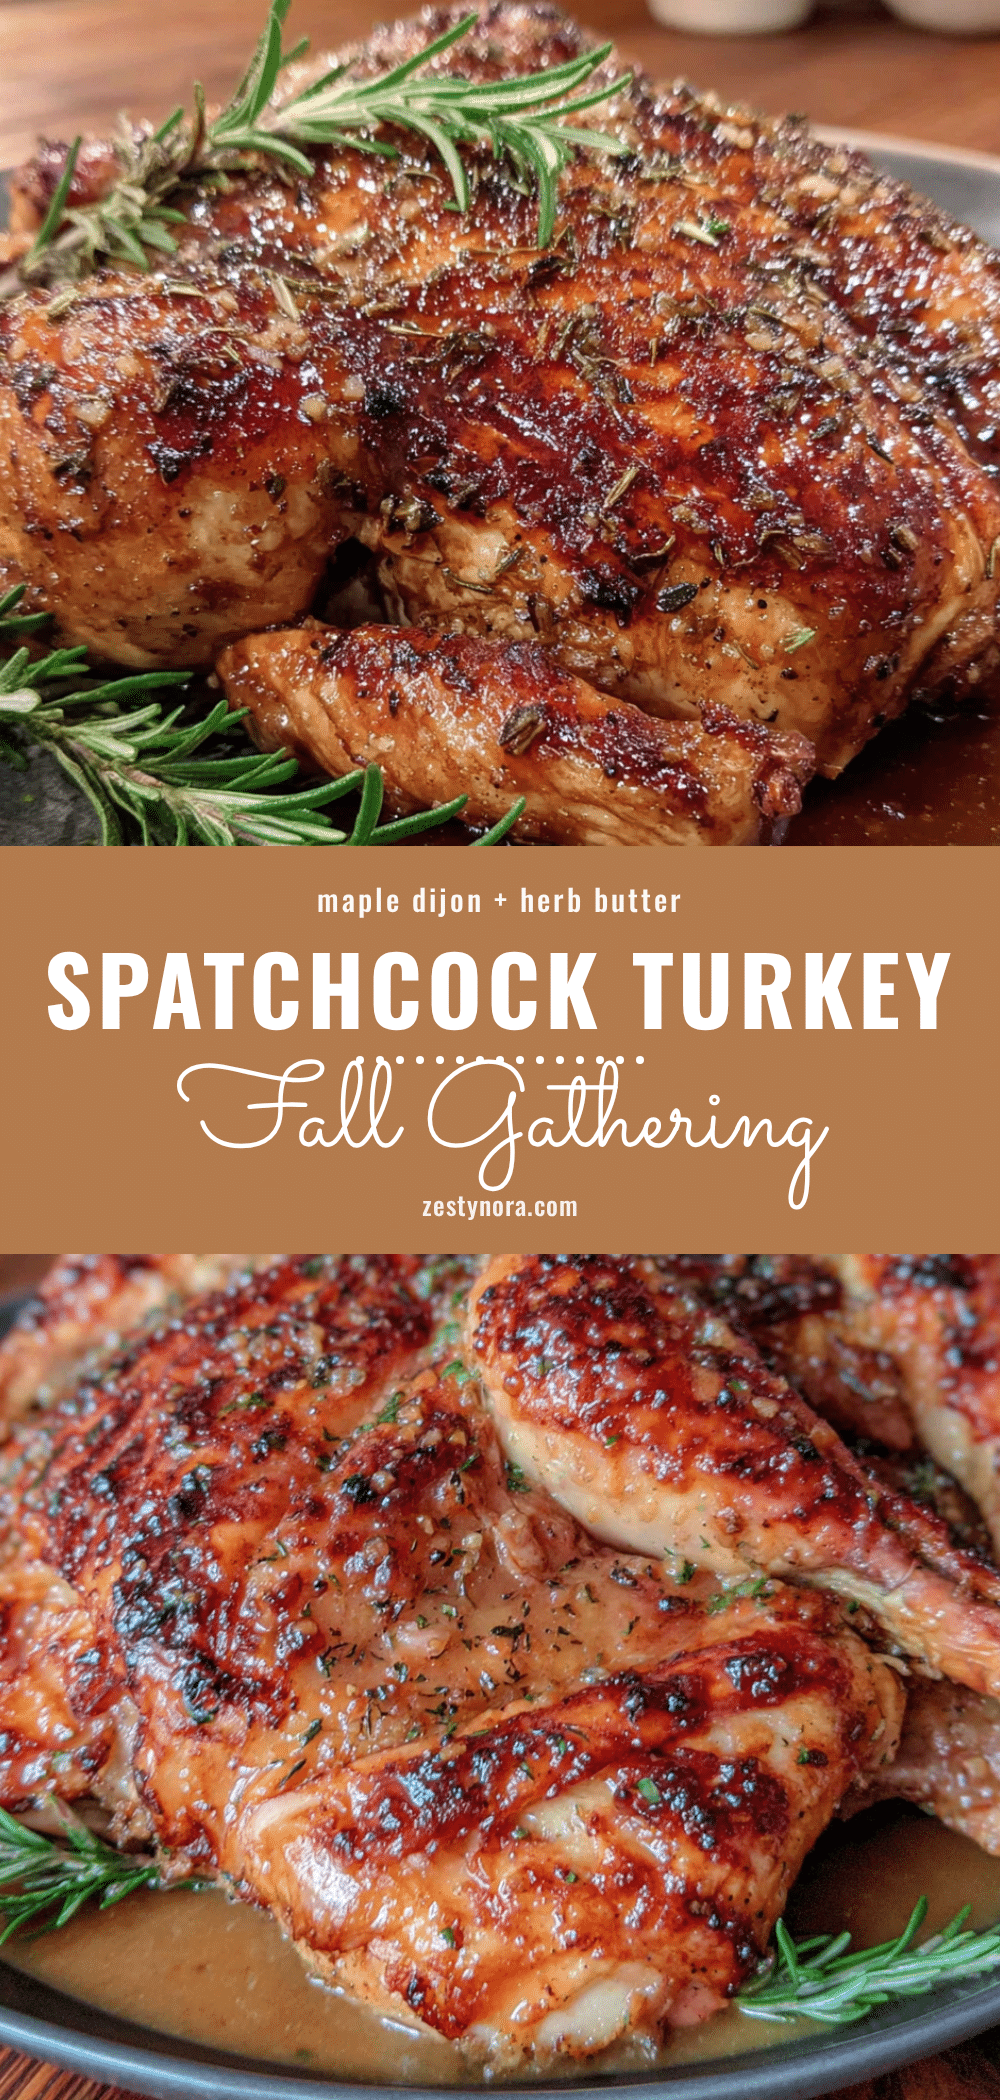
Perfect Maple Dijon Spatchcock Turkey for Easy Fall Dinners
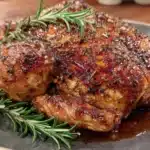
This spatchcock turkey is dry-brined and glazed with a sweet-tangy maple Dijon mixture, roasted until the skin is crackly and caramelized and the meat is juicy. It’s a faster, easier way to get a showstopping turkey perfect for fall gatherings.
- Prep Time: 30 minutes
- Cook Time: 75 minutes
- Total Time: 9 hours 45 minutes (includes dry-brining time)
- Yield: 8-10 servings 1x
- Category: Main Course
- Cuisine: American
Ingredients
- 1 whole turkey (10–14 pounds), thawed if frozen
- 2 tablespoons kosher salt
- 1 teaspoon black pepper, freshly ground
- 1 teaspoon garlic powder
- 1 teaspoon onion powder
- 1/3 cup pure maple syrup
- 1/4 cup Dijon mustard
- 2 tablespoons unsalted butter, melted
- 1 tablespoon apple cider vinegar
- 2 cloves garlic, minced
- 1 teaspoon fresh thyme leaves (or 1/2 teaspoon dried)
- 1/2 teaspoon smoked paprika (optional)
- 1 onion, quartered
- 3–4 sprigs fresh thyme
- 2 bay leaves
- 1 lemon, halved
Instructions
- Spatchcock the turkey: Place turkey breast-side down on a cutting board. Using kitchen shears, cut along one side of the backbone from tail to neck. Repeat on the other side to remove the backbone. Flip turkey over and press down firmly on the breastbone until you hear a crack and the turkey lies flat.
- Dry-brine the turkey: Pat turkey completely dry with paper towels. Mix kosher salt, pepper, garlic powder, and onion powder in a small bowl. Sprinkle mixture all over the turkey, including under the skin. Place turkey on a wire rack over a baking sheet and refrigerate uncovered for 8-24 hours.
- Make the glaze: About 30 minutes before roasting, combine maple syrup, Dijon mustard, melted butter, apple cider vinegar, minced garlic, thyme, and smoked paprika in a small saucepan. Whisk over medium heat until smooth and simmering. Cook 2-3 minutes until slightly thickened. Remove from heat and let cool. Set aside half for serving.
- Preheat and prepare: Remove turkey from fridge 30 minutes before roasting. Preheat oven to 425°F (220°C) with rack in lower third. Stuff cavity with quartered onion, thyme sprigs, bay leaves, and lemon halves. Tuck wing tips under turkey.
- Roast the turkey: Brush turkey all over with half the glaze. Roast for 30 minutes. Brush with more glaze and rotate pan. Continue roasting, glazing every 20 minutes, until breast reaches 155°F (68°C) and thigh reaches 170°F (77°C), about 60-90 minutes total. Tent with foil if browning too quickly.
- Rest and serve: Transfer turkey to a cutting board and let rest at least 20 minutes before carving. Internal temperature will rise 5-10°F during resting. Carve against the grain and serve with reserved glaze on the side.
Notes
Dry-brining is key for juicy meat and crispy skin. If short on time, season generously and let sit 30 minutes at room temperature. For dairy-free, use coconut oil or plant-based butter. For a lower-sugar option, reduce maple syrup to 1/4 cup and add extra Dijon. Leftover turkey keeps 3-4 days in the fridge or up to 3 months frozen.
Nutrition
- Serving Size: 4 ounces
- Calories: 280
- Sugar: 6
- Sodium: 520
- Fat: 12
- Saturated Fat: 4
- Carbohydrates: 8
- Protein: 34
Keywords: spatchcock turkey, maple dijon turkey, roasted turkey, thanksgiving turkey, fall dinner, turkey recipe