My neighbor Carol watched me fumbling with a box of corn muffin mix at the grocery store last Thanksgiving, and she didn’t say anything at first. Then she just gently took the box out of my cart and said, “Put that back. I’ll show you something better this weekend.” I barely knew her—just the occasional wave across the fence—but that Saturday morning, she showed up at my door with a casserole dish wrapped in a kitchen towel, still warm. That dish changed how I think about holiday sides forever. No box, no fuss, just honest ingredients that somehow turned into this golden, creamy, slightly sweet thing that made everyone at the table go quiet.
I’ll be honest—I was skeptical at first. I mean, I’d been making that boxed version for years, thinking I was saving time and effort. But Carol’s version? It had this texture that the boxed stuff just couldn’t touch. Creamy in the middle, golden and a little crispy on top, with real corn kernels that actually tasted like corn. Not that weird, artificially sweet, mushy situation you sometimes get. I asked her for the recipe, and she laughed. “There’s no recipe,” she said. “It’s just what I’ve got in the pantry. You’ll figure it out.” So I did. It took a few tries, honestly—the first batch was too runny, the second too dry—but by the third attempt, I had it. And let me tell you, once you make this easy creamy corn casserole from scratch, you’re never going back to the box.
Maybe you’ve been there, standing in the baking aisle, trying to decide which box mix is least likely to disappoint you. Or maybe you’re just tired of side dishes that feel like an afterthought. This one is different. It’s the kind of dish that gets asked for by name at every family gathering, the one people hover around while it’s still cooling on the counter. And the best part? It comes together with stuff you probably already have in your kitchen. No special trips, no weird ingredients, no stress. Just real food that tastes like you spent hours on it when you really didn’t.
Why You’ll Love This Recipe
This easy creamy corn casserole from scratch is the side dish that keeps on giving. I’ve made it for potlucks, weeknight dinners, and three different Thanksgiving tables, and it never fails to get that “who made this?” reaction. Here’s why it works so well:
- Quick and Easy: You can have this in the oven in under 10 minutes. No kidding. Just stir, pour, and bake. Perfect for those nights when you need a side dish fast but don’t want to open a box.
- Simple Ingredients: No cream of mushroom soup, no boxed cornbread mix, no weird preservatives. Just butter, eggs, sour cream, corn, and a few pantry staples. You probably have everything right now.
- Perfect for Weeknights and Holidays: It’s fancy enough for Thanksgiving but simple enough for a Tuesday. That’s the sweet spot, right?
- Crowd-Pleaser: Kids love the sweet, creamy texture. Adults love that it tastes homemade. Picky eaters? They’ll go back for seconds. I’ve seen it happen.
- Unbelievably Delicious: The texture is what gets me every time. It’s creamy but not mushy, with a golden-brown top that has just a little bite. The sweetness of the corn balances perfectly with the tangy sour cream and rich butter. It’s comfort food that actually feels good to eat.
What makes this version different from all the others? It’s the technique. Instead of using a boxed mix that’s full of preservatives and artificial flavors, we’re using real ingredients that work together to create that perfect creamy texture. The secret is in how we combine the ingredients—a little patience, a little know-how, and you get a casserole that’s light, fluffy, and absolutely loaded with corn flavor. No shortcuts, no compromises, just honest food that tastes like you made it with love. Because you did.
This isn’t just another side dish. It’s the one that makes people close their eyes after the first bite. It’s the one that gets requested for birthday dinners and holiday feasts. And honestly? It’s the one that makes you look like a hero in the kitchen without breaking a sweat. That’s worth making, don’t you think?
What Ingredients You Will Need
This recipe uses simple, wholesome ingredients to deliver that signature creamy texture and sweet corn flavor. No fancy stuff here—just real food that works together beautifully. I’ve tested this with different brands and variations, so I’ll share what I’ve learned along the way.
For the Casserole Base
- 1/2 cup (1 stick) unsalted butter, melted — I use Kerrygold when I can, but any good unsalted butter works. The butter adds richness and helps create that golden top. If you only have salted butter, just reduce the added salt by half.
- 2 large eggs, lightly beaten — Room temperature eggs work best here. They incorporate more smoothly into the batter. If you’re in a hurry, place cold eggs in a bowl of warm water for 5 minutes.
- 1 cup sour cream — Full-fat gives the creamiest result, but I’ve used light sour cream with good results too. Greek yogurt works as a substitute in a pinch, though the texture will be slightly tangier.
- 1 can (15 oz) cream-style corn — This is non-negotiable for the creamy texture. I prefer Del Monte or store brand—both work fine. Don’t drain it; the liquid is essential.
- 1 can (15 oz) whole kernel corn, drained — This adds texture and those lovely pops of whole corn. You can use frozen corn (thawed and drained) if that’s what you have. About 1 1/2 cups frozen works.
- 1 box (8.5 oz) corn muffin mix — Wait, I know I said no boxed mix! But this is different—we’re using the dry mix as a base, not a complete meal. Jiffy is the classic choice, but I’ve also used Krusteaz with great results. The mix provides structure without the artificial flavors of the full boxed casserole kits. If you want to go completely from scratch, substitute 1 cup all-purpose flour, 1/2 cup cornmeal, 2 tablespoons sugar, 1 1/2 teaspoons baking powder, and 1/2 teaspoon salt.
- 1 tablespoon sugar — Optional, but I like a touch more sweetness. Omit if you prefer a less sweet casserole.
- 1/2 teaspoon salt — Enhances all the flavors. If using salted butter, reduce to 1/4 teaspoon.
- 1/4 teaspoon black pepper — Just a hint to balance the sweetness.
Optional Add-Ins

- 1/2 cup shredded cheddar cheese — Adds a savory note and makes the top extra crispy. I’ve used sharp cheddar and pepper jack—both delicious.
- 2 tablespoons chopped jalapeño — For heat lovers. Adds a nice kick without overwhelming the corn flavor.
- 1/4 cup chopped green onions — For freshness and color. Sprinkle on top before serving.
Equipment Needed
You don’t need a fancy kitchen to make this easy creamy corn casserole from scratch. Here’s what you’ll need:
- 9×13-inch baking dish — This is the standard size for this recipe. Glass or ceramic works best because they heat evenly. I use a Pyrex dish that’s seen better days, but it still works like a charm. If you only have metal, reduce the oven temperature by 25°F and check for doneness a few minutes early.
- Large mixing bowl — Any big bowl will do. I use the same one I use for cookie dough—just make sure it’s clean!
- Whisk — For beating the eggs and mixing everything together smoothly. A fork works in a pinch, but a whisk gives you a better texture.
- Measuring cups and spoons — For accuracy. I’ve eyeballed it before, and it’s never as good.
- Rubber spatula — For scraping every last bit of batter into the dish. Waste not, want not.
- Oven mitts — Trust me on this one. That dish gets hot.
That’s it. No stand mixer, no food processor, no special gadgets. Just basic kitchen tools you probably already have. If you’re buying a baking dish, go for glass or ceramic—they’re more forgiving and clean up easier. Budget tip: check thrift stores. I found my favorite Pyrex dish for three dollars.
Preparation Method
Let me walk you through this step by step. I’ve made this easy creamy corn casserole from scratch more times than I can count, so I’ll share all the little tricks I’ve picked up along the way.
- Preheat your oven to 350°F (175°C). Do this first so it’s ready when you are. While it’s heating, grease your 9×13 baking dish with butter or non-stick spray. I use butter because it adds flavor to the edges, but spray works fine too.
- Melt the butter. Pop it in the microwave for 30-45 seconds, or melt it in a small saucepan on the stove. Let it cool for a minute—you don’t want it hot enough to cook the eggs when you mix everything together. I learned this the hard way when I ended up with scrambled egg bits in my casserole. Not the end of the world, but not ideal.
- Beat the eggs in your large mixing bowl. Just a quick whisk until they’re uniform in color and texture. About 30 seconds of whisking should do it. You’re not making meringue here, just getting them incorporated.
- Add the sour cream and melted butter to the eggs. Whisk until smooth. The mixture should look pale yellow and creamy. If it looks separated, keep whisking—it’ll come together.
- Add both cans of corn. Remember: the cream-style corn goes in with its liquid, but drain the whole kernel corn first. I usually just open the can, hold the lid on, and pour off the liquid. Then dump the kernels into the bowl. Stir everything together with your whisk or spatula.
- Add the corn muffin mix, sugar, salt, and pepper. Sprinkle the dry ingredients over the wet mixture, then stir until just combined. Don’t overmix! A few lumps are fine—they’ll bake out. Overmixing can make the casserole tough instead of tender. This is the most common mistake I see people make.
- Pour the batter into your prepared baking dish. Use your rubber spatula to get every last bit. Spread it evenly with the back of the spatula. The batter will be fairly thin—that’s normal. It thickens as it bakes.
- Bake for 45-55 minutes. Here’s what to look for: the edges should be golden brown and pulling away from the sides of the dish slightly. The center should be set but still have a slight jiggle—like a cheesecake, not like Jell-O. A toothpick inserted in the center should come out clean or with just a few moist crumbs. If the top is browning too quickly but the center isn’t set, tent loosely with foil for the last 10-15 minutes.
- Let it rest for 5-10 minutes before serving. This is crucial. The casserole needs time to set up. If you cut into it right away, it’ll be runny. I know it’s hard to wait, but trust me. The texture is so much better after a short rest.
- Serve warm. Spoon it out with a big serving spoon. The top should be golden and slightly crispy, the inside creamy and tender. That first bite? Worth every second of waiting.
Cooking Tips & Techniques
After making this easy creamy corn casserole from scratch more times than I care to count, I’ve collected a few tips that make a real difference. Some I learned from failures, some from happy accidents.
Don’t overmix the batter. I cannot stress this enough. Stir until the dry ingredients are just moistened. A few lumps are perfectly fine. Overmixing develops the gluten in the corn muffin mix, which can make your casserole dense and rubbery instead of light and tender. I made this mistake my second time making it, and it came out more like a corn pancake than a casserole. Still edible, but not what I was going for.
Let your eggs come to room temperature. Cold eggs can cause the melted butter to seize up, creating lumps in your batter. If you forgot to take them out ahead of time, place them in a bowl of warm (not hot) water for 5 minutes. This little step makes a big difference in how smoothly everything comes together.
Watch your baking time. Every oven runs a little differently. My old oven used to take the full 55 minutes, but my new one gets it done in 45. Start checking at 40 minutes. The casserole is done when the edges are golden and pulling away from the dish, and the center is set but still has a slight wobble. A toothpick test is your friend here.
Use a glass or ceramic dish. These materials heat more evenly than metal, giving you a consistent texture throughout. If you only have metal, reduce the oven temperature by 25°F and keep an eye on it. Metal conducts heat faster, so the edges can burn before the center is done.
Don’t skip the rest time. I know you’re hungry. I know it smells amazing. But letting the casserole sit for 5-10 minutes after it comes out of the oven allows the starches to set and the moisture to redistribute. Cut into it too soon, and you’ll have a soupy mess. Patience pays off here.
Make it ahead. You can assemble the casserole the night before, cover it, and keep it in the fridge. Just add about 10 minutes to the baking time since you’re starting from cold. This is a lifesaver for holiday cooking when you’re juggling a million things at once.
Variations & Adaptations
This easy creamy corn casserole from scratch is wonderfully adaptable. Here are some variations I’ve tried and loved:
Cheesy Corn Casserole: Stir in 1/2 cup shredded cheddar cheese (or pepper jack for heat) before baking. Sprinkle another 1/4 cup on top during the last 5 minutes of baking for a cheesy crust. I did this for a potluck once, and the dish came back empty. People were practically licking the spoon.
Spicy Southwest Version: Add 1 can (4 oz) drained diced green chiles, 1/2 cup corn kernels (for extra corn goodness), and 1/4 teaspoon cumin to the batter. Top with chopped cilantro before serving. This version is fantastic with grilled chicken or tacos.
Gluten-Free Option: Use a gluten-free corn muffin mix (I like Bob’s Red Mill) and make sure your cream-style corn is gluten-free (most brands are, but check the label). Everything else in the recipe is naturally gluten-free. I’ve made this for friends with celiac disease, and they couldn’t tell the difference.
Lower-Fat Version: Substitute light sour cream and use 1/4 cup melted butter instead of 1/2 cup. The texture won’t be quite as rich, but it’s still delicious. I’ve also used plain Greek yogurt in place of sour cream with good results—just expect a slightly tangier flavor.
Vegan Adaptation: Use vegan butter, flax eggs (1 tablespoon ground flaxseed mixed with 3 tablespoons water per egg), and vegan sour cream. The texture will be slightly different, but it’s still tasty. I haven’t perfected this version yet, but it’s on my to-do list.
Add Some Protein: Stir in 1 cup of cooked, crumbled bacon or diced ham before baking. This turns the casserole into a main dish. I’ve done this for brunch, and it was a hit. Serve with a side salad, and you’ve got a complete meal.
Serving & Storage Suggestions
This easy creamy corn casserole from scratch is best served warm, right when it comes out of the oven. The contrast between the golden, slightly crispy top and the creamy, tender interior is what makes it so special. But it’s also pretty good at room temperature, which makes it perfect for potlucks and buffets.
Serving Suggestions: Spoon it into a warm serving bowl or just bring the baking dish to the table—it’s rustic and homey. Garnish with a sprinkle of fresh parsley, chives, or a pat of butter melting on top. It pairs beautifully with roasted chicken, grilled steak, baked ham, or even a simple green salad. For Thanksgiving, it’s a fantastic alternative to traditional stuffing or cornbread.
Storage: Cover any leftovers tightly with foil or plastic wrap and refrigerate for up to 4 days. The flavors actually meld together overnight, so leftovers might taste even better the next day. I’ve been known to eat it cold straight from the fridge—don’t judge me.
Reheating: The best way to reheat is in the oven at 350°F for 10-15 minutes, covered with foil to prevent drying out. The microwave works in a pinch (about 1-2 minutes per serving), but the top won’t be as crispy. If you’re using the microwave, place a damp paper towel over the dish to add moisture.
Freezing: You can freeze this casserole for up to 3 months. Bake it completely, let it cool, then wrap tightly in plastic wrap and foil. To serve, thaw overnight in the fridge and reheat in the oven at 350°F until warmed through (about 20-25 minutes). I’ve done this for holiday prep, and it works beautifully.
Make-Ahead Tip: Assemble the casserole the night before, cover, and refrigerate. The next day, let it sit on the counter for 30 minutes while the oven preheats, then bake as directed (add 5-10 minutes to the baking time). This is a game-changer for busy weeknights or holiday mornings.
Nutritional Information & Benefits
While this easy creamy corn casserole from scratch is definitely a comfort food, it does have some redeeming nutritional qualities. Here’s a rough estimate per serving (based on 12 servings):
- Calories: 280
- Total Fat: 15g
- Saturated Fat: 8g
- Cholesterol: 65mg
- Sodium: 480mg
- Total Carbohydrates: 32g
- Dietary Fiber: 2g
- Sugars: 8g
- Protein: 5g
Health Benefits: Corn is a good source of fiber, which aids digestion and helps you feel full. It also contains antioxidants like lutein and zeaxanthin, which are good for eye health. The eggs provide high-quality protein and important nutrients like choline, which supports brain health. Sour cream adds calcium for strong bones. And let’s be honest—sometimes you need a little comfort food that makes you feel good inside and out.
Dietary Considerations: This recipe contains dairy (butter, sour cream), eggs, and gluten (from the corn muffin mix). For gluten-free, use a gluten-free corn muffin mix. For dairy-free, use vegan butter and dairy-free sour cream. It’s naturally nut-free and soy-free (check your corn muffin mix labels to be sure).
I’m not a nutritionist, and I don’t pretend to be. But I do believe in balance. This casserole is a treat, not an everyday thing, and that’s okay. Food is about pleasure, connection, and nourishment—all three matter.
Conclusion
This easy creamy corn casserole from scratch is the kind of recipe that becomes a staple. It’s simple enough for a Tuesday night, special enough for Thanksgiving, and forgiving enough for beginner cooks. No boxed mix, no weird ingredients, no stress. Just real food that tastes like you put love into it.
I still think about Carol every time I make it. That simple act of kindness—taking a box out of my cart and offering something better—changed how I approach cooking. It reminded me that the best recipes aren’t about shortcuts or convenience. They’re about connection. About taking a little time to make something that feeds more than just your stomach.
So go ahead and make this. Customize it however you like—add cheese, spice it up, make it your own. That’s what cooking is all about. And when you take that first warm, creamy, golden bite, I hope you close your eyes and smile. Because that’s what good food does. It makes you feel something.
I’d love to hear how yours turns out. Leave a comment below and tell me what variations you tried. Did you add cheese? Jalapeños? Bacon? Share your creation—I’m always looking for new ideas. And if you loved it, pass it along to someone who needs a little comfort food in their life. That’s how recipes live on.
Happy cooking, friend. You’ve got this.
Frequently Asked Questions
Can I make this corn casserole ahead of time?
Absolutely! You can assemble the casserole the night before, cover it, and keep it in the fridge. When you’re ready to bake, let it sit on the counter for 30 minutes while the oven preheats, then bake as directed, adding 5-10 minutes to the baking time since you’re starting from cold. This is a lifesaver for holiday cooking.
Can I use fresh corn instead of canned?
Yes, you can! Use about 2 cups of fresh corn kernels (cut from about 4 ears of corn) for the whole kernel corn. For the cream-style corn, you’ll need to make your own by blending 1 cup of fresh corn kernels with a little water or milk until creamy. The fresh corn will give you a sweeter, more vibrant flavor, especially in summer.
Why is my corn casserole runny in the middle?
This usually happens for one of three reasons: the casserole wasn’t baked long enough, it was cut into too soon, or the ingredients weren’t measured correctly. Make sure you’re baking until the edges are golden and the center is set but still has a slight jiggle. Let it rest for 5-10 minutes after baking to allow it to set up properly. Also, make sure you’re using the right size baking dish—a 9×13 is standard.
Can I freeze this corn casserole?
Yes, it freezes beautifully! Bake the casserole completely, let it cool to room temperature, then wrap it tightly in plastic wrap followed by a layer of foil. It will keep in the freezer for up to 3 months. To serve, thaw overnight in the fridge and reheat in a 350°F oven for about 20-25 minutes, or until warmed through. The texture will be just as good as fresh.
What can I substitute for the corn muffin mix?
If you want to go completely from scratch, substitute 1 cup all-purpose flour, 1/2 cup cornmeal, 2 tablespoons sugar, 1 1/2 teaspoons baking powder, and 1/2 teaspoon salt. Whisk these dry ingredients together and add them to the wet mixture as directed. This version is a little less sweet than using Jiffy, so you might want to add an extra tablespoon of sugar if you like a sweeter casserole.
Pin This Recipe!
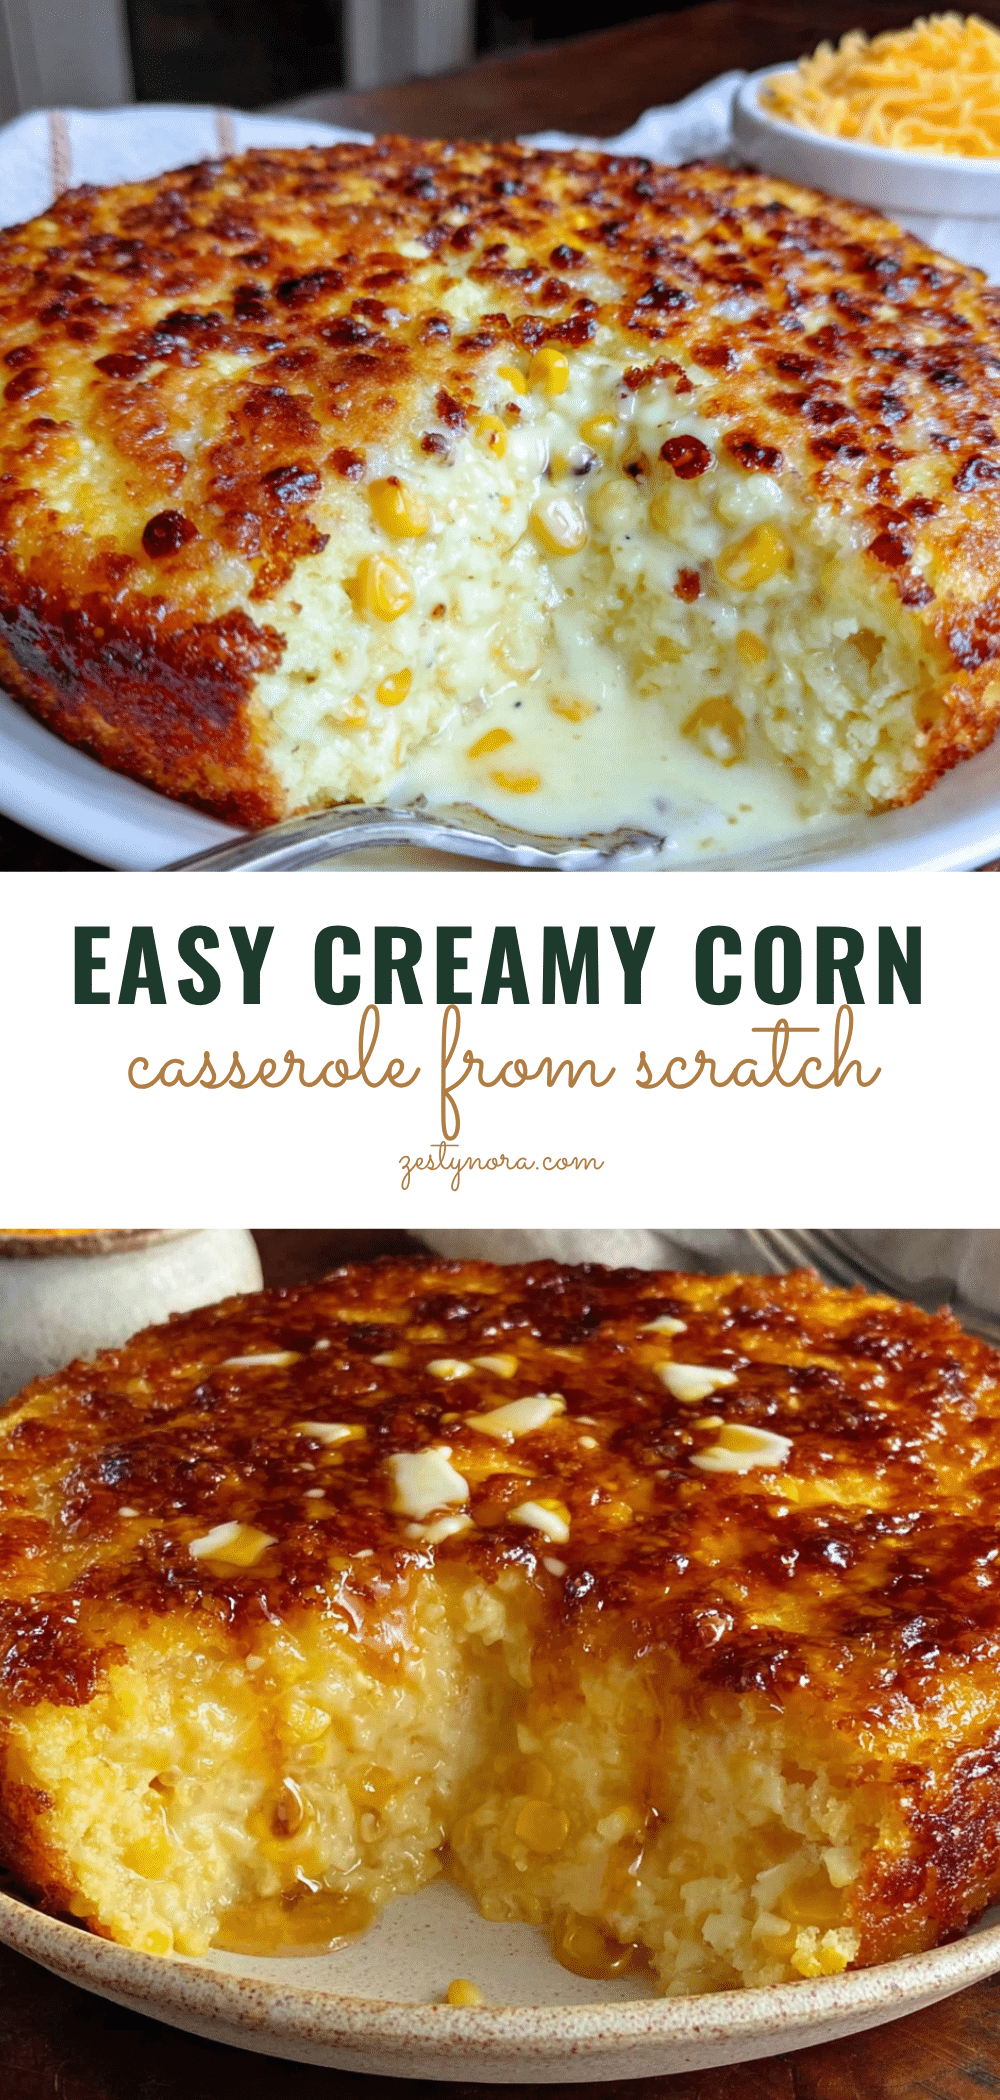
Easy Creamy Corn Casserole from Scratch (Best Homemade Side Dish)

This easy creamy corn casserole from scratch is the perfect side dish for any occasion. Made with simple, wholesome ingredients like butter, eggs, sour cream, and corn, it delivers a creamy, slightly sweet, and golden-brown dish that will have everyone asking for the recipe.
- Prep Time: 10 minutes
- Cook Time: 50 minutes
- Total Time: 1 hour
- Yield: 12 servings 1x
- Category: Side Dish
- Cuisine: American
Ingredients
- 1/2 cup (1 stick) unsalted butter, melted
- 2 large eggs, lightly beaten
- 1 cup sour cream
- 1 can (15 oz) cream-style corn
- 1 can (15 oz) whole kernel corn, drained
- 1 box (8.5 oz) corn muffin mix (e.g., Jiffy)
- 1 tablespoon sugar (optional)
- 1/2 teaspoon salt
- 1/4 teaspoon black pepper
- 1/2 cup shredded cheddar cheese (optional)
- 2 tablespoons chopped jalapeño (optional)
- 1/4 cup chopped green onions (optional)
Instructions
- Preheat your oven to 350°F (175°C). Grease a 9×13-inch baking dish with butter or non-stick spray.
- Melt the butter in the microwave or on the stovetop. Let it cool for a minute.
- In a large mixing bowl, beat the eggs until uniform in color and texture.
- Add the sour cream and melted butter to the eggs. Whisk until smooth and pale yellow.
- Add the cream-style corn (with its liquid) and the drained whole kernel corn. Stir to combine.
- Sprinkle the corn muffin mix, sugar (if using), salt, and pepper over the wet mixture. Stir until just combined; do not overmix. A few lumps are fine.
- Pour the batter into the prepared baking dish and spread evenly with a rubber spatula.
- Bake for 45-55 minutes, until the edges are golden brown and pulling away from the dish, and the center is set but still has a slight jiggle. A toothpick inserted in the center should come out clean or with a few moist crumbs.
- Let the casserole rest for 5-10 minutes before serving to allow it to set.
- Serve warm, spooning out portions with a large serving spoon.
Notes
Don’t overmix the batter to avoid a dense texture. Let eggs come to room temperature for smoother mixing. Use a glass or ceramic dish for even heating. Let the casserole rest after baking to set properly. For make-ahead, assemble the night before and refrigerate; add 5-10 minutes to baking time.
Nutrition
- Serving Size: 1 serving
- Calories: 280
- Sugar: 8
- Sodium: 480
- Fat: 15
- Saturated Fat: 8
- Carbohydrates: 32
- Fiber: 2
- Protein: 5
Keywords: corn casserole, creamy corn casserole, homemade corn casserole, easy side dish, Thanksgiving side dish, corn casserole from scratch