I wasn’t expecting baking advice from my accountant, but there I was, hunched over my kitchen island at 10 PM on a Tuesday, listening to Mr. Henderson describe exactly how to make the perfect cut-out Christmas sugar cookies. He’d come over to drop off my tax folder, saw the flour dust on my counter, and just… started talking. For twenty minutes. About sugar cookies. Turns out, the man who crunches numbers for a living has been making the royal icing for every single church bake sale in our town for the last thirty years. Who knew?
Honestly, I’d been struggling. My previous attempts at cut-out Christmas sugar cookies looked like something a toddler would be proud of—lopsided stars, trees with missing branches, and icing that ran right off the edges like a sugary waterfall. I was this close to giving up and just buying a tin of store-bought cookies for the family gathering. But Mr. Henderson, with his quiet confidence and a recipe scribbled on the back of an envelope, changed everything. He told me the secret wasn’t in the dough—it was in the patience. And the butter. Lots of butter.
That night, I made a batch of cut-out Christmas sugar cookies that actually held their shape. The royal icing set perfectly, glossy and smooth, like little edible stained glass windows. I brought them to the potluck, and let me tell you, they disappeared before the ham. Someone asked me last week why I always bring cookies to holiday parties, and I realized it’s because of that random Tuesday night. You know that feeling when you finally crack a recipe that’s been eluding you? It’s like winning a small, delicious lottery. This is that recipe.
Why You’ll Love This Recipe
Let me be real with you—there are a million sugar cookie recipes out there. But this one? This is the one you’ll come back to year after year. I’ve tested it more times than I care to admit, tweaked the butter-to-flour ratio, and even had a pastry chef friend taste-test the final version. It passed with flying colors.
- Holds Its Shape: No more blobby snowmen. These cut-out Christmas sugar cookies keep their edges crisp and clean, even with detailed cookie cutters.
- Simple Ingredients: You probably have everything in your pantry right now. No weird extracts or hard-to-find specialty flours.
- Perfect for Hosting: This dough can be made days ahead, so you’re not scrambling the morning of your party. Just roll, bake, and decorate while your guests mingle.
- Crowd-Pleaser: Kids love the decorating, adults love the taste, and everyone loves the presentation. It’s the kind of cookie that makes people say, “Wait, you made these?”
- Foolproof Royal Icing: Mr. Henderson’s method gives you that perfect glossy finish without the stress. It dries hard enough to stack, soft enough to bite.
What makes this recipe different? It’s the technique. Most recipes tell you to cream butter and sugar until fluffy, but I’ve found that undermixing slightly gives you a denser, more stable dough that doesn’t spread. Plus, the royal icing uses meringue powder instead of raw egg whites—safer for kids, easier to work with, and just as shiny.
This isn’t just another sugar cookie. It’s the kind that makes you close your eyes after the first bite. The kind your friends will ask for year after year. Perfect for impressing guests without stress, or turning a simple holiday gathering into something memorable.
What Ingredients You Will Need
This recipe uses simple, wholesome ingredients to deliver that classic sugar cookie flavor and sturdy texture. Most of these are pantry staples, which makes it perfect for last-minute holiday baking.
For the Cut-Out Christmas Sugar Cookies
- Unsalted butter, softened: 1 cup (2 sticks, 226g). I prefer using Kerrygold or Land O’Lakes for consistent fat content. Make sure it’s truly softened—leave it out for at least an hour.
- Granulated sugar: 1 cup (200g). Regular white sugar works best here; don’t substitute with brown sugar as it changes the texture.
- Large egg: 1, room temperature. Cold eggs can seize the butter mixture, so let it sit out with the butter.
- Vanilla extract: 2 teaspoons. Pure vanilla extract gives the best flavor, but imitation works in a pinch. I’ve also used vanilla bean paste for those fancy speckled cookies.
- Almond extract: ½ teaspoon (optional but recommended). This is Mr. Henderson’s secret weapon—it adds a subtle, nutty warmth that makes people wonder what’s different.
- All-purpose flour: 2 ½ cups (312g). Spoon and level your flour—don’t scoop directly from the bag or you’ll end up with dense cookies.
- Baking powder: 1 teaspoon. Make sure it’s fresh; test it by dropping a bit in hot water—it should fizz.
- Salt: ½ teaspoon. I use fine sea salt, but table salt works too.
For the Royal Icing

- Meringue powder: 3 tablespoons. I recommend Wilton brand for reliability. It stabilizes the icing and gives that professional shine.
- Powdered sugar: 4 cups (480g), sifted. Sifting is non-negotiable here—lumps will ruin the smooth finish.
- Warm water: 5-6 tablespoons. Start with 5 and add more as needed. The consistency should be like thick honey for outlining, and slightly thinner for flooding.
- Vanilla extract: ½ teaspoon (optional). For flavor, but it will slightly tint the icing off-white. Use clear vanilla if you want pure white.
- Gel food coloring: Your choice of colors. I love AmeriColor brand—they’re concentrated and don’t thin the icing like liquid dyes do.
For Decorating
- Sprinkles, sanding sugar, edible glitter: Whatever you fancy. Apply them while the icing is still wet so they stick.
- Piping bags and tips: Wilton #2 or #3 tips for outlining, #1 for fine details. Snip-the-corner bags work for flooding.
Equipment Needed
You don’t need a professional bakery setup, but a few key tools make a world of difference. Here’s what I use every single time.
- Stand mixer or hand mixer: I use my KitchenAid for the dough, but a hand mixer works just as well—just expect to cream the butter for a minute or two longer.
- Rolling pin: A standard rolling pin is fine, but I love my adjustable rolling pin with thickness rings. It ensures even dough thickness every time (I roll to ¼ inch).
- Cookie cutters: Any shape works, but avoid overly intricate cutters with tiny details—they tend to break. My favorites are classic stars, trees, and snowflakes.
- Baking sheets: Light-colored, rimmed baking sheets are best. Dark sheets absorb more heat and can over-brown the bottoms.
- Parchment paper or silicone baking mats: Parchment is cheaper and disposable; silicone mats are reusable and provide even heat distribution. Both work great.
- Cooling racks: Essential for letting cookies cool completely before icing. If you ice warm cookies, the royal icing will melt into a sad puddle.
- Piping bags and tips: Disposable piping bags are my go-to—no cleanup. Wilton #2 tip for outlining, and a #3 for flooding.
- Toothpicks and scribe tools: For popping air bubbles in the icing and dragging it into corners. A toothpick works perfectly fine.
If you’re on a budget, skip the fancy piping tips and use a zip-top bag with a tiny corner snipped off. It’s not as precise, but it gets the job done for a casual decorating session.
Preparation Method
Let’s get baking. This method is tried and tested, and I’ve included all the little cues that tell you you’re on the right track.
- Cream the butter and sugar. In a large mixing bowl, beat the softened butter and granulated sugar together on medium speed until light and fluffy, about 2-3 minutes. You’re looking for a pale yellow color and a texture that feels like soft sand. Scrape down the sides of the bowl halfway through.
- Add the wet ingredients. Beat in the egg, vanilla extract, and almond extract (if using) until fully combined. The mixture might look slightly curdled at this point—that’s normal, don’t panic. It’ll come together when you add the flour.
- Mix the dry ingredients. In a separate bowl, whisk together the all-purpose flour, baking powder, and salt. This ensures the baking powder is evenly distributed so you don’t get weird puffy spots in your cookies.
- Combine wet and dry. Gradually add the flour mixture to the butter mixture, mixing on low speed just until the dough comes together. Stop as soon as you don’t see any more streaks of flour. Overmixing develops gluten and makes tough cookies.
- Chill the dough. Divide the dough in half, flatten each half into a disc, wrap tightly in plastic wrap, and refrigerate for at least 1 hour. This is non-negotiable—chilled dough holds its shape during baking. I’ve skipped this step before, and let me tell you, my snowmen looked like melting puddles.
- Preheat and prepare. When you’re ready to bake, preheat your oven to 350°F (175°C). Line your baking sheets with parchment paper or silicone mats.
- Roll and cut. On a lightly floured surface, roll one disc of dough to ¼-inch thickness. Use your adjustable rolling pin if you have one, or just check the thickness with your fingers. Cut out shapes with your cookie cutters, re-rolling the scraps as needed. Place cookies about 1 inch apart on the prepared baking sheets.
- Bake. Bake for 8-10 minutes, rotating the baking sheet halfway through. The cookies are done when the edges are just barely golden—the centers should still look pale. They’ll continue to set as they cool. Let them cool on the baking sheet for 5 minutes, then transfer to a cooling rack to cool completely.
- Make the royal icing. In a clean bowl, combine the meringue powder and warm water. Whisk until frothy, about 30 seconds. Add the sifted powdered sugar and vanilla extract (if using), and beat on medium speed for 4-5 minutes. The icing should be thick and glossy, with stiff peaks that hold their shape. If it’s too thick, add water a teaspoon at a time. If too thin, add more powdered sugar.
- Color and bag the icing. Divide the icing into bowls and tint with gel food coloring. Keep the bowls covered with damp paper towels to prevent the icing from drying out. Transfer to piping bags fitted with your desired tips.
- Decorate. Outline each cookie with the thicker icing (stiff peak consistency), then fill in with thinner icing (flood consistency—it should flow like honey). Use a toothpick to pop any air bubbles and drag the icing into corners. Add sprinkles while the icing is wet.
- Let the icing set. Allow the decorated cookies to dry at room temperature for at least 4 hours, or overnight. The icing should be completely hard to the touch before stacking or storing.
Cooking Tips & Techniques
After countless batches, I’ve learned a few things the hard way. Here’s what I wish someone had told me.
Chill your cut-out shapes. After cutting, pop the baking sheet with the cut cookies into the fridge for 10-15 minutes before baking. This extra chill time firms up the butter and virtually eliminates spreading. I learned this trick after my reindeer lost their antlers in the oven.
Don’t overwork the dough. When you’re re-rolling scraps, handle the dough as little as possible. Too much handling warms the butter and develops gluten, leading to tough, misshapen cookies. I try to limit re-rolls to twice maximum; after that, I just bake the scraps as “chef’s snacks.”
Use a scribe tool for icing. A scribe tool (or a toothpick) is your best friend for flooding. It helps you push the icing into every corner and pop those annoying air bubbles. I once tried to skip this step and ended up with cookies that looked like they had chickenpox.
Keep your icing covered. Royal icing dries out fast. Whenever you’re not actively using a bowl, cover it with a damp paper towel or plastic wrap. I’ve had entire batches of icing crust over because I got distracted by a phone call.
Bake similar-sized cookies together. If you’re making both tiny stars and giant snowflakes, bake them on separate sheets. Smaller cookies bake faster, and you don’t want burnt edges on your delicate shapes while you’re waiting for the big ones to finish.
Test your oven temperature. Ovens run hot or cold. I use an oven thermometer to make sure mine is actually at 350°F. One Thanksgiving, my oven was running 25 degrees hot, and my cookies went from pale to charcoal in what felt like seconds.
Variations & Adaptations
One of the best things about this recipe is how flexible it is. Here are some ways to make it your own.
Flavor Variations
- Lemon Sugar Cookies: Add 1 tablespoon of lemon zest and replace the almond extract with lemon extract. The citrus flavor pairs beautifully with royal icing.
- Spiced Christmas Cookies: Add 1 teaspoon of cinnamon, ½ teaspoon of nutmeg, and ¼ teaspoon of cloves to the dry ingredients. These taste like gingerbread’s sophisticated cousin.
- Chocolate Cut-Outs: Replace ¼ cup of the flour with ¼ cup of unsweetened cocoa powder. You’ll need to chill the dough a bit longer since cocoa absorbs moisture.
Dietary Adaptations
- Gluten-Free: Use a 1:1 gluten-free flour blend that contains xanthan gum. I’ve had good results with King Arthur Measure for Measure. The dough will be slightly more fragile, so handle it gently.
- Dairy-Free: Substitute the butter with a high-quality vegan butter stick (not the spreadable kind in a tub). I like Earth Balance or Miyoko’s. The texture will be slightly different, but still delicious.
- Egg-Free: Replace the egg with a flax egg (1 tablespoon ground flaxseed + 3 tablespoons water, let sit for 5 minutes). The cookies will be a bit more crumbly, so roll them thicker—about ⅜ inch.
Decorating Variations
- Stained Glass Cookies: Before baking, cut small shapes out of the center of each cookie and fill the hole with crushed hard candies (like Jolly Ranchers). Bake as usual—the candy will melt into a beautiful translucent window.
- Cookie Sandwiches: Bake simple round or square cookies, then sandwich them with a layer of buttercream, chocolate ganache, or even Nutella. The royal icing goes on top.
- Dipped Cookies: Skip the piping and simply dip half of each cooled cookie into melted white or dark chocolate. Sprinkle with crushed candy canes or festive sprinkles before the chocolate sets.
My personal favorite variation? I once made a batch with orange zest and dipped them in dark chocolate. They were supposed to be for a cookie exchange, but I may have “tested” a few too many. No regrets.
Serving & Storage Suggestions
These cookies are perfect for holiday parties, cookie exchanges, or as edible gifts. Here’s how to serve and store them like a pro.
Serving: Arrange the decorated cookies on a beautiful platter or tiered stand. They’re best enjoyed at room temperature, so take them out of storage about 30 minutes before serving. The royal icing should be completely set and hard to the touch—this usually takes 4-6 hours, but overnight is safest.
Pairing Suggestions: Serve these cut-out Christmas sugar cookies with a glass of cold milk, a hot cup of coffee, or a mug of spiced hot chocolate. For an adult gathering, they pair beautifully with a glass of dessert wine like Moscato or a creamy eggnog. If you’re hosting a cookie platter, add some classic gingerbread men and fudgy chocolate crinkle cookies for variety.
Storage: Store undecorated cookies in an airtight container at room temperature for up to 1 week. Decorated cookies should be stored in a single layer (or between layers of parchment paper) to prevent the icing from smudging. They’ll keep for up to 2 weeks, though they’re best within the first week.
Freezing: You have two options here. Freeze the unbaked dough discs (wrapped tightly in plastic and placed in a freezer bag) for up to 3 months. Thaw overnight in the fridge before rolling and baking. Alternatively, freeze the baked, undecorated cookies for up to 3 months. Thaw at room temperature, then decorate as usual. I always keep a stash of baked cookies in my freezer for last-minute hostess gifts.
Reheating: These cookies are meant to be eaten at room temperature, but if you want that just-baked warmth, pop an undecorated cookie in a 300°F oven for 3-4 minutes. Don’t try this with decorated cookies—the icing will melt.
Flavor Development: Here’s a little secret—these cookies actually taste better the next day. The flavors meld together, the texture softens slightly, and the icing sets to that perfect snap. So don’t stress about baking them the day of your party. Bake ahead, and your future self will thank you.
Nutritional Information & Benefits
Let’s be honest—sugar cookies are a treat, not a health food. But here’s what you’re working with per cookie (based on a 2-inch star, undecorated):
- Calories: Approximately 120-150 per cookie (more with royal icing and sprinkles)
- Fat: 6-8g
- Carbohydrates: 16-20g
- Sugar: 8-12g
- Protein: 1-2g
Health Highlights: While these aren’t exactly a superfood, there are a few bright spots. The butter provides a small amount of vitamin A, and if you use almond extract, you’re getting a hint of natural almond flavor without any artificial additives. Plus, there’s something to be said for the mental health benefits of baking—the process is meditative, the results are rewarding, and sharing them with loved ones is good for the soul.
Dietary Considerations: This recipe contains gluten, dairy, and eggs. For gluten-free or dairy-free options, check the variations section above. The royal icing is egg-free (thanks to the meringue powder), but it does contain sugar—lots of it.
Allergen Note: If you’re using almond extract, be aware that it’s not suitable for those with nut allergies. You can simply omit it or replace it with more vanilla extract.
My personal take? These cookies are about joy, not nutrition. They’re for Christmas mornings, cookie swaps, and the look on a kid’s face when they decorate their first snowman. Enjoy them in moderation, and don’t feel guilty about it.
Conclusion
So there you have it—the perfect cut-out Christmas sugar cookies with royal icing, straight from an accountant’s kitchen to yours. Honestly, I still laugh when I think about that Tuesday night. Who knew that my tax guy would be the one to finally crack the code on cookies that actually hold their shape?
This recipe is worth trying because it works. It’s been tested, tweaked, and tested again. The dough is forgiving, the icing is foolproof, and the results are genuinely impressive. Whether you’re hosting a holiday party, attending a cookie exchange, or just want to spend a cozy afternoon baking with your kids, these cookies deliver every single time.
I’d love to hear how they turn out for you. Did you try a fun variation? Did your kids go wild with the sprinkles? Drop a comment below and share your creations—I read every single one. And if you’re feeling generous, share this recipe with a friend who needs a little holiday baking magic in their life.
Now go preheat that oven. Your perfect cut-out Christmas sugar cookies are waiting. Happy baking!
Frequently Asked Questions
Why did my sugar cookies spread in the oven?
The most common culprit is dough that wasn’t chilled long enough. Make sure you chill the dough for at least 1 hour, and consider chilling the cut shapes on the baking sheet for 10-15 minutes before baking. Also, check that your butter was properly softened—if it was too warm, the cookies will spread.
Can I freeze the royal icing?
Yes, you can! Transfer the royal icing to an airtight container, press plastic wrap directly onto the surface, and freeze for up to 1 month. Thaw in the fridge overnight, then whisk vigorously before using. You may need to add a teaspoon of warm water to bring it back to the right consistency.
How do I get my royal icing to dry faster?
Royal icing dries through evaporation, so good air circulation is key. Place the decorated cookies in front of a fan (on low, not directly blasting) or in a dry, warm room. Avoid putting them in the fridge or freezer—condensation will ruin the finish. Most icing sets within 4-6 hours at room temperature.
Can I use liquid food coloring instead of gel?
You can, but I don’t recommend it. Liquid food coloring adds extra moisture to the icing, which can thin it out and affect the consistency. You’d need to add more powdered sugar to compensate, which throws off the recipe. Gel food coloring is concentrated, doesn’t add moisture, and gives you much more vibrant colors.
My cookies turned out tough—what went wrong?
Tough cookies are usually a sign of overmixing or overworking the dough. When you mix the flour into the butter, stop as soon as it comes together. When you’re re-rolling scraps, handle the dough gently and minimize the number of re-rolls. Also, make sure you’re measuring your flour correctly—scooping directly from the bag can pack in too much flour, leading to dry, tough cookies.
Pin This Recipe!
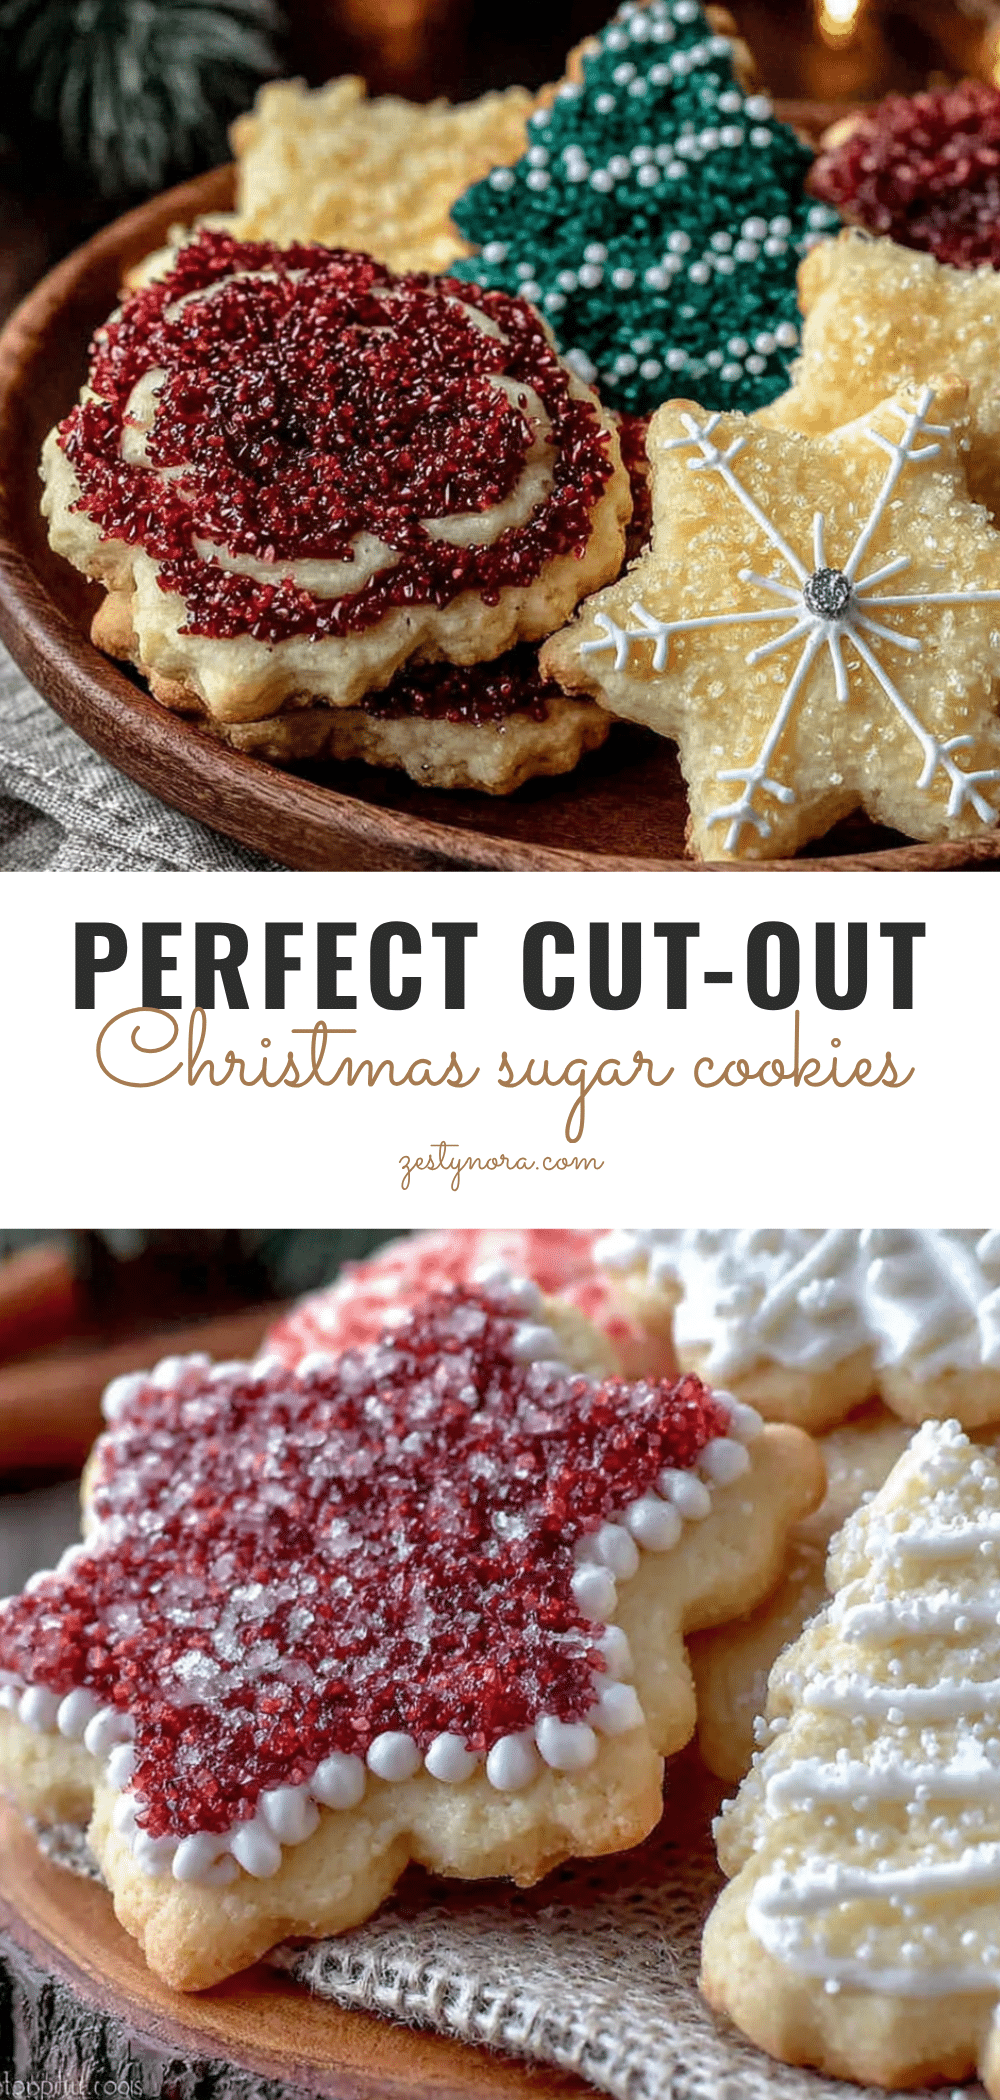
Easy Perfect Cut-Out Christmas Sugar Cookies & Royal Icing Recipe

These cut-out Christmas sugar cookies hold their shape perfectly and are topped with a glossy royal icing. A foolproof recipe from an unlikely source—an accountant—that yields delicious, beautifully decorated cookies ideal for holiday gatherings.
- Prep Time: 20 minutes
- Cook Time: 10 minutes
- Total Time: 1 hour 30 minutes (includes 1 hour chilling)
- Yield: 24-36 cookies (depending on cutter size) 1x
- Category: Dessert
- Cuisine: American
Ingredients
- 1 cup (2 sticks, 226g) unsalted butter, softened
- 1 cup (200g) granulated sugar
- 1 large egg, room temperature
- 2 teaspoons vanilla extract
- ½ teaspoon almond extract (optional but recommended)
- 2 ½ cups (312g) all-purpose flour
- 1 teaspoon baking powder
- ½ teaspoon fine sea salt
- 3 tablespoons meringue powder
- 4 cups (480g) powdered sugar, sifted
- 5–6 tablespoons warm water
- ½ teaspoon vanilla extract (optional, for icing)
- Gel food coloring (optional)
- Sprinkles, sanding sugar, edible glitter (for decorating)
Instructions
- Cream the butter and sugar: In a large mixing bowl, beat the softened butter and granulated sugar together on medium speed until light and fluffy, about 2-3 minutes. Scrape down the sides halfway through.
- Add the wet ingredients: Beat in the egg, vanilla extract, and almond extract (if using) until fully combined. The mixture may look slightly curdled—that’s normal.
- Mix the dry ingredients: In a separate bowl, whisk together the all-purpose flour, baking powder, and salt.
- Combine wet and dry: Gradually add the flour mixture to the butter mixture, mixing on low speed just until the dough comes together. Stop as soon as no streaks of flour remain.
- Chill the dough: Divide the dough in half, flatten each half into a disc, wrap tightly in plastic wrap, and refrigerate for at least 1 hour.
- Preheat and prepare: When ready to bake, preheat oven to 350°F (175°C). Line baking sheets with parchment paper or silicone mats.
- Roll and cut: On a lightly floured surface, roll one disc of dough to ¼-inch thickness. Cut out shapes with cookie cutters, re-rolling scraps as needed. Place cookies about 1 inch apart on prepared baking sheets.
- Bake: Bake for 8-10 minutes, rotating the baking sheet halfway through. Cookies are done when edges are just barely golden. Let cool on baking sheet for 5 minutes, then transfer to a cooling rack to cool completely.
- Make the royal icing: In a clean bowl, combine meringue powder and warm water. Whisk until frothy, about 30 seconds. Add sifted powdered sugar and vanilla extract (if using), and beat on medium speed for 4-5 minutes until thick and glossy with stiff peaks. Adjust consistency with water or powdered sugar as needed.
- Color and bag the icing: Divide icing into bowls and tint with gel food coloring. Keep bowls covered with damp paper towels. Transfer to piping bags fitted with desired tips.
- Decorate: Outline each cookie with thicker icing (stiff peak consistency), then fill in with thinner icing (flood consistency). Use a toothpick to pop air bubbles and drag icing into corners. Add sprinkles while icing is wet.
- Let the icing set: Allow decorated cookies to dry at room temperature for at least 4 hours, or overnight, until icing is completely hard to the touch.
Notes
Chill the cut-out shapes on the baking sheet for 10-15 minutes before baking to prevent spreading. Do not overwork the dough when re-rolling scraps. Keep royal icing covered with a damp paper towel to prevent drying. Bake similar-sized cookies together for even baking. Use an oven thermometer to ensure accurate temperature.
Nutrition
- Serving Size: 1 cookie (2-inch sta
- Calories: 135
- Sugar: 10
- Sodium: 75
- Fat: 7
- Saturated Fat: 4
- Carbohydrates: 18
- Protein: 1
Keywords: sugar cookies, cut-out cookies, Christmas cookies, royal icing, holiday baking, easy sugar cookies


