It was 11:47 PM on a random Tuesday in late November, and I was hit with the most specific craving—not for food, but for something that looked like a cozy winter postcard come to life. I didn’t have the energy for a full baking project, but I had three navel oranges sitting in the fruit bowl and a vague memory of seeing dried citrus on someone’s holiday tree years ago. The idea arrived like a quiet little gift: I could just slice them thin, dry them out in the oven, and suddenly my whole kitchen would smell like Christmas. Honestly, I wasn’t sure if it would work, but it was late, I was tired, and the impulse felt right.
I grabbed my sharpest knife—which, let me tell you, is not nearly as sharp as it should be—and started slicing. The juice dripped all over the cutting board, and I accidentally cut my thumb on the second orange. Classic. But once those slices were laid out on a baking sheet, something shifted. The kitchen got warm. The scent of orange filled the air. And by the time I pulled them out an hour later, they looked like little stained-glass windows. I mean, they were gorgeous. That night, I strung a few on some twine and hung them in the window, and I swear the whole room felt cozier instantly.
Maybe you’ve been there—wanting that holiday feeling without the hours of complicated recipes. This cozy dried orange slice garnish is exactly that. It’s simple, almost meditative to make, and it turns any treat, table, or tree into something special. I’ve been making them every year since, and they never get old. They’re like little edible ornaments that just make everything feel a bit more magical.
Why You’ll Love This Recipe
Listen, I’ve tested a lot of holiday garnishes over the years, and this one is hands-down my favorite. Not because it’s fancy, but because it’s so forgiving and rewarding at the same time. Here’s why you’ll fall for it too:
- Incredibly Easy: You just slice, bake, and wait. That’s it. No complicated steps, no special equipment. It’s practically foolproof.
- Simple Ingredients: Oranges and time. That’s all you need. No trips to a specialty store or hunting for obscure items.
- Perfect for Holiday Gifting: String them on twine, tuck them into gift bags, or use them to top homemade treats—they make everything look intentional and beautiful.
- Crowd-Pleaser: Everyone loves the look and smell of dried oranges. They’re nostalgic and charming, and they make people smile without even trying.
- Unbelievably Versatile: Use them on cakes, cookies, cocktails, gift tags, wreaths, or just in a bowl on the coffee table. They pull double duty as decoration and garnish.
What makes this recipe different from the rest? It’s the texture. When you dry them just right, they get this chewy, slightly leathery edge that’s not brittle or burnt. I’ve tried every method—high heat, low heat, with sugar, without—and this one nails it every time. Plus, the aroma that fills your house is pure comfort. It’s the kind that makes you close your eyes after the first whiff and just breathe.
This isn’t just another garnish recipe. It’s the kind of small, satisfying project that makes your whole home feel like a holiday movie set. And honestly, in the middle of a busy season, that’s exactly what we all need.
What Ingredients You Will Need
This recipe uses the simplest ingredients you can imagine. Honestly, you might already have everything you need in your kitchen right now. The magic is in the technique, not the shopping list.
- Fresh Oranges (3-4 medium): The star of the show. Go for firm, heavy oranges with smooth skin—they slice more evenly. Navel oranges are my go-to because they’re widely available and have a nice balance of sweetness and acidity. (For a prettier look, try blood oranges or cara caras for that pinkish hue.)
- Optional: Granulated Sugar (1-2 tablespoons): A light dusting adds a subtle sweetness and helps the slices dry with a slightly candied edge. I use it about half the time, depending on my mood. (Skip it if you’re watching sugar or want a more natural look.)
- Optional: Cinnamon or Star Anise (for spice): If you want to go full holiday mode, sprinkle a tiny pinch of cinnamon over the slices before baking. Or place a star anise pod on the pan—it infuses a gentle warmth into the air as they dry. I did this once on a whim, and now I can’t stop.
That’s it. Seriously. Three ingredients (or two if you keep it simple). The beauty of this recipe is that it lets the orange do the work. You don’t need fancy syrups or extracts—just good fruit and a little patience.
One thing I’ve learned: use organic oranges if you can. The peel is the star here, and conventional oranges sometimes have a waxy coating that doesn’t dry as nicely. I’ve made the mistake of using non-organic before, and the slices came out a little glossy and weird. Never again. Look for oranges that feel heavy for their size—that means they’re juicy and fresh.
If you’re feeling adventurous, try mixing different citrus. Lemons, limes, and grapefruits all work beautifully. Just keep in mind that thinner-skinned fruit dries faster, so check them a bit earlier. I once made a batch with Meyer lemons and blood oranges, and the color contrast was stunning.
Equipment Needed
You don’t need a lot of fancy tools for this one, which is part of why I love it. Here’s what you’ll want on hand:
- A Sharp Knife or Mandoline: A sharp chef’s knife works fine, but a mandoline slicer is a game-changer for getting even, thin slices. I’ve used both, and the mandoline wins for consistency. Just watch your fingers—I’ve got a few scars that prove how sharp those blades are.
- Cutting Board: Any sturdy board will do. I prefer a large wooden one because it doesn’t slide around as much.
- Baking Sheet: A standard rimmed baking sheet works perfectly. Line it with parchment paper for easy cleanup.
- Paper Towels: You’ll need these to blot the slices before baking. It helps remove excess moisture and speeds up the drying process.
- Cooling Rack: Optional but helpful. Letting the slices cool completely on a rack prevents them from steaming and getting soft.
- Twine or Ribbon (for garlands): If you’re making ornaments or gift toppers, a simple piece of kitchen twine is all you need.
If you don’t have a mandoline, don’t stress. A sharp knife and a steady hand will get you there. Just aim for slices about 1/8-inch thick—thin enough to dry evenly, thick enough to hold their shape. I’ve made plenty of batches with just a knife, and they turned out beautiful.
Preparation Method
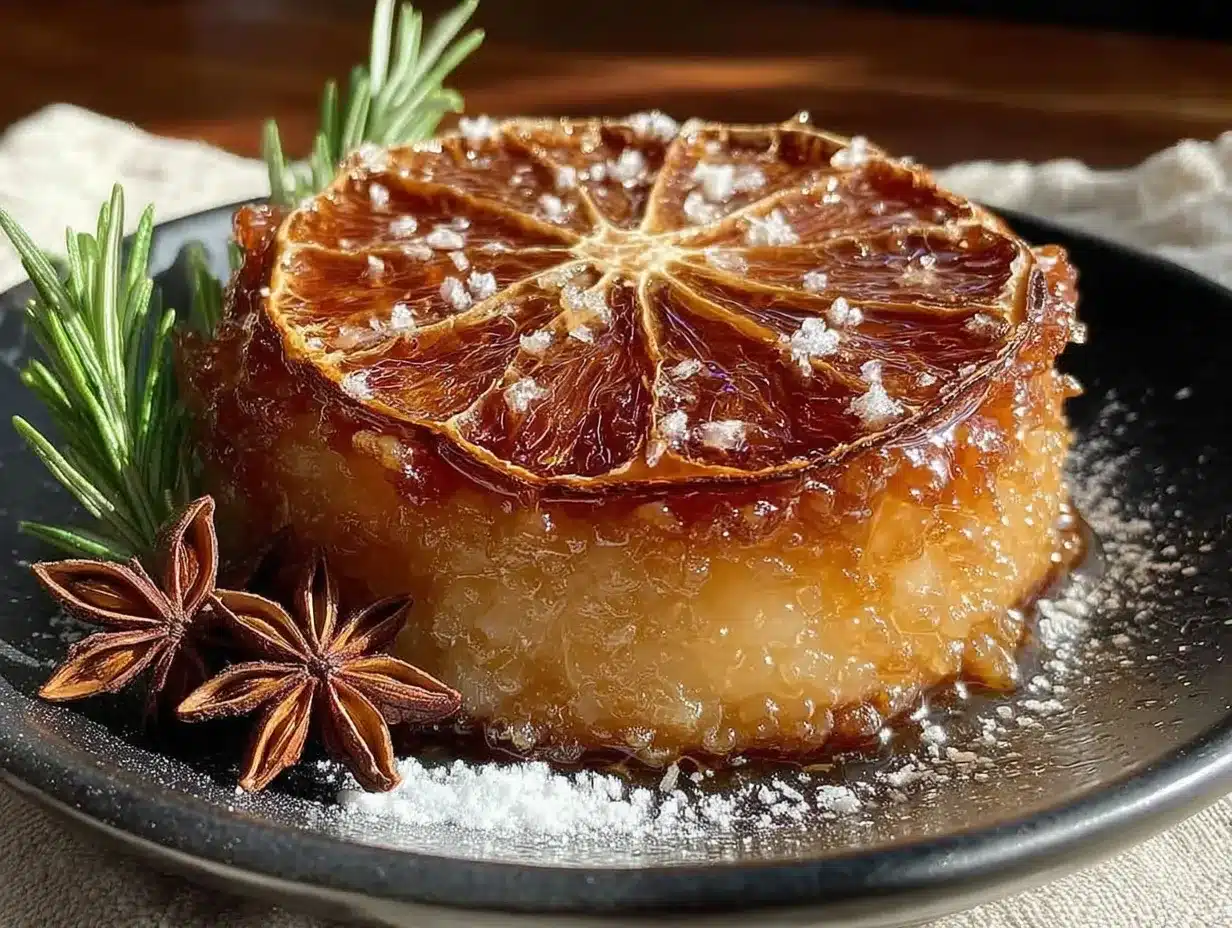
Alright, let’s get to it. This is where the magic happens. Follow these steps, and you’ll have gorgeous dried orange slices in no time.
- Preheat your oven to 200°F (95°C). Low and slow is the name of the game here. High heat will burn the sugars and leave you with bitter, crispy discs. Trust me, I learned that the hard way. Set your oven to the lowest possible temperature—most ovens go to 170°F or 200°F.
- Wash and dry the oranges thoroughly. Even if they’re organic, give them a good scrub under warm water to remove any dirt or residue. Pat them dry with a clean towel.
- Slice the oranges into even rounds, about 1/8-inch thick. Use a sharp knife or mandoline. Try to keep the slices as uniform as possible—this ensures they dry at the same rate. If you get a few thicker ones, just set them aside for snacking or juicing.
- Blot the slices with paper towels. Lay the slices out on a double layer of paper towels and gently press another towel on top. You want to remove as much surface moisture as possible. This step is crucial—wet slices take forever to dry and can steam instead of dehydrate.
- Arrange the slices in a single layer on a parchment-lined baking sheet. Make sure they’re not touching or overlapping. If they’re too close, they’ll stick together and dry unevenly. I usually fit about 12-15 slices per standard sheet.
- Optional: Sprinkle with sugar or cinnamon. If you want a slightly sweeter, more festive look, dust the tops with a pinch of granulated sugar or a whisper of cinnamon. Don’t overdo it—a little goes a long way.
- Bake for 2.5 to 3 hours, flipping halfway through. At the 90-minute mark, carefully flip each slice with a spatula. This helps them dry evenly on both sides. Keep an eye on them during the last 30 minutes—ovens vary, and you want them dry but not brittle.
- Check for doneness. The slices should feel mostly dry to the touch, with a slightly leathery texture. They’ll still be a tiny bit pliable when warm, but they’ll firm up as they cool. If they feel damp or sticky, give them another 15-20 minutes.
- Cool completely on a wire rack. Transfer the slices to a cooling rack and let them sit for at least 30 minutes. This step is important—if you stack them while warm, they can trap moisture and get soft.
- Store or use immediately. Once cool, they’re ready to use. String them on twine, tuck them into gift bags, or pile them on a cake. They’ll last for weeks if stored properly.
A quick note: don’t walk away during the last hour. I’ve definitely burned a batch because I got distracted by a movie. Set a timer and check them regularly. The difference between perfectly dried and overdone is just a few minutes.
Cooking Tips & Techniques
After making these for several seasons, I’ve picked up a few tricks that make the process smoother and the results prettier. Here’s what I’ve learned:
- Use a mandoline for even slices. I know I said this already, but it bears repeating. Even thickness is the single most important factor for consistent drying. A mandoline makes it effortless. If you’re using a knife, take your time and try to keep the slices uniform.
- Don’t skip the blotting step. I once thought I could skip it to save time, and my slices took nearly four hours to dry. The extra moisture just sat there, steaming the oranges instead of dehydrating them. Blotting is worth the two minutes it takes.
- Rotate the baking sheet halfway through. Most ovens have hot spots, and rotating the pan ensures even drying. I usually do this when I flip the slices at the 90-minute mark.
- Let them cool completely before storing. This is non-negotiable. Warm slices are still releasing moisture, and sealing them too soon can cause mold. Give them at least an hour on a cooling rack.
- If they’re still a bit soft after cooling, pop them back in the oven. Sometimes a slice or two will retain a little moisture. Just return them to the oven for another 15-20 minutes. Better to be safe than sorry.
One mistake I made early on was trying to rush the process with higher heat. I set the oven to 250°F thinking it would save time, and the edges burned while the centers stayed wet. Low and slow is the only way to go. Patience pays off here.
Variations & Adaptations
Once you’ve mastered the basic dried orange slice, the possibilities are endless. Here are some of my favorite ways to mix it up:
- Citrus Medley: Use a mix of oranges, lemons, limes, and grapefruits. The color variety is stunning—golden, pale yellow, bright green, and deep pink. I did this for a holiday party last year, and everyone asked where I bought them.
- Spiced Oranges: Before baking, brush the slices lightly with a mixture of honey and water, then sprinkle with cinnamon, cloves, and a pinch of nutmeg. The spices add a warm, aromatic layer that’s perfect for garlands or gift tags.
- Herb-Infused: Lay a few sprigs of rosemary or thyme on the baking sheet next to the oranges. The herbs release their oils as they dry, infusing the slices with a subtle savory note. I love using these in cocktail garnishes.
- Chocolate-Dipped: Once the slices are fully dry and cool, dip half of each slice in melted dark chocolate. Let them set on parchment paper. They become a sweet-and-tart treat that’s amazing on its own or as a cake topper.
- Low-Sugar Option: Skip the sugar altogether. The oranges have plenty of natural sweetness, and the slices dry beautifully without any added sugar. This is my go-to for savory dishes or cocktails.
I once tried a batch with a light dusting of powdered sugar before baking, and it created a delicate, snowy effect. They looked like little winter scenes. Just be careful—powdered sugar can burn faster than granulated, so keep an eye on them.
Serving & Storage Suggestions
These dried orange slices are incredibly versatile. Here’s how to use and store them:
- As a Garnish: Place a slice on top of cakes, cupcakes, or cookies. They add a pop of color and a subtle citrus aroma. I love them on a simple vanilla cake—it instantly looks fancy.
- In Cocktails: Float a dried orange slice in a mug of mulled wine, hot cider, or a winter cocktail. They look beautiful and infuse a gentle citrus note as they steep.
- As Decorations: String them on twine with cinnamon sticks and star anise for a homemade garland. Hang them on the tree, over a window, or along a mantel. They last for months if kept dry.
- In Gift Bags: Tuck a few slices into gift bags or boxes. They add a personal, handmade touch that store-bought decorations just can’t match.
Storage Instructions: Keep dried orange slices in an airtight container at room temperature. They’ll stay good for 2-3 months. If you live in a humid climate, add a silica gel packet to the container to absorb excess moisture. Do not refrigerate—the moisture in the fridge can make them soft.
Reheating Tip: If your slices lose their crispness over time, pop them in a 200°F oven for 10-15 minutes. They’ll crisp right back up. I’ve done this with slices that were six weeks old, and they looked and smelled like fresh ones.
One thing I love about these slices is that they actually get better-looking over time. The colors deepen, and the edges curl slightly, giving them an antique, rustic charm. They’re like little edible heirlooms.
Nutritional Information & Benefits
While dried orange slices are mostly used as a garnish, they do offer some nutritional perks. Here’s a quick look:
- Per Slice (approx.): 15-20 calories, 0g fat, 4g carbs, 3g sugar, 0g protein. (Values are approximate and vary based on size and any added sugar.)
- Rich in Vitamin C: Oranges are packed with immune-boosting vitamin C, and drying concentrates the nutrients. A few slices can contribute to your daily intake.
- Antioxidants: Citrus peels contain flavonoids and antioxidants that support overall health. The peel is actually the most nutrient-dense part of the fruit.
- Dietary Fiber: Dried orange slices retain some fiber from the peel, which aids digestion.
- Dietary Considerations: Naturally gluten-free, dairy-free, vegan, and paleo-friendly. If you skip the sugar, they’re also low-carb and keto-friendly.
I like to think of these slices as a little dose of sunshine in the middle of winter. They’re not a health food, but they’re a wholesome, natural way to add beauty and flavor to your holiday treats without artificial colors or preservatives.
Conclusion
There’s something deeply satisfying about making something so beautiful from such simple ingredients. These cozy dried orange slices are proof that you don’t need a fancy kitchen or a long shopping list to create holiday magic. They’re easy, forgiving, and endlessly versatile—whether you’re decorating a cake, stringing a garland, or just filling your home with that warm, citrusy scent.
I love that this recipe lets me slow down for a few hours. It’s a quiet, meditative process that feels like a little gift to myself in the middle of a busy season. And the result? Pure joy. Every time I see those golden slices catching the light, I smile.
Now I want to see what you create! Try this recipe and let me know how it goes. Did you add cinnamon? String them on twine? Dip them in chocolate? Drop a comment below or tag me in your photos—I love seeing your cozy holiday creations. Happy drying, friends!
Frequently Asked Questions
Can I use a dehydrator instead of an oven?
Absolutely! A dehydrator works perfectly for this. Set it to 135°F (57°C) and dry for 4-6 hours, or until the slices feel leathery and dry. The process is even more forgiving with a dehydrator since there’s no risk of burning.
How do I know when the slices are done?
They should feel mostly dry to the touch, with a slightly leathery texture. They’ll still be a tiny bit pliable when warm, but they’ll firm up as they cool. If they feel damp or sticky, give them more time. When in doubt, it’s better to over-dry than under-dry—moisture can lead to mold.
Can I use other citrus fruits?
Yes! Lemons, limes, grapefruits, and blood oranges all work beautifully. Just adjust the drying time based on thickness and water content. Thinner-skinned fruits like limes may dry faster, while grapefruits might take a bit longer.
How long do dried orange slices last?
Stored in an airtight container at room temperature, they’ll last 2-3 months. Keep them away from humidity and direct sunlight. If they lose their crispness, you can re-crisp them in a low oven for 10-15 minutes.
Can I eat dried orange slices?
Yes, they’re edible! The peel becomes chewy and slightly sweet, especially if you added sugar. They’re great on their own as a snack, or used as a garnish for desserts and drinks. Just note that the pith can be a bit bitter, so they’re best in small pieces.
Pin This Recipe!
Cozy Dried Orange Slice Garnish: Easy Holiday Treats

Transform simple oranges into beautiful, chewy dried slices that double as edible ornaments and garnishes. This easy, low-and-slow oven method fills your home with a warm citrus aroma and creates stunning decorations for cakes, cocktails, garlands, and gifts.
- Prep Time: 15 minutes
- Cook Time: 2 hours 30 minutes
- Total Time: 3 hours
- Yield: 12-15 slices 1x
- Category: Garnish
- Cuisine: American
Ingredients
- 3–4 medium fresh oranges (preferably organic, such as navel oranges)
- 1–2 tablespoons granulated sugar (optional)
- Pinch of cinnamon or 1 star anise pod (optional)
Instructions
- Preheat your oven to 200°F (95°C).
- Wash and dry the oranges thoroughly.
- Slice the oranges into even rounds, about 1/8-inch thick, using a sharp knife or mandoline.
- Blot the slices with paper towels to remove excess surface moisture.
- Arrange the slices in a single layer on a parchment-lined baking sheet, ensuring they do not touch or overlap.
- Optional: Sprinkle with sugar or cinnamon for a sweeter, festive look.
- Bake for 2.5 to 3 hours, flipping halfway through at the 90-minute mark.
- Check for doneness: slices should feel mostly dry with a slightly leathery texture; they will firm up as they cool.
- Cool completely on a wire rack for at least 30 minutes.
- Store in an airtight container at room temperature for up to 2-3 months, or use immediately.
Notes
Use organic oranges to avoid waxy coatings that affect drying. Blotting slices thoroughly is crucial to prevent steaming. Rotate the baking sheet halfway through for even drying. Do not rush with higher heat; low and slow prevents burning. Slices will firm up as they cool. If they lose crispness over time, re-crisp in a 200°F oven for 10-15 minutes.
Nutrition
- Serving Size: 1 slice
- Calories: 1520
- Sugar: 3
- Carbohydrates: 4
Keywords: dried orange slices, holiday garnish, edible ornaments, citrus decorations, easy holiday treats, homemade garland, orange slice recipe


