It was 11:47 PM on a random Wednesday in early November. I was supposed to be asleep, but instead, I was staring into the fridge like it held the secrets to the universe. The craving hit me out of nowhere — not for pie, not for turkey, but for deviled eggs. The problem? I had exactly six hard-boiled eggs from a failed salad experiment earlier that week, a half-used pack of bacon, and a container of Greek yogurt I bought thinking I’d start eating healthy. Classic me.
I didn’t have any fancy chives or smoked paprika. I didn’t have the patience for a complicated recipe. But I had this idea — what if I made them creamy, almost like a loaded baked potato situation, but for Thanksgiving? I mean, let’s be honest, Thanksgiving deviled eggs are already a thing, but most versions are just… eggs with a little mustard. I wanted something that felt like a celebration. Something that would make people close their eyes when they bit into it.
So there I was, mashing yolks with Greek yogurt and a splash of pickle juice (don’t knock it till you try it), while the bacon sizzled on the stove. The kitchen smelled like breakfast and holidays all at once. I accidentally dropped a yolk on the floor — our dog was thrilled — but honestly, that little mess made the whole thing feel real. These eggs weren’t perfect. They were better. They were mine.
That night, I ate one standing over the counter. Then another. By the time I went to bed, I knew I had stumbled onto something special. Maybe you’ve been there — that moment when a random kitchen experiment turns into a recipe you can’t stop thinking about. These creamy Thanksgiving deviled eggs with crispy bacon are that recipe for me. And I’m pretty sure they’ll become one of yours too.
Why You’ll Love This Recipe
Let me tell you — I have tested this recipe at three different holiday gatherings, and it disappeared faster than the pumpkin pie every single time. These aren’t just deviled eggs; they are the appetizer everyone remembers. Here is why this version is different:
- Quick & Easy: You can have these ready in under 30 minutes, especially if you prep the eggs a day ahead. Perfect for when you are juggling a dozen other dishes on Thanksgiving morning.
- Simple Ingredients: No need to hunt down specialty stores. Eggs, bacon, Greek yogurt, mustard, and a few pantry staples — that is it. You probably already have everything in your kitchen right now.
- Perfect for Thanksgiving: These eggs fit right in on any holiday table. They are fancy enough for guests but simple enough that you won’t stress making them.
- Crowd-Pleaser: I have served these to picky kids, health-conscious aunts, and bacon-obsessed uncles. Every single person came back for seconds. Honestly, I had to hide a few just to save some for photos.
- Unbelievably Delicious: The secret is blending Greek yogurt with the yolks instead of using all mayo. It makes the filling incredibly smooth and tangy, while the crispy bacon adds that salty crunch everyone craves.
What makes this recipe stand out from all the other deviled egg recipes out there? It is the texture. Most versions use too much mayo and end up greasy. Here, the Greek yogurt keeps things light but still decadent — think of it as the perfect middle ground between healthy and indulgent. Plus, the bacon is baked, not fried, so it stays extra crispy without being a soggy mess.
This is the kind of appetizer that makes you close your eyes after the first bite. It is comfort food reimagined — healthier, faster, but with the same soul-soothing satisfaction. Perfect for impressing guests without stress, or turning a simple Thanksgiving snack into something truly memorable.
What Ingredients You Will Need
This recipe uses simple, wholesome ingredients to deliver bold flavor and satisfying texture without the fuss. Most of these are pantry staples, especially around the holidays, but I have included a few notes to help you pick the best options.
- Large eggs — 12 eggs, hard-boiled and peeled. Fresh eggs are harder to peel, so use eggs that are at least a week old if possible. Room temperature eggs work best for smooth filling.
- Bacon — 6 strips of thick-cut bacon. I prefer Applegate or Niman Ranch for consistent crispiness. Avoid thin bacon; it burns too easily.
- Greek yogurt — 1/2 cup plain full-fat Greek yogurt. Full fat is key here — nonfat can make the filling watery. I like Fage 5% for its thickness.
- Mayonnaise — 2 tablespoons. Just enough for richness without overpowering the tang. Hellmann’s or Duke’s both work great.
- Dijon mustard — 1 tablespoon. Adds a subtle kick. You can use yellow mustard in a pinch, but Dijon gives a more sophisticated flavor.
- Pickle juice — 1 tablespoon. This is my secret ingredient. It brightens everything up and cuts through the richness. Use dill pickle juice for best results.
- Salt — 1/4 teaspoon, or to taste. Go easy — bacon adds saltiness.
- Black pepper — 1/4 teaspoon freshly ground.
- Smoked paprika — 1/2 teaspoon for garnish. Regular paprika works too, but smoked adds that extra layer of holiday flavor.
- Fresh chives — 2 tablespoons, finely chopped. Optional but recommended for a pop of color and mild onion flavor.
Ingredient Selection Tips: For the creamiest filling, make sure your Greek yogurt is strained and thick. If you can only find nonfat, place it in a cheesecloth over a bowl for 30 minutes to drain excess liquid. For the bacon, look for center-cut slices — they have less fat and crisp up more evenly. And please, do not skip the pickle juice. It sounds weird, but it is the thing that makes people ask, “What did you put in these?”
Equipment Needed
You do not need any fancy gadgets for this recipe, which is part of why I love it. Here is what you will need:
- Large pot — For boiling the eggs. Use one wide enough to hold all 12 eggs in a single layer.
- Baking sheet — For baking the bacon. A rimmed sheet works best to catch the grease.
- Parchment paper — Optional, but makes cleanup a breeze.
- Mixing bowls — One medium bowl for the yolks, one small bowl for the bacon.
- Fork or potato masher — For mashing the yolks. A fork works perfectly; no need for a food processor here.
- Piping bag or zip-top bag — For filling the eggs neatly. A zip-top bag with the corner snipped off works just as well as a fancy piping tip.
- Sharp knife — For halving the eggs cleanly. A serrated knife can help prevent the whites from tearing.
- Cutting board — For chopping bacon and chives.
Budget-Friendly Tip: If you do not have a piping bag, do not buy one. Just use a sturdy zip-top bag — it is cheaper and works exactly the same. I have been doing this for years and honestly prefer it because there is less cleanup.
Preparation Method

Let me walk you through this step by step. Take your time with the eggs — they are the foundation of the whole dish.
- Hard-boil the eggs. Place 12 large eggs in a large pot in a single layer. Cover with cold water by about 1 inch. Bring to a boil over high heat. Once boiling, turn off the heat, cover the pot, and let it sit for exactly 10 minutes. Meanwhile, prepare an ice bath — a large bowl filled with ice and cold water. After 10 minutes, transfer the eggs to the ice bath using a slotted spoon. Let them cool for at least 15 minutes. This method gives you perfectly cooked yolks — no green rings!
- Bake the bacon. While the eggs cool, preheat your oven to 400°F (200°C). Line a baking sheet with parchment paper. Lay 6 strips of thick-cut bacon in a single layer — do not overlap. Bake for 15-18 minutes, until golden and crispy. Keep an eye on it after 15 minutes; bacon can go from perfect to burnt fast. Transfer to a paper towel-lined plate to drain. Once cool, crumble or chop into small pieces.
- Peel the eggs. Gently tap each egg on the counter to crack the shell all over. Roll it between your palms to loosen the shell. Start peeling from the wider end — there is usually an air pocket there that makes it easier. Rinse the peeled eggs under cold water to remove any tiny shell fragments. Pat dry with a paper towel.
- Halve the eggs. Using a sharp knife, slice each egg lengthwise. Wipe the knife clean between cuts for neat halves. Gently pop out the yolks into a medium mixing bowl. Arrange the egg white halves on a serving platter, cut side up.
- Make the filling. Add 1/2 cup Greek yogurt, 2 tablespoons mayonnaise, 1 tablespoon Dijon mustard, 1 tablespoon pickle juice, 1/4 teaspoon salt, and 1/4 teaspoon black pepper to the yolks. Mash everything together with a fork until smooth. Taste it — you should get a nice tang with a hint of mustard. Adjust salt if needed.
- Assemble the eggs. Spoon the filling into a piping bag or a zip-top bag. If using a zip-top bag, squeeze the filling into one corner, then snip off about 1/4 inch from the tip. Pipe the filling into each egg white half, dividing it evenly. You want a nice swirl on top — it looks fancy but takes seconds.
- Top with bacon and garnish. Sprinkle the crumbled bacon evenly over the filled eggs. Finish with a dusting of smoked paprika and a sprinkle of fresh chives. Serve immediately, or refrigerate until ready.
Sensory Cue: At step 5, the filling should be thick but spreadable — like a very smooth hummus. If it is too stiff, add another teaspoon of pickle juice. If it is too runny, add a little more yogurt. Trust your hands here.
Troubleshooting Tip: If your egg whites tear while peeling, do not panic. Just use them for the ends of the platter — no one will notice once they are filled. I have served plenty of “ugly” deviled eggs that tasted amazing.
Cooking Tips & Techniques
After making these eggs about a dozen times (not exaggerating), I have learned a few things the hard way. Let me save you some trouble.
Perfect hard-boiled eggs every time: The biggest mistake people make is overcooking. Ten minutes of resting in hot water is the sweet spot. If you boil them for 12 minutes, the yolks turn chalky and develop that unappetizing gray ring. Trust the 10-minute rule. Also, older eggs peel much easier than fresh ones. If you are buying eggs specifically for this recipe, buy them a week ahead.
Bacon baking vs. frying: I used to fry bacon in a pan, but it never got evenly crispy. Baking is a game changer. The fat renders out evenly, and you get perfectly flat, crisp strips that crumble beautifully. Plus, no splattering grease on your stovetop. If you are in a rush, you can microwave bacon between paper towels for 1 minute per slice, but the texture won’t be as good.
Make the filling ahead: You can prepare the filling up to two days in advance. Store it in a piping bag in the fridge, and just pipe it into the eggs before serving. Do not fill the eggs more than 4 hours ahead, though, or the whites can get watery. I learned this the hard way before a brunch party — my eggs were sitting in a puddle by noon.
Keep the eggs stable: If your egg halves wobble on the platter, slice a tiny sliver off the bottom of each white half to create a flat surface. It makes them sit neatly and looks more professional.
Multitasking strategy: Boil the eggs and bake the bacon at the same time. While the eggs cool, the bacon bakes. While the bacon cools, you peel the eggs. This whole recipe comes together in about 25 minutes of active time. It is efficient enough for a busy holiday kitchen.
Variations & Adaptations
One of the best things about this recipe is how easy it is to tweak. Here are some variations I have tried and loved:
- Spicy Southwest Version: Add 1/4 teaspoon of chipotle powder to the yolk mixture and top with pickled jalapeños instead of chives. The smoky heat pairs beautifully with the bacon. I made this for a football party, and it was gone in 10 minutes.
- Herb Garden Twist: Mix in 2 tablespoons of finely chopped fresh dill and 1 tablespoon of fresh parsley into the filling. Top with extra dill and a sprinkle of flaky sea salt. This version tastes lighter and brighter — perfect for spring gatherings.
- Dairy-Free Adaptation: Replace the Greek yogurt with an equal amount of dairy-free sour cream or cashew cream. Use a vegan mayonnaise. The texture will be slightly less thick, but still delicious. I tested this with Kite Hill plain unsweetened yogurt, and it worked surprisingly well.
- Everything Bagel Style: Skip the chives and top the filled eggs with everything bagel seasoning instead of paprika. The sesame seeds and poppy seeds add an incredible crunch. This is my go-to for brunch events.
- Loaded Baked Potato Version: Add 1/4 cup of finely shredded sharp cheddar cheese to the filling and top with extra cheese and a dollop of sour cream. It sounds over the top, but honestly, it is incredible for game day.
Each of these variations takes the base recipe in a different direction, so you can make these eggs again and again without getting bored. My personal favorite is the Everything Bagel version — it is unexpected and always gets compliments.
Serving & Storage Suggestions
These creamy Thanksgiving deviled eggs are best served slightly chilled or at room temperature. If you refrigerate them, take them out about 15 minutes before serving to take the chill off. The flavors really open up when they are not ice-cold.
Presentation Tips: Arrange the eggs on a large white platter in concentric circles or rows. Sprinkle the bacon and chives just before serving so they stay crisp. If you are bringing these to a potluck, keep the bacon separate and add it at the last minute — otherwise, it gets soft from the moisture in the filling.
Complementary Dishes: These eggs pair beautifully with roasted turkey, glazed ham, or even a simple green salad. For drinks, a crisp white wine like Sauvignon Blanc or a light beer cuts through the richness nicely. If you are serving them as an appetizer before Thanksgiving dinner, keep portions small — one egg per person is plenty when there is a feast coming.
Storage Instructions: Store leftover deviled eggs in an airtight container in the refrigerator for up to 3 days. Place them in a single layer with a paper towel on top to absorb any excess moisture. Do not freeze — the texture of the filling will become grainy and watery upon thawing.
Reheating: Honestly, these are best eaten cold or at room temperature. If you absolutely must reheat them, place them on a baking sheet in a 300°F (150°C) oven for 5 minutes — just enough to take the chill off without cooking the filling. Microwaving is not recommended; it makes the whites rubbery.
Flavor Development: Interestingly, the filling tastes even better the next day. The flavors meld together overnight, making it richer and more balanced. If you can, make the filling a day ahead and pipe it fresh — that is the sweet spot between convenience and freshness.
Nutritional Information & Benefits
Here is an approximate nutritional breakdown per deviled egg (based on 24 servings, using full-fat Greek yogurt and thick-cut bacon):
- Calories: ~85
- Protein: 6g
- Fat: 6g
- Carbohydrates: 1g
- Fiber: 0g
- Sugar: 0.5g
- Sodium: 180mg
Health Benefits: Eggs are a fantastic source of high-quality protein and contain essential nutrients like choline, which supports brain health. Greek yogurt adds probiotics and calcium, while bacon provides a small amount of B vitamins. Compared to traditional deviled eggs made entirely with mayonnaise, this version has significantly less saturated fat and more protein — a small but meaningful swap for a healthier holiday.
Dietary Considerations: This recipe is naturally gluten-free and low-carb, making it suitable for keto and paleo diets if you use a dairy-free yogurt option. It is not suitable for vegans or those with egg allergies. For a lower-sodium version, use low-sodium bacon and skip the added salt in the filling.
I am not a nutritionist, but I love that this recipe lets me enjoy a classic indulgence without feeling weighed down. It is a small win on a day full of heavy food.
Conclusion
These creamy Thanksgiving deviled eggs with crispy bacon are the appetizer you did not know you needed. They are simple enough for a weeknight snack but impressive enough for a holiday table. The tangy, smooth filling paired with salty, crunchy bacon is a combination that just works — no fuss, no pretense, just really good food.
I love this recipe because it reminds me that the best dishes often come from late-night experiments and happy accidents. It is forgiving, adaptable, and always a hit. Whether you stick with the classic version or try one of the variations, I hope these eggs become a staple in your kitchen too.
If you make them, I would love to hear how they turned out. Leave a comment below with your favorite twist, or tag me in your photos — I genuinely get excited seeing other people enjoy recipes I have tested so many times. And if you are looking for more holiday appetizers, check out my crispy garlic chicken for a main dish that pairs beautifully with these eggs, or browse my Thanksgiving sides for more inspiration.
Happy cooking, and remember — the best recipes are the ones you make your own.
Frequently Asked Questions
Can I make these deviled eggs a day ahead?
Yes, you can prepare the filling and boil the eggs up to two days in advance. Store the filling in a piping bag in the fridge and the peeled eggs in an airtight container. Assemble them no more than 4 hours before serving for the best texture.
Why did my egg whites turn watery after filling?
This usually happens when the filling is too thin or the eggs have been sitting for too long. Make sure your Greek yogurt is thick and strained. Also, pat the egg white halves dry with a paper towel before filling them.
Can I use turkey bacon instead of regular bacon?
Absolutely. Turkey bacon works, but it will be less crispy and have a slightly different flavor. Bake it at 375°F (190°C) for 12-15 minutes, and crumble it finely to mimic the texture of regular bacon.
How do I keep the bacon crispy on top?
Add the bacon just before serving. If you are transporting the eggs, keep the bacon in a separate container and sprinkle it on at the last minute. Moisture from the filling will soften the bacon over time.
Can I freeze leftover deviled eggs?
I do not recommend freezing them. The egg whites become rubbery and the filling turns grainy when thawed. It is better to only make as many as you will eat within 3 days.
Pin This Recipe!
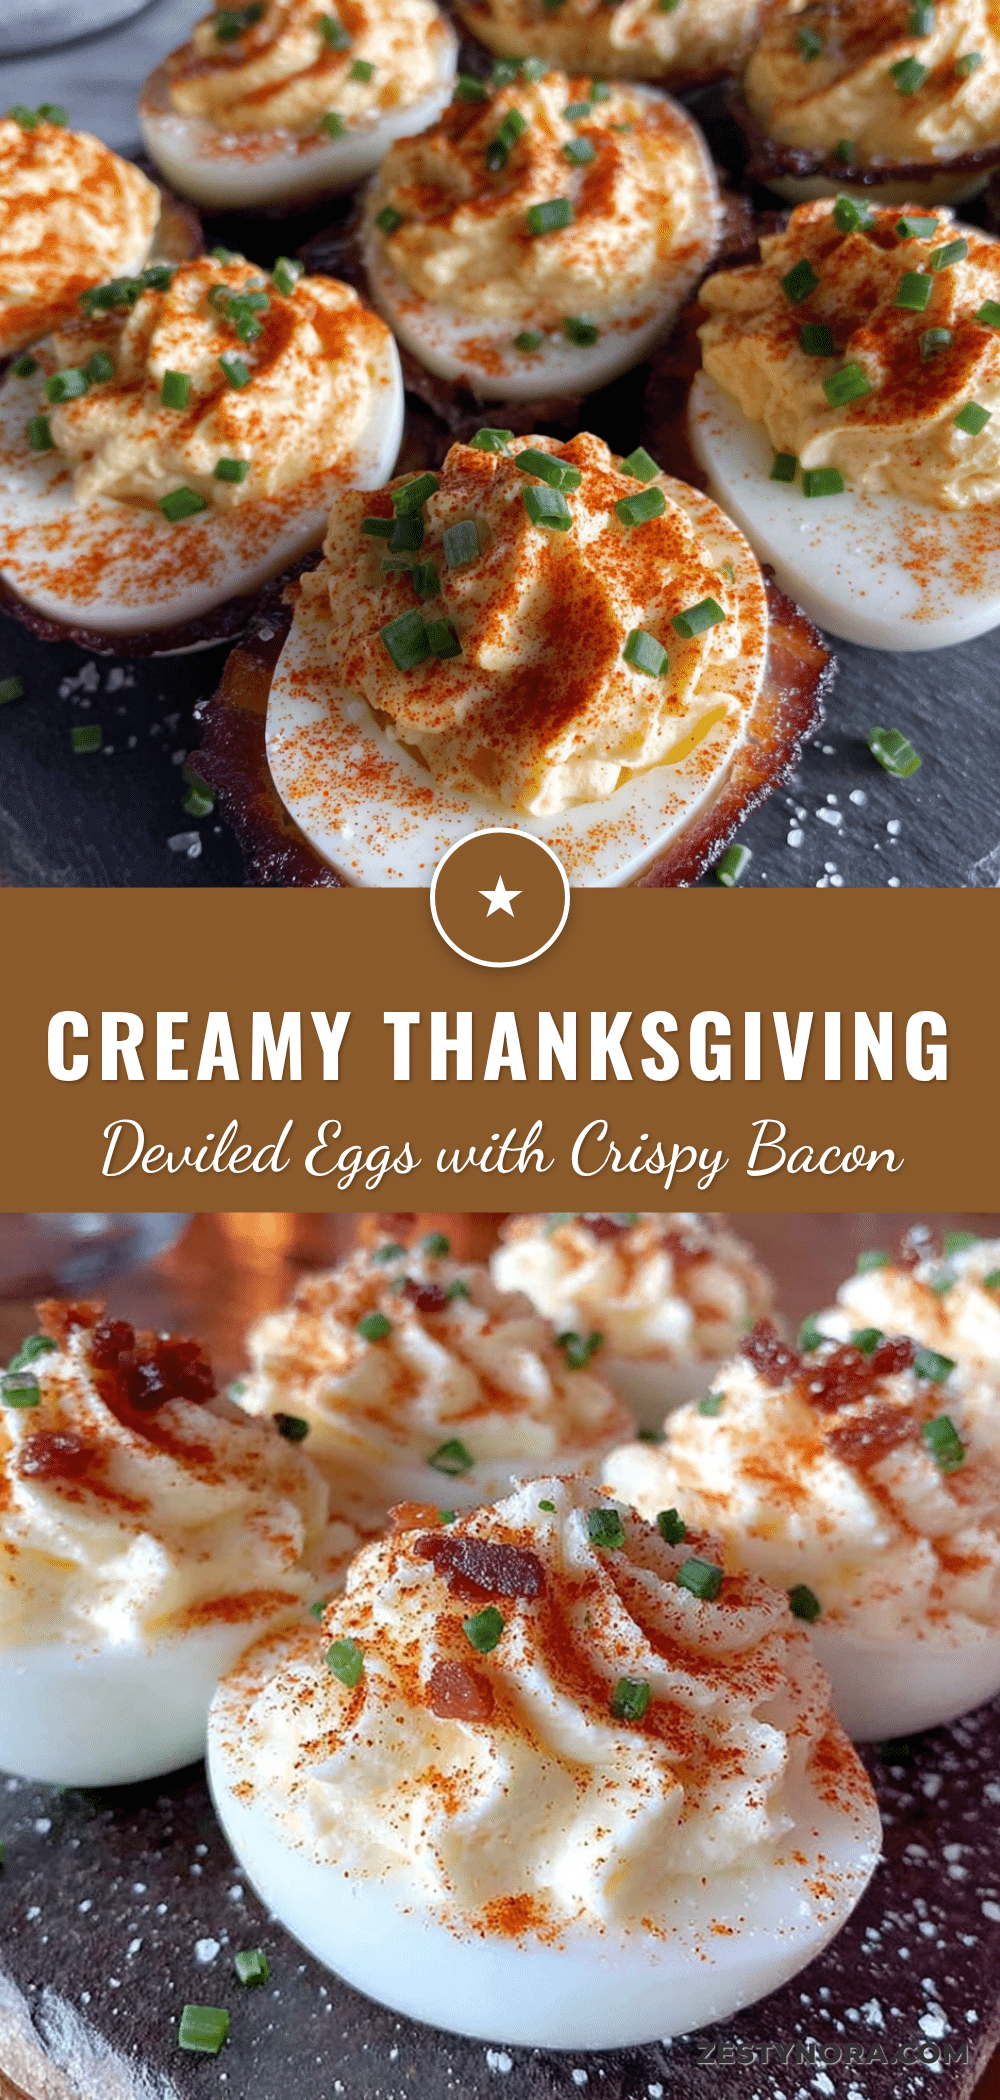
Thanksgiving Deviled Eggs with Bacon: Easy & Creamy

These creamy deviled eggs with crispy bacon are the perfect Thanksgiving appetizer. Made with Greek yogurt for a tangy, light filling and topped with crunchy bacon, they are quick, easy, and always a crowd-pleaser.
- Prep Time: 15 minutes
- Cook Time: 20 minutes
- Total Time: 35 minutes
- Yield: 24 deviled eggs 1x
- Category: Appetizer
- Cuisine: American
Ingredients
- 12 large eggs
- 6 strips thick-cut bacon
- 1/2 cup plain full-fat Greek yogurt
- 2 tablespoons mayonnaise
- 1 tablespoon Dijon mustard
- 1 tablespoon dill pickle juice
- 1/4 teaspoon salt
- 1/4 teaspoon black pepper
- 1/2 teaspoon smoked paprika (for garnish)
- 2 tablespoons fresh chives, finely chopped (optional)
Instructions
- Hard-boil the eggs: Place 12 large eggs in a large pot in a single layer. Cover with cold water by about 1 inch. Bring to a boil over high heat. Once boiling, turn off the heat, cover the pot, and let it sit for exactly 10 minutes. Meanwhile, prepare an ice bath. After 10 minutes, transfer the eggs to the ice bath using a slotted spoon. Let them cool for at least 15 minutes.
- Bake the bacon: While the eggs cool, preheat your oven to 400°F (200°C). Line a baking sheet with parchment paper. Lay 6 strips of thick-cut bacon in a single layer. Bake for 15-18 minutes, until golden and crispy. Transfer to a paper towel-lined plate to drain. Once cool, crumble or chop into small pieces.
- Peel the eggs: Gently tap each egg on the counter to crack the shell all over. Roll it between your palms to loosen the shell. Start peeling from the wider end. Rinse the peeled eggs under cold water to remove any tiny shell fragments. Pat dry with a paper towel.
- Halve the eggs: Using a sharp knife, slice each egg lengthwise. Wipe the knife clean between cuts for neat halves. Gently pop out the yolks into a medium mixing bowl. Arrange the egg white halves on a serving platter, cut side up.
- Make the filling: Add 1/2 cup Greek yogurt, 2 tablespoons mayonnaise, 1 tablespoon Dijon mustard, 1 tablespoon pickle juice, 1/4 teaspoon salt, and 1/4 teaspoon black pepper to the yolks. Mash everything together with a fork until smooth. Taste and adjust salt if needed.
- Assemble the eggs: Spoon the filling into a piping bag or a zip-top bag. If using a zip-top bag, squeeze the filling into one corner, then snip off about 1/4 inch from the tip. Pipe the filling into each egg white half, dividing it evenly.
- Top with bacon and garnish: Sprinkle the crumbled bacon evenly over the filled eggs. Finish with a dusting of smoked paprika and a sprinkle of fresh chives. Serve immediately, or refrigerate until ready.
Notes
For the creamiest filling, use full-fat Greek yogurt. If using nonfat, drain it in cheesecloth for 30 minutes. Older eggs peel easier. The filling can be made up to 2 days ahead; assemble no more than 4 hours before serving. Add bacon just before serving to keep it crispy.
Nutrition
- Serving Size: 1 deviled egg
- Calories: 85
- Sugar: 0.5
- Sodium: 180
- Fat: 6
- Saturated Fat: 2
- Carbohydrates: 1
- Protein: 6
Keywords: deviled eggs, Thanksgiving appetizer, bacon deviled eggs, creamy deviled eggs, easy deviled eggs, holiday appetizer


