There used to be a tiny wine bar tucked behind a bookstore in my neighborhood—the kind of place with mismatched chairs and a chalkboard menu that changed daily. They made this incredible harvest board every autumn, piled high with seasonal fruit, creamy cheeses, and these little honey-drizzled figs that I still dream about. When they closed last January, I honestly felt a little lost. That board was my go-to for catching up with friends, my pre-dinner ritual, my happy place on a plate.
After six tries—some embarrassingly sad, one where I dropped an entire wheel of brie on the floor—I finally cracked the code. It took some trial and error, let me tell you. I mean, who knew that the temperature of the cheese actually matters that much? Or that the arrangement of the fruit could make or break the whole vibe? But now, this Friendsgiving charcuterie board with fall fruit is my signature move for hosting, and it gets more compliments than any main dish I’ve ever made.
The secret, honestly, is treating it like a puzzle. You want a mix of textures, colors, and flavors that all make sense together. Sweet apples next to sharp cheddar, salty prosciutto wrapped around juicy pears, crunchy nuts scattered like little treasures. It’s the kind of spread that makes people stop and take a picture before they even grab a plate. And when you’re hosting Friendsgiving, that’s exactly the energy you want, right? Maybe you’ve been there—staring at a blank cutting board, wondering how to make it look as good as it tastes. This is the answer.
Why You’ll Love This Recipe
This isn’t just another cheese board. This is the board that steals the show at your Friendsgiving gathering. I’ve tested this combination at four different parties now, and every single time, someone asks for the recipe. Here’s why it works so well for hosting:
- Totally Make-Ahead Friendly: You can prep everything the night before. Just arrange the board an hour before guests arrive, and you’re golden. No last-minute stress, I promise.
- No Cooking Required: Seriously, if you can slice an apple and unwrap cheese, you’ve got this. Perfect for when you’re already juggling a turkey and three sides.
- Naturally Crowd-Pleasing: There’s something for everyone here—gluten-free friends, vegetarians, even the picky eaters. The variety means nobody leaves hungry.
- Looks Incredibly Impressive: Let’s be honest, a well-arranged charcuterie board makes you look like a hosting pro. The colors of fall fruit against the rich cheeses? Absolute art.
- Budget-Friendly: You don’t need fancy ingredients. Most of these items are affordable at any grocery store, and you can mix and match based on what’s on sale.
What makes this board different from the hundreds you’ll see on Pinterest is the balance. I spent weeks figuring out the perfect ratio of fruit to cheese to meat, and the secret is in the layering. You don’t just throw things on a board—you build it like a landscape, with hills of grapes and valleys of prosciutto. The first time I served this at a Friendsgiving, my friend Sarah actually closed her eyes after biting into a fig with gorgonzola. That’s the moment I knew I’d nailed it.
This is the kind of recipe that makes you feel like a hero host without breaking a sweat. It’s comfort food for the soul, served on a wooden board with good friends and good wine. Exactly what Friendsgiving should be.
What Ingredients You Will Need
This recipe uses simple, seasonal ingredients that come together to create something truly special. Most of these are easy to find at any grocery store, especially during fall. Here’s what you’ll need to build your crowd-pleasing Friendsgiving charcuterie board with fall fruit:
For the Cheeses
- 8 ounces brie cheese (I prefer the double-cream variety from Président—it gets perfectly gooey at room temperature)
- 6 ounces aged cheddar (sharp white cheddar works best, like Cabot or Kerrygold)
- 4 ounces gorgonzola or blue cheese (Point Reyes Blue is my go-to for that tangy kick)
- 4 ounces goat cheese (a soft log, not crumbled—look for Chavrie or Vermont Creamery)
For the Fall Fruit
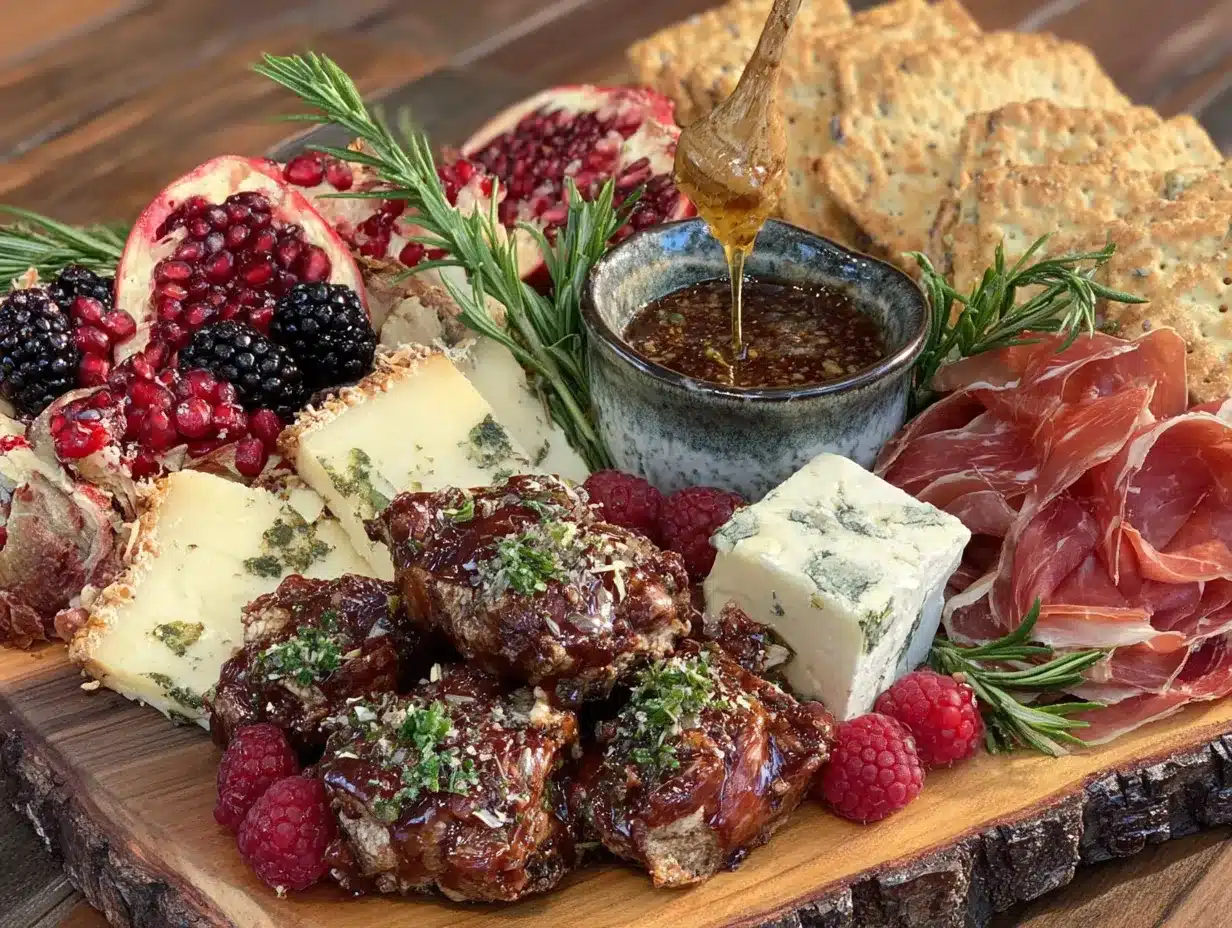
- 2 crisp apples (Honeycrisp or Fuji—they hold up well and don’t brown too fast)
- 2 ripe pears (Bosc or Anjou, sliced thin just before serving)
- 1 cup seedless red grapes (small clusters look gorgeous on the board)
- 8-10 fresh figs (halved lengthwise—when in season, these are non-negotiable)
- 1/2 cup dried apricots (adds sweetness and chewy texture)
- 1/4 cup dried cranberries (for that pop of tartness and festive color)
For the Meats
- 6 ounces prosciutto (ask for it sliced thin at the deli counter)
- 4 ounces salami (genoa or soppressata, sliced into thin rounds)
- 4 ounces capicola (optional, but adds nice variety if you have guests who love cured meats)
For the Accompaniments
- 1/2 cup honey (local honey adds a lovely floral note—warm it slightly for drizzling)
- 1/3 cup fig jam or fig spread (Bonne Maman makes an excellent one)
- 1/2 cup mixed nuts (toasted almonds and candied pecans are my favorite combo)
- 1/4 cup pumpkin seeds (for crunch and that fall aesthetic)
- Fresh rosemary sprigs (for garnish—they smell amazing and look festive)
For the Base
- 1 baguette (sliced into thin rounds and lightly toasted if you have time)
- 1 box crackers (water crackers or rosemary crackers work beautifully)
- Optional: pita chips or crostini (for extra crunch variety)
A quick note on substitutions: If figs aren’t in season, swap in extra dried apricots or fresh blackberries. For a dairy-free option, use cashew cheese and skip the brie. And if you’re feeding a smaller crowd, just halve the quantities—the ratios stay the same.
Equipment Needed
You don’t need fancy equipment to build a stunning charcuterie board. Here’s what I use every time:
- A large wooden cutting board or serving platter (at least 16 inches wide—the bigger the better for that wow factor)
- Small bowls or ramekins (for the honey, fig jam, and nuts—keeps things tidy)
- A sharp chef’s knife (for slicing apples, pears, and cheese cleanly)
- A cheese knife or small spreader (for the brie and goat cheese)
- Tongs or small serving forks (guests appreciate not touching everything)
- Parchment paper (optional, for lining the board if you want easy cleanup)
I found my favorite board at a thrift store for eight dollars—it’s a little scratched up, but that just adds character. Don’t stress if you don’t have a fancy cheese board. A large baking sheet lined with parchment works perfectly in a pinch.
Preparation Method
Building this Friendsgiving charcuterie board with fall fruit is more about art than science. But follow these steps, and you’ll have a showstopper every time. Plan for about 30 minutes of active prep time.
- Take your cheeses out of the fridge 30 minutes before you start. This is crucial—cold cheese doesn’t have the same creamy texture or flavor. Let them come to room temperature while you prep everything else.
- Wash and dry all your fruit thoroughly. Nobody wants wet grapes making the crackers soggy. Pat everything dry with a clean kitchen towel.
- Slice the apples and pears just before arranging. Cut them into thin wedges, about 1/4 inch thick. Toss them with a little lemon juice if you’re worried about browning—though honestly, they’ll get eaten too fast for it to matter.
- Halve the figs lengthwise and cut the grapes into small clusters of 3-4 grapes each. This makes them easier to grab and looks more intentional than loose grapes rolling around.
- Slice the brie into wedges (or leave it whole if you want guests to cut their own—I prefer wedges for easier serving). Cut the cheddar into thin slices or small cubes. Crumble the gorgonzola into rustic chunks. Leave the goat cheese log whole, but score it lightly with a knife so guests know where to cut.
- Arrange the prosciutto by folding each slice into loose ribbons or ruffles. Don’t lay it flat—the folds create height and texture. Do the same with the salami, overlapping the slices slightly.
- Place your small bowls on the board first. Fill one with honey, one with fig jam, and one with the mixed nuts and pumpkin seeds. This anchors your layout and creates natural sections.
- Add the cheeses next. Place them at different spots around the board, not all clumped together. Space them out so guests can reach different cheeses from different angles.
- Layer in the meats. Tuck the prosciutto ribbons and salami folds between the cheeses, filling in gaps. Think of this as the connective tissue of your board.
- Add the fruit. Scatter the apple and pear slices, fig halves, and grape clusters in the remaining spaces. Try to create color contrast—put red grapes next to green apples, golden pears next to dark figs.
- Fill any empty spots with dried apricots, dried cranberries, and the fresh rosemary sprigs. The rosemary adds a beautiful green pop and makes the whole board smell incredible.
- Arrange the baguette slices and crackers around the edges of the board, or on a separate small plate if space is tight. You want them accessible but not taking over the main display.
- Drizzle a little honey over the brie and goat cheese right before serving. It catches the light and makes everything look glossy and irresistible.
- Step back and admire your work. Add any last-minute tweaks—maybe a few extra figs here, a sprinkle of pumpkin seeds there. Then set it out and watch it disappear.
One thing I learned the hard way: don’t overfill the board. Leave a little breathing room so it looks curated, not chaotic. You can always refill from the kitchen if things run low.
Cooking Tips & Techniques
After building this board more times than I can count, I’ve picked up some tricks that make a real difference. Here’s what I wish someone had told me earlier:
Temperature is everything. I once served a board with fridge-cold brie, and it was like eating flavored butter straight from the freezer. Not good. Give your cheeses at least 30 minutes at room temperature before serving. The texture changes completely—brie becomes luscious, cheddar softens and gets more flavorful.
Layer for height. Flat boards look boring. Use the small bowls to create different levels, then build up from there. I like to put the prosciutto folds on top of slightly overlapping salami slices, and the fig halves perched on little cheese wedges. It makes the board look abundant and professional.
Prep in stages. I learned this after a particularly stressful Friendsgiving where I tried to do everything at once. Slice the cheeses and arrange the meats the night before, cover with plastic wrap, and refrigerate. The morning of, wash and cut the fruit. Then all you have to do is assemble, which takes about 15 minutes.
Don’t forget the salt. A tiny sprinkle of flaky sea salt over the goat cheese or the sliced pears brings out all the flavors. It sounds weird, but trust me—it’s a game-changer. The salt contrasts with the sweet honey and fruit, making every bite more interesting.
Watch the apple browning. If you’re slicing apples more than an hour ahead, toss them in a little lemon water (about 1 tablespoon lemon juice to 1 cup water). Drain well before adding to the board. Or just use Honeycrisp apples—they brown slower than other varieties.
One mistake I still make occasionally: putting wet fruit next to crackers. The moisture makes them soft and sad. Keep a little separation, or arrange the crackers on a separate plate. Your guests will thank you.
Variations & Adaptations
This Friendsgiving charcuterie board with fall fruit is endlessly adaptable. Here are some of my favorite variations:
Vegetarian Version: Skip the meats entirely and double up on the cheeses and fruit. Add some marinated artichoke hearts, roasted red peppers, and olives for extra savory elements. I’ve made this for a vegetarian Friendsgiving and it was just as popular as the original.
Gluten-Free Option: Use gluten-free crackers or sliced cucumber rounds as the base. Rice crackers work beautifully, and so do those little seed-based crackers from the health food section. The fruit and cheese are naturally gluten-free, so it’s an easy swap.
Seasonal Twist: In summer, swap the apples and pears for fresh peaches, nectarines, and berries. In winter, add pomegranate seeds, persimmon slices, and candied ginger. The board changes with the seasons, which keeps it exciting all year round.
Spicy Kick: Add a small bowl of hot honey or red pepper flakes for guests who like heat. The sweet-spicy combo with the cheese is unexpectedly amazing. I tried this on a whim last fall and now I can’t go back.
Nut-Free Version: Replace the almonds and pecans with roasted chickpeas or pumpkin seeds. Sunflower seeds also work well. Just make sure to check all packaging for cross-contamination warnings if allergies are a concern.
My personal favorite variation? Adding a small dish of dark chocolate chunks. It sounds indulgent, but the combination of dark chocolate with sharp cheddar and a slice of apple is honestly life-changing. Try it once and you’ll understand.
Serving & Storage Suggestions
This board is best served at room temperature, so take it out of the fridge about 30 minutes before guests arrive. Arrange it on a central table where people can gather around and graze—that’s the whole point of a charcuterie board, right?
What to serve alongside: This board pairs beautifully with a crisp white wine like Sauvignon Blanc or a light red like Pinot Noir. For non-alcoholic options, sparkling apple cider or a fall-inspired mocktail with pomegranate and rosemary works perfectly. I also like to have a simple arugula salad on the side for a fresh contrast.
Storage tips: If you have leftovers (unlikely, but possible!), separate the components into individual containers. Cheese keeps well in the fridge for up to a week. Store fruits separately—they release moisture and can make everything soggy. The meats will last 3-4 days in the fridge. Don’t store the assembled board; it’s better to break it down.
Reheating: You don’t really reheat a charcuterie board, but if you want to serve the brie warm, pop it in a 350°F oven for 5-7 minutes before adding it to the board. Just be careful—it gets very soft very fast.
Flavor development: The cheeses actually taste better after sitting out for a bit. That’s why I always prep everything early and let the board rest at room temperature for 15-20 minutes before serving. The flavors meld together in a way that cold ingredients just can’t match.
Nutritional Information & Benefits
This Friendsgiving charcuterie board with fall fruit is more balanced than you might think. Here’s a rough estimate per serving (about 1/8 of the board):
- Calories: Approximately 380-450
- Protein: 15-18 grams
- Fat: 22-28 grams
- Carbohydrates: 30-35 grams
- Fiber: 4-6 grams
- Sugar: 18-22 grams (mostly natural from fruit)
Health highlights: The apples and pears provide fiber and vitamin C, while the nuts offer healthy fats and protein. Cheese is a good source of calcium and protein. The dried fruit adds antioxidants, and the honey has antibacterial properties. It’s not diet food, but it’s real food with real nutritional value.
Dietary considerations: This recipe contains dairy and gluten (from the crackers and baguette). It’s naturally vegetarian if you skip the meats. For a lower-sugar option, reduce the dried fruit and honey drizzle. The nuts add healthy fats that help keep you full.
I personally love that this board lets people eat intuitively—grab what looks good, stop when you’re satisfied. There’s no pressure to finish everything, and nobody’s counting calories at Friendsgiving anyway, right?
Conclusion
This Friendsgiving charcuterie board with fall fruit is the recipe that keeps on giving. It’s the one I bring to every gathering, the one that gets photographed before anyone takes a bite, the one that disappears faster than the turkey. And honestly? It makes me happy every single time I make it.
I love that you can customize it based on what’s at the market, what your friends like, or what’s on sale that week. It’s forgiving, flexible, and always impressive. Whether you’re hosting a big Friendsgiving or a small get-together, this board sets the tone for a relaxed, joyful evening.
So go ahead—grab a big board, pile on the fruit and cheese, and don’t be afraid to get a little messy with it. Your guests will love it, and you’ll feel like a hosting rockstar. If you make this for your next Friendsgiving, I’d love to hear about it! Drop a comment below and tell me what variations you tried. And seriously, don’t skip the dark chocolate with the cheddar—it might just change your life.
Frequently Asked Questions
How far in advance can I prepare this Friendsgiving charcuterie board?
You can prep most components the night before. Slice the cheeses, arrange the meats, and portion out the nuts and dried fruit. Cover everything tightly with plastic wrap and refrigerate. The morning of, wash and cut the fruit, then assemble everything about an hour before serving. This way, the cheeses have time to come to room temperature.
Can I make this board dairy-free?
Absolutely! Use cashew cheese or almond-based cheese spreads instead of the traditional cheeses. Many brands now make excellent dairy-free brie alternatives. Skip the cheese knife and go for spreadable options that work well with crackers. The fruit and meats are naturally dairy-free, so it’s an easy swap.
What if I can’t find fresh figs?
No worries at all. Fresh figs are seasonal and can be hard to find. Substitute with dried figs (they’re sweeter and chewier), fresh blackberries, or sliced strawberries. In fall, you can also use sliced persimmons or pomegranate seeds for that same jewel-like look. The board will still be beautiful and delicious.
How many people does this board serve?
This recipe is designed for a crowd—about 8-10 people as an appetizer or light meal. If you’re serving it as a main course alongside other dishes, it stretches to 12 people. For a smaller gathering, just halve the quantities. The ratios stay the same, so you can scale it up or down easily.
What’s the best way to arrange the board so it looks professional?
Start with the small bowls for dips and nuts—they anchor the layout. Add the cheeses next, spacing them evenly. Then layer in the meats, followed by the fruit. Fill gaps with dried fruit and nuts. Use fresh herbs like rosemary for color contrast. And remember: height creates visual interest, so fold meats and prop up fruit slices. Don’t overfill—leave some breathing room for a curated look.
Pin This Recipe!
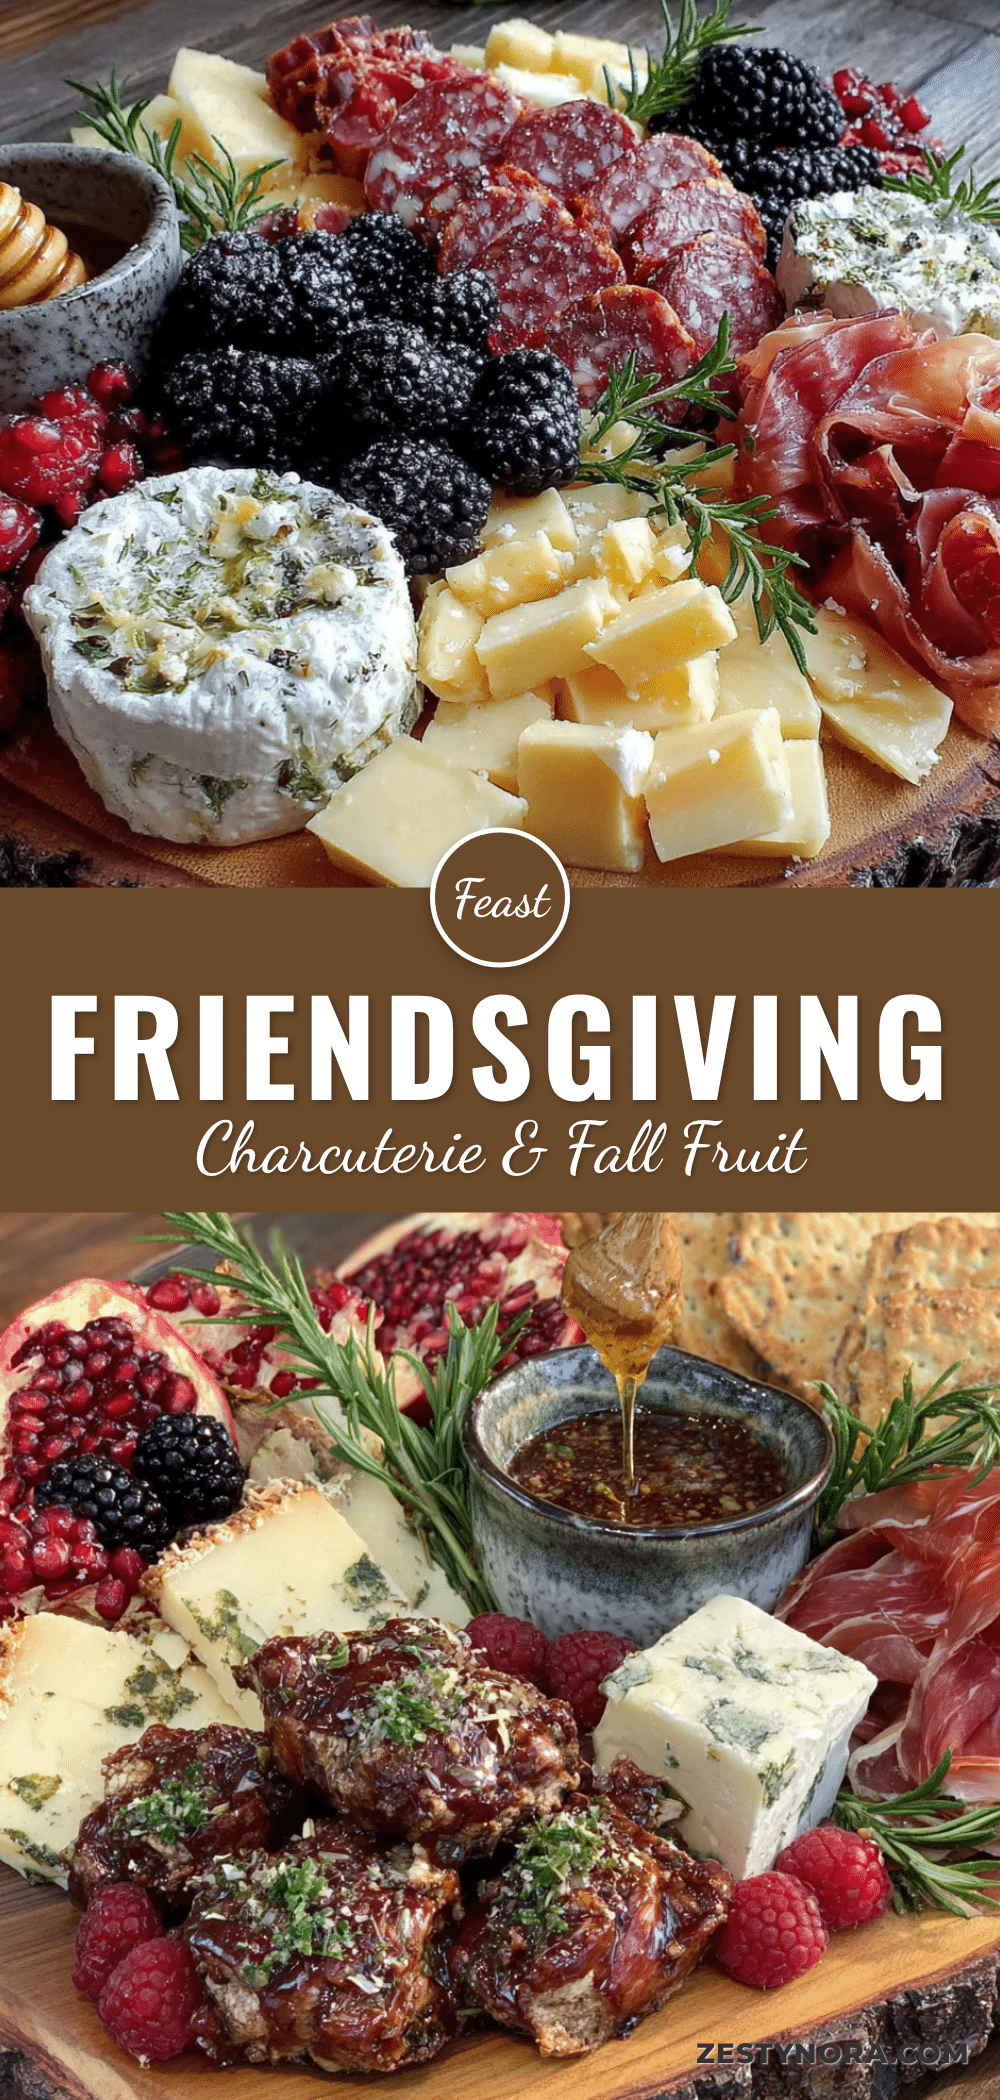
Friendsgiving Charcuterie Board: Easy Fall Fruit Recipe
A stunning fall charcuterie board piled high with seasonal fruit, creamy cheeses, cured meats, and sweet accompaniments. Perfect for Friendsgiving gatherings, this no-cook recipe is make-ahead friendly, crowd-pleasing, and looks incredibly impressive.
- Prep Time: 30 minutes
- Cook Time: 0 minutes
- Total Time: 30 minutes
- Yield: 8-10 servings 1x
- Category: Appetizer
- Cuisine: American
Ingredients
- 8 ounces brie cheese (double-cream, like Président)
- 6 ounces aged sharp white cheddar (like Cabot or Kerrygold)
- 4 ounces gorgonzola or blue cheese (like Point Reyes Blue)
- 4 ounces soft goat cheese log (like Chavrie or Vermont Creamery)
- 2 crisp apples (Honeycrisp or Fuji)
- 2 ripe pears (Bosc or Anjou)
- 1 cup seedless red grapes
- 8–10 fresh figs, halved lengthwise
- 1/2 cup dried apricots
- 1/4 cup dried cranberries
- 6 ounces prosciutto, thinly sliced
- 4 ounces genoa or soppressata salami, thinly sliced
- 4 ounces capicola (optional)
- 1/2 cup honey (local, warmed slightly)
- 1/3 cup fig jam or fig spread (like Bonne Maman)
- 1/2 cup mixed nuts (toasted almonds and candied pecans)
- 1/4 cup pumpkin seeds
- Fresh rosemary sprigs for garnish
- 1 baguette, sliced into thin rounds (lightly toasted if desired)
- 1 box water crackers or rosemary crackers
- Optional: pita chips or crostini
Instructions
- Take cheeses out of the fridge 30 minutes before starting to let them come to room temperature.
- Wash and dry all fruit thoroughly. Pat dry with a clean kitchen towel.
- Slice apples and pears into thin wedges (about 1/4 inch thick) just before arranging. Toss with a little lemon juice if desired to prevent browning.
- Halve figs lengthwise and cut grapes into small clusters of 3-4 grapes each.
- Slice brie into wedges. Cut cheddar into thin slices or small cubes. Crumble gorgonzola into rustic chunks. Leave goat cheese log whole but score lightly with a knife.
- Fold prosciutto slices into loose ribbons or ruffles. Overlap salami slices slightly.
- Place small bowls on the board first: one with honey, one with fig jam, and one with mixed nuts and pumpkin seeds.
- Add cheeses at different spots around the board, spacing them out.
- Layer in meats, tucking prosciutto ribbons and salami folds between cheeses to fill gaps.
- Scatter apple and pear slices, fig halves, and grape clusters in remaining spaces, creating color contrast.
- Fill empty spots with dried apricots, dried cranberries, and fresh rosemary sprigs.
- Arrange baguette slices and crackers around the edges of the board or on a separate plate.
- Drizzle a little honey over the brie and goat cheese right before serving.
- Step back and admire your work, adding any last-minute tweaks.
Notes
Temperature is key: let cheeses sit at room temperature for at least 30 minutes before serving. Layer for height using small bowls and folded meats. Prep in stages: slice cheeses and arrange meats the night before, wash and cut fruit the morning of. Don’t overfill the board—leave breathing room. A sprinkle of flaky sea salt over goat cheese or pears enhances flavors. Keep wet fruit away from crackers to prevent sogginess.
Nutrition
- Serving Size: 1/8 of the board
- Calories: 380450
- Sugar: 1822
- Sodium: 600800
- Fat: 2228
- Saturated Fat: 1014
- Carbohydrates: 3035
- Fiber: 46
- Protein: 1518
Keywords: Friendsgiving charcuterie board, fall fruit charcuterie, harvest board, cheese board, easy appetizer, no-cook recipe, holiday entertaining


