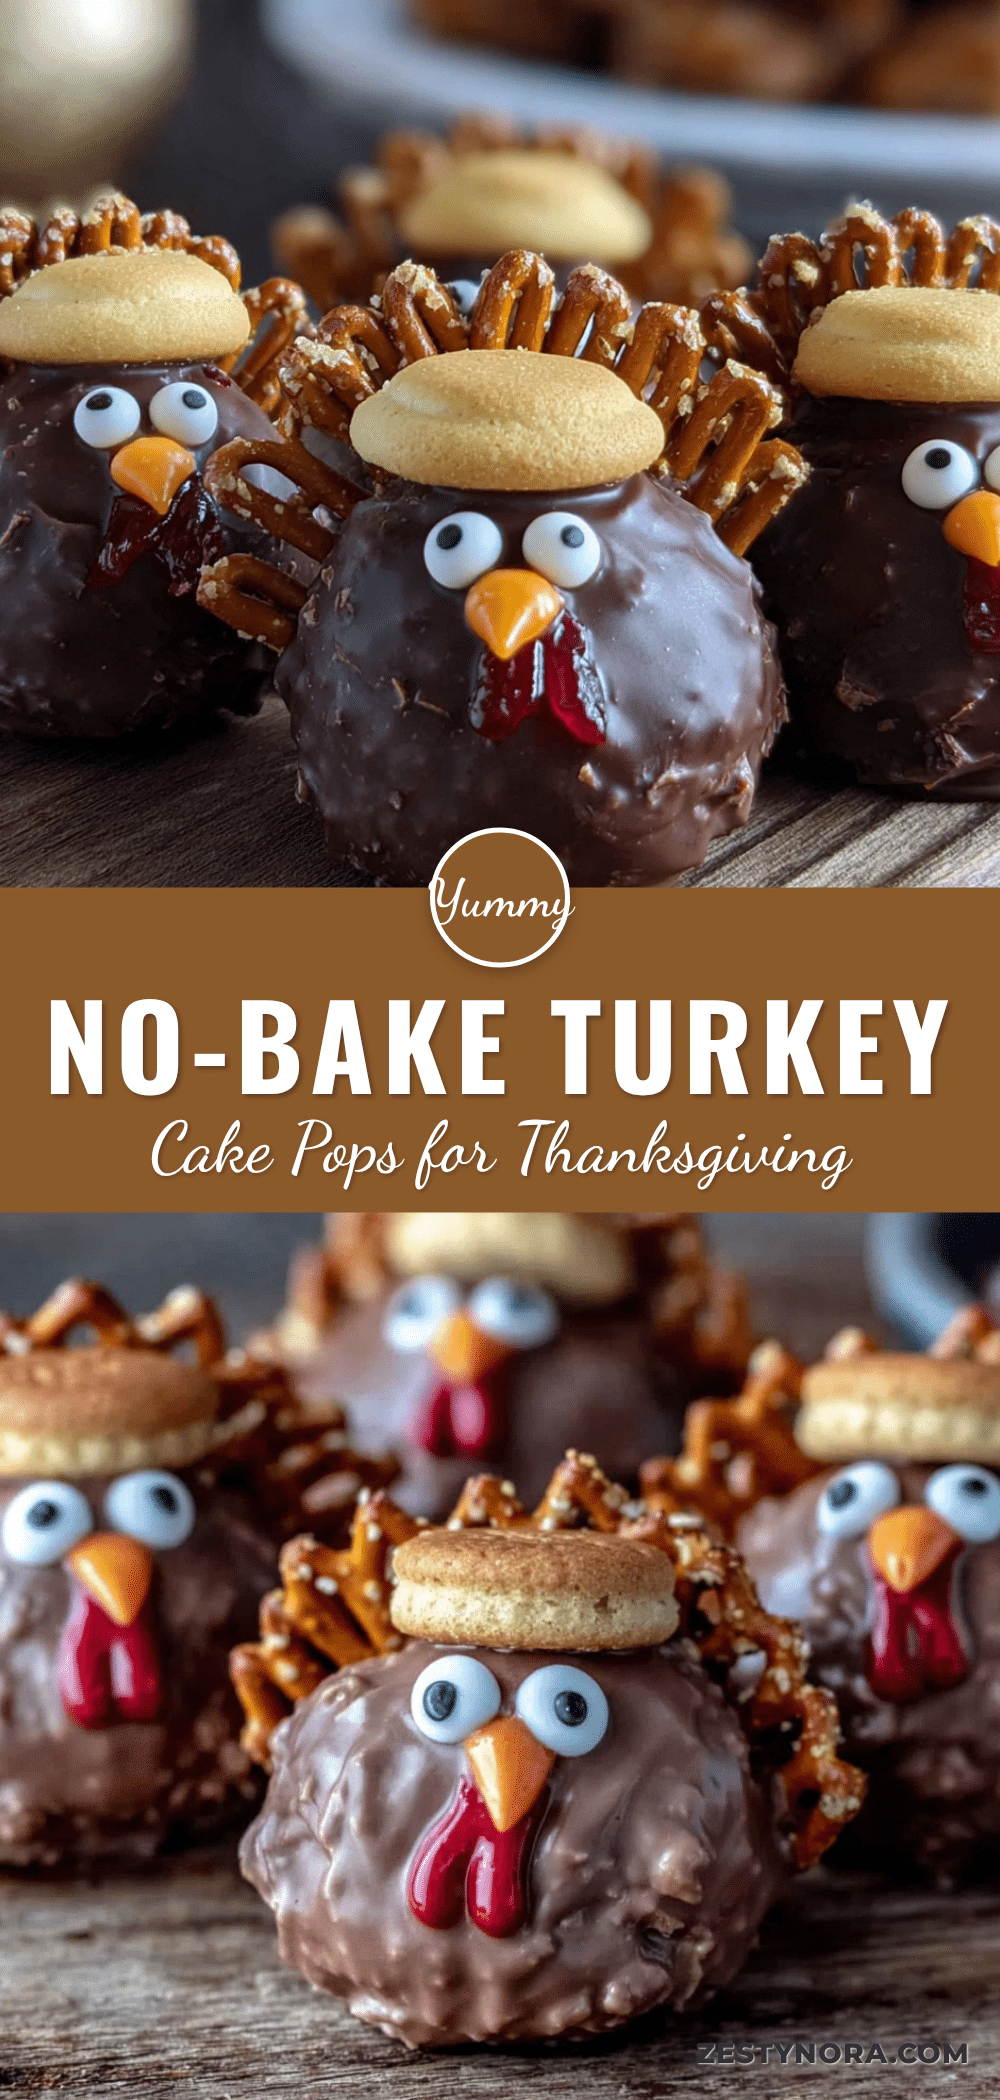
I was at the hardware store buying lightbulbs when the guy behind the counter started talking about turkey cake pops.
Honestly, that’s not where I expected to find Thanksgiving dessert inspiration. But there I was, standing in the aisle with a weird mix of plumbing supplies and potting soil, listening to him explain how he makes these little turkey-shaped cake pops every year for his kids’ school party. He wasn’t a baker, he said. Not even close. He was an accountant who just got tired of showing up to the holiday potluck with a store-bought pie. So one year, he tried these. And now, apparently, he’s the guy known for the turkey cake pops. I mean, how could I not try that?
So I went home, grabbed a box of cake mix I had sitting in the pantry, and gave it a shot. The first batch? Let’s just say they looked more like sad chickens than turkeys. But the second batch? That was the one. These No-Bake Turkey Cake Pops are now my go-to for Thanksgiving, and they are so much easier than you think. No oven required, no fancy piping bags, and honestly, you don’t even need to be a good baker. You just need a little patience and some candy melts. Maybe you’ve been there—scrolling Pinterest at 10 PM wondering if there’s a dessert that looks impressive but doesn’t take all day. These are it.
Why You’ll Love This Recipe
Let me tell you, I’ve tested a lot of holiday treats over the years, and these turkey cake pops have a special spot in my heart. They are the kind of thing that makes people stop and say, “Wait, you made those?” And the best part? You don’t have to be a pastry chef to pull them off.
- No-Bake & Simple: You don’t even turn on the oven. Just crumble, mix, shape, and dip. Perfect for when the oven is already full of stuffing and turkey.
- Kid-Friendly Fun: My niece helped me make these last year, and she had a blast rolling the balls and sticking on the candy eyes. It’s a great way to get little hands involved in Thanksgiving prep.
- Made with Pantry Staples: Cake mix, frosting, and candy melts. That’s it. No weird ingredients you have to hunt down at three different stores.
- Perfect for Thanksgiving: Whether it’s a classroom party, a Friendsgiving gathering, or just a fun dessert for the family dinner table, these little turkeys steal the show.
- Crowd-Pleaser: I brought a batch to my book club last month, and they were gone in ten minutes. Everyone asked for the recipe.
What makes these different from other cake pop recipes? It’s the texture, honestly. A lot of cake pops turn out too dense or too crumbly. I figured out the perfect ratio of cake to frosting so they hold their shape without being heavy. Plus, the no-bake method keeps them soft and moist instead of dry. That’s the secret—no baking, just mixing and rolling. It’s comfort food reimagined as a cute little bite-sized treat.
What Ingredients You Will Need
This recipe uses simple, straightforward ingredients that you can find at any grocery store. The beauty of it is that you don’t need anything fancy. Here’s what you’ll need to gather:
For the Cake Pops
- 1 box (15.25 oz) vanilla or yellow cake mix – I prefer Betty Crocker or Duncan Hines for consistent results. You can use chocolate too, but the lighter color works better for the turkey “body.”
- 1 1/3 cups water – As called for on the box.
- 1/2 cup vegetable oil – Or canola oil. Don’t substitute with olive oil; the flavor will be off.
- 3 large eggs – Room temperature works best for even mixing.
- 1/2 cup store-bought vanilla frosting – I use Pillsbury cream cheese frosting sometimes for a tangy twist, but classic vanilla is perfect. You won’t use the whole tub.
For the Turkey Design
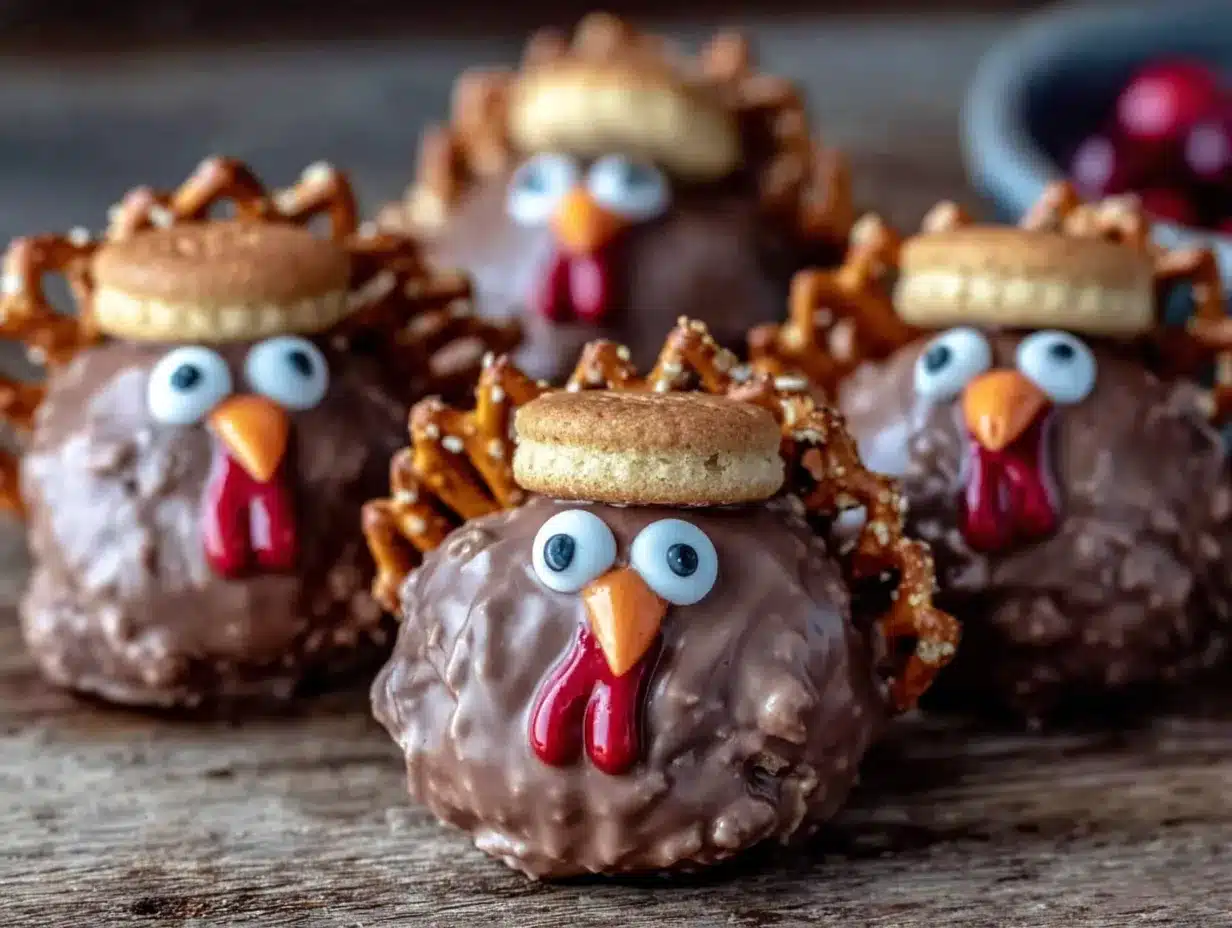
- 1 bag (12 oz) candy melts in brown or chocolate – Wilton brand melts smoothly. If you can’t find brown, use chocolate chips with a teaspoon of coconut oil to thin them out.
- 1 bag (12 oz) candy melts in orange – For the beak and feet. You could also use orange frosting if you prefer.
- 1 bag (12 oz) candy melts in red – For the wattle (that little red dangly part under the beak).
- Candy eyes – You can find these in the baking aisle. They come in little tubes.
- Pretzel sticks – These become the turkey legs. Break them in half for shorter legs.
- Lollipop sticks – Optional, but they make the cake pops easier to dip and hold.
Ingredient Selection Tip: When buying candy melts, check the bag for melting instructions. Some brands are finicky and seize up if you overheat them. I always melt mine in 30-second bursts in the microwave, stirring in between. And if you’re dairy-free, look for Enjoy Life brand chocolate chips—they melt well and are allergen-friendly.
For a gluten-free version, swap the cake mix for a gluten-free vanilla cake mix. The texture will be slightly different, but it still works. Just make sure your frosting is also gluten-free.
Equipment Needed
You don’t need a ton of fancy gadgets for this, which is one of the reasons I love this recipe. Here’s what you’ll need:
- Large mixing bowl – For mixing the cake batter and later crumbling the baked cake.
- 9×13-inch baking pan – To bake the cake. You can use two 8-inch rounds if that’s what you have.
- Hand mixer or stand mixer – Not strictly necessary, but it makes mixing the batter easier. A whisk works too.
- Baking sheet – Lined with parchment paper or a silicone mat to hold the cake pops while they set.
- Microwave-safe bowls – For melting the candy melts. One for each color.
- Lollipop sticks – Found at craft stores or online. They make dipping much cleaner.
- Styrofoam block – To hold the cake pops upright while the coating dries. You can also use a cardboard box with holes poked in it.
- Small offset spatula or butter knife – For smoothing and shaping.
Budget-Friendly Tip: If you don’t have lollipop sticks, you can skip them entirely. Just shape the cake balls and dip them using a fork. They won’t look as neat, but they’ll taste the same. And instead of a Styrofoam block, I’ve used a cardboard egg carton before—just poke holes in the top and it works perfectly.
Preparation Method
- Bake the cake. Preheat your oven to 350°F (175°C). Grease a 9×13-inch baking pan. In a large bowl, combine the cake mix, water, oil, and eggs. Beat with a hand mixer on medium speed for about 2 minutes until smooth. Pour the batter into the pan and bake for 28-32 minutes, or until a toothpick inserted in the center comes out clean. Let the cake cool completely—this is important. If it’s even slightly warm, the frosting will melt and your cake pops will be a sticky mess.
- Crumble the cake. Once the cake is cool, break it into chunks and place them in a large bowl. Use your hands to crumble the cake into fine crumbs. There shouldn’t be any big pieces left. It should look like coarse sand. (I usually do this while watching TV—it’s oddly satisfying.)
- Add the frosting. Add about 1/3 cup of the vanilla frosting to the cake crumbs. Start mixing with a spatula or your hands. You want the mixture to hold together when you squeeze it. If it’s too dry, add another tablespoon of frosting. If it’s too wet, add a little more cake crumb. The texture should be like play dough—moldable but not sticky.
- Shape the turkey bodies. Roll the cake mixture into 1-inch balls. You should get about 24-30 balls depending on size. Place them on a parchment-lined baking sheet. Insert a lollipop stick into each ball, pushing it about halfway through. This helps with dipping later. Pop the tray in the fridge for at least 30 minutes to firm up. (Pro tip: If you’re short on time, freeze them for 15 minutes.)
- Melt the brown candy melts. Place the brown candy melts in a microwave-safe bowl. Microwave in 30-second intervals, stirring after each, until completely smooth. Don’t overheat—candy melts are picky and can seize up if you rush them.
- Dip the cake pops. Take the chilled cake pops out of the fridge. Dip each one into the melted brown coating, covering the entire ball. Gently tap the stick on the edge of the bowl to let excess coating drip off. Place the dipped pop upright in your Styrofoam block or cardboard stand. Repeat with all the pops. Let them set completely—about 15-20 minutes at room temperature.
- Add the turkey features. While the brown coating is setting, melt the orange and red candy melts in separate bowls. Use a toothpick or small piping bag to add a tiny orange triangle for the beak and a small red dot for the wattle on each turkey. Press on two candy eyes while the coating is still wet. For the feet, dip the ends of the pretzel sticks into the orange candy melts and attach them to the bottom of the cake pop. You can also just place the pretzel sticks directly into the cake pop before dipping—I’ve done both methods, and both work fine.
- Let everything set. Allow the decorations to harden completely before serving. This takes about 20-30 minutes. If you’re impatient (like me), pop them in the fridge for 10 minutes.
Cooking Tips & Techniques
I’ve made these turkey cake pops about a dozen times now, and I’ve learned a few things the hard way. Let me save you some trouble.
Don’t skip the chilling step. I know it’s tempting to rush, but if the cake balls are warm or even room temperature, the candy coating will crack and slide off. Chilled cake pops hold their shape and give you a smooth, even coating. Trust me on this one—I had a whole batch fall apart once because I was in a hurry.
Thin your candy melts if needed. Sometimes candy melts are too thick straight out of the bag. If yours seem gloppy, add a teaspoon of coconut oil or vegetable shortening and stir. It makes the coating much easier to work with and gives a thinner, more even layer.
Work in small batches. Only take a few cake pops out of the fridge at a time. If you take them all out at once, they’ll start to sweat, and the coating won’t stick properly. Keep the rest chilled until you’re ready to dip them.
Use a fork for dipping if you don’t have sticks. Just place the cake ball on a fork, lower it into the melted coating, and tap off the excess. It’s a little messier, but it works in a pinch.
Common mistake: Overmixing the cake and frosting. If you mix too much, the cake pops become dense and almost greasy. Mix just until it holds together—stop the second it forms a cohesive mass.
Variations & Adaptations
One of the best things about this recipe is how flexible it is. Here are a few ways to switch it up:
- Chocolate Turkey Cake Pops: Use a chocolate cake mix and chocolate frosting instead of vanilla. The dark coating pairs beautifully with the rich flavor. Just make sure to use brown candy melts for the coating so the turkey color still works.
- Peanut Butter Twist: Swap half the vanilla frosting for peanut butter frosting. It adds a nutty depth that’s amazing with chocolate coating. My husband says these are his favorite.
- Vegan Version: Use a vegan cake mix (most are accidentally vegan), replace the eggs with flax eggs (1 tablespoon flaxseed meal + 3 tablespoons water per egg), and use vegan frosting. Daiya makes a good dairy-free cream cheese frosting. For the coating, use dairy-free chocolate chips with a little coconut oil.
- Mini Turkey Bites: Roll the cake mixture into smaller balls—about the size of a marble. They’re perfect for kids’ parties and easier to pop in your mouth. Just reduce the dipping time since they’re smaller.
- Spiced Pumpkin: Add 1/2 teaspoon pumpkin pie spice to the cake crumb mixture before adding frosting. It gives a subtle fall flavor that works perfectly for Thanksgiving.
Serving & Storage Suggestions
These turkey cake pops are best served at room temperature. The coating stays firm but the inside is soft and cake-like. Arrange them on a platter with the pretzel legs pointing down, like they’re standing up. You can also stick them into a small pumpkin or a styrofoam base covered in fall leaves for a cute centerpiece.
Storage: Keep the cake pops in an airtight container in the refrigerator for up to 5 days. They actually taste better on day two—the flavors meld together and the texture gets even softer. Just let them sit at room temperature for about 10 minutes before serving so the coating isn’t too hard.
Freezer Instructions: You can freeze the undipped cake balls for up to 3 months. Just roll them, place them on a baking sheet, and freeze until solid. Then transfer to a freezer bag. When you’re ready to use them, thaw in the fridge overnight, then dip and decorate as usual. I’ve done this for holiday prep, and it saves so much time.
Reheating Note: Don’t microwave these—the coating will melt and the cake will get rubbery. Just let them come to room temperature naturally.
Nutritional Information & Benefits
Let’s be real—these are a treat, not a health food. But here’s a rough estimate per cake pop (based on 24 servings):
- Calories: 180
- Fat: 8g
- Carbohydrates: 26g
- Protein: 2g
- Sugar: 18g
If you’re looking to lighten them up, use a sugar-free cake mix and frosting. The texture will be a little different, but it’s a decent option for those watching their sugar intake. Also, the candy eyes are technically edible, but they’re mostly sugar and wax—so don’t let the kids eat too many of those separately.
On the plus side, these are portion-controlled treats. One or two is usually enough to satisfy a sweet tooth, which is better than a giant slice of pie. And if you use dark chocolate coating, you get a little antioxidant boost. Small wins!
Conclusion
Honestly, I never thought I’d be the person who makes turkey-shaped desserts for Thanksgiving. But here I am, and I’m not mad about it. These No-Bake Turkey Cake Pops are fun, easy, and they make people smile. That’s really what the holidays are about, right?
I’d love to see how yours turn out! Leave a comment below and tell me if you tried any fun variations—or if you have a better story than the accountant at the hardware store. (I’m still not over that one.) Share this recipe with a friend who needs a last-minute Thanksgiving dessert idea, and don’t forget to pin it for later. Happy Thanksgiving, and happy dipping!
Frequently Asked Questions
Can I use a homemade cake instead of a box mix?
Absolutely! Just use your favorite vanilla cake recipe. Make sure it’s fully cooled before crumbling. The texture might be a little different, but it will work fine.
Why did my candy melts crack?
This usually happens if the cake pops are too cold when you dip them. Let them sit at room temperature for 5 minutes before dipping. Also, don’t overheat the candy melts—they can seize and crack as they cool.
Can I make these ahead of time?
Yes! You can make the cake balls up to 3 days in advance and store them in the fridge. Dip and decorate the day you plan to serve them for the best appearance.
How do I get the pretzel legs to stay on?
Dip the end of the pretzel stick in melted candy coating before attaching it to the cake pop. This acts like glue. Let it set for a few minutes before moving the pop.
Can I use white chocolate instead of candy melts?
You can, but white chocolate is more finicky. Add a teaspoon of coconut oil to thin it out, and be careful not to overheat it. Candy melts are more forgiving for beginners.
Pin This Recipe!