There used to be a little bakery tucked between a dry cleaner and a nail salon on the corner of Elm and Fourth that made the best dirt pudding cups I have ever tasted. When they closed three years ago—just a sign on the door one Tuesday morning saying “Thanks for the memories”—I honestly felt a little lost. That sounds dramatic, I know, but those little cups of crushed cookies, creamy pudding, and gummy worms were my go-to for every Halloween party, every classroom celebration, every “I need a dessert that looks impressive but takes zero effort” moment. After twelve tries—some too soggy, some too sweet, one where the pudding never set and I served soup with gummy worms floating in it—I finally got it.
The secret, let me tell you, is all in the layering and the chilling time. You cannot rush this one, even though it is called “no bake.” There is a specific rhythm to it: crumbs on the bottom, a thick layer of that chocolate pudding, then more crumbs on top so it looks like real dirt. And the worms? You tuck them in just right so they look like they are crawling out of the ground. It is silly, I know, but every time I make these, I think about that little bakery and how something so simple can make people so happy.
Maybe you have been there—that one dessert that feels like the official start of spooky season. For me, it is these no bake dirt pudding cups. They are quick, they are fun, and honestly, they taste better than anything you could buy at a store. Let me show you how to make them.
Why You Will Love This Recipe
Let me be real with you for a second. I have tested this recipe more times than I care to admit. I have made it with instant pudding, cook-and-serve pudding, even homemade pudding from scratch (do not do that, by the way—it takes forever and the texture is wrong). I have tried different cookies, different cream cheese ratios, different chilling times. This version? It is the one. The one that works every single time, that sets up perfectly, that makes people say “Wait, you made these?”
- Quick & Easy: These come together in about 15 minutes of active prep time. Seriously. Crush the cookies, mix the pudding, layer everything in cups, and you are done. The hardest part is waiting for them to chill.
- Simple Ingredients: You probably already have most of this stuff in your kitchen. Chocolate pudding mix, milk, cream cheese, butter, Oreos, and some gummy worms. No fancy grocery trips required.
- Perfect for Halloween: These are the ultimate spooky season dessert. Kids love them, adults secretly love them, and they look amazing on a dessert table with minimal effort.
- Crowd-Pleaser: I have brought these to Halloween parties, school events, and family gatherings. They disappear fast. Like, embarrassingly fast.
- Unbelievably Delicious: The texture is what gets me every time. That creamy, rich pudding against the crunchy cookie crumbs? It is comfort food in a cup.
What makes this recipe different from all the other dirt pudding recipes out there? It is the cream cheese. Most recipes just use pudding and Cool Whip, which tastes fine but lacks that rich, almost cheesecake-like depth. Adding cream cheese to the pudding mixture gives it a tangy richness that balances the sweetness of the cookies perfectly. It also helps the pudding set up firmer, so your dirt cups hold their shape better. Trust me on this one.
This recipe is not just good—it is the kind that makes you close your eyes after the first bite. It is nostalgic, it is fun, and it tastes like childhood in the best possible way. Perfect for impressing guests without stress, or turning a simple weeknight into something special.
What Ingredients You Will Need
This recipe uses simple, everyday ingredients to create something that tastes way more complicated than it actually is. Most of these are pantry staples, which means you can whip up a batch of these dirt pudding cups whenever the craving hits.
For the Pudding Layer
- 1 package (3.9 ounces) instant chocolate pudding mix (I prefer Jell-O brand for consistent results, but any brand works)
- 2 cups cold whole milk (you can use 2% or even oat milk, but whole milk gives the richest, creamiest texture)
- 4 ounces cream cheese, softened to room temperature (this is the secret ingredient—do not skip it)
- 1/4 cup powdered sugar (just enough to sweeten the cream cheese without making things too sweet)
- 1 teaspoon vanilla extract (pure vanilla extract is best, but imitation works in a pinch)
- 1 cup frozen whipped topping, thawed (Cool Whip or any store brand—just make sure it is fully thawed before mixing)
For the Dirt Layer
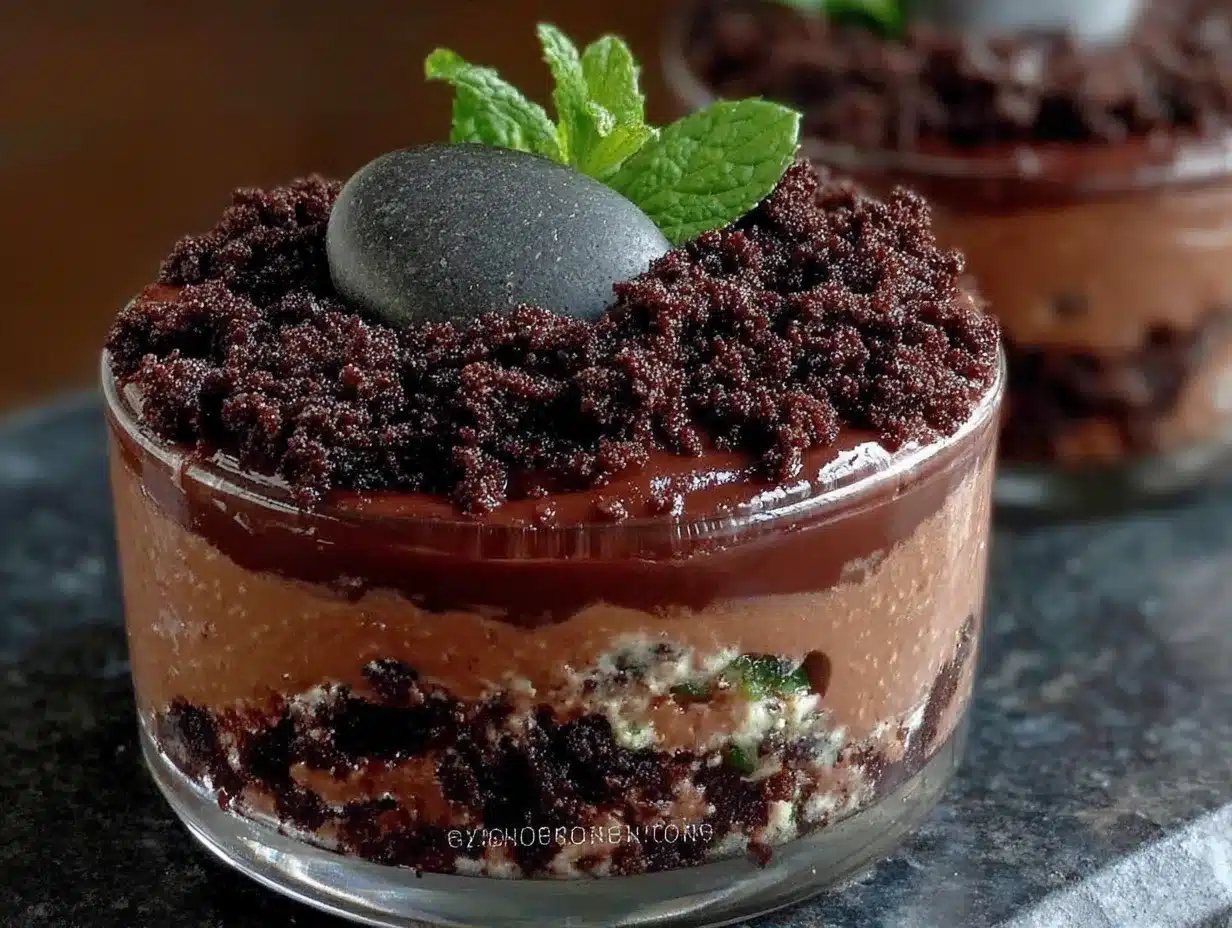
- 1 package (14.3 ounces) Oreo cookies (regular Oreos work best—the double stuff ones make the crumbs too greasy)
- 2 tablespoons melted butter (unsalted butter, melted and slightly cooled—this helps the crumbs stick together)
For Decoration
- Gummy worms (about 2-3 per cup, plus extra for snacking—I use Trolli brand because they are extra squishy)
- Optional: crushed graham crackers or chocolate shavings (for extra texture on top)
- Optional: small plastic spiders or tombstones (for a fun Halloween touch)
A quick note about the Oreos: you want to remove the cream filling before crushing them. I know, it feels wasteful, but the cream filling makes the crumbs clump together and get greasy. Just scrape it out with a butter knife—it takes about five minutes and makes a huge difference in the final texture. Save the filling for another use if you want, or just eat it straight from the bowl (no judgment here).
For the cream cheese, make sure it is truly softened to room temperature. Cold cream cheese will leave lumps in your pudding mixture, and nobody wants lumpy dirt pudding. Take it out of the fridge about 30 minutes before you start, or microwave it for about 10 seconds if you are in a hurry.
Equipment Needed
You do not need anything fancy for this recipe. That is one of the things I love about it—no special equipment required, just basic kitchen tools you probably already have.
- Mixing bowls: You will need a medium bowl for the pudding mixture and a small bowl for the cream cheese mixture. I use glass bowls because they are easy to clean and do not retain odors.
- Electric hand mixer or stand mixer: You can technically mix everything by hand, but an electric mixer makes the cream cheese mixture silky smooth in about 30 seconds. If you do not have one, just make sure your cream cheese is extra soft and whisk vigorously.
- Food processor or zip-top bag and rolling pin: For crushing the Oreos into fine crumbs. A food processor gives the most consistent texture, but a zip-top bag and a rolling pin work just as well—it is just a little more arm work.
- Small cups or glasses: I use 8-ounce plastic cups for Halloween parties because they are disposable and easy to transport. You can also use small mason jars, clear plastic cups, or even wine glasses for a fancier presentation.
- Spatula: For scraping every last bit of pudding into the cups. A rubber spatula is your best friend here.
- Measuring cups and spoons: Standard set for accurate measurements.
If you are making these for a party, I highly recommend using clear cups so people can see the layers. It makes the presentation so much more fun. I found a pack of 50 clear plastic cups at the dollar store for three bucks—best investment I ever made for Halloween desserts.
Preparation Method
Alright, let us get to the good part. Here is exactly how to make these quick graveyard dirt pudding cups, step by step. Follow along, and you will have a spooky dessert that looks like you spent hours on it.
- Crush the Oreos. Remove the cream filling from each Oreo cookie and discard (or eat—again, no judgment). Place the cookie wafers in a food processor and pulse until you have fine crumbs. If you do not have a food processor, put the cookies in a zip-top bag, seal it, and crush them with a rolling pin until they are finely ground. You want the crumbs to be uniform in size—no big chunks. Transfer the crumbs to a medium bowl and stir in the melted butter until everything is evenly moistened. Set aside.
- Make the cream cheese mixture. In a medium mixing bowl, beat the softened cream cheese with an electric hand mixer until it is smooth and fluffy, about 2 minutes. Add the powdered sugar and vanilla extract, and beat until combined. Scrape down the sides of the bowl with a spatula to make sure everything is incorporated. The mixture should be smooth, creamy, and slightly tangy.
- Prepare the pudding. In a separate large bowl, whisk together the instant chocolate pudding mix and cold milk. Whisk vigorously for about 2 minutes until the pudding starts to thicken. It will still be a little loose at this point—that is normal. Let it sit for about 5 minutes to fully thicken. You will know it is ready when it holds soft peaks when you lift the whisk.
- Combine everything. Fold the cream cheese mixture into the pudding mixture until smooth and fully combined. Use a spatula and be gentle—you do not want to deflate the pudding too much. Once the cream cheese is fully incorporated, gently fold in the thawed whipped topping until the mixture is light, fluffy, and uniform in color. It should look like a thick, creamy chocolate mousse.
- Layer the cups. Grab your cups or glasses. Start with a layer of crushed Oreo crumbs at the bottom of each cup—about 2 tablespoons per cup. Press the crumbs down gently with the back of a spoon to create a firm base. Next, spoon or pipe the pudding mixture on top of the crumbs, filling each cup about three-quarters full. Smooth the top with the back of a spoon. Finally, sprinkle a generous layer of the remaining Oreo crumbs on top to completely cover the pudding. It should look like a little cup of dirt.
- Add the worms. Here is where the fun happens. Take 2-3 gummy worms per cup and gently push them into the top layer of crumbs so they look like they are crawling out of the dirt. You can leave some worms partially buried and some fully visible for a more dramatic effect. If you are using plastic spiders or tombstones, place them on top now.
- Chill. This is the hardest step. Place the cups in the refrigerator for at least 2 hours, but overnight is even better. The chilling time allows the pudding to set fully and the flavors to meld together. The cookies will soften slightly, which gives the whole thing a more cohesive, dessert-like texture. Do not skip this step—I promise it is worth the wait.
- Serve. Take the cups out of the fridge about 10 minutes before serving to take the chill off. Serve them as is, or add a few extra gummy worms on top for visual appeal. Watch them disappear.
A few notes from someone who has made these more times than she cares to admit: if your pudding mixture seems too thin after mixing, do not panic. It will thicken up in the fridge. If it seems too thick, add a splash of milk and stir gently. And if you accidentally eat all the gummy worms before they make it into the cups? I have been there. Buy an extra bag.
Cooking Tips & Techniques
After making these dirt pudding cups for every Halloween party, school event, and “I need a dessert right now” emergency for the past three years, I have picked up a few tricks that make the process smoother and the results better.
Use cold milk for the pudding. This sounds obvious, but I have made the mistake of using room temperature milk before, and the pudding never set properly. Cold milk activates the pudding mix faster and helps it thicken up the way it should. Take the milk straight from the fridge and use it immediately.
Do not overmix the pudding. Once the pudding mix and milk are combined, whisk just until it starts to thicken. Overmixing can break down the starches and prevent the pudding from setting properly. About 2 minutes of vigorous whisking is all it needs.
Let the cream cheese come to room temperature. I know I said this already, but it is worth repeating. Cold cream cheese will leave lumps in your pudding that no amount of mixing will fix. Set it out on the counter for 30 minutes before you start, or microwave it in 10-second bursts until it is soft but not melted.
Crush the Oreos finely. Big chunks of cookie make the layers look messy and uneven. You want the crumbs to be as fine as possible—almost like sand. A food processor gives the best results, but a rolling pin and some elbow grease work fine too.
Layer strategically. Press the bottom crumb layer down firmly so it holds together. When you add the pudding, spoon it in gently so you do not disturb the crumb layer. And when you add the top crumb layer, make sure it completely covers the pudding—no white spots showing through.
Chill overnight if you can. Two hours is the minimum, but overnight is magic. The cookies soften into something that resembles a cake-like texture, and the flavors meld together in a way that makes everything taste more cohesive. I have made these the night before a party more times than I can count, and they always taste better the next day.
Double the recipe. Seriously. These disappear fast, and you will regret not making more. I learned this the hard way at my son’s Halloween party when I made 12 cups for 15 kids and watched them vanish in under five minutes.
Variations & Adaptations
One of the best things about this recipe is how adaptable it is. Here are a few ways to switch things up depending on your mood, dietary needs, or what you have in your pantry.
Peanut Butter Dirt Cups
Add 1/4 cup of creamy peanut butter to the cream cheese mixture before combining it with the pudding. The peanut butter adds a savory richness that pairs beautifully with the chocolate. Use Reese’s Pieces instead of gummy worms for a fun twist. My husband claims this version is better than the original—I am not sure I agree, but it is close.
Gluten-Free Version
Use gluten-free chocolate sandwich cookies (Glutino makes a good one) and make sure your pudding mix is labeled gluten-free. The rest of the ingredients are naturally gluten-free, so this is an easy swap. I have made this for friends with celiac disease and they could not tell the difference.
Dairy-Free Version
Use dairy-free cream cheese (Kite Hill is my favorite), dairy-free milk (oat milk works best), and a dairy-free whipped topping like CocoWhip. The texture will be slightly less rich, but it still tastes amazing. Just make sure everything is well-chilled before serving.
Pumpkin Dirt Cups
For a fall twist, add 1/2 cup of pumpkin puree and 1 teaspoon of pumpkin pie spice to the cream cheese mixture. Use crushed ginger snaps instead of Oreos for the “dirt.” Top with candy corn instead of gummy worms. This version is perfect for Thanksgiving or fall gatherings.
Individual Dessert Shooters
Instead of cups, layer everything in small shot glasses or mini mason jars for a party appetizer. Use extra-fine cookie crumbs and pipe the pudding in with a piping bag for a cleaner look. These are always a hit at adult Halloween parties.
Serving & Storage Suggestions
These dirt pudding cups are best served cold, straight from the fridge. The contrast between the cool, creamy pudding and the slightly softened cookie crumbs is what makes them so addictive. If you are serving them at a party, I recommend taking them out of the fridge about 10 minutes before serving to take the chill off—it lets the flavors come through more clearly.
For presentation, arrange the cups on a platter or tray with extra gummy worms scattered around for effect. You can also add small plastic tombstones, spiders, or bats to the tray for a full graveyard vibe. If you are feeling extra creative, use a black marker to write “RIP” on the cups.
These pair beautifully with other Halloween treats like pumpkin cookies, caramel apples, or a warm cup of apple cider. They also work great as a standalone dessert—they are rich enough to satisfy any sweet tooth without being too heavy.
Storage: Store any leftover cups in the refrigerator, covered with plastic wrap or in an airtight container. They will keep for up to 3 days, but honestly, they are best within the first 24 hours. After that, the cookies start to get too soft and the texture becomes less appealing.
Freezing: I do not recommend freezing these cups. The pudding can become grainy and the cookies will turn mushy when thawed. If you need to make them ahead of time, prepare them the night before and keep them refrigerated.
Make-Ahead Tip: You can prepare the cookie crumbs and the pudding mixture separately up to 2 days in advance. Store the crumbs in an airtight container at room temperature and the pudding mixture in the refrigerator. When you are ready to serve, just layer everything together and chill for 2 hours. This is a huge time-saver if you are hosting a party.
Nutritional Information & Benefits
Let me be honest with you—these are not health food. They are a fun, indulgent treat meant for special occasions. But here is the estimated nutritional breakdown for one serving (based on 8 servings per recipe):
- Calories: Approximately 380-420 per cup
- Fat: 18-22g (mostly from cream cheese and butter)
- Carbohydrates: 48-52g
- Protein: 5-7g
- Sugar: 32-36g
- Fiber: 2-3g
That said, there are a few redeeming qualities. The cream cheese adds a small amount of protein and calcium. The cocoa in the cookies and pudding mix contains antioxidants—though probably not enough to count as a health benefit. And honestly, sometimes you just need a dessert that makes you smile.
If you are watching your sugar intake, you can use sugar-free pudding mix and reduced-fat cream cheese to cut down on calories and sugar. The texture will be slightly different, but it still tastes great. For a lower-carb option, use almond flour cookies and sugar-free pudding—just know that the texture will not be quite the same.
These cups are not suitable for vegans unless you use the dairy-free substitutions mentioned above. They contain gluten unless you use gluten-free cookies. And obviously, they are not nut-free unless you check your specific brands for cross-contamination warnings.
Conclusion
Look, I know there are a million dirt pudding recipes out there. I have tried most of them. But this one? This is the one I keep coming back to. It is the one I make for Halloween parties, the one I bring to school events, the one I whip up when I need a dessert that looks impressive but takes almost no effort. It is quick, it is fun, and it tastes like childhood in the best possible way.
The cream cheese makes it richer. The chilling time makes it better. And the gummy worms? They make it unforgettable. Whether you are making these for a Halloween party, a classroom celebration, or just because you need a little spooky fun in your life, these quick graveyard dirt pudding cups will not let you down.
I would love to hear how yours turn out. Did you add your own twist? Did your kids help make them? Did you eat all the gummy worms before they made it into the cups? (I have been there.) Drop a comment below and let me know—I read every single one. And if you loved this recipe, share it with a friend who needs a little Halloween magic in their life.
Happy haunting, and happy eating!
Frequently Asked Questions
Can I use homemade pudding instead of instant?
You can, but I do not recommend it. Homemade pudding has a different texture and takes much longer to set. Instant pudding is specifically designed to thicken quickly and hold its shape, which is exactly what you need for these cups. Save the homemade pudding for a different dessert.
How far in advance can I make these?
You can make these up to 2 days in advance. Just keep them covered in the refrigerator. The texture is best within the first 24 hours, but they will still taste good for up to 3 days. After that, the cookies start to get too soft.
Can I use a different type of cookie?
Absolutely. Chocolate wafer cookies, gluten-free chocolate cookies, or even crushed chocolate graham crackers all work well. Just make sure whatever you use is finely crushed and mixed with a little melted butter to help it hold together.
My pudding did not set properly. What went wrong?
This usually happens for one of three reasons: your milk was not cold enough, you overmixed the pudding, or you did not let it sit long enough before layering. Make sure your milk is straight from the fridge, whisk gently for exactly 2 minutes, and let the pudding sit for a full 5 minutes before adding the cream cheese mixture.
Can I make these in a large dish instead of individual cups?
Yes! Layer everything in a 9×13 inch baking dish for a graveyard dirt cake. Just double the recipe and chill for at least 4 hours before serving. This is great for larger gatherings where individual cups are not practical.
Pin This Recipe!
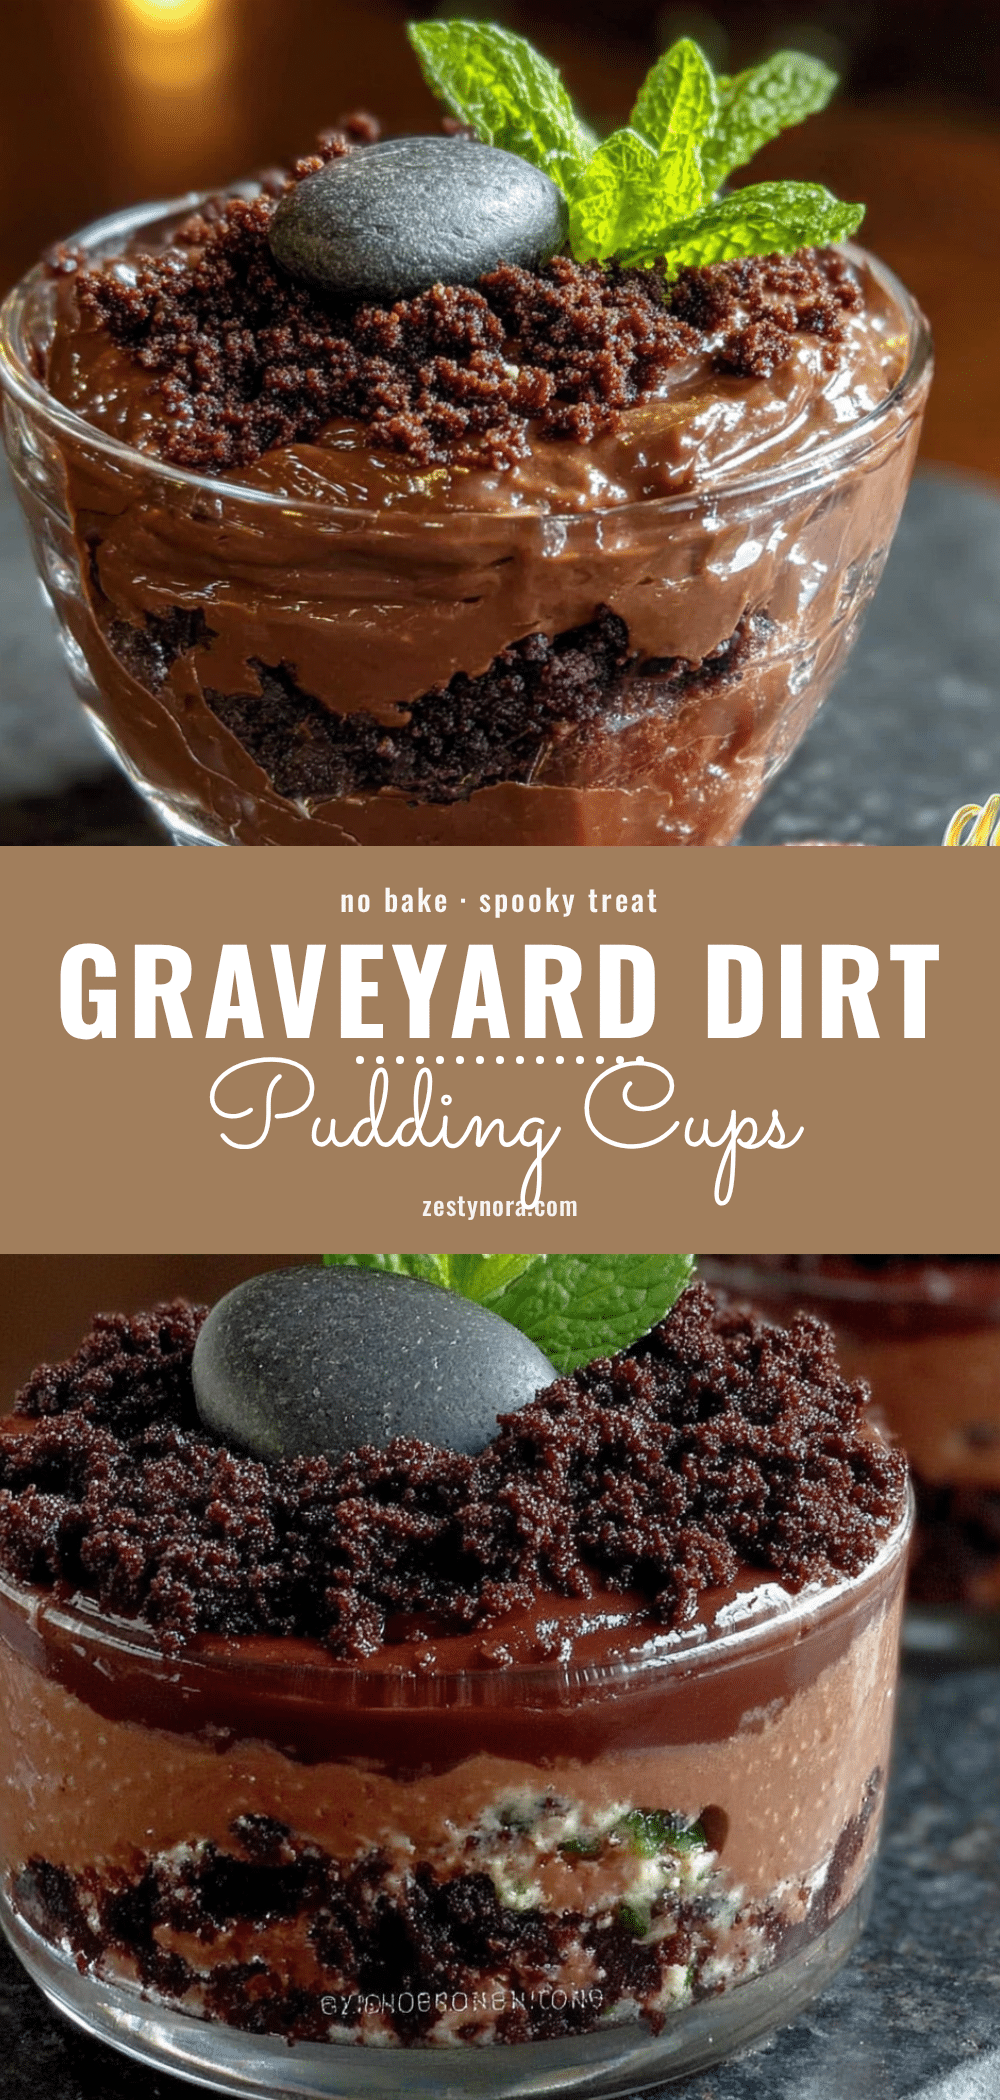
Quick Graveyard Dirt Pudding Cups – Easy No Bake Dessert
These no-bake dirt pudding cups are a quick and easy Halloween dessert featuring layers of creamy chocolate pudding, crushed Oreo cookies, and gummy worms. Perfect for parties and guaranteed to disappear fast.
- Prep Time: 15 minutes
- Cook Time: 0 minutes
- Total Time: 2 hours 15 minutes (includes chilling)
- Yield: 8 servings 1x
- Category: Dessert
- Cuisine: American
Ingredients
- 1 package (3.9 ounces) instant chocolate pudding mix
- 2 cups cold whole milk
- 4 ounces cream cheese, softened to room temperature
- 1/4 cup powdered sugar
- 1 teaspoon vanilla extract
- 1 cup frozen whipped topping, thawed
- 1 package (14.3 ounces) Oreo cookies
- 2 tablespoons unsalted butter, melted
- Gummy worms (about 2-3 per cup)
- Optional: crushed graham crackers or chocolate shavings
- Optional: small plastic spiders or tombstones
Instructions
- Crush the Oreos: Remove the cream filling from each Oreo cookie and discard. Place the cookie wafers in a food processor and pulse until fine crumbs form. Transfer to a medium bowl and stir in the melted butter until evenly moistened. Set aside.
- Make the cream cheese mixture: In a medium mixing bowl, beat the softened cream cheese with an electric hand mixer until smooth and fluffy, about 2 minutes. Add the powdered sugar and vanilla extract, and beat until combined. Scrape down the sides of the bowl.
- Prepare the pudding: In a separate large bowl, whisk together the instant chocolate pudding mix and cold milk. Whisk vigorously for about 2 minutes until the pudding starts to thicken. Let it sit for about 5 minutes to fully thicken.
- Combine everything: Fold the cream cheese mixture into the pudding mixture until smooth and fully combined. Gently fold in the thawed whipped topping until the mixture is light, fluffy, and uniform in color.
- Layer the cups: Place a layer of crushed Oreo crumbs at the bottom of each cup (about 2 tablespoons per cup). Press down gently. Spoon or pipe the pudding mixture on top, filling each cup about three-quarters full. Smooth the top. Sprinkle a generous layer of remaining Oreo crumbs on top to completely cover the pudding.
- Add the worms: Gently push 2-3 gummy worms into the top layer of crumbs so they look like they are crawling out of the dirt. Add optional decorations if desired.
- Chill: Refrigerate the cups for at least 2 hours, or overnight for best results.
- Serve: Take the cups out of the fridge about 10 minutes before serving. Add extra gummy worms on top if desired.
Notes
Use cold milk for the pudding. Do not overmix the pudding. Let cream cheese come to room temperature. Crush Oreos finely. Layer strategically. Chill overnight if possible. Double the recipe for larger gatherings.
Nutrition
- Serving Size: 1 cup
- Calories: 400
- Sugar: 34
- Sodium: 350
- Fat: 20
- Saturated Fat: 10
- Carbohydrates: 50
- Fiber: 2
- Protein: 6
Keywords: dirt pudding cups, Halloween dessert, no bake dessert, chocolate pudding, Oreo dessert, gummy worms, graveyard dessert


