My neighbor, a retired nurse named Carol, watched me struggle with a Halloween veggie tray one October afternoon. I was trying to make a spider web out of bell pepper strips, and honestly, it was a disaster. The peppers kept breaking, the dip was sliding everywhere, and I was about five seconds away from just dumping everything into a bowl and calling it a day. She didn’t say anything at first. Then she walked over, picked up a strip of crescent roll dough I had left on the counter, and wrapped it around a baby carrot. “Make mummies,” she said simply. “Kids don’t care about webs. They want something that looks like it’s coming back to life.”
That conversation changed my whole approach to Halloween snacks. I mean, here I was trying to be fancy and artistic, and Carol had solved the problem in about two seconds flat. The recipe arrived through that simple exchange — not a formal teaching moment, just a neighbor watching me mess up and offering a better idea. And you know what? She was right. These mummy-wrapped veggies are the easiest Halloween appetizer you will ever make. They come together in under 30 minutes, use ingredients you probably already have, and kids actually eat vegetables off this tray. I’ve been making them every year since, and I keep coming back because they are genuinely foolproof. Even when you are rushing between work and trick-or-treat prep, this tray works. Let me tell you — if you have ever wanted a Halloween appetizer that looks impressive but takes almost no effort, this is it.
Why You’ll Love This Recipe
I have tested this recipe about a dozen times over the past few years, tweaking the wrapping technique and the dip ratio until it was just right. Here is why I keep coming back to it — and why I think you will too:
- Quick & Easy : This whole tray comes together in under 30 minutes. Seriously, from fridge to table in less time than it takes to sort through your kid’s candy haul. Perfect for those chaotic weeknights when Halloween sneaks up on you.
- Simple Ingredients : You need crescent roll dough, your favorite veggies, and a packet of ranch seasoning. No specialty stores, no weird ingredients you will never use again. Everything is from the regular grocery store.
- Perfect for Halloween Parties : Whether it is a school party, a neighborhood gathering, or just your family before trick-or-treating, this tray fits right in. It looks festive without being over-the-top.
- Crowd-Pleaser : I have brought this to three different Halloween events and it disappeared every single time. Kids love the mummy look, adults love the ranch dip, and nobody complains about eating vegetables.
- Unbelievably Delicious : The combination of warm, flaky crescent dough wrapped around cold, crunchy veggies is honestly addictive. The contrast in textures is what makes this work — soft bread, crisp vegetables, and creamy dip.
What makes this recipe different from every other veggie tray out there is the wrapping technique. Most people just arrange vegetables on a platter and call it a day. But wrapping them in dough transforms the whole experience. It turns vegetables into something fun and unexpected. Plus, the ranch dip is homemade in about two minutes, so you skip the bottled stuff and get something way better. This isn’t just another veggie tray — it is the one that makes people stop and ask for the recipe.
What Ingredients You Will Need
This recipe uses simple, everyday ingredients to create something that looks way more complicated than it actually is. Most of these are pantry staples, so you probably have everything already. Here is what you need:
For the Mummy-Wrapped Veggies
- 1 can (8 oz) refrigerated crescent roll dough — I recommend Pillsbury for consistent results. You need the sheet-style dough if you can find it, but the perforated triangles work fine too. Just pinch the seams together before cutting.
- 1 large carrot — peeled and cut into 3-inch sticks, about 1/4 inch thick. Look for carrots that are straight and even so they wrap nicely.
- 1 large zucchini — cut into 3-inch sticks, similar size to the carrots. Green zucchini gives nice color contrast against the dough.
- 1 yellow squash — cut into sticks. The yellow adds visual variety to the tray.
- 1 red bell pepper — cut into 1/2-inch wide strips. Red stands out beautifully against the golden dough.
- 8-10 green beans — trimmed. These make great thin mummies that look extra spooky.
- 1 tablespoon olive oil — for brushing the dough before baking. This gives that golden, crispy finish.
- Candy eyes — optional but highly recommended. You can find these at any grocery store near the baking supplies. They make the mummies come alive.
For the Ranch Dip

- 1 cup sour cream — full-fat works best for thickness. Greek yogurt works as a lighter substitute (adds tang).
- 1/2 cup mayonnaise — I use Hellmann’s for consistency. This gives the dip richness.
- 1 packet (1 oz) ranch seasoning mix — Hidden Valley is my go-to. You can make your own with dried herbs if you prefer.
- 1 tablespoon fresh dill — chopped fine. This is optional but adds a fresh pop of flavor that makes the dip taste homemade.
- 1 teaspoon garlic powder — for extra savory depth.
- 1/2 teaspoon black pepper — freshly ground if you have it.
Substitution Guidance: If you are gluten-free, use gluten-free crescent dough or puff pastry sheets. For dairy-free, swap the sour cream with a plant-based version and use vegan mayo. The veggies are totally flexible — use whatever you have in the fridge. Broccoli florets, cucumber spears, and celery sticks all work great. Just keep the sizes similar so they bake evenly.
Equipment Needed
You do not need much for this recipe, which is part of why I love it. Here is what you will need:
- Baking sheet — a standard half-sheet pan works perfectly. Line it with parchment paper for easy cleanup. I use Nordic Ware because they don’t warp in the oven.
- Sharp knife — for cutting the dough into strips. A pizza cutter works even better for clean, straight lines.
- Cutting board — any sturdy board will do. I prefer a large wooden board for stability.
- Pastry brush — for brushing the olive oil onto the dough. If you don’t have one, use a paper towel dipped in oil.
- Small bowl — for mixing the ranch dip.
- Serving platter — a large, flat platter works best for arranging the mummies. A white platter makes the colors pop.
Budget-friendly tip: If you don’t have a pastry brush, just use your fingers to spread the oil. It is not fancy but it works. And honestly, I have used a clean paintbrush from the hardware store in a pinch — just make sure it is unused!
Preparation Method
Making these mummy-wrapped veggies is straightforward, but a few tricks make the difference between okay and amazing. Follow these steps and you will have a tray that disappears in minutes.
- Preheat your oven to 375°F (190°C). Line a baking sheet with parchment paper. This is important — without parchment, the dough can stick and tear when you try to remove the mummies.
- Prepare your vegetables. Wash and peel the carrot. Cut it into 3-inch long sticks, about 1/4 inch thick. Do the same with the zucchini and yellow squash. Cut the bell pepper into 1/2-inch wide strips. Trim the green beans. Pat everything dry with a paper towel — wet veggies make the dough soggy. I learned this the hard way after my first batch came out of the oven looking sad and limp.
- Prepare the crescent dough. Unroll the crescent dough onto a clean cutting board. If you are using the perforated triangles, pinch the seams together to create one solid sheet. Use a pizza cutter or sharp knife to cut the dough lengthwise into 1/2-inch wide strips. You should get about 12-14 strips. Don’t worry if they are not perfectly even — mummies are supposed to look a little messy.
- Wrap the vegetables. Take one vegetable stick and place it at the end of a dough strip. Wrap the dough around the vegetable, overlapping slightly as you go. Leave a small gap near the top so you can see the vegetable “face.” For the green beans, you can wrap two or three together in one strip of dough. Press the end of the dough gently to seal it. Repeat with all the vegetables. This takes about 5 minutes once you get into a rhythm.
- Arrange on the baking sheet. Place the wrapped vegetables on the prepared baking sheet, leaving about 1 inch of space between each one. They don’t spread much, but a little room helps them brown evenly.
- Brush with olive oil. Use your pastry brush to lightly coat each mummy with olive oil. This gives them that beautiful golden color. Don’t skip this step — dry dough looks pale and unappetizing.
- Bake for 12-15 minutes. The mummies are done when the dough is golden brown and puffed. Keep an eye on them after 12 minutes — ovens vary and you want them golden, not burnt. The vegetables should still have some crunch. Overcooking makes the veggies mushy.
- Let cool slightly. Remove the baking sheet from the oven and let the mummies cool for 2-3 minutes on the sheet. This lets the dough set so it doesn’t fall apart when you move them.
- Make the ranch dip. While the mummies cool, combine the sour cream, mayonnaise, ranch seasoning, fresh dill, garlic powder, and black pepper in a small bowl. Stir until smooth. Taste and adjust seasoning — I sometimes add a pinch of salt if needed. Cover and refrigerate until ready to serve.
- Assemble the tray. Arrange the mummy-wrapped veggies on a large platter. Place the ranch dip bowl in the center. If you are using candy eyes, gently press them onto the exposed vegetable tips. They stick best when the veggies are still slightly warm. Serve immediately or at room temperature.
Time-saving tip: You can prep the vegetables and mix the dip up to a day ahead. Store them separately in the fridge. When you are ready to serve, just wrap and bake. This makes Halloween night so much less stressful.
Cooking Tips & Techniques
After making these mummies for several Halloweens, I have collected a few tricks that make the process smoother. Here are the things I wish someone had told me the first time:
Don’t over-wrap the vegetables. I made this mistake my second time — I wrapped the dough around and around until the vegetable was completely hidden. The problem is the dough gets too thick and doesn’t cook through properly. Two to three wraps is plenty. You want to see the vegetable peeking through in places. It looks more like a mummy that way anyway.
Pat your veggies dry. This cannot be overstated. Wet vegetables create steam in the oven, which makes the dough soggy instead of crispy. I dry each vegetable stick with a paper towel before wrapping. It takes an extra 30 seconds and makes a huge difference.
Use room temperature dough. Cold crescent dough cracks when you try to unroll it. Let it sit on the counter for 10 minutes before you start. If you are in a hurry, you can microwave the sealed can for 5 seconds — but be careful, too long and it will start to puff.
Watch the oven like a hawk. The difference between perfect golden mummies and burnt ones is about two minutes. I set a timer for 12 minutes and then check every minute after that. The dough goes from pale to golden to dark brown very quickly. Pull them out when the tips of the dough just start to brown.
Arrange strategically on the platter. Place the mummies with their “faces” facing outward so people can see the vegetable tips. Group similar colors together for visual impact. I put the ranch dip in a small bowl in the center and arrange the mummies around it like they are coming to drink from a pond. Kids love this presentation.
One mistake I still make: I always underestimate how many people will eat these. I made two batches last year and they were gone in 20 minutes. Make more than you think you need. Trust me on this.
Variations & Adaptations
This recipe is incredibly flexible. Here are some variations I have tried and loved:
Dietary Variations:
- Gluten-Free: Use gluten-free crescent dough or gluten-free puff pastry sheets. The texture is slightly different but the concept works perfectly. I tested this with a friend who has celiac disease and she gave it two thumbs up.
- Dairy-Free: Use vegan crescent dough (some brands offer this) and make the ranch dip with dairy-free sour cream and vegan mayo. The flavor is slightly tangier but still delicious.
- Low-Carb: Skip the dough entirely and just arrange the vegetables in mummy shapes on the platter. Use the candy eyes directly on the veggies. It is not as warm and flaky, but the visual effect is still fun.
Flavor Variations:
- Spicy Mummies: Add 1/2 teaspoon cayenne pepper to the ranch dip and sprinkle chili flakes on the dough before baking. My husband loves this version.
- Everything Bagel Mummies: Sprinkle everything bagel seasoning on the dough after brushing with oil. The sesame seeds and garlic add amazing crunch.
- Cheesy Mummies: Sprinkle shredded Parmesan on the dough before baking. It gets crispy and adds a salty, savory element that pairs beautifully with the ranch dip.
Seasonal Adaptations:
- Fall: Use sweet potato sticks instead of carrots. The orange color is perfect for Halloween and the sweetness contrasts nicely with the savory dough.
- Summer: Use asparagus spears instead of green beans. They are thinner and wrap beautifully. Plus, they are in season and taste amazing.
My personal favorite variation: I tried a version last year where I added a thin slice of cheddar cheese under the dough wrap. The cheese melted and got all gooey inside. It was ridiculous and amazing. I am not saying you should do this every time, but for a special Halloween party, it is a game-changer.
Serving & Storage Suggestions
These mummy-wrapped veggies are best served warm, right after the dough comes out of the oven. The contrast between the warm, flaky dough and the cool, crunchy vegetables is what makes them special. However, they are also delicious at room temperature, which makes them perfect for parties where food sits out for a while.
Presentation tips: Arrange the mummies on a large white platter for maximum visual impact. Place the ranch dip in a small bowl in the center. I like to add some extra raw vegetables around the edges — cherry tomatoes, cucumber slices, and baby carrots — to fill out the tray. It makes the spread look abundant without extra work.
Complementary dishes: This tray pairs beautifully with other Halloween snacks. I often serve it alongside a bowl of spicy pumpkin soup for a full Halloween meal. The creamy soup balances the crunchy veggies perfectly. For a party, add some crispy garlic chicken wings for a protein option that fits the spooky theme.
Storage instructions: If you have leftovers (unlikely, but possible), store the mummies and ranch dip separately. Place the mummies in an airtight container in the refrigerator for up to 2 days. The ranch dip keeps for up to 5 days. Do not freeze the mummies — the vegetables get mushy when thawed.
Reheating methods: To reheat, place the mummies on a baking sheet in a 350°F (175°C) oven for 5-7 minutes. This crisps the dough back up. Do not use the microwave — it makes the dough rubbery and the vegetables soggy. I speak from experience on this one.
Flavor development: Interestingly, the ranch dip actually tastes better after sitting in the fridge for a few hours. The flavors meld together and become richer. If you are making this for a party, mix the dip the night before and let it chill overnight. It makes a noticeable difference.
Nutritional Information & Benefits
Here is the approximate nutritional breakdown for one serving (about 3 mummy-wrapped veggies with 2 tablespoons of ranch dip):
- Calories: 220
- Total Fat: 14g
- Saturated Fat: 4g
- Carbohydrates: 18g
- Fiber: 3g
- Sugar: 5g
- Protein: 5g
- Sodium: 480mg
Health benefits: This recipe packs a surprising amount of nutrition into a fun package. The carrots provide beta-carotene for eye health and immune support. Zucchini and yellow squash are low-calorie sources of vitamin C and potassium. Bell peppers are loaded with antioxidants. Even the green beans contribute fiber and folate. The crescent dough adds carbohydrates for energy, which is helpful before a long night of trick-or-treating.
Dietary considerations: This recipe contains gluten and dairy. For gluten-free and dairy-free adaptations, see the variations section above. The ranch dip contains eggs (from the mayo) and dairy. If you have allergies, the dip is easy to customize with alternative ingredients.
My personal perspective: I love that this recipe lets me serve vegetables at a Halloween party without anyone complaining. The dough and dip make the veggies approachable, but the nutritional benefits are still there. It is a win-win for parents who want their kids to eat something healthy before the candy binge begins.
Conclusion
This mummy-wrapped veggie tray with ranch dip has become my go-to Halloween appetizer for good reason. It is quick, simple, and always a hit. The vegetables stay crunchy, the dough gets golden and flaky, and the ranch dip ties everything together with creamy, herby goodness. Plus, it looks adorable on the table — those little candy eyes staring up at your guests never fail to get a smile.
I encourage you to make this recipe your own. Swap in your favorite vegetables, experiment with different seasonings, or try one of the variations I shared. The beauty of this recipe is how forgiving it is. You cannot really mess it up, and even the imperfect mummies taste delicious. That is the kind of recipe I love — one that works with you, not against you.
I would love to hear how your mummy tray turns out. Did you add any creative twists? Did your kids help with the wrapping? Drop a comment below and share your experience. And if you snap a photo, tag me on social media — I love seeing your Halloween creations! Until next time, happy cooking and have a spooktacular Halloween.
Frequently Asked Questions
Can I make these mummy-wrapped veggies ahead of time?
Yes, you can prep the vegetables and mix the ranch dip up to a day ahead. Store them separately in the refrigerator. Wrap and bake the mummies just before serving for the best texture. The dough is best fresh from the oven.
What vegetables work best for this recipe?
Firm vegetables that hold their shape during baking work best. Carrots, zucchini, yellow squash, bell peppers, green beans, and asparagus are all excellent choices. Avoid soft vegetables like tomatoes or mushrooms — they release too much moisture and make the dough soggy.
Can I use puff pastry instead of crescent dough?
Absolutely. Puff pastry creates a flakier, more buttery result. Cut the puff pastry into strips and wrap the vegetables the same way. The baking time may be slightly longer — about 15-18 minutes at 375°F (190°C). Watch for golden brown color as your cue.
How do I keep the dough from unraveling during baking?
Press the end of the dough strip firmly against the wrapped portion to seal it. Placing the mummies seam-side down on the baking sheet also helps. If you are still having trouble, a tiny dab of water on the end of the dough acts like glue.
Can I use homemade ranch seasoning instead of a packet?
Yes, homemade ranch seasoning works great. Mix 1 tablespoon dried parsley, 1 teaspoon dried dill, 1 teaspoon garlic powder, 1 teaspoon onion powder, 1/2 teaspoon dried chives, 1/2 teaspoon salt, and 1/4 teaspoon black pepper. Use 2 tablespoons of this mix in place of the packet.
Pin This Recipe!
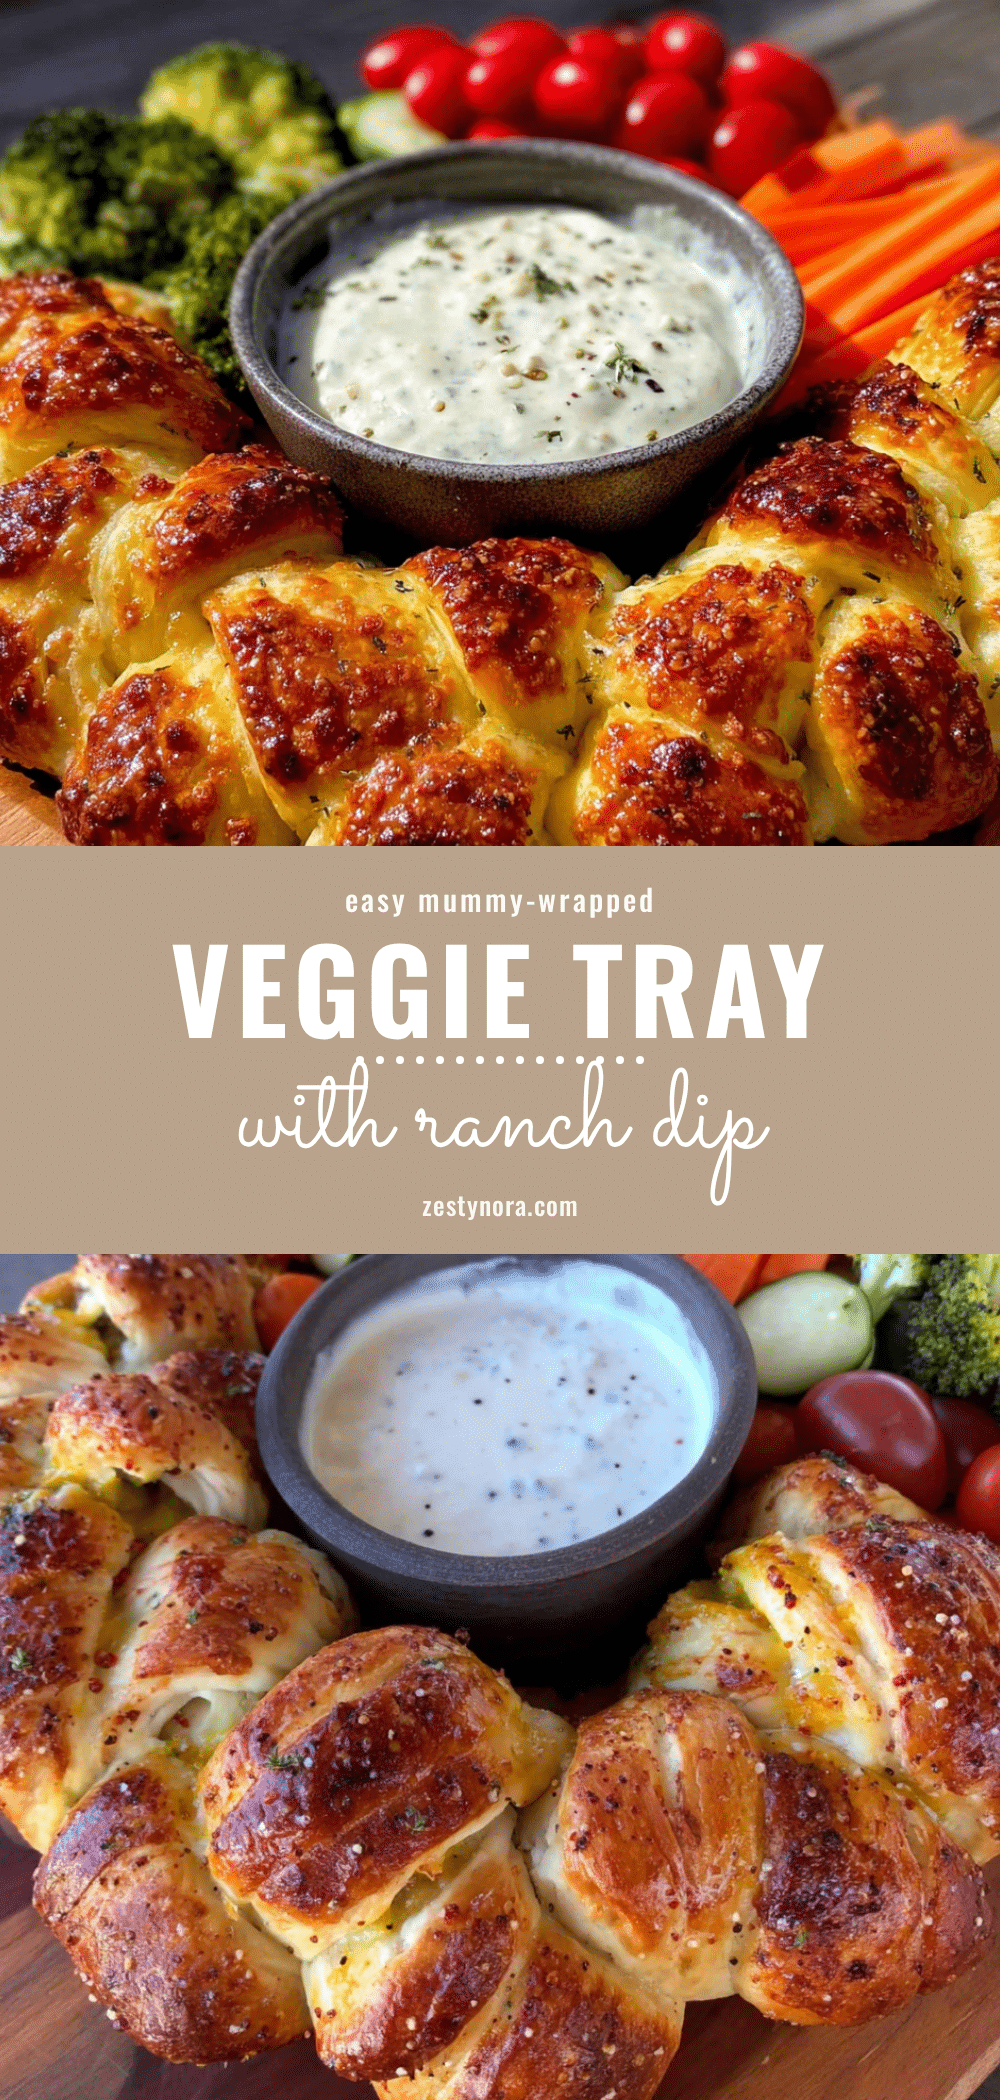
Easy Mummy-Wrapped Veggie Tray: Best Halloween Ranch Dip

These mummy-wrapped veggies are the easiest Halloween appetizer you will ever make. They come together in under 30 minutes, use ingredients you probably already have, and kids actually eat vegetables off this tray.
- Prep Time: 15 minutes
- Cook Time: 15 minutes
- Total Time: 30 minutes
- Yield: 4 servings 1x
- Category: Appetizer
- Cuisine: American
Ingredients
- 1 can (8 oz) refrigerated crescent roll dough
- 1 large carrot, peeled and cut into 3-inch sticks (about 1/4 inch thick)
- 1 large zucchini, cut into 3-inch sticks
- 1 yellow squash, cut into sticks
- 1 red bell pepper, cut into 1/2-inch wide strips
- 8–10 green beans, trimmed
- 1 tablespoon olive oil
- Candy eyes (optional)
- 1 cup sour cream
- 1/2 cup mayonnaise
- 1 packet (1 oz) ranch seasoning mix
- 1 tablespoon fresh dill, chopped fine
- 1 teaspoon garlic powder
- 1/2 teaspoon black pepper
Instructions
- Preheat your oven to 375°F (190°C). Line a baking sheet with parchment paper.
- Prepare your vegetables. Wash and peel the carrot. Cut it into 3-inch long sticks, about 1/4 inch thick. Do the same with the zucchini and yellow squash. Cut the bell pepper into 1/2-inch wide strips. Trim the green beans. Pat everything dry with a paper towel.
- Prepare the crescent dough. Unroll the crescent dough onto a clean cutting board. If using perforated triangles, pinch the seams together to create one solid sheet. Use a pizza cutter or sharp knife to cut the dough lengthwise into 1/2-inch wide strips (about 12-14 strips).
- Wrap the vegetables. Take one vegetable stick and place it at the end of a dough strip. Wrap the dough around the vegetable, overlapping slightly as you go. Leave a small gap near the top so you can see the vegetable ‘face.’ For green beans, wrap two or three together in one strip. Press the end of the dough gently to seal. Repeat with all vegetables.
- Arrange on the baking sheet. Place the wrapped vegetables on the prepared baking sheet, leaving about 1 inch of space between each one.
- Brush with olive oil. Use a pastry brush to lightly coat each mummy with olive oil.
- Bake for 12-15 minutes, until the dough is golden brown and puffed. The vegetables should still have some crunch.
- Let cool slightly. Remove the baking sheet from the oven and let the mummies cool for 2-3 minutes on the sheet.
- Make the ranch dip. While the mummies cool, combine the sour cream, mayonnaise, ranch seasoning, fresh dill, garlic powder, and black pepper in a small bowl. Stir until smooth. Cover and refrigerate until ready to serve.
- Assemble the tray. Arrange the mummy-wrapped veggies on a large platter. Place the ranch dip bowl in the center. If using candy eyes, gently press them onto the exposed vegetable tips. Serve immediately or at room temperature.
Notes
Don’t over-wrap the vegetables; two to three wraps is plenty. Pat veggies dry to avoid soggy dough. Use room temperature dough to prevent cracking. Watch the oven closely to avoid burning. Arrange mummies with ‘faces’ facing outward on the platter. Make more than you think you need.
Nutrition
- Serving Size: 3 mummy-wrapped vegg
- Calories: 220
- Sugar: 5
- Sodium: 480
- Fat: 14
- Saturated Fat: 4
- Carbohydrates: 18
- Fiber: 3
- Protein: 5
Keywords: Halloween, mummy, veggie tray, ranch dip, appetizer, party food, crescent roll, vegetables


