There used to be a tiny French bistro tucked on a side street in Portland called Le P’tit Coin that made a butternut squash soup that I still dream about. When they closed their doors back in 2018—the landlord tripled the rent, the rumor went—I honestly felt a little pang of grief. That soup was my cold-weather ritual. I’d order it every November with a crusty baguette and a glass of something dry and white, and I’d sit there letting the warmth soak into my bones. After they disappeared, I spent three winters trying to crack that code. The first attempt was watery and sad. The second was too sweet, like dessert in a bowl. The third? Closer, but missing that nutty, almost savory depth that made the original so unforgettable.
Then, last fall, standing over my stove on a drizzly Tuesday, I had a little kitchen epiphany. I was browning butter for a batch of cookies, and that smell—toasty, rich, almost hazelnutty—hit me. That was the missing piece. The bistro’s soup had that same deep, golden undertone, and I’d never connected the dots. So I roasted the squash until the edges caramelized, stirred in that liquid gold brown butter, and when I took that first spoonful, I closed my eyes. It was the one. Maybe you’ve been there—chasing a flavor from a place that no longer exists. Let me tell you, it’s a sweet victory when you finally catch it.
Why You’ll Love This Recipe
This isn’t just another butternut squash soup recipe floating around the internet. I’ve tested this version more times than I care to count—my family has been my willing (and honest) taste-test crew for every single batch. Here’s why this one earns a permanent spot in your fall and winter rotation:
- Simple Ingredients, Maximum Flavor: No fancy grocery store runs required. You’ll grab a butternut squash, some onion, garlic, broth, and butter—that’s the backbone. The magic happens in the roasting and the browning.
- Budget-Friendly for Family Meals: A single butternut squash goes a long way. Paired with pantry staples, this soup stretches to feed a hungry family without stretching your wallet. Leftovers reheat beautifully, too.
- Crowd-Pleaser That Pleases Picky Eaters: My youngest, who usually eyes anything orange with suspicion, asked for seconds. The natural sweetness from roasting wins over even the most skeptical little diners.
- Comfort Food, Reimagined: It’s creamy without a drop of heavy cream. The brown butter adds a richness that feels indulgent but isn’t heavy. It’s the kind of soup that makes you slow down and actually taste it.
- Comes Together in Under an Hour: Active prep time is maybe 15 minutes. The oven does most of the work while you get on with your evening.
Honestly, this recipe is the one I turn to when I need a win in the kitchen. It’s forgiving, it’s deeply satisfying, and it makes the whole house smell like a warm hug. That’s not nothing.
What Ingredients You Will Need
This recipe leans on a handful of simple, wholesome ingredients that work together to deliver that cozy, soul-warming flavor. No surprises here—just good, honest food.
- 1 large butternut squash (about 3 pounds / 1.4 kg): Look for one that feels heavy for its size with a solid, unblemished skin. I prefer the long-necked variety because they’re easier to peel and have fewer seeds. (Peeled, seeded, and cut into 1-inch cubes.)
- 1 medium yellow onion, roughly chopped: Adds a subtle savory base. A sweet onion works nicely here, too.
- 3 cloves garlic, smashed: I leave them whole-ish and smash them with the side of my knife. They soften and sweeten during roasting.
- 3 tablespoons unsalted butter: This is the star player for the brown butter magic. I use Kerrygold for its rich flavor, but any good-quality unsalted butter will do.
- 4 cups (960 ml) low-sodium chicken or vegetable broth: Homemade is lovely, but a good store-bought brand like Imagine or Kitchen Basics works perfectly. Low-sodium lets you control the salt.
- 1 tablespoon olive oil: For roasting the squash and aromatics. Just your everyday cooking olive oil is fine.
- ½ teaspoon salt, plus more to taste: I use fine sea salt for cooking and finishing.
- ¼ teaspoon black pepper, freshly ground: A little goes a long way, but don’t skip it—it balances the sweetness.
- ¼ teaspoon ground nutmeg (optional but recommended): A whisper of nutmeg lifts the whole soup. Freshly grated is best, but pre-ground works in a pinch.
- Optional garnishes: Toasted pepitas (pumpkin seeds), a swirl of cream or yogurt, fresh thyme or sage, and an extra drizzle of brown butter.
For the brown butter, you really only need the butter itself, but keep an eye on it—it goes from golden to burnt in seconds. I’ve learned that the hard way, more than once. If you want to add a little something extra, a sprig of fresh sage dropped into the sizzling butter as it browns is a beautiful touch.
Equipment Needed
You don’t need a fancy kitchen to pull this off. Here’s what you’ll need:
- Baking sheet: A rimmed half-sheet pan is ideal for roasting the squash without spilling juices everywhere. I’ve used a jelly-roll pan in a pinch—it works fine.
- Large pot or Dutch oven: A 5- to 6-quart pot is perfect for simmering the soup. A Dutch oven holds heat beautifully and makes for easy stirring.
- Immersion blender (or regular blender): An immersion blender is my go-to—it means less cleanup and you can blend right in the pot. If you’re using a countertop blender, work in batches and be careful with the hot liquid. (Pro tip: remove the center cap from the lid and cover it with a kitchen towel to let steam escape.)
- Small skillet: For browning the butter. A light-colored skillet helps you see the color change more easily.
- Vegetable peeler: A sharp Y-peeler makes quick work of the squash skin.
- Chef’s knife and cutting board: For all that chopping.
If you don’t have an immersion blender, don’t sweat it. A potato masher will give you a chunkier texture, or you can pass the soup through a food mill. I’ve done all three, and honestly, each version has its own charm.
Preparation Method

Let’s get cooking. This method is straightforward, but I’ll walk you through each step with the little details that make a difference.
- Preheat your oven to 400°F (200°C). While it heats, peel the butternut squash. I find it easiest to cut off the top and bottom first, then slice the neck from the bulbous base. Use a sharp vegetable peeler to strip off the skin. Cut the squash in half lengthwise, scoop out the seeds with a spoon, and chop it into 1-inch cubes. Don’t stress about perfect uniformity—just aim for similar sizes so they cook evenly.
- Toss the cubed squash, chopped onion, and smashed garlic cloves on your baking sheet with the olive oil, ¼ teaspoon of salt, and a few grinds of pepper. Spread everything in a single layer. Crowding the pan will steam the squash instead of roasting it, and you want those caramelized edges. Roast for 25 to 30 minutes, stirring halfway through, until the squash is tender and the edges are browned and slightly crispy.
- While the squash roasts, make the brown butter. In your small skillet, melt the 3 tablespoons of butter over medium heat. Swirl the pan occasionally. The butter will foam up, then subside, and you’ll see little golden specks forming at the bottom. This happens quickly—watch for a nutty aroma and a deep amber color. As soon as it smells toasted, about 3 to 4 minutes, pull it off the heat and pour it into a heatproof bowl to stop the cooking. (Trust me, don’t walk away. I burned a batch while answering the door for a package delivery. Learn from my mistake.)
- Transfer the roasted vegetables to your large pot. Add the 4 cups of broth and the remaining ¼ teaspoon of salt. Bring it to a gentle simmer over medium heat. Let it bubble away for about 10 minutes, stirring occasionally. This lets the flavors meld together.
- Remove the pot from the heat. Using your immersion blender, puree the soup until it’s silky smooth. If you’re using a countertop blender, let the soup cool for a few minutes first, then blend in batches. The soup should be thick but pourable—if it’s too thick for your liking, stir in a little extra broth or water until it reaches your desired consistency.
- Stir in the brown butter and the ground nutmeg. Reserve about a tablespoon of the brown butter for drizzling over the top of each bowl, if you like. Taste the soup and adjust the salt and pepper. This is your moment to dial it in.
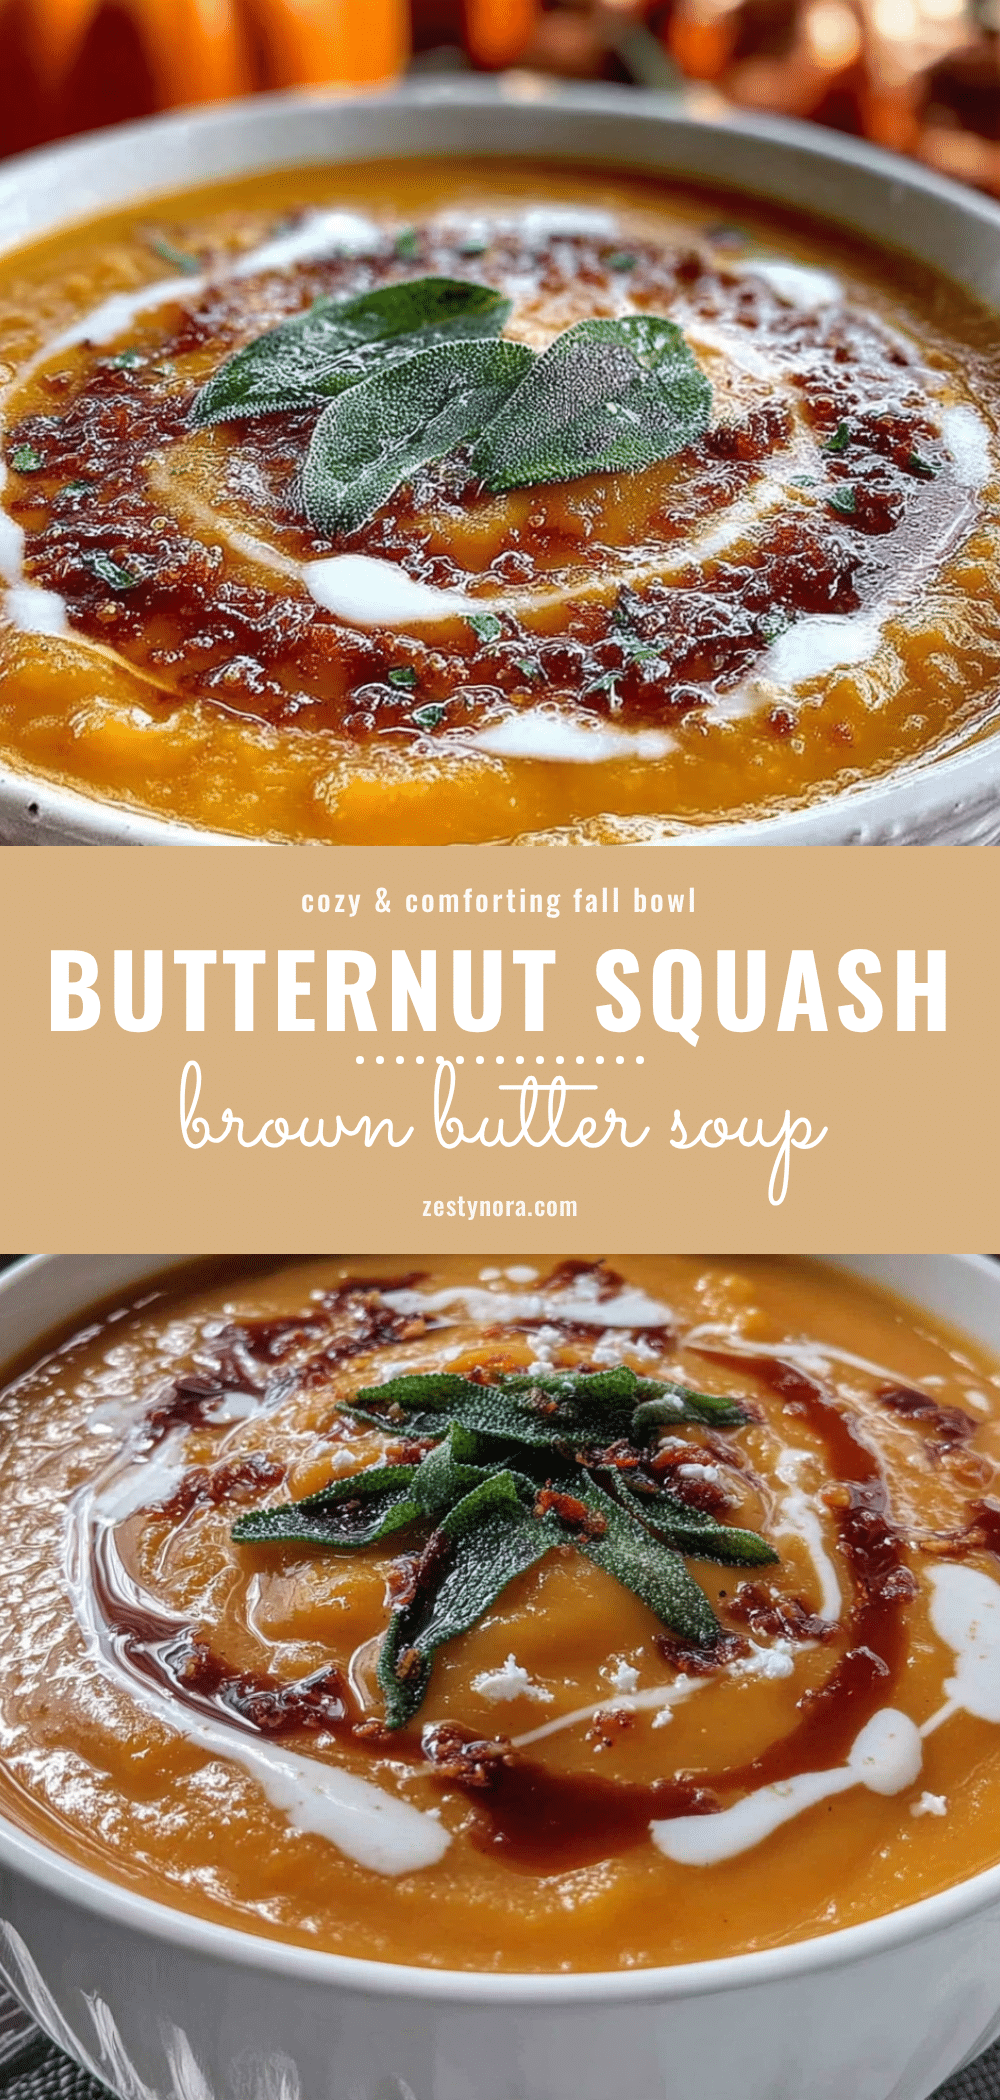
- Ladle the soup into bowls. Garnish with a swirl of cream or yogurt, a sprinkle of toasted pepitas, a few fresh thyme leaves, and that reserved drizzle of brown butter. Serve hot, with crusty bread or a simple grilled cheese on the side.
One thing I’ve learned: the soup tastes even better the next day. The flavors deepen overnight in the fridge, so don’t hesitate to make it ahead.
Cooking Tips & Techniques
I’ve made this soup more times than I can count, and I’ve picked up a few tricks along the way that make a real difference.
- Don’t skip the roasting step. I know it’s tempting to just boil the squash to save time, but roasting concentrates the natural sugars and adds a caramelized depth you simply can’t get any other way. It’s the difference between a good soup and a great one.
- Watch the brown butter like a hawk. It goes from perfect to burnt in about 30 seconds. I like to use a light-colored pan so I can actually see the color change. The moment it smells nutty and looks like liquid amber, it’s done. Pour it out immediately.
- Season in layers. A little salt on the vegetables before roasting, a little more in the pot, and a final adjustment at the end. This builds complexity without making the soup taste salty.
- If your soup is too sweet, add a squeeze of lemon juice. A little acidity cuts through the sweetness of the squash and brightens everything up. I’ve done this more times than I care to admit, and it works like a charm.
- For a dairy-free version, skip the brown butter and use 2 tablespoons of olive oil or coconut oil instead. You’ll lose that nutty note, so consider adding a pinch of smoked paprika or a dash of toasted sesame oil to compensate.
Honestly, the biggest lesson I’ve learned is to trust your senses. Look at the color, smell the aromas, taste as you go. Cooking this soup is more about feeling than following a rigid script.
Variations & Adaptations
This recipe is a fantastic base, and it’s easy to tweak based on what you have on hand or who you’re feeding.
- Coconut Curry Twist: Swap the brown butter for 1 tablespoon of coconut oil and stir in 1 tablespoon of red curry paste along with the broth. Finish with a splash of full-fat coconut milk instead of cream. It’s warming, a little spicy, and totally vegan-friendly.
- Apple & Sage Version: Toss one peeled, chopped apple (like Honeycrisp or Fuji) onto the baking sheet with the squash. The apple adds a subtle sweetness and pairs beautifully with fresh sage leaves stirred into the soup at the end.
- Smoky Bacon Variation: Cook 4 slices of bacon until crispy, then use the rendered fat in place of the olive oil for roasting. Crumble the bacon over the finished soup. This one disappears fast in my house.
- Make It a Meal: Stir in a can of drained and rinsed chickpeas or some shredded rotisserie chicken after blending. It turns a side soup into a hearty main dish.
- Low-Carb Adaptation: Swap the butternut squash for a combination of roasted cauliflower and carrots. The texture is slightly different, but the flavor is still deeply satisfying.
I’ve tried all of these at one point or another, and my personal favorite is the apple and sage version. The apple adds a brightness that feels perfect for a crisp fall day.
Serving & Storage Suggestions
This soup is best served piping hot, straight from the pot. Ladle it into wide bowls and top with your favorite garnishes. A dollop of Greek yogurt or a swirl of heavy cream adds a lovely tangy contrast to the sweet, nutty soup. Toasted pepitas give a nice crunch, and a few fresh thyme leaves add a pop of color.
For a full meal, pair it with a crispy garlic chicken sandwich or a simple green salad with a tangy vinaigrette. A slice of crusty sourdough bread slathered with butter is practically mandatory.
Storage: Let the soup cool completely, then transfer it to an airtight container. It will keep in the refrigerator for up to 5 days. The flavors actually get better after a day or two.
Freezing: This soup freezes beautifully. Pour it into freezer-safe bags or containers, leaving a little room for expansion. It will keep for up to 3 months. Thaw overnight in the fridge before reheating.
Reheating: Warm the soup gently on the stovetop over medium-low heat, stirring occasionally. If it’s too thick after thawing, add a splash of broth or water to loosen it up. You can also reheat individual portions in the microwave—just cover the bowl and heat in 30-second bursts, stirring in between.
One thing I love about this soup is how the brown butter flavor deepens as it sits. Day-old soup might actually be better than fresh. Don’t tell anyone I said that.
Nutritional Information & Benefits
This soup is as nourishing as it is delicious. Here’s an approximate breakdown per serving (based on 6 servings):
- Calories: 210
- Fat: 12g
- Carbohydrates: 26g
- Fiber: 5g
- Protein: 4g
- Sugar: 8g (naturally occurring)
Butternut squash is packed with vitamin A (over 450% of your daily needs per cup), vitamin C, potassium, and fiber. It’s great for eye health, immune support, and digestion. The brown butter adds a touch of healthy fat that helps your body absorb those fat-soluble vitamins.
This soup is naturally gluten-free and can easily be made dairy-free or vegan by swapping the butter for oil or a plant-based butter alternative. If you’re watching your sodium, use low-sodium broth and go easy on the added salt.
For a lighter option, skip the brown butter drizzle on top and use a dollop of plain Greek yogurt instead. Every little swap counts, and this recipe is flexible enough to accommodate most dietary needs without sacrificing flavor.
Conclusion
This cozy roasted butternut squash soup with brown butter is the kind of recipe that becomes a seasonal tradition. It’s warm, it’s comforting, and it’s made from ingredients you probably already have in your kitchen. The brown butter takes it from good to unforgettable, and the whole process—from roasting to blending to that first spoonful—feels like a little act of self-care.
I hope you make this soup on a chilly evening, maybe when the rain is tapping at the windows or the first snow is falling. I hope you serve it to people you love, and I hope it brings you the same quiet joy it brings me every time I make it. Don’t be afraid to tweak it to your taste—swap in different herbs, add a pinch of cayenne for heat, or top it with whatever crunchy seeds you have on hand. This recipe is yours now.
If you give it a try, I’d love to hear how it turned out. Drop a comment below, share your own twist, or tag me in your photos. Happy cooking, friend.
Frequently Asked Questions
Can I use frozen butternut squash instead of fresh?
Yes, you can use frozen cubed butternut squash. However, you’ll want to roast it directly from frozen on a baking sheet for about 35 to 40 minutes, until tender and lightly browned. Frozen squash tends to release more moisture, so the texture might be slightly less caramelized, but the soup will still be delicious.
How can I make this soup vegan or dairy-free?
Simply replace the butter with 2 tablespoons of olive oil or a high-quality vegan butter for the browning step. The flavor will be different—less nutty—but still lovely. Use vegetable broth and skip any cream garnish. A swirl of coconut milk at the end adds a nice richness.
Can I make this soup in a slow cooker or Instant Pot?
Absolutely. For a slow cooker, roast the squash and aromatics first, then transfer them to the slow cooker with the broth. Cook on low for 4 to 6 hours or high for 2 to 3 hours. Blend and stir in the brown butter at the end. For an Instant Pot, use the sauté function to brown the butter first (set it aside), then sauté the onion and garlic in a little oil. Add the roasted squash and broth, pressure cook on high for 5 minutes, quick release, blend, and stir in the brown butter.
What can I use instead of an immersion blender?
A regular countertop blender works perfectly. Just let the soup cool for a few minutes before blending, and work in batches to avoid overfilling. Remove the center cap from the blender lid and cover it with a kitchen towel to let steam escape safely. You can also use a food mill or even a potato masher for a chunkier texture.
How do I prevent the brown butter from burning?
The key is to stay close and watch for visual and olfactory cues. Use a light-colored pan so you can see the color change. Melt the butter over medium heat, swirling occasionally. Once the foam subsides and you see golden specks forming on the bottom, you’ll smell a distinct nutty aroma. That’s your signal to remove it from the heat immediately and pour it into a cool bowl. Don’t leave it in the hot pan—it will continue to cook and can burn quickly.
Pin This Recipe!
Cozy Roasted Butternut Squash Soup with Brown Butter

This creamy, comforting butternut squash soup gets its deep, nutty flavor from brown butter. Roasted squash and aromatics are blended into a silky soup that’s perfect for chilly days.
- Prep Time: 15 minutes
- Cook Time: 30 minutes
- Total Time: 45 minutes
- Yield: 6 servings 1x
- Category: Soup
- Cuisine: American
Ingredients
- 1 large butternut squash (about 3 pounds / 1.4 kg), peeled, seeded, and cut into 1-inch cubes
- 1 medium yellow onion, roughly chopped
- 3 cloves garlic, smashed
- 3 tablespoons unsalted butter
- 4 cups (960 ml) low-sodium chicken or vegetable broth
- 1 tablespoon olive oil
- ½ teaspoon salt, plus more to taste
- ¼ teaspoon black pepper, freshly ground
- ¼ teaspoon ground nutmeg (optional but recommended)
- Optional garnishes: toasted pepitas, cream or yogurt, fresh thyme or sage, extra drizzle of brown butter
Instructions
- Preheat your oven to 400°F (200°C). Peel the butternut squash, cut off the top and bottom, slice the neck from the bulbous base. Cut in half lengthwise, scoop out seeds, and chop into 1-inch cubes.
- Toss the cubed squash, chopped onion, and smashed garlic cloves on a baking sheet with olive oil, ¼ teaspoon salt, and a few grinds of pepper. Spread in a single layer. Roast for 25 to 30 minutes, stirring halfway, until tender and edges are browned.
- While the squash roasts, make the brown butter: In a small skillet, melt 3 tablespoons butter over medium heat. Swirl occasionally. When the butter foams, then subsides, and golden specks form at the bottom (about 3-4 minutes), remove from heat and pour into a heatproof bowl.
- Transfer the roasted vegetables to a large pot. Add 4 cups broth and remaining ¼ teaspoon salt. Bring to a gentle simmer over medium heat and cook for about 10 minutes, stirring occasionally.
- Remove from heat. Using an immersion blender, puree the soup until smooth. If using a countertop blender, let cool slightly, then blend in batches.
- Stir in the brown butter and ground nutmeg. Reserve about 1 tablespoon of brown butter for drizzling. Taste and adjust salt and pepper.
- Ladle into bowls. Garnish with a swirl of cream or yogurt, toasted pepitas, fresh thyme, and reserved brown butter. Serve hot.
Notes
The soup tastes even better the next day. For a dairy-free version, skip the brown butter and use 2 tablespoons olive oil or coconut oil instead. If soup is too sweet, add a squeeze of lemon juice. Watch the brown butter carefully—it goes from perfect to burnt in seconds.
Nutrition
- Serving Size: 1 serving (about 1.5
- Calories: 210
- Sugar: 8
- Sodium: 480
- Fat: 12
- Saturated Fat: 7
- Carbohydrates: 26
- Fiber: 5
- Protein: 4
Keywords: butternut squash soup, roasted butternut squash soup, brown butter soup, fall soup, winter soup, creamy soup, gluten-free soup


