I was staring at a dozen hard-boiled eggs that I’d accidentally left on the stove for fifteen extra minutes. The yolks were that weird greenish-gray color around the edges, and I was already running late for my niece’s Halloween party. My plan had been to make something simple, maybe just regular deviled eggs with some paprika on top, and call it a day. But the eggs were overcooked, the clock was ticking, and I had two kids hanging off my legs asking if we could make something “really gross looking.” I grabbed the wrong can from the pantry — black olives instead of green — and my first thought was, well, that’s useless now. What came out of that chaotic afternoon was nothing like the plan, and honestly? It was way better. The kids went absolutely wild for them, and the adults kept sneaking extras when they thought nobody was looking. I mean, there I was, standing in my messy kitchen with flour on my shirt and eggshells stuck to my fingers, watching a platter of these little olive spiders disappear in minutes. Maybe you’ve been there — that moment when a kitchen disaster turns into something you end up making every single year.
Why You’ll Love This Recipe
Let me tell you, these spooky deviled eggs have saved me more times than I can count. They’ve become my secret weapon for Halloween parties, school events, and any gathering where kids need to be entertained and fed at the same time.
- Kid-Approved Fun: The olive spiders are creepy-cute enough to get excited squeals from little ones, but not so scary that picky eaters refuse to try them.
- Budget-Friendly: Eggs are still one of the cheapest protein sources out there, and a jar of olives costs pocket change. This whole platter costs less than a fast-food run.
- Surprisingly Simple: If you can boil an egg and slice an olive, you can make these. The spider design looks impressive but takes maybe two extra minutes per egg.
- Make-Ahead Magic: You can prep everything the day before, which is a lifesaver when you’re juggling costumes and candy on Halloween day.
- Disappears Fast: I’ve watched kids who swear they hate eggs gobble down three of these in a row. Something about the presentation tricks their brains into trying something new.
What makes these different from every other Halloween appetizer? It’s the combination of creamy, tangy filling with that briny olive pop on top. The texture contrast is chef’s kiss, and the black olives against the yellow filling just looks striking on a platter. This isn’t just another deviled egg recipe — it’s the kind that makes people ask for the recipe before they even finish eating.
What Ingredients You Will Need
This recipe uses simple, everyday ingredients that you probably already have in your fridge and pantry. No special trips to fancy grocery stores required, which is exactly what you want when you’re feeding a family on a sensible budget.
- 12 large eggs, hard-boiled and peeled (room temperature eggs peel more easily, but cold ones work fine too)
- 1/3 cup mayonnaise (I prefer Hellmann’s or Duke’s for that tangy creaminess, but any brand works)
- 1 tablespoon yellow mustard (regular ballpark mustard, not Dijon — we want that classic deviled egg flavor kids recognize)
- 1 teaspoon white vinegar (adds brightness without overpowering)
- 1/4 teaspoon salt (adjust to taste)
- 1/8 teaspoon black pepper (freshly ground if you have it)
- 1/4 teaspoon paprika, plus extra for garnish (smoked paprika works great too)
- 1 can (6 ounces) large black olives, drained (look for jumbo or colossal size — the bigger the olives, the easier they are to slice into spiders)
- Optional: 1 tablespoon pickle relish (my secret ingredient for extra tang, but skip it if your kids are picky about pickles)
For the olive spiders, you’ll want olives that are firm and not too mushy. I’ve found that store-brand olives work just as well as name brands here, so grab whatever is on sale. If you can only find sliced olives, you can still make it work by using two slices per spider body, but whole olives are definitely easier to work with.
One thing I learned the hard way — don’t use kalamata olives for this. They’re too soft and fall apart when you try to slice them into legs. Stick with basic canned black olives and you’ll be golden.
Equipment Needed
You don’t need any fancy gadgets for this recipe, which is part of why I love it so much. Here’s what you’ll need:
- Large pot for boiling eggs (any pot works, just make sure it’s big enough to hold eggs in a single layer)
- Medium mixing bowl for the filling
- Fork or potato masher for mashing yolks (I’ve used a fork for years and it works perfectly)
- Piping bag or zip-top bag for filling the eggs (a sandwich bag with the corner snipped off works like a charm)
- Sharp paring knife for slicing olives (a dull knife will squish them)
- Cutting board
- Serving platter
If you don’t have a piping bag, don’t stress. I’ve spooned the filling into eggs for years before I finally tried the bag method. Both work, but the bag makes it look prettier and goes faster. A small cookie scoop also works in a pinch.
Preparation Method
Let me walk you through this step by step. I’ve made these so many times that I’ve got the process down to a science, and I’ll share all my little tricks along the way.
Step 1: Hard-Boil the Eggs
Place your eggs in a single layer in a large pot. Cover them with cold water by about an inch. Bring the water to a rolling boil over high heat, then immediately turn off the heat, cover the pot, and let it sit for exactly 12 minutes. This method gives you perfectly cooked yolks every time — no green ring around the edges like my original disaster. While the eggs are sitting, prepare an ice bath in a large bowl. After 12 minutes, transfer the eggs to the ice bath and let them cool for at least 10 minutes. This stops the cooking and makes peeling way easier.
Step 2: Peel and Halve the Eggs
Gently tap each egg on the counter to crack the shell all over, then roll it between your palms to loosen the shell. Start peeling from the wider end where the air pocket is — that’s the secret to getting clean peels. Rinse any tiny shell fragments off under cold water. Pat the eggs dry with a paper towel, then slice each one in half lengthwise. Carefully pop out the yolks into your mixing bowl and arrange the white halves on your serving platter.
Step 3: Make the Filling
Mash the yolks with a fork until they’re crumbly with no large chunks. Add the mayonnaise, mustard, vinegar, salt, pepper, and paprika. Mash and stir until the mixture is smooth and creamy. Taste it — seriously, taste it. This is where you adjust. Need more tang? Add a splash more vinegar. Too thick? Another spoonful of mayo. Too thin? That’s rare, but if it happens, add another yolk from somewhere. Fold in the pickle relish if you’re using it.
Step 4: Fill the Egg Whites
Spoon the filling into a piping bag or a zip-top bag. If using a zip-top bag, squeeze the filling into one corner and snip off about 1/2 inch from the tip. Pipe the filling into each egg white half, mounding it slightly. You want it to look generous and inviting. I usually aim for about a tablespoon of filling per egg half.
Step 5: Create the Olive Spiders
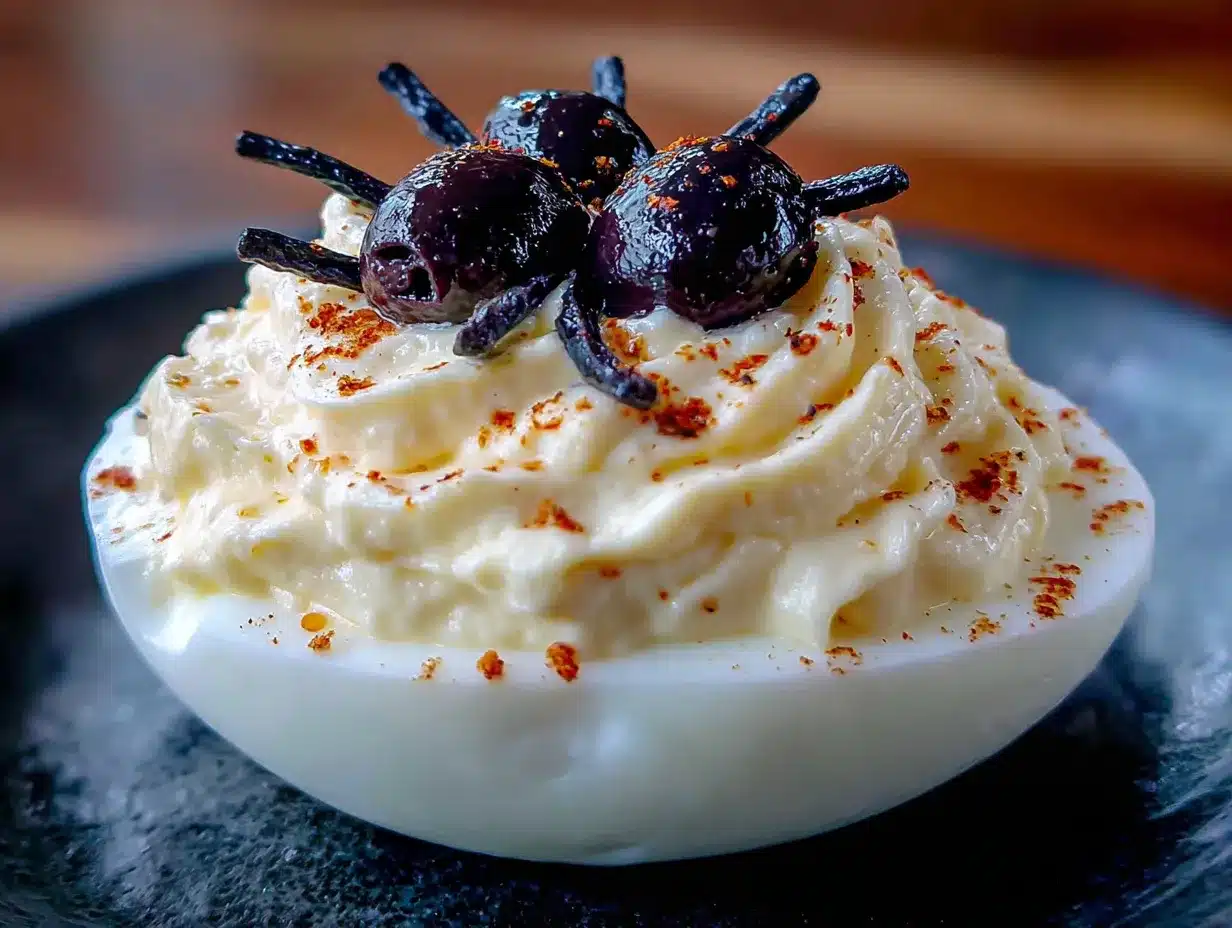
This is where the magic happens. Drain your black olives and pat them dry with a paper towel. For each spider, you’ll need one whole olive for the body and one olive sliced into thin strips for the legs. Take a whole olive and slice it in half crosswise — you’ll use one half per spider. For the legs, slice the remaining olives lengthwise into thin strips, about 1/8 inch thick. You want 8 strips per spider, but don’t stress about counting exactly. Arrange 4 leg strips on each side of the olive half body, pressing them gently into the filling so they stay put. Place one spider on top of each deviled egg. The legs should look like they’re crawling out from under the olive body.
Step 6: Garnish and Serve
Sprinkle a little extra paprika over the exposed filling around each spider. I like to add a tiny dot of paprika on top of each olive body too, just for color contrast. Refrigerate for at least 30 minutes before serving to let the flavors meld and the spiders set in place.
Cooking Tips & Techniques
After making these for three Halloweens straight, I’ve collected some hard-won wisdom that’ll save you from my early mistakes.
Don’t Overcook the Eggs
I cannot stress this enough. Overcooked eggs develop that sulfur smell and chalky yolk texture that kids will immediately reject. Set a timer for 12 minutes and stick to it. If your eggs are extra large or jumbo, add one more minute to the resting time.
Use Older Eggs for Easier Peeling
Fresh eggs are a nightmare to peel. If you can, buy your eggs a week before you plan to make these. The slight air pocket that develops between the shell and the egg white makes peeling dramatically easier. I’ve had eggs that were two weeks old peel in one perfect sheet.
Dry Your Olives Thoroughly
Wet olives slide around on the filling and won’t stay in place. Pat them dry with a paper towel before slicing, and pat the slices dry too. This small step makes a huge difference in how your spiders look.
Make Extra Filling
I always make about 25% more filling than I think I’ll need. Some egg whites will tear during halving, and you’ll have extra filling that you can eat with a spoon (no judgment) or use to fill the torn halves. Plus, the kids will inevitably want to “help” by eating some of the filling directly.
Chill Before Transporting
If you’re bringing these to a party, assemble them on the platter, cover tightly with plastic wrap, and refrigerate for at least an hour. The filling firms up and the spiders set in place, making them much more stable for travel.
Variations & Adaptations
One of the best things about this recipe is how flexible it is. Here are some variations I’ve tried over the years:
Spicy Spider Eggs
Add 1/2 teaspoon of sriracha or hot sauce to the filling for a grown-up version. The kids won’t touch these, which means more for the adults. I made these for a Halloween potluck at work and they disappeared in five minutes.
Avocado Deviled Spiders
Replace half the mayonnaise with mashed avocado for a creamier, greener filling. The color contrast with the black olives is gorgeous, and it’s a sneaky way to add some healthy fats. Just add a squeeze of lemon juice to keep the avocado from browning.
Bacon Spider Eggs
Crumble crispy bacon over the filling before placing the olive spiders on top. The salty, smoky flavor pairs beautifully with the creamy filling. My brother-in-law requests these every year and refuses to eat the regular version now.
Gluten-Free and Low-Carb Friendly
This recipe is naturally gluten-free and low-carb, so it works for keto and paleo diets too. Just double-check your mayonnaise label to make sure it’s gluten-free (most brands are).
Dairy-Free Option
Use vegan mayonnaise or make your own with aquafaba. The filling will be slightly thinner, so pipe it carefully. The olive spiders look just as good on top.
Serving & Storage Suggestions
These spooky deviled eggs are best served chilled, straight from the fridge. The cold filling contrasts nicely with the room-temperature olive spiders, and the flavors are brightest when they’re cold.
Presentation Tips
Arrange the eggs on a black or dark-colored platter for maximum spooky effect. I use a flat black serving tray I found at a thrift store for two dollars. Add some fake spiderweb decorations around the edges of the platter for extra Halloween flair. You can also sprinkle black sesame seeds around the eggs to look like tiny spider eggs — the kids get a kick out of that.
What to Serve With Them
These pair beautifully with other Halloween finger foods like mummy hot dogs, pumpkin-shaped cheese slices, and bat-shaped crackers. For drinks, apple cider or a fizzy grape juice (it looks like purple potion) rounds out the spread nicely.
Storage Instructions
Store leftover deviled eggs in an airtight container in the refrigerator for up to 2 days. The filling may soften slightly, and the olive spiders might shift around, but they’ll still taste great. Do not freeze them — the texture of the egg whites becomes rubbery and unpleasant.
Make-Ahead Tips
You can boil and peel the eggs up to 3 days in advance. Store them in a covered container in the fridge. The filling can be made 1 day ahead and stored in a piping bag in the refrigerator. Assemble the spiders and fill the eggs no more than 6 hours before serving for the best presentation.
Nutritional Information & Benefits
Here’s the approximate nutritional breakdown for one deviled egg (half an egg with filling and one olive spider):
- Calories: 85
- Protein: 6g
- Fat: 6g
- Carbohydrates: 1g
- Fiber: 0g
- Sugar: 0g
Eggs are a fantastic source of high-quality protein and contain important nutrients like choline, which supports brain health in growing kids. Black olives provide healthy monounsaturated fats and a good dose of vitamin E. This recipe is naturally low-carb, gluten-free, and keto-friendly, making it a smart choice for families with different dietary needs.
One thing I love about this recipe is that it sneaks protein into a fun Halloween treat. Kids are getting a nutritious snack without realizing it, which feels like a small victory for parents. Just keep an eye on the sodium from the olives and mayonnaise if that’s a concern for your family.
Conclusion
These spooky deviled eggs with olive spiders have become a non-negotiable part of our Halloween tradition, and I honestly can’t imagine the holiday without them. They’re proof that sometimes the best recipes come from kitchen chaos and happy accidents. What started as a panicked scramble with overcooked eggs turned into something my family genuinely looks forward to every October.
I’d love to hear how yours turn out! Did your kids help make the spiders? Did anyone scream when they saw them? Drop a comment below and share your spooky creations — I read every single one and answer questions personally. And if you come up with your own variation, please share that too. Some of my best ideas have come from readers who took this recipe and made it their own.
Now go make some spiders, and don’t stress if they’re not perfect. Mine never are, and the kids still devour them every single time. Happy Halloween, friends!
Frequently Asked Questions
Can I make these spooky deviled eggs the night before?
Yes, you can! Boil and peel the eggs up to 3 days ahead, and make the filling 1 day ahead. For best results, assemble the spiders and fill the eggs no more than 6 hours before serving. The olive legs can soften and shift if they sit too long in the fridge.
How do I keep the olive spiders from falling off?
Pat your olives completely dry before slicing, and press the legs gently into the filling so they’re anchored. Chilling the assembled eggs for at least 30 minutes before serving helps everything set in place. If you’re transporting them, cover the platter tightly and keep it level.
My kids are picky eaters and don’t like olives. Can I use something else?
Absolutely! You can use small pretzel sticks for spider legs and a grape tomato half for the body. Or try cucumber slices with cream cheese dots for eyes. The fun is in the presentation, so get creative with whatever your kids enjoy.
How many eggs should I make for a Halloween party?
For a party where these are the main appetizer, plan on 2 to 3 deviled eggs per person. Kids tend to eat 2, adults usually grab 3 or 4. A dozen eggs makes 24 deviled egg halves, which serves about 8 to 12 people alongside other snacks.
Can I use green olives instead of black olives?
You can, but the spiders won’t look as spooky. Green olives have a milder flavor that some kids prefer, and the pimento center can look like a spider’s eye if you position it right. Just be aware that the color contrast with the yellow filling isn’t as dramatic.
Pin This Recipe!
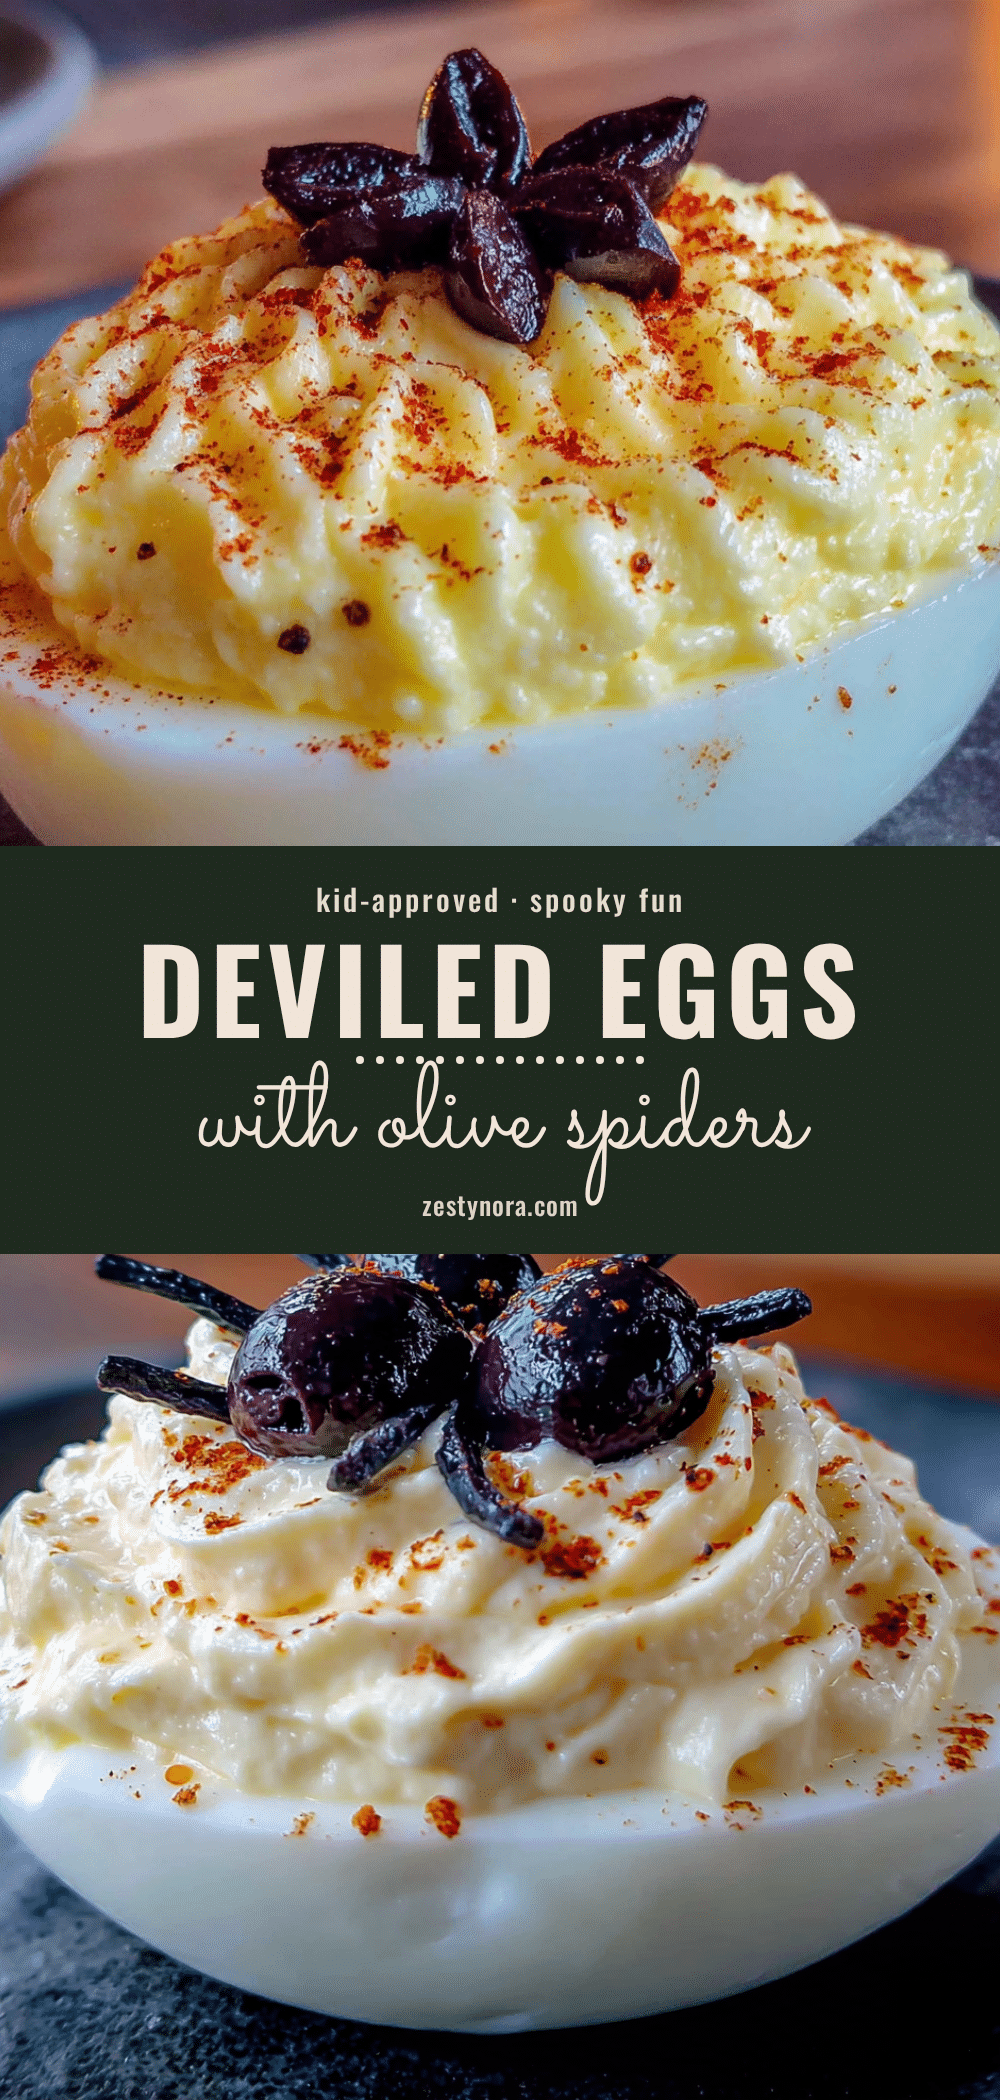
Kid-Approved Spooky Deviled Eggs with Olive Spiders: Easy Halloween Recipe
Transform a kitchen mishap into a Halloween hit! These spooky deviled eggs feature creamy filling topped with olive spiders that kids and adults alike will devour. Perfect for parties, school events, and any gathering where you need a fun, budget-friendly appetizer.
- Prep Time: 20 minutes
- Cook Time: 12 minutes
- Total Time: 32 minutes
- Yield: 24 deviled egg halves (serves 8-12) 1x
- Category: Appetizer
- Cuisine: American
Ingredients
- 12 large eggs, hard-boiled and peeled
- 1/3 cup mayonnaise
- 1 tablespoon yellow mustard
- 1 teaspoon white vinegar
- 1/4 teaspoon salt
- 1/8 teaspoon black pepper
- 1/4 teaspoon paprika, plus extra for garnish
- 1 can (6 ounces) large black olives, drained
- Optional: 1 tablespoon pickle relish
Instructions
- Hard-boil the eggs: Place eggs in a single layer in a large pot, cover with cold water by about an inch. Bring to a rolling boil over high heat, then immediately turn off heat, cover, and let sit for exactly 12 minutes. Meanwhile, prepare an ice bath. After 12 minutes, transfer eggs to ice bath and cool for at least 10 minutes.
- Peel and halve the eggs: Gently tap each egg on the counter to crack the shell, then roll between palms to loosen. Peel starting from the wider end. Rinse off any shell fragments, pat dry, slice each egg in half lengthwise, and pop out yolks into a mixing bowl. Arrange whites on a serving platter.
- Make the filling: Mash yolks with a fork until crumbly. Add mayonnaise, mustard, vinegar, salt, pepper, and paprika. Mash and stir until smooth and creamy. Taste and adjust seasoning. Fold in pickle relish if using.
- Fill the egg whites: Spoon filling into a piping bag or zip-top bag. If using a zip-top bag, squeeze filling into one corner and snip off about 1/2 inch from the tip. Pipe filling into each egg white half, mounding slightly (about 1 tablespoon per half).
- Create the olive spiders: Drain olives and pat dry. For each spider, slice one whole olive in half crosswise (use one half per spider). For legs, slice remaining olives lengthwise into thin strips (about 1/8 inch thick). Arrange 4 leg strips on each side of the olive half body, pressing gently into the filling. Place one spider on top of each deviled egg.
- Garnish and serve: Sprinkle extra paprika over exposed filling around each spider. Add a tiny dot of paprika on top of each olive body for color contrast. Refrigerate for at least 30 minutes before serving to let flavors meld and spiders set.
Notes
For easier peeling, use eggs that are at least a week old. Pat olives dry thoroughly before slicing to help spiders stay in place. Make extra filling (about 25% more) to account for torn egg whites or eager helpers. Assemble no more than 6 hours before serving for best presentation. Store leftovers in an airtight container in the refrigerator for up to 2 days; do not freeze.
Nutrition
- Serving Size: 1 deviled egg half
- Calories: 85
- Sodium: 180
- Fat: 6
- Saturated Fat: 1.5
- Carbohydrates: 1
- Protein: 6
Keywords: Halloween deviled eggs, spooky deviled eggs, olive spiders, Halloween appetizer, kid-friendly Halloween recipe, easy Halloween snack


