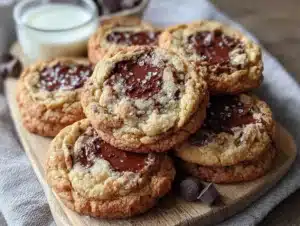
My husband swore he hated chocolate chip cookies. For years. The whole ten years we’ve been married, actually. He’d make a face whenever I’d pull out a baking sheet, claiming they were always too sweet, too cakey, or just “not worth the calories.” Then last Tuesday, I made this perfect small-batch chocolate chip cookies recipe just for myself—a tiny batch, six cookies, barely enough to share. I walked back into the kitchen to grab my coffee and found him standing over the cooling rack, hand frozen mid-reach, crumbs on his shirt, with this look on his face like he’d been caught doing something shameful. “These are different,” he mumbled, reaching for another one. And honestly? That moment made me happier than any five-star review ever could.
You know that feeling when you want a warm, gooey chocolate chip cookie but don’t want to commit to three dozen of them sitting on your counter, calling your name all week? That’s exactly why I developed this recipe. I mean, let’s face it—not everyone needs a giant batch of cookies. Sometimes you just want that perfect little moment of indulgence without the temptation of an entire Tupperware full of them. This recipe makes exactly six generous cookies, which is somehow both reasonable and deeply satisfying.
I’ve tested this small batch more times than I care to admit. The first version was too flat. The second was too puffy. The third had me questioning my life choices. But this version? This is the one that converted a self-proclaimed cookie hater into someone who now asks “are you making those small batch cookies tonight?” with hopeful eyes. It’s got that perfect balance—crispy edges, soft centers, and just enough salt to make the chocolate sing. Maybe you’ve been burned by bad cookie recipes before. I get it. But trust me on this one.
Why You’ll Love This Recipe
Let me tell you why this recipe has earned a permanent spot in my weekly rotation. I’ve tested it at least a dozen times, tweaked the flour ratio, adjusted the chill time, and even experimented with different chocolate brands. The result? A cookie that’s genuinely foolproof and deeply satisfying.
- Quick & Easy: From bowl to oven in under 20 minutes (plus a quick chill). Perfect for those spontaneous cookie cravings that strike at 9 PM.
- Simple Ingredients: You probably have everything in your kitchen right now. No weird specialty flours or obscure extracts.
- Perfect for Date Night: Six cookies is exactly the right amount for two people to share without feeling like you overdid it. Great for cozy nights in.
- Crowd-Pleaser: Even my husband—the former cookie skeptic—demands these. They’ve won over friends, neighbors, and even my mother-in-law.
- Unbelievably Delicious: The texture is what gets people. That crackly top, the slightly underbaked center, the pools of melted chocolate. It’s comfort in cookie form.
What makes this recipe different from the dozens of other small batch recipes out there? It’s the technique. Most small batch recipes just scale down a full-size recipe, which messes up the ratios. I developed this one from scratch specifically for a six-cookie yield. The butter-to-flour ratio is carefully calibrated so you get that perfect spread without the cookies turning into flat discs. And the chill time? Non-negotiable. Trust me, I learned that the hard way.
This recipe isn’t just good—it’s the kind that makes you close your eyes after the first bite. It’s the cookie that proves you don’t need a crowd to justify baking something special. Sometimes the best things come in small batches.
What Ingredients You Will Need
This recipe uses simple, everyday ingredients to deliver that classic chocolate chip cookie experience. Nothing fancy here—just good, honest ingredients that work together beautifully. Here’s what you’ll need and why each one matters.
For the Cookie Dough
- 4 tablespoons unsalted butter, melted and slightly cooled (Melted butter gives you that chewy texture without needing to wait for it to soften. I use Kerrygold for the flavor, but any good unsalted butter works.)
- 1/4 cup granulated sugar (White sugar helps with spreading and gives those crispy edges.)
- 1/4 cup packed light brown sugar (Brown sugar adds moisture and that deep, caramel-like flavor. Dark brown sugar works too if that’s what you have.)
- 1 large egg yolk (Just the yolk! This is key for a small batch—using a whole egg would make the dough too wet. Save the white for scrambled eggs tomorrow.)
- 1/2 teaspoon vanilla extract (Pure vanilla makes a difference here. I prefer Nielsen-Massey, but any real vanilla extract is fine.)
- 3/4 cup all-purpose flour (Measure it correctly—spoon and level, don’t scoop directly from the bag.)
- 1/4 teaspoon baking soda (Fresh baking soda matters. If yours has been sitting in the back of your cabinet for a year, it’s time to replace it.)
- 1/4 teaspoon salt (I use fine sea salt for the dough and a pinch of flaky salt for finishing. Don’t skip the salt—it balances the sweetness.)
- 1/3 cup chocolate chips or chopped chocolate (This is where you can get creative. I love using a mix of semisweet and dark chocolate chips. Ghirardelli 60% cacao chips are my go-to. For a fancier touch, chop up a good quality chocolate bar—the irregular pieces melt into beautiful pools.)
Optional Add-Ins
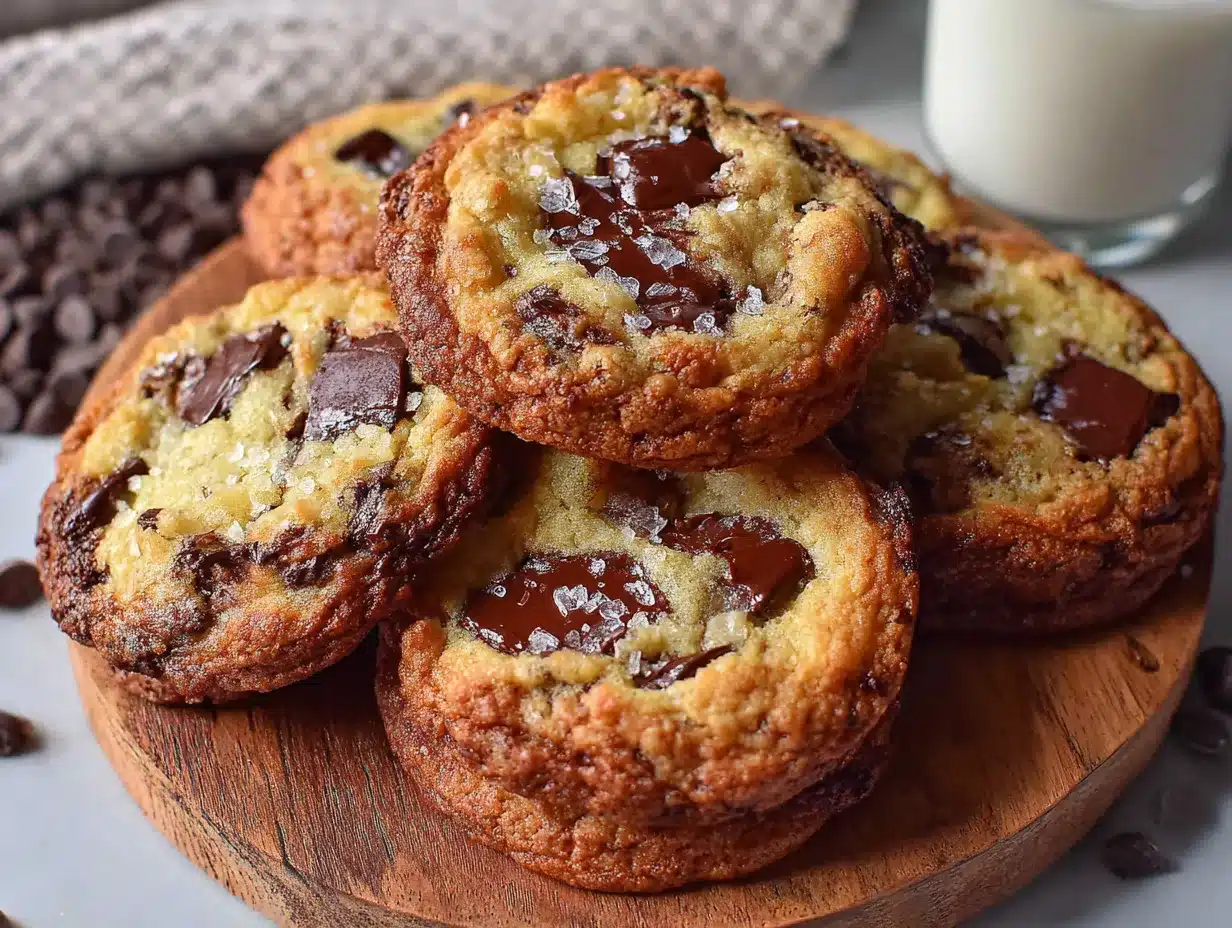
- Flaky sea salt for sprinkling (Maldon salt is my favorite. That little crunch of salt on top takes these cookies to another level.)
- 1/4 cup chopped nuts (Walnuts or pecans add nice texture if you’re into that. Toast them first for better flavor.)
Ingredient Selection Tips: For the best texture, use butter that’s been melted but not hot. If your butter is too warm, it’ll make the cookies spread too much. And please, please use real vanilla extract. I once tried the imitation stuff in a pinch, and the cookies had this weird artificial aftertaste. Never again.
Substitution Guidance: Need a dairy-free option? Use vegan butter sticks (not the spreadable kind) and dairy-free chocolate chips. For a gluten-free version, swap the all-purpose flour with a good 1:1 gluten-free baking flour. I’ve tested this with Bob’s Red Mill 1:1 and it worked beautifully—just add an extra tablespoon of flour if the dough seems too sticky.
Equipment Needed
You don’t need a fancy kitchen to make these cookies. Here’s what you’ll actually use:
- Medium mixing bowl (Any bowl will do. I use a ceramic one because it feels nice, but glass or metal works fine.)
- Whisk and rubber spatula (A whisk for combining wet ingredients, a spatula for folding in the dry stuff.)
- Measuring cups and spoons (Invest in a good set of dry measuring cups. The difference between properly measured flour and scooped flour is real.)
- Small cookie scoop or two spoons (A 1.5-tablespoon scoop makes perfectly uniform cookies. But two spoons work just as well.)
- Baking sheet (A light-colored, rimmed baking sheet gives you the most consistent results. Dark sheets can cause over-browning.)
- Parchment paper or silicone baking mat (Parchment paper is cheap and makes cleanup a breeze. Silicone mats work too, but cookies might spread slightly more.)
- Wire cooling rack (Essential for getting those crispy edges. If you leave cookies on the hot pan, they’ll keep cooking.)
Budget-Friendly Tip: Don’t have a cookie scoop? Two regular spoons work perfectly. Just scoop the dough with one spoon and push it off with the other. I did this for years before I finally bought a scoop, and honestly, the cookies tasted exactly the same.
Preparation Method
Alright, let’s get to the good part. Here’s how to make these perfect small-batch chocolate chip cookies step by step.
- Melt the butter. Place 4 tablespoons unsalted butter in a microwave-safe bowl and heat in 15-second intervals until just melted. Let it cool for about 2 minutes—you want it warm, not hot. Hot butter will cook the egg yolk when you add it.
- Combine the wet ingredients. In your medium mixing bowl, whisk together the melted butter, 1/4 cup granulated sugar, and 1/4 cup packed light brown sugar. Whisk for about 30 seconds until the mixture looks like wet sand and starts to pull away from the sides of the bowl. This little bit of extra whisking helps dissolve the sugar and gives you that crackly top.
- Add the egg yolk and vanilla. Drop in 1 large egg yolk and 1/2 teaspoon vanilla extract. Whisk vigorously for about 1 minute until the mixture is thick, pale, and slightly glossy. You’ll notice it looks almost like a thin caramel. This step is important—it’s what gives the cookies that chewy texture.
- Mix the dry ingredients separately. In a small bowl, whisk together 3/4 cup all-purpose flour, 1/4 teaspoon baking soda, and 1/4 teaspoon salt. This ensures the baking soda is evenly distributed so your cookies rise uniformly.
- Combine wet and dry. Add the flour mixture to the wet ingredients. Use your rubber spatula to fold everything together gently. Mix just until you see the last streaks of flour disappear. Overmixing develops gluten and makes tough cookies. Stop while there are still a few floury spots showing.
- Fold in the chocolate. Add 1/3 cup chocolate chips or chopped chocolate. Fold gently until the chocolate is evenly distributed. The dough will be soft and slightly sticky—that’s exactly what you want.
- Chill the dough. This step is non-negotiable. Cover the bowl and pop it in the fridge for at least 30 minutes. I know you want to bake them right now. I’ve been there. But trust me, that chill time is what prevents flat, greasy cookies. The butter solidifies, the flavors meld, and the sugar dissolves properly. If you’re really impatient, 20 minutes is the absolute minimum.
- Preheat and prepare. While the dough chills, preheat your oven to 350°F (175°C). Line your baking sheet with parchment paper.
- Portion the dough. Use your cookie scoop or two spoons to portion the dough into 6 equal balls, about 1.5 tablespoons each. Place them on the prepared baking sheet, spacing them about 2 inches apart. They’ll spread, but not too much.
- Bake. Bake for 10-12 minutes. At 10 minutes, the edges should be golden brown and the centers should still look slightly puffy and underdone. That’s exactly what you want. The cookies will continue to bake on the hot pan after you pull them out. For softer cookies, go with 10 minutes. For slightly crispier ones, push to 11 or 12.
- Cool on the pan. Let the cookies rest on the baking sheet for 5 minutes. This is crucial—if you try to move them right away, they’ll fall apart. After 5 minutes, transfer them to a wire cooling rack.
- Finish with salt. While the cookies are still warm, sprinkle a tiny pinch of flaky sea salt on top of each one. That little salty crunch against the sweet chocolate? Perfection.
Cooking Tips & Techniques
After making these cookies more times than I can count, I’ve learned a few things the hard way. Here’s what I wish someone had told me.
The Chill Factor: I cannot stress this enough—chill your dough. The first time I made these, I was starving and skipped the chill. The cookies spread into one giant, greasy pancake. They still tasted okay, but they looked sad. The second time, I chilled the dough for a full hour, and the difference was night and day. The cookies were thick, chewy, and perfectly domed. If you’re short on time, even 20 minutes helps, but 30-45 minutes is ideal.
Room Temperature Matters: Your ingredients don’t need to be at room temperature here since we’re using melted butter. But if your kitchen is particularly warm (like in summer), your dough might be softer than usual. In that case, extend the chill time to a full hour. Conversely, if it’s cold, the dough might firm up faster. Adjust accordingly.
The Scoop Trick: For perfectly round cookies, use a cookie scoop. If you don’t have one, roll the dough balls between your palms until they’re smooth. This gives you those nice, even cookies instead of lumpy, irregular ones.
Don’t Overbake: This is the most common mistake people make. Cookies continue to bake on the hot pan after you pull them out of the oven. If they look perfectly done in the oven, they’ll be overdone by the time they cool. Pull them when the edges are set but the centers still look slightly underdone and puffy. That’s the sweet spot.
Batch Consistency: Bake one cookie first as a test if you’re nervous. That way, you can adjust the time for the remaining five. I do this whenever I’m using a new oven or a different brand of baking sheet.
Variations & Adaptations
One of the best things about this recipe is how easily it adapts. Here are some of my favorite variations.
Double Chocolate Chip: Replace 1 tablespoon of the flour with 1 tablespoon of unsweetened cocoa powder. Use white chocolate chips instead of regular chocolate chips. The contrast between the dark cookie and the white chocolate is gorgeous, and it feels extra indulgent.
Peanut Butter Swirl: After you portion the dough onto the baking sheet, drop a small teaspoon of peanut butter on top of each dough ball. Use a toothpick to swirl it in gently. Bake as directed. The peanut butter gets all melty and creates these little pockets of salty, nutty goodness.
Brown Butter Version: This is my personal favorite when I want to feel fancy. Instead of simply melting the butter, brown it in a small saucepan over medium heat until it turns golden brown and smells nutty. Let it cool completely before using. Brown butter adds this incredible depth of flavor that makes the cookies taste almost caramelized. Just note that brown butter has less water content, so you might need to add 1 teaspoon of milk to the dough to compensate.
Gluten-Free Adaptation: As I mentioned earlier, swap the all-purpose flour with a 1:1 gluten-free baking flour. I’ve had great results with Bob’s Red Mill 1:1. Add an extra tablespoon of flour if the dough seems too sticky, and chill for at least 45 minutes to let the gluten-free flour absorb properly.
Vegan Version: Use vegan butter sticks and replace the egg yolk with 1 tablespoon of aquafaba (the liquid from a can of chickpeas) mixed with 1/2 teaspoon of cornstarch. The cookies won’t be quite as chewy, but they’re still delicious. I tested this for a friend with egg allergies, and she couldn’t tell the difference.
Serving & Storage Suggestions
These cookies are best enjoyed warm, about 10 minutes after they come out of the oven. That’s when the edges are crispy, the center is still soft, and the chocolate is perfectly melted. Serve them with a cold glass of milk or a hot cup of coffee for the ultimate treat.
For a Dinner Party: These cookies are perfect for impressing guests without stress. Make the dough ahead of time and keep it chilled in the fridge. When your guests arrive, just scoop and bake. The smell of fresh cookies will fill your kitchen, and everyone will think you slaved away. Serve them on a nice plate with a sprinkle of flaky salt and maybe a scoop of vanilla ice cream on the side. Trust me, people lose their minds over warm cookies with ice cream.
Storage: Store any leftover cookies (if there are any) in an airtight container at room temperature for up to 3 days. They’ll lose a bit of their crispiness, but they’ll still be delicious. To revive them, pop one in the microwave for 10 seconds—it’ll soften the chocolate and make it taste almost fresh-baked.
Freezing: This is where the small batch really shines. You can freeze the unbaked dough balls on a baking sheet until solid, then transfer them to a freezer bag. Bake directly from frozen, adding 2-3 minutes to the baking time. This way, you can have fresh cookies whenever the craving strikes without committing to a full batch. I always keep a few dough balls in my freezer for emergencies.
Reheating: If you’re reheating baked cookies, the oven is better than the microwave. Warm them at 300°F (150°C) for about 5 minutes. The microwave works in a pinch, but it’ll make them soft all the way through instead of giving you that crispy edge.
Nutritional Information & Benefits
Let’s be real—these are cookies, not health food. But here’s the breakdown if you’re curious.
Per cookie (based on 6 cookies):
- Calories: Approximately 220
- Fat: 12g
- Carbohydrates: 28g
- Protein: 3g
- Sugar: 18g
Health Highlights: The dark chocolate chips (if you use 60% cacao or higher) contain antioxidants called flavonoids, which are good for heart health. The butter provides vitamin A, and the egg yolk offers choline, which supports brain function. Plus, there’s something to be said for the mental health benefits of enjoying a warm, homemade treat in moderation.
Dietary Considerations: This recipe contains dairy, eggs, and gluten. For dairy-free and gluten-free options, check the variations section above. These cookies are nut-free if you skip the optional walnuts or pecans, making them safe for school lunches or parties.
My Personal Take: I believe in balance. These cookies aren’t an everyday food, but they’re a wonderful occasional indulgence. The small batch size means you’re not tempted by a giant container of cookies sitting on your counter. You get your fix, you enjoy every bite, and then they’re gone. That’s a win in my book.
Conclusion
These perfect small-batch chocolate chip cookies have become a staple in my kitchen for good reason. They’re quick, they’re reliable, and they deliver that nostalgic cookie experience without the commitment of a full batch. Whether you’re baking for yourself, surprising your partner on a weeknight, or bringing something special to a small gathering, these cookies never disappoint.
I love that this recipe has converted my husband from a cookie skeptic to someone who actually looks forward to baking day. There’s something deeply satisfying about watching someone take that first bite and seeing their eyes light up. That’s what cooking is all about, isn’t it? Those small moments of connection and joy.
I’d love to hear how these turn out for you. Did you try any of the variations? Did you add your own twist? Drop a comment below and let me know. And if you’re looking for more small-batch desserts, check out my small-batch brownies recipe or these no-bake cookie dough bites for another quick fix. Happy baking, friends!
Frequently Asked Questions
Can I double this recipe?
Absolutely! This recipe doubles beautifully. Just use a whole egg instead of two egg yolks when you double it—the extra white helps with structure. Double all other ingredients and bake in two batches or on two baking sheets.
Why did my cookies spread too much?
This usually happens for one of three reasons: your butter was too warm when you mixed it, you didn’t chill the dough long enough, or your baking soda is old. Make sure your melted butter has cooled to room temperature before adding the egg yolk, and don’t skip the chill time. If your baking soda has been open for more than six months, it’s worth replacing.
Can I use margarine instead of butter?
I wouldn’t recommend it. Margarine has a higher water content than butter, which will make your cookies spread more and give them a different texture. If you need a dairy-free option, use vegan butter sticks (not the tub variety) for the best results.
How do I get that crackly top?
The crackly top comes from two things: whisking the butter and sugars together until the mixture is smooth and slightly thickened, and using an egg yolk instead of a whole egg. The yolk gives you that beautiful, shiny, crackly surface that makes these cookies look so professional.
Can I make the dough ahead of time?
Yes! The dough can be refrigerated for up to 3 days in an airtight container. In fact, the flavor actually improves after a day in the fridge as the ingredients meld together. Just let the dough sit at room temperature for about 10 minutes before scooping and baking, as it will be quite firm straight from the fridge.
Pin This Recipe!
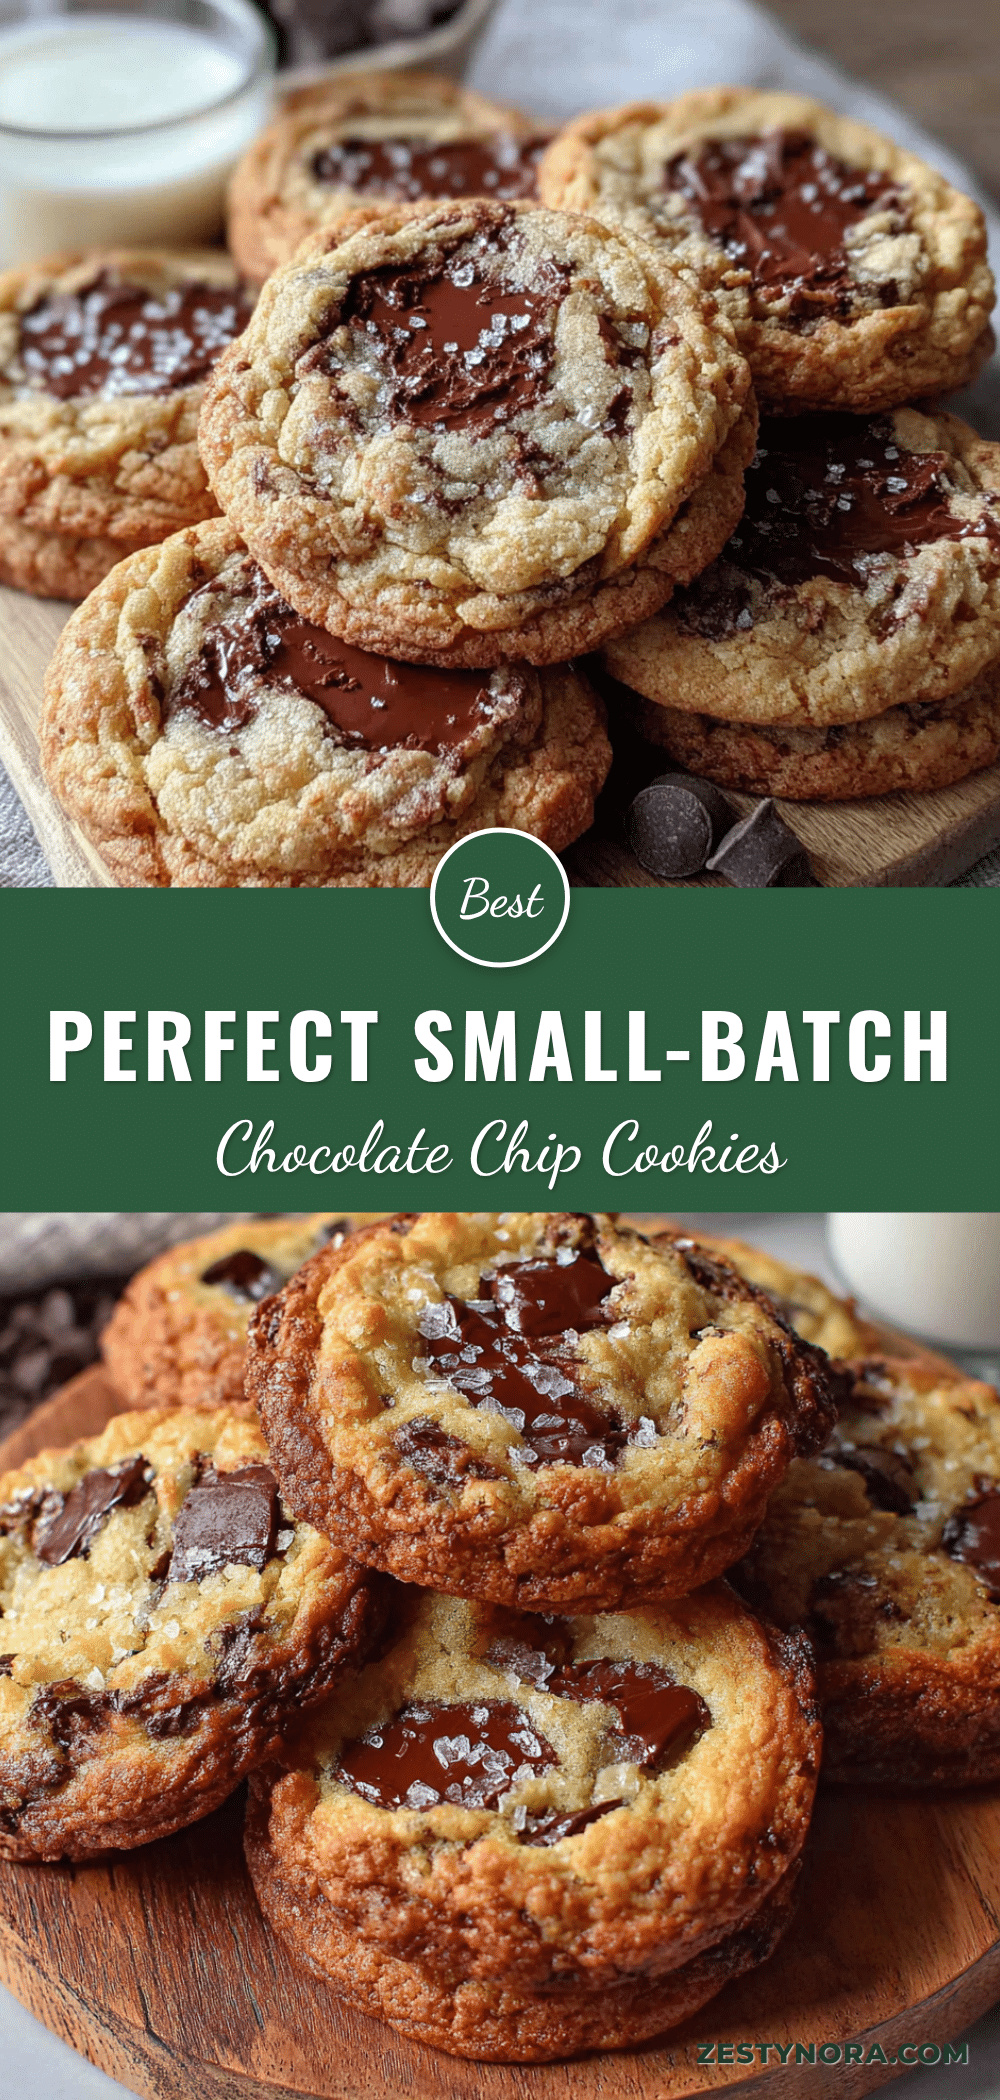
Perfect Small-Batch Chocolate Chip Cookies for Two

These perfect small-batch chocolate chip cookies make exactly six generous cookies with crispy edges, soft centers, and pools of melted chocolate. Developed from scratch for a six-cookie yield, this foolproof recipe has even converted a self-proclaimed cookie hater into a devoted fan.
- Prep Time: 15 minutes
- Cook Time: 10-12 minutes
- Total Time: 55 minutes (includes 30 minutes chilling)
- Yield: 6 cookies 1x
- Category: Dessert
- Cuisine: American
Ingredients
- 4 tablespoons unsalted butter, melted and slightly cooled
- 1/4 cup granulated sugar
- 1/4 cup packed light brown sugar
- 1 large egg yolk
- 1/2 teaspoon vanilla extract
- 3/4 cup all-purpose flour
- 1/4 teaspoon baking soda
- 1/4 teaspoon salt
- 1/3 cup chocolate chips or chopped chocolate
- Flaky sea salt for sprinkling (optional)
- 1/4 cup chopped nuts, such as walnuts or pecans (optional)
Instructions
- Melt the butter. Place 4 tablespoons unsalted butter in a microwave-safe bowl and heat in 15-second intervals until just melted. Let it cool for about 2 minutes—you want it warm, not hot.
- Combine the wet ingredients. In your medium mixing bowl, whisk together the melted butter, 1/4 cup granulated sugar, and 1/4 cup packed light brown sugar. Whisk for about 30 seconds until the mixture looks like wet sand and starts to pull away from the sides of the bowl.
- Add the egg yolk and vanilla. Drop in 1 large egg yolk and 1/2 teaspoon vanilla extract. Whisk vigorously for about 1 minute until the mixture is thick, pale, and slightly glossy.
- Mix the dry ingredients separately. In a small bowl, whisk together 3/4 cup all-purpose flour, 1/4 teaspoon baking soda, and 1/4 teaspoon salt.
- Combine wet and dry. Add the flour mixture to the wet ingredients. Use your rubber spatula to fold everything together gently. Mix just until you see the last streaks of flour disappear.
- Fold in the chocolate. Add 1/3 cup chocolate chips or chopped chocolate. Fold gently until the chocolate is evenly distributed.
- Chill the dough. Cover the bowl and pop it in the fridge for at least 30 minutes.
- Preheat and prepare. While the dough chills, preheat your oven to 350°F (175°C). Line your baking sheet with parchment paper.
- Portion the dough. Use your cookie scoop or two spoons to portion the dough into 6 equal balls, about 1.5 tablespoons each. Place them on the prepared baking sheet, spacing them about 2 inches apart.
- Bake. Bake for 10-12 minutes. At 10 minutes, the edges should be golden brown and the centers should still look slightly puffy and underdone.
- Cool on the pan. Let the cookies rest on the baking sheet for 5 minutes. After 5 minutes, transfer them to a wire cooling rack.
- Finish with salt. While the cookies are still warm, sprinkle a tiny pinch of flaky sea salt on top of each one.
Notes
Chilling the dough is non-negotiable for best results. For softer cookies, bake for 10 minutes; for crispier, bake for 11-12 minutes. Cookies continue to bake on the hot pan after removal. Dough can be refrigerated for up to 3 days or frozen for later use.
Nutrition
- Serving Size: 1 cookie
- Calories: 220
- Sugar: 18
- Sodium: 150
- Fat: 12
- Saturated Fat: 7
- Carbohydrates: 28
- Fiber: 1
- Protein: 3
Keywords: small batch cookies, chocolate chip cookies, cookies for two, easy cookie recipe, small batch dessert, homemade cookies