This was supposed to be a full-sized pecan pie. I had the deep-dish crust ready, the filling mixed, and I was feeling pretty good about myself. Then my neighbor knocked on the door needing help with something, I got distracted, and by the time I came back, I realized I’d grabbed the mini muffin tin instead of the pie plate. Honestly, I almost cried. I mean, it was Thanksgiving week, and I had already burned the first batch of rolls. The last thing I needed was another kitchen disaster.
But I was out of time and patience, so I just poured the filling into those tiny cups and shoved them in the oven. Twenty minutes later, something amazing happened. The smell alone made my husband walk into the kitchen asking what bakery I’d hidden in the house. The edges were caramelized, the pecans had toasted perfectly, and each little bite had that perfect filling-to-crust ratio that a big slice never quite gets. I stood there eating one straight from the pan, and I knew I’d accidentally stumbled onto something better than my original plan.
These Quick Mini Maple Pecan Pie Bites have been my go-to ever since. They solve every problem a regular pecan pie has—no slicing drama, no soggy bottom crust, no waiting forever for it to cool. You get all that sticky, nutty, maple goodness in a two-bite package that’s ready in under half an hour. Maybe you’ve been there, staring at a recipe that sounds great but feels like too much work on a Tuesday night. That’s exactly why these little guys exist. They’re the happy accident that turned into a weeknight hero.
Why You’ll Love This Recipe
Let me tell you why these mini pies have earned a permanent spot in my recipe rotation. I’ve tested this recipe at least a dozen times, tweaking the maple-to-pecan ratio, adjusting the bake time, and even trying different crust options. This version is the one that works every single time, no matter how distracted or tired you are.
- Quick & Easy: These come together in under 30 minutes from start to finish. No chilling dough, no rolling out crusts, no complicated steps. Perfect for those evenings when you need dessert but don’t have the energy for a project.
- Simple Ingredients: You probably have most of these in your pantry right now. Maple syrup, eggs, butter, pecans, and pre-made pie crust or crescent roll dough. No fancy grocery store runs required.
- Perfect for Weeknights: These are ideal for a regular Tuesday when you want something sweet without spending an hour in the kitchen. They also work great for last-minute guests or potlucks.
- Crowd-Pleaser: I’ve brought these to parties, family dinners, and even work events. They disappear faster than anything else on the table. Kids love the small size, and adults appreciate not having to commit to a full slice of pie.
- Unbelievably Delicious: The combination of buttery crust, rich maple filling, and toasted pecans creates this incredible texture contrast. The tops get slightly crispy while the centers stay soft and gooey. It’s comfort food in the best way.
What makes these different from other mini pecan pie recipes is the maple syrup. Most recipes use corn syrup, which gives a one-note sweetness. Maple syrup adds this complex, almost smoky flavor that makes the filling taste more sophisticated without any extra effort. Plus, the mini size means the filling-to-crust ratio is perfect in every bite. You get that satisfying crunch from the pecans and crust, followed by the silky, rich filling. It’s the kind of dessert that makes you close your eyes after the first bite.
What Ingredients You Will Need
This recipe uses simple, wholesome ingredients that work together to create something truly special. Most of these are pantry staples, so you can whip up a batch whenever the craving hits.
For the Crust:
- 1 package refrigerated pie crust (or 1 can refrigerated crescent roll dough) – I prefer Pillsbury pie crust for its buttery flavor and easy handling. If you’re feeling ambitious, homemade pie crust works beautifully too.
- All-purpose flour (for dusting) – Just a little to keep the dough from sticking when you’re cutting it.
For the Filling:
- 1/2 cup pure maple syrup – Please don’t use pancake syrup here. Real maple syrup makes a huge difference in flavor. Grade A or Grade B both work, but Grade B (or dark amber) gives a richer, more intense maple taste that I personally love.
- 1/4 cup light brown sugar, packed – This adds depth and helps create that signature sticky texture. Dark brown sugar works too if that’s what you have.
- 1 large egg – Bring it to room temperature for easier mixing. Cold egg can make the filling seize up slightly.
- 2 tablespoons unsalted butter, melted – Salted butter works in a pinch, just reduce the added salt slightly. I use Kerrygold for its rich flavor.
- 1 teaspoon vanilla extract – Pure vanilla extract is worth it here. The flavor really shines through.
- 1/4 teaspoon salt – Don’t skip this. Salt balances the sweetness and makes the maple flavor pop.
- 1/2 cup pecan halves or pieces – You can use whole pecans and chop them roughly, or buy pre-chopped. I like to leave some pieces a bit larger for texture.
Optional for Topping:
- Flaky sea salt – A tiny sprinkle on top before serving takes these to another level. The salt crystals add crunch and contrast.
- Whipped cream or vanilla ice cream – If you want to make these feel extra special.
For substitutions, you can use gluten-free pie crust if needed. Coconut sugar works as a substitute for brown sugar, though the texture will be slightly different. If you’re out of maple syrup, honey is an option, but the flavor profile changes significantly. I’ve tried it with honey, and while it’s still good, it’s just not the same as the maple version.
Equipment Needed
You don’t need any fancy equipment for these mini pies. Here’s what you’ll need:
- Mini muffin tin – This is essential. Standard muffin tins are too big. I use a 24-cup mini muffin tin, but a 12-cup works fine—just bake in batches.
- Rolling pin – For rolling out the pie crust if needed. A wine bottle works in a pinch, trust me on this one.
- 2-inch round cookie cutter – Or a small glass or jar lid. I’ve used a shot glass before when I couldn’t find my cutter.
- Mixing bowls – One medium bowl for the filling, one small for melting butter.
- Whisk – For combining the filling ingredients smoothly.
- Spatula – For scraping every last bit of filling into the cups.
- Measuring cups and spoons – Accuracy matters with the maple syrup and butter.
If you don’t have a mini muffin tin, you can use a regular muffin tin and make slightly larger pies. Just increase the bake time by 3-5 minutes. I’ve also made these in silicone mini muffin molds, which work great and release the pies easily. My first mini muffin tin was a $5 one from a discount store, and it lasted for years. You don’t need to spend much.
Preparation Method
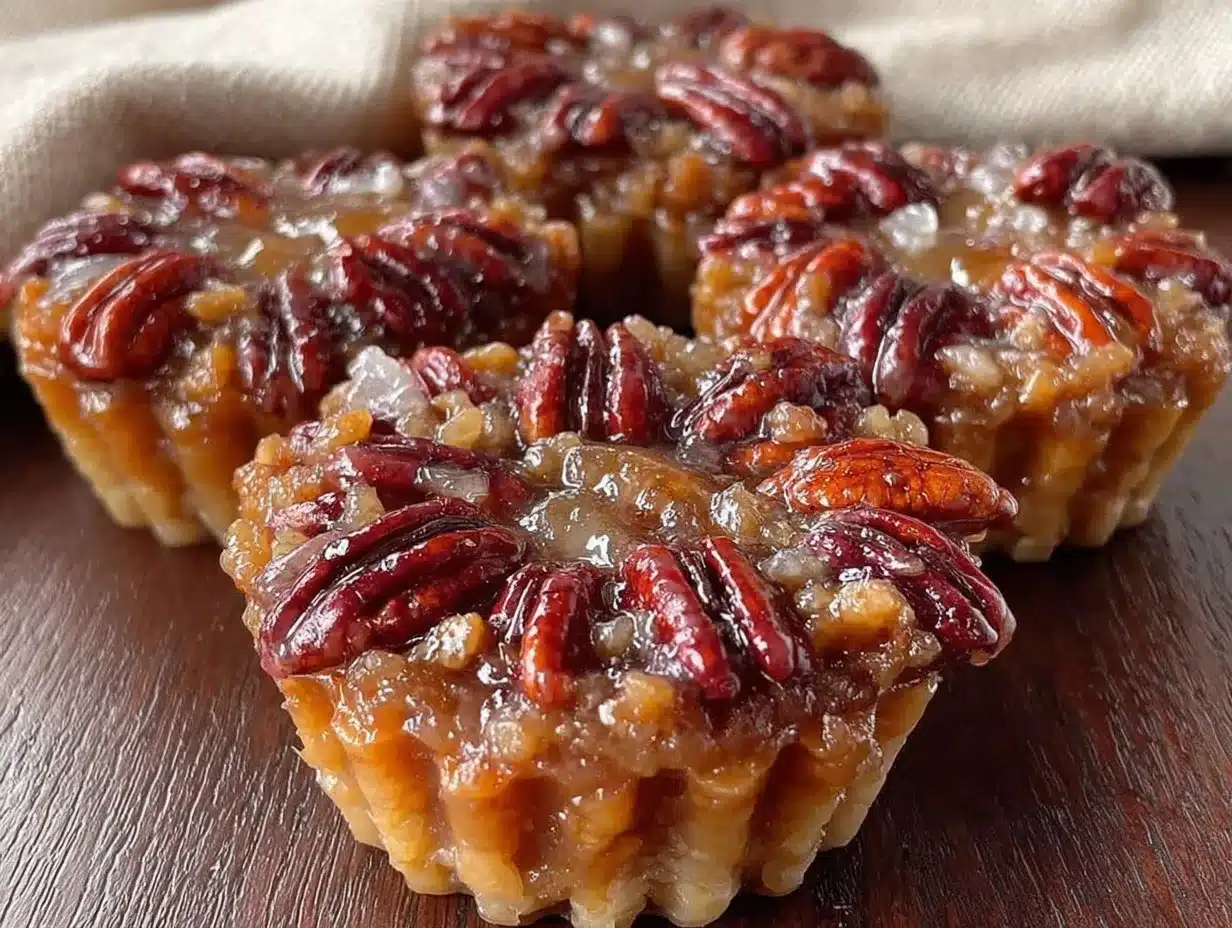
- Preheat your oven to 375°F (190°C). This is important—don’t skip the preheat. While the oven is warming up, lightly spray your mini muffin tin with non-stick cooking spray. I forgot to do this once, and let me tell you, prying stuck pie bits out of the tin is not fun.
- Prepare the crust. If using refrigerated pie crust, let it sit at room temperature for about 5 minutes so it’s easier to handle. Lightly flour your work surface and roll the crust out to about 1/8-inch thickness. Using your 2-inch cookie cutter or glass, cut out circles. You should get about 24 circles from one crust. If you’re using crescent roll dough, unroll it and press the seams together, then cut into squares. Gently press each circle or square into the mini muffin cups, making sure the dough comes up the sides a bit. Don’t worry if they look messy—they’ll puff up and look beautiful after baking.
- Make the filling. In a medium bowl, whisk together the maple syrup, brown sugar, and egg until smooth. Make sure the egg is fully incorporated—you don’t want streaks of egg white in your filling. Add the melted butter, vanilla extract, and salt, and whisk again until everything is combined. The mixture should be smooth and slightly thick, like a thin caramel sauce.
- Add the pecans. Stir the chopped pecans into the filling mixture. Make sure they’re evenly distributed. I like to save a few pecan halves to place on top of each pie for a pretty presentation, but it’s totally optional.
- Fill the cups. Spoon the filling into each prepared crust cup, filling them about 3/4 full. The filling will puff up slightly as it bakes, so don’t overfill. If you saved some pecan halves, place one on top of each filled cup now. Work quickly—the filling can start to separate if it sits too long.
- Bake. Place the muffin tin in the preheated oven and bake for 12-15 minutes. Start checking at 12 minutes. The filling should be set around the edges but still slightly jiggly in the center. The crust should be golden brown. My oven runs hot, so I usually check at 11 minutes. Every oven is different, so trust your eyes more than the timer.
- Cool. Let the pies cool in the pan for 5 minutes. This is crucial—the filling needs time to set. After 5 minutes, use a small knife or offset spatula to gently loosen the edges and lift the pies out. Transfer them to a wire rack to cool completely. If you try to remove them too early, they’ll fall apart. Trust me, I learned this the hard way.
- Serve. Once cooled, these are ready to eat. They’re delicious warm, at room temperature, or even cold from the fridge. If you’re adding flaky sea salt, sprinkle it on right before serving.
The whole process takes about 25 minutes from start to finish. That’s faster than driving to the store and buying a dessert.
Cooking Tips & Techniques
After making these mini pies more times than I can count, I’ve picked up a few tricks that make the process smoother and the results better.
Don’t overmix the filling. I made this mistake early on. Whisking too vigorously incorporates too much air, which can cause the filling to puff up and then collapse. Just whisk until everything is combined, no more.
Room temperature ingredients matter. Cold egg and cold butter can make the filling seize up or separate. Let your egg sit out for 15 minutes before starting. Melt the butter and let it cool slightly before adding it. Small details like this make a real difference in texture.
Watch the bake time closely. These go from perfectly done to overbaked very quickly. Overbaked mini pies have a hard, almost rubbery filling instead of that soft, gooey texture we’re after. Start checking at 12 minutes, and if the edges are set and the center still has a slight wobble, they’re done. They’ll continue cooking slightly as they cool in the pan.
Line your pan properly. Even with non-stick spray, sometimes the filling can stick. I’ve started using paper mini muffin liners, and it makes removal so much easier. Just press the crust into the liner before adding the filling. The liners peel off easily after baking.
Make extra crust circles. You might end up with a few extra if you’re cutting carefully. It’s better to have extra than to run short. Leftover dough scraps can be rerolled once—any more than that and the crust gets tough.
Clean up spills immediately. If any filling spills over the edges of the cups during baking, it can burn onto the pan. Wipe it off as soon as the pan is cool enough to handle. A little warm water and a scrub brush usually does the trick.
Variations & Adaptations
One of the best things about this recipe is how flexible it is. Here are some variations I’ve tried and loved:
Chocolate Maple Pecan Bites: Add 1/4 cup of mini chocolate chips to the filling along with the pecans. The chocolate melts into the filling and creates these little pockets of richness. I made these for a friend’s birthday and they were gone in minutes.
Bourbon Maple Version: Replace the vanilla extract with 1 tablespoon of bourbon. The alcohol cooks off, leaving behind this warm, slightly smoky flavor that pairs beautifully with the maple and pecans. Great for adult gatherings.
Gluten-Free Option: Use a gluten-free pie crust or make a crustless version by greasing the muffin tin well and filling it directly. The crustless version is essentially pecan pie filling baked into little cups—still delicious, just different texture.
Vegan Adaptation: Replace the egg with a flax egg (1 tablespoon ground flaxseed mixed with 3 tablespoons water, let sit for 5 minutes). Use vegan butter or coconut oil instead of butter. The texture will be slightly less firm, but the flavor is still fantastic.
Spiced Version: Add 1/2 teaspoon of cinnamon and a pinch of nutmeg to the filling. This gives the pies a cozy, almost pumpkin-pie-like warmth that’s perfect for fall. I made this version for Thanksgiving last year and it was a hit.
Savory-Sweet Twist: Add a pinch of black pepper and a sprinkle of fresh thyme leaves to the filling. The pepper adds warmth, and the thyme cuts through the sweetness in the most unexpected way. Sounds weird, tastes amazing.
Serving & Storage Suggestions
These mini pies are incredibly versatile when it comes to serving. They’re delicious at room temperature, warm from the oven, or even chilled. For a fancy presentation, arrange them on a platter with a dusting of powdered sugar and a few extra pecan halves scattered around. A dollop of whipped cream or a scoop of vanilla ice cream on the side takes them to dessert heaven.
They pair beautifully with coffee, tea, or a glass of cold milk. For a holiday spread, serve them alongside other bite-sized desserts like chocolate truffles or fruit tarts. They’re also fantastic on a brunch table next to fruit salad and pastries.
Storage: Store leftover pies in an airtight container at room temperature for up to 3 days. If your kitchen is warm, refrigerate them—they’ll last up to a week. The texture stays surprisingly good, though the crust might soften slightly over time.
Freezing: These freeze beautifully. Place the cooled pies in a single layer on a baking sheet and freeze until solid, about 1 hour. Transfer to a freezer-safe bag or container. They’ll keep for up to 3 months. To serve, thaw at room temperature for about 30 minutes, or warm them in a 300°F oven for 5-7 minutes.
Reheating: If you prefer them warm, pop them in a 300°F oven for 5 minutes. The microwave works too, but it can make the crust soggy. I’ve found that the oven method gives the best results—the crust stays crisp and the filling gets that soft, gooey texture again.
The flavors actually develop and deepen after a day or two. I sometimes make these a day ahead of time for events because they taste even better on day two. The maple flavor becomes more pronounced, and the filling sets into the perfect consistency.
Nutritional Information & Benefits
Each mini pie bite (based on a batch of 24) contains approximately:
- Calories: 120
- Total Fat: 7g
- Saturated Fat: 2.5g
- Cholesterol: 15mg
- Sodium: 85mg
- Total Carbohydrates: 14g
- Dietary Fiber: 0.5g
- Sugars: 10g
- Protein: 1.5g
While these are definitely a treat, there are some nutritional bright spots. Pecans are packed with healthy fats, fiber, and antioxidants. They’re one of the best nut sources of gamma-tocopherol, a form of vitamin E that supports heart health. Maple syrup contains antioxidants and minerals like zinc and manganese, though it’s still sugar, so moderation is key.
For those with dietary restrictions, this recipe can be adapted to be gluten-free, dairy-free, or vegan as mentioned in the variations section. The main allergens are wheat (crust), eggs, tree nuts (pecans), and dairy (butter). Always check your specific ingredient labels if cooking for someone with allergies.
I personally love that these mini portions make portion control easier. You get that satisfying dessert experience without the temptation of a whole slice of pie sitting in front of you. Two or three of these feel like a perfect treat without going overboard.
Conclusion
These Quick Mini Maple Pecan Pie Bites are proof that sometimes the best recipes come from happy accidents. What started as a distracted mistake turned into my most-requested dessert, and I honestly can’t imagine going back to making full-sized pecan pie. The mini version is faster, easier, and honestly tastes better.
I love that I can make these on a busy Tuesday night when the craving hits, or double the batch for a holiday party without spending hours in the kitchen. They’re forgiving, flexible, and always impress. Whether you’re a seasoned baker or someone who rarely turns on the oven, these little pies will make you look like a pro.
I’d love to hear how yours turn out! Try adding your own twist—maybe a sprinkle of cinnamon, a drizzle of chocolate, or a pinch of sea salt. Drop a comment below and let me know what variations you come up with. And if you loved these, share the recipe with a friend who needs a quick dessert win. Happy baking!
Frequently Asked Questions
Can I use pre-made mini tart shells instead of cutting my own crust?
Absolutely! Pre-made mini graham cracker or pastry tart shells work great and save even more time. Just fill them directly and bake as directed, though you may need to reduce the bake time by a minute or two since the shells are already partially baked.
Why did my filling come out too hard?
This usually happens from overbaking. The filling should still have a slight jiggle in the center when you take it out of the oven. It will continue to set as it cools. If you bake until the center is completely firm, the filling will become hard and almost candy-like.
Can I make these without a mini muffin tin?
Yes! You can use a regular muffin tin to make larger pies—just increase the bake time to 18-22 minutes. You can also use silicone baking cups placed on a regular baking sheet. The shape will be slightly different, but the taste will be the same.
How do I prevent the crust from getting soggy?
Make sure your filling isn’t too thin. If it seems runny, you can add an extra tablespoon of pecans to thicken it slightly. Also, don’t let the filled cups sit too long before baking. Get them in the oven as soon as possible after filling.
Can I use dark corn syrup instead of maple syrup?
You can, but the flavor will be different. Corn syrup gives a sweeter, one-dimensional taste. Maple syrup adds complexity and depth. If you only have corn syrup, consider adding 1/2 teaspoon of maple extract to bring back some of that maple flavor.
Pin This Recipe!
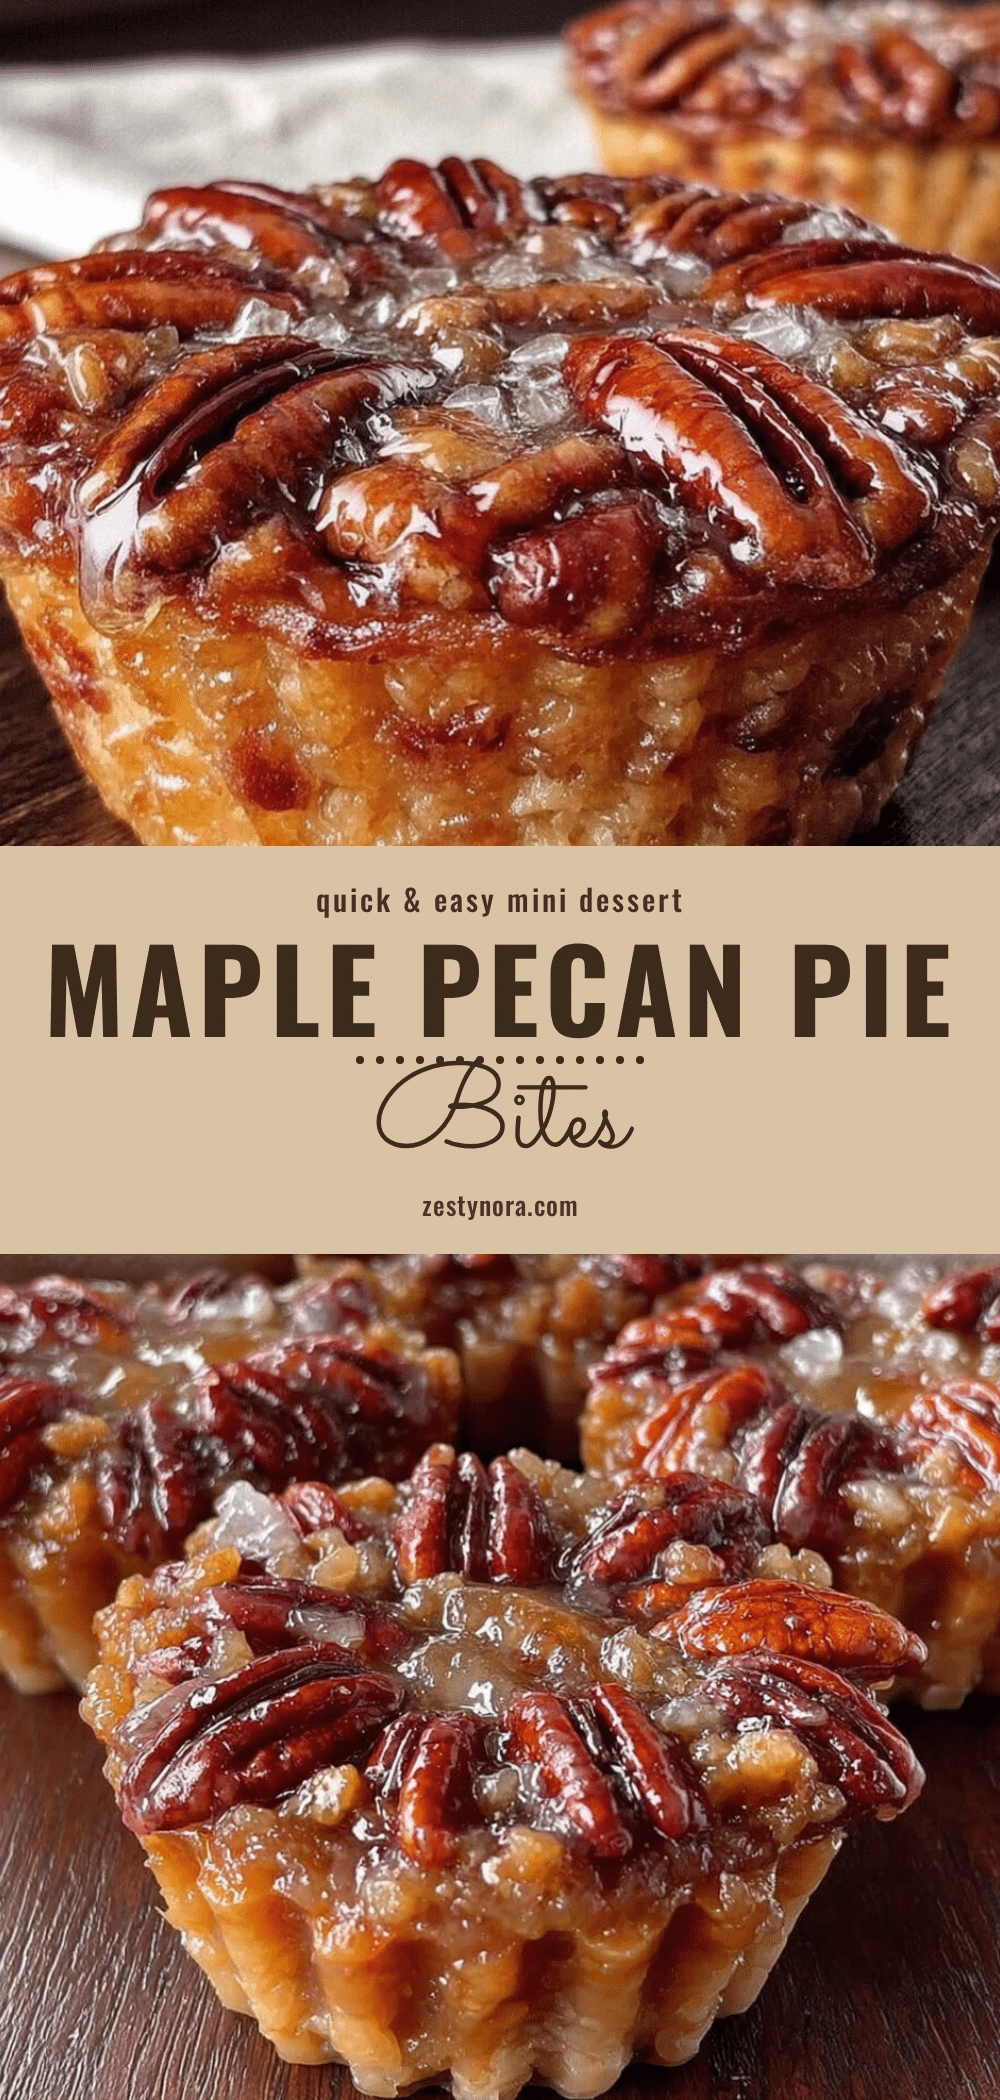
Quick Mini Maple Pecan Pie Bites: Easy Bite-Sized Dessert

These Quick Mini Maple Pecan Pie Bites are a happy accident turned weeknight hero. They solve every problem a regular pecan pie has—no slicing drama, no soggy bottom crust, no waiting forever for it to cool. You get all that sticky, nutty, maple goodness in a two-bite package that’s ready in under half an hour.
- Prep Time: 10 minutes
- Cook Time: 15 minutes
- Total Time: 25 minutes
- Yield: 24 servings 1x
- Category: Dessert
- Cuisine: American
Ingredients
- 1 package refrigerated pie crust (or 1 can refrigerated crescent roll dough)
- All-purpose flour (for dusting)
- 1/2 cup pure maple syrup
- 1/4 cup light brown sugar, packed
- 1 large egg, room temperature
- 2 tablespoons unsalted butter, melted
- 1 teaspoon vanilla extract
- 1/4 teaspoon salt
- 1/2 cup pecan halves or pieces
- Flaky sea salt (optional, for topping)
- Whipped cream or vanilla ice cream (optional, for serving)
Instructions
- Preheat your oven to 375°F (190°C). Lightly spray your mini muffin tin with non-stick cooking spray.
- Prepare the crust: If using refrigerated pie crust, let it sit at room temperature for about 5 minutes. Lightly flour your work surface and roll the crust out to about 1/8-inch thickness. Using a 2-inch cookie cutter or glass, cut out circles (about 24). If using crescent roll dough, unroll it and press the seams together, then cut into squares. Gently press each circle or square into the mini muffin cups, making sure the dough comes up the sides a bit.
- Make the filling: In a medium bowl, whisk together the maple syrup, brown sugar, and egg until smooth. Add the melted butter, vanilla extract, and salt, and whisk again until everything is combined.
- Add the pecans: Stir the chopped pecans into the filling mixture until evenly distributed. Optionally, save a few pecan halves to place on top of each pie for presentation.
- Fill the cups: Spoon the filling into each prepared crust cup, filling them about 3/4 full. If you saved some pecan halves, place one on top of each filled cup now.
- Bake: Place the muffin tin in the preheated oven and bake for 12-15 minutes. Start checking at 12 minutes. The filling should be set around the edges but still slightly jiggly in the center. The crust should be golden brown.
- Cool: Let the pies cool in the pan for 5 minutes. After 5 minutes, use a small knife or offset spatula to gently loosen the edges and lift the pies out. Transfer them to a wire rack to cool completely.
- Serve: Once cooled, these are ready to eat. They’re delicious warm, at room temperature, or even cold from the fridge. If you’re adding flaky sea salt, sprinkle it on right before serving.
Notes
Don’t overmix the filling. Room temperature ingredients matter. Watch the bake time closely. Line your pan properly with paper mini muffin liners for easier removal. Make extra crust circles. Clean up spills immediately. The flavors develop and deepen after a day or two.
Nutrition
- Serving Size: 1 mini pie bite
- Calories: 120
- Sugar: 10
- Sodium: 85
- Fat: 7
- Saturated Fat: 2.5
- Carbohydrates: 14
- Fiber: 0.5
- Protein: 1.5
Keywords: mini pecan pie bites, maple pecan pie, bite-sized dessert, quick dessert, easy pecan pie, mini muffin tin recipe, Thanksgiving dessert, holiday dessert, pecan pie bites, maple syrup dessert


