I was standing in the checkout line at the hardware store of all places, holding a bag of lightbulbs and a new garden hose, when the woman behind me tapped my shoulder. She was probably in her seventies, wearing a sweater with little pumpkins embroidered on it, and she pointed at my cart and said, “You know what those are perfect for?” I figured she was about to give me gardening advice, which I desperately need, but instead she launched into a detailed description of how to make mummy-shaped pizza snacks for her grandkids’ Halloween party. I’m not sure I even responded at first—I was too busy trying to remember if I had crescent roll dough at home. Honestly, I wasn’t expecting cooking advice from a stranger at the hardware store, but there I was, listening to her explain exactly how to wrap the dough strips so they looked like bandages. She told me she’d been making these spooky mummy pizza bites for Halloween for over twenty years, and she’d never once had leftovers. I bought the crescent roll dough on the way home, and I’ve been making them every October since.
The best part about these little guys is how simple they are. I mean, we’re talking about store-bought dough, some cheese, and a few pepperonis. Nothing fancy. But the way they come together—those little strip bandages wrapped around a gooey center—it’s genuinely cute. The first time I made them, I got a little too excited and wrapped the dough too tight, and the cheese exploded out the side like some kind of horror movie scene. It was a mess, but honestly, it was also hilarious. My kids called it the “zombie mummy” and ate it anyway. Maybe you’ve been there, you know? When a recipe goes slightly sideways but tastes just as good? That’s the kind of energy these mummy pizza bites bring. They’re forgiving. They’re fun. And they’re exactly the kind of thing that makes Halloween dinner feel like a party without requiring you to spend all day in the kitchen.
I keep coming back to this recipe because it solves the eternal Halloween problem: what do you feed everyone between trick-or-treating and sugar overload? Something warm, cheesy, and silly. These spooky mummy pizza bites for Halloween check every box. They’re quick enough to throw together while the kids are putting on costumes, and they look impressive without any actual skill involved. That’s my favorite kind of recipe, honestly. The one that makes you look like you planned something special when really you just wrapped some dough around cheese and called it a day. And let me tell you—that hardware store lady was right. Nobody ever leaves leftovers.
Why You’ll Love This Recipe
I’ve tested this recipe about seven times now—yes, seven—because I wanted to make sure the dough-to-cheese ratio was perfect and the mummies actually looked like mummies and not sad blobs. Here’s what I learned, and why I think you’ll love these spooky mummy pizza bites for Halloween as much as I do.
- Quick & Easy : These come together in under 20 minutes from start to finish. That’s faster than ordering pizza, and way more fun. Perfect for that chaotic window between school pickup and the first trick-or-treaters.
- Simple Ingredients : You only need five ingredients, and three of them are probably already in your fridge. No specialty stores. No hunting down obscure items. Just pizza sauce, cheese, pepperoni, and crescent roll dough.
- Perfect for Halloween Parties : Whether you’re hosting a classroom party, a neighborhood gathering, or just feeding your own little monsters before the candy haul begins, these fit right in. They’re themed without being complicated.
- Crowd-Pleaser : I’ve served these to kids, adults, picky eaters, and people who claim they “don’t do themed food.” Every single person ate at least three. They’re just pizza bites, but better because they’re dressed up.
- Unbelievably Delicious : The texture is what gets me. The outside gets golden and slightly crispy, while the inside stays warm and melty. The pepperoni adds that little salty kick. It’s comfort food in costume.
What makes this version different from other mummy recipes I’ve seen online is the technique. Most people just wrap the dough strips randomly, but I figured out that spacing them slightly apart—like real bandages—gives a much better mummy effect. Also, I add a tiny dab of pizza sauce under the cheese so the center stays moist even if the cheese gets a little overdone. It’s a small thing, but it makes a difference. This isn’t just another Halloween snack. It’s the one that’ll get requested every single year.
What Ingredients You Will Need
This recipe uses simple, everyday ingredients to deliver big flavor and maximum spooky fun. No fancy stuff here—just the basics that come together in a way that feels special. Let’s break down each one so you know exactly what to grab at the store.
For the Mummy Pizza Bites
- Crescent roll dough (1 can, 8 ounces) — I use Pillsbury original crescent rolls because they’re widely available and roll out consistently. The perforated triangles make it easy to cut the strips. If you can find the sheet-style crescent dough (without perforations), that’s even better because you get longer, unbroken strips. But the regular cans work perfectly fine. Just press the seams together before cutting.
- Pizza sauce (¼ cup) — Any brand works here. I personally prefer Rao’s because it’s thicker and doesn’t make the dough soggy. But honestly, even the store-brand jar is fine. You just need enough to add flavor without turning the dough into a wet mess. Look for a sauce that’s not too watery. If yours seems thin, drain off the liquid before using.
- Mozzarella cheese (8 ounces, cut into ½-inch cubes) — Fresh mozzarella works best here because it melts into that perfect stretchy pull. Pre-shredded cheese has anti-caking agents that prevent it from melting as smoothly. I buy a fresh mozzarella log and cube it myself. It takes two minutes and makes a noticeable difference. If you only have shredded, it’ll still work—just know the texture won’t be quite as gooey.
- Pepperoni slices (16 slices) — Regular-sized pepperoni works best. You’ll place one slice under each cheese cube before wrapping. The pepperoni adds a little saltiness and helps protect the dough from getting too soggy from the cheese. I prefer Hormel or Boar’s Head, but any brand is fine. For a less greasy option, pat the pepperoni slices with a paper towel before using.
- Mini chocolate chips or candy eyes (32 pieces) — These are for the mummy eyes. You can use store-bought candy eyes from the baking aisle, or just use mini chocolate chips. I actually prefer chocolate chips because they don’t fall off as easily during baking. If you use candy eyes, press them in gently after baking while the cheese is still warm so they stick.
For Brushing (Optional but Recommended)
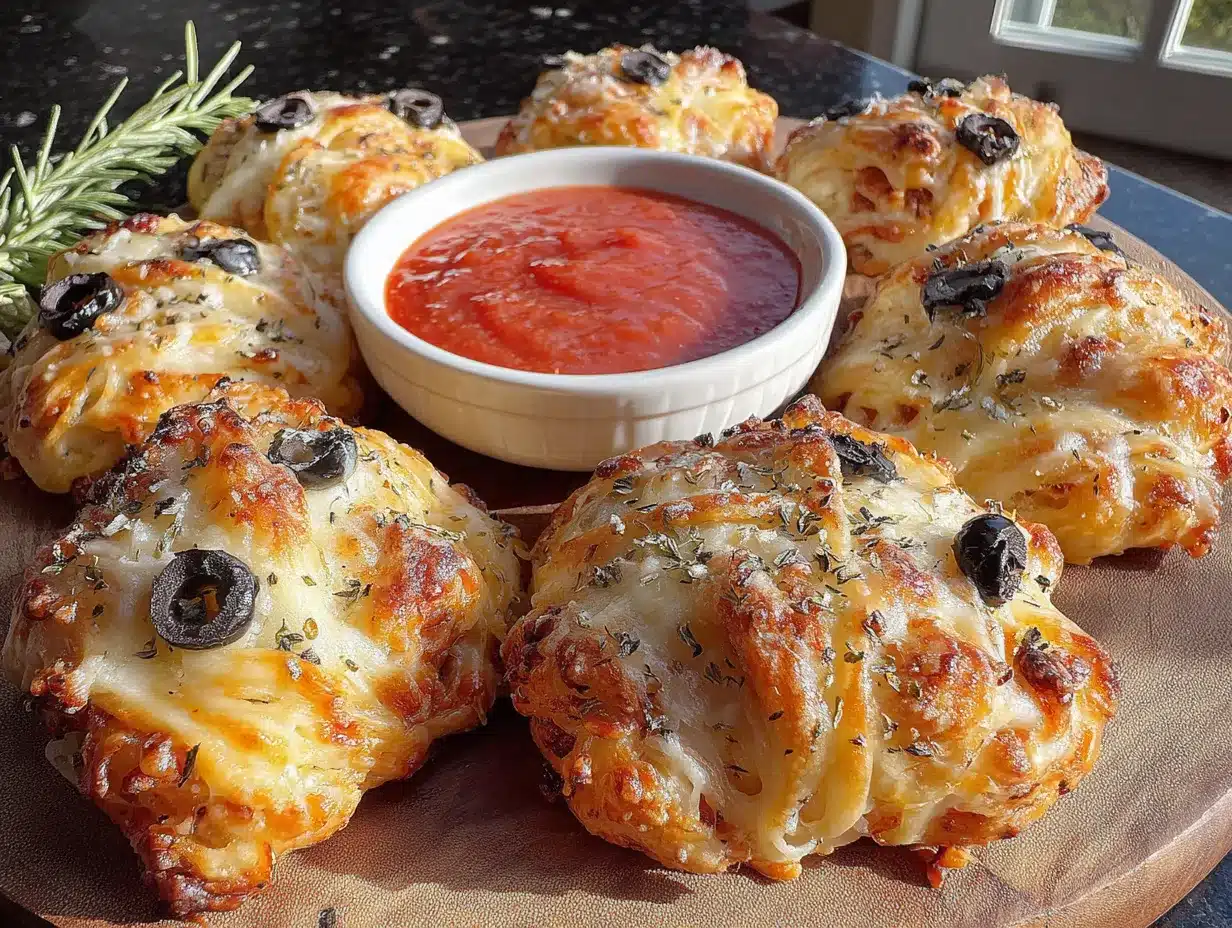
- Olive oil or melted butter (1 tablespoon) — Brushing the tops before baking gives that golden, shiny finish. Butter adds more flavor, but olive oil works great too. I use melted butter for that classic pizza-shop taste.
- Garlic powder (½ teaspoon) — A light sprinkle on top adds savory depth. Don’t use garlic salt unless you want them overly salty. Just a tiny dusting of garlic powder makes them smell incredible while baking.
- Dried oregano or Italian seasoning (½ teaspoon) — Optional, but I love the little green flecks on the finished mummies. It adds color and that pizza-parlor aroma that makes everyone wander into the kitchen.
That’s it. Five main ingredients plus a few optional extras. Everything is easy to find, easy to prep, and easy to customize. If you’re making these for a crowd, just double or triple the ingredients. The recipe scales beautifully.
Equipment Needed
You don’t need much to make these spooky mummy pizza bites for Halloween. That’s part of the appeal. Here’s what you’ll want to have on hand.
- Baking sheet (standard half-sheet pan works great) — Line it with parchment paper or a silicone baking mat for easy cleanup. I’ve forgotten the parchment before, and let me tell you, scrubbing melted cheese off a baking sheet is not how I want to spend Halloween night. Learn from my mistake.
- Sharp knife or pizza cutter — You’ll be cutting the crescent dough into thin strips. A pizza cutter makes this super fast, but a sharp knife works just as well. Don’t use a dull knife—it’ll squish the dough instead of cutting it cleanly.
- Pastry brush — For brushing on the butter or oil. If you don’t have one, you can use a paper towel dipped in butter. It’s not fancy, but it works. I’ve done it plenty of times.
- Small bowl — For melting the butter and mixing the garlic powder. You could also just melt the butter in the microwave in a mug if you’re trying to minimize dishes. No judgment here.
- Cutting board — For cutting the cheese into cubes and prepping the pepperoni. Any clean surface works, really. I’ve used a plate in a pinch.
- Cooling rack (optional) — If you want the bottoms to stay crispy, transfer the baked mummies to a cooling rack after a minute or two. Otherwise, they can get a little steamy on the baking sheet. Not the end of the world, but the cooling rack helps.
That’s genuinely it. No stand mixer, no food processor, no special gadgets. Just basic kitchen tools you probably already own. If you’re buying parchment paper specifically for this, it’s a worthwhile investment—you’ll use it for a hundred other things.
Preparation Method
Alright, let’s get into the actual making of these little guys. I’ll walk you through every step so you don’t end up with cheese explosions like I did the first time. Trust me, following these steps exactly will save you some cleanup.
- Preheat your oven to 375°F (190°C). Line a baking sheet with parchment paper or a silicone mat. Getting the oven hot before you start assembling is key. A hot oven means the dough puffs up quickly and the cheese melts before the dough gets too brown. If you put them in a cold oven, the dough will spread out and your mummies will look more like flattened ghosts.
- Prep the cheese. Cut your mozzarella into 16 cubes, each about ½ inch in size. They don’t have to be perfect squares—actually, slightly irregular cubes look more organic wrapped in dough. Aim for pieces that are roughly the same size so they cook evenly. Set them on a plate. If your cheese is very wet (fresh mozzarella can be), pat it dry with a paper towel. Extra moisture makes the dough soggy.
- Open the crescent roll dough. Unroll it onto a clean cutting board. If you’re using the perforated kind, press the seams together gently with your fingers so you have one solid sheet of dough. Don’t mash it—just press until the lines disappear. You want a smooth surface for cutting.
- Cut the dough into strips. Using a sharp knife or pizza cutter, slice the dough lengthwise into 16 thin strips. Each strip should be about ½ inch wide. Don’t stress about making them perfectly even. Some can be a little wider, some a little thinner. The uneven ones actually make the mummies look more authentic, like real bandages wrapped at different tensions. Cut the strips all the way through so they separate cleanly.
- Spread a tiny amount of pizza sauce. Take a small spoonful of sauce and spread it in a thin line down the center of each dough strip. We’re not talking a lot here—just a smear, about a teaspoon per strip. This adds flavor and moisture without making the dough heavy. Leave the ends of the strips bare so you can pinch them closed later.
- Assemble the mummies. Place one pepperoni slice on the sauced area of each dough strip. Then put one mozzarella cube on top of the pepperoni. The pepperoni acts as a barrier between the cheese and the dough, which helps prevent sogginess. Trust me on this one—I learned it after my first batch turned into a doughy mess.
- Wrap the mummies. Fold the dough strips over the cheese and pepperoni, wrapping them like you’re bandaging a tiny finger. Cross the strips over the center, leaving a small gap at the top where the face will go. Don’t wrap too tightly—leave a little room for the cheese to expand as it melts. If you wrap too tight, the cheese will burst through the dough. Ask me how I know. Pinch the ends of the dough together underneath to seal them.
- Place on the baking sheet. Arrange the wrapped mummies on the prepared baking sheet, leaving about an inch of space between each one. They’ll puff up a bit, so give them room to breathe. Tuck any loose dough ends underneath so they don’t burn.
- Brush with butter. Melt your butter (or warm your olive oil) and stir in the garlic powder. Using a pastry brush, lightly coat the top of each mummy. This is what gives them that gorgeous golden color. Don’t skip this step—unbrushed mummies look pale and sad. They still taste fine, but they don’t have that bakery-finish look.
- Sprinkle with oregano. If you’re using it, sprinkle a tiny pinch of dried oregano over each mummy. This is purely cosmetic, but it adds a nice visual touch and makes the kitchen smell incredible.
- Bake for 10-12 minutes. Place the baking sheet on the center rack and bake until the dough is golden brown and the cheese is bubbly. Start checking at 10 minutes. Ovens vary, so yours might need a minute or two more. You’re looking for a deep golden color on the dough, not pale. If the cheese has started to ooze out a little, that’s fine—it’s character.
- Add the eyes immediately. As soon as the mummies come out of the oven, press two mini chocolate chips or candy eyes into the exposed cheese at the top. The cheese will still be hot and soft, so the eyes will sink in slightly and stay put. Work quickly here—the cheese sets as it cools. If you wait too long, the eyes won’t stick and you’ll be chasing them around the kitchen. Ask me how I know this too.
- Cool for 2-3 minutes. Let the mummies rest on the baking sheet for a couple of minutes before transferring them to a plate. This lets the cheese set just enough that you don’t burn your mouth on molten mozzarella. I know it’s tempting to eat them immediately, but patience pays off here.
- Serve warm. These are best eaten within 15 minutes of coming out of the oven. The dough is crispiest right after baking, and the cheese is perfectly stretchy. Serve them with extra pizza sauce for dipping if you want, though honestly, they’re great on their own.
And that’s it. Fourteen steps, most of which take about 30 seconds each. The whole process from start to finish is under 25 minutes, including baking time. That’s faster than a pizza delivery, and way more fun to make.
Cooking Tips & Techniques
I’ve made these spooky mummy pizza bites for Halloween about a dozen times now, and I’ve picked up a few tricks along the way. Some came from success, some came from spectacular failure. Here’s what I’ve learned so you can skip the mistakes.
Don’t overwork the dough. Crescent roll dough is delicate. The more you handle it, the tougher it gets. When you’re cutting the strips and wrapping the mummies, work quickly and gently. If the dough starts to feel sticky or stretchy, pop it in the fridge for five minutes to firm up. Cold dough is much easier to handle than warm, soft dough.
Space the strips properly. I mentioned this earlier, but it’s worth repeating: leave small gaps between the dough strips when you wrap. If you cover the entire cheese cube with dough, it looks like a bread roll, not a mummy. The exposed cheese is what gives it that bandaged look. Plus, the exposed cheese gets those beautiful brown spots from direct heat, which adds flavor.
Watch the cheese. Fresh mozzarella has a lot of moisture. As it melts, that moisture turns to steam, which can cause the cheese to expand and push through the dough. To minimize this, pat your cheese cubes dry before wrapping. Also, don’t use oversized cheese cubes. Stick to ½-inch cubes. Bigger cubes take longer to melt and are more likely to burst through the dough before they’re fully melted.
Rotate the pan halfway through. If your oven has hot spots (most do), rotate the baking sheet halfway through baking. This ensures all the mummies brown evenly. I forgot to do this once, and half my batch came out pale while the other half was almost too dark. It still tasted fine, but the presentation was uneven.
Make ahead tip. You can assemble these up to 4 hours ahead of time. Just arrange the wrapped mummies on the baking sheet, cover loosely with plastic wrap, and refrigerate. When you’re ready to bake, add 2-3 minutes to the baking time since they’re starting from cold. Don’t brush with butter until right before baking, or the dough will absorb it and get greasy.
My biggest failure: The first time I made these, I used pre-shredded mozzarella and just piled it in the center instead of using cubes. It melted into a flat, greasy puddle that seeped through every gap in the dough. My mummies looked like they’d been through a swamp. They tasted fine, but they were not photogenic. Cubed cheese is the way to go. It stays contained and melts into that perfect gooey center.
Variations & Adaptations
One of the best things about this recipe is how easy it is to change up. Here are some variations I’ve tried and loved.
Vegetarian Mummies: Skip the pepperoni and use a slice of roasted red pepper or a sun-dried tomato under the cheese instead. The smoky sweetness of roasted red pepper pairs beautifully with the mozzarella. You could also use sautéed mushrooms or spinach. Just make sure whatever you use isn’t too wet, or the dough will get soggy.
Spicy Mummies: Add a thin slice of jalapeño or a drizzle of sriracha under the cheese before wrapping. The heat cuts through the richness of the cheese and adds a nice kick. My husband loves these. I make a separate batch with the spicy ones marked with a toothpick so nobody bites into a surprise.
Breakfast Mummies: Swap the pizza sauce for a thin layer of scrambled egg and use a slice of breakfast sausage instead of pepperoni. Brush with melted butter and sprinkle with everything bagel seasoning before baking. These are surprisingly good for a Halloween morning breakfast before school.
Gluten-Free Option: Use gluten-free crescent roll dough. I’ve tried two brands, and both worked reasonably well. The dough is a bit more fragile, so handle it gently. You might need to press the seams together more carefully. The baking time might also be slightly shorter, so start checking at 8 minutes.
Dairy-Free Option: Use dairy-free mozzarella shreds instead of cubed cheese. I know, I said shreds don’t melt as well, but for dairy-free versions, they’re your best bet. Let the shreds come to room temperature before wrapping so they melt more evenly. You can also use a dairy-free cream cheese in the center for extra creaminess.
Sweet Mummies: This is a weird one, but hear me out. Use a thin strip of crescent dough wrapped around a marshmallow or a chocolate square. Bake as directed, then dust with powdered sugar. They look like little ghost mummies and taste like a warm s’more. My kids go absolutely crazy for these. I make a batch of savory and a batch of sweet for Halloween parties.
Serving & Storage Suggestions
These spooky mummy pizza bites for Halloween are best served warm, right after the cheese has had a minute to set. The dough is at its crispiest in that first 15-minute window. Serve them on a platter with a small bowl of warm pizza sauce for dipping. You can also serve them alongside a simple green salad if you want to pretend this is a balanced meal.
For a Halloween party spread, I like to arrange them on a black platter or a dark-colored cutting board. The contrast makes the golden mummies pop. Add a few fake spider webs or plastic spiders around the platter for extra spooky vibes. Kids love this. Adults pretend to be unimpressed, but they take photos too.
Storage: If you have leftovers (unlikely, but possible), let them cool completely, then store in an airtight container in the refrigerator for up to 3 days. The dough will soften as they sit, so they won’t be as crispy as fresh, but they’ll still taste good.
Reheating: The best way to reheat these is in the oven or an air fryer. Pop them in a 350°F (175°C) oven for 5-7 minutes, or in an air fryer at 350°F for 3-4 minutes. This will help crisp the dough back up. The microwave works in a pinch, but the dough will be soft and chewy rather than crispy. Not bad, just different.
Freezing: You can freeze the assembled, unbaked mummies. Arrange them on a baking sheet and freeze until solid (about 2 hours), then transfer to a freezer bag. When you’re ready to bake, place them frozen on a parchment-lined baking sheet and add 3-5 minutes to the baking time. Don’t thaw them first, or the dough will get too soft. I do this every year so I have a batch ready to go at a moment’s notice during Halloween week.
One thing I’ve noticed: the flavors actually meld together a bit if you let them sit for a day. The pepperoni flavor seeps into the cheese, and the garlic butter soaks into the dough. They’re not as pretty the next day, but they taste almost better. That’s my secret confession.
Nutritional Information & Benefits
Let’s be honest—these are not health food. They’re a fun Halloween treat. But here’s the approximate nutritional breakdown per mummy (based on one serving, which is about 2 mummies):
| Nutrient | Amount per serving (2 mummies) |
|---|---|
| Calories | 210-240 |
| Total Fat | 12-14g |
| Saturated Fat | 6-7g |
| Cholesterol | 25-30mg |
| Sodium | 480-520mg |
| Total Carbohydrates | 18-20g |
| Dietary Fiber | 1g |
| Sugars | 4-5g |
| Protein | 9-10g |
| Calcium | 150-180mg |
These numbers will vary depending on the exact brands you use and whether you add extra toppings. The mozzarella provides a decent amount of calcium and protein, which is something, right? The pepperoni adds some protein too, along with a bit of iron. The crescent dough is mostly refined carbs, so if you want to boost the nutritional profile, you could use a whole-wheat crescent dough if you can find it.
From a wellness perspective, I think of these as a “sometimes food.” They’re for celebrations, for Halloween parties, for those nights when you want to make something special without spending hours in the kitchen. Balance comes from the rest of what you eat, not from one recipe. So I say enjoy them fully, without guilt, and maybe add some carrot sticks to the party platter for balance. That’s my philosophy, anyway.
Conclusion
These spooky mummy pizza bites for Halloween have become a tradition in my house, all because a stranger in a hardware store decided to share her secret recipe with me. That’s the thing about cooking—sometimes the best recipes come from the most unexpected places. A checkout line. A neighbor’s porch. A scribbled note from a coworker. You never know when you’re going to stumble onto something that becomes a yearly ritual.
What I love most about this recipe is how it brings people together. My kids help me wrap the mummies now. They argue over who gets to place the eyes. My husband pretends he’s too cool for themed food, but I always catch him sneaking extras off the baking sheet. It’s simple, it’s silly, and it’s exactly the kind of low-pressure fun that Halloween should be about. No fancy costumes required. Just dough, cheese, and a little imagination.
I’d love to hear how yours turn out. Did you add any fun variations? Did your cheese explode like mine did the first time? Leave a comment below and let me know. And if you’re looking for more Halloween recipes, I’ve got a few other favorites that I think you’ll love. Until then, happy Halloween, and may your mummies be perfectly wrapped and perfectly delicious.
Frequently Asked Questions
Can I use pizza dough instead of crescent roll dough?
You can, but the texture will be different. Pizza dough is chewier and denser, while crescent roll dough is lighter and flakier. If you use pizza dough, roll it out very thin (about ⅛ inch) and cut it into strips. You’ll also need to bake them a few minutes longer. The mummy effect is better with crescent dough because it puffs up more, giving that bandaged look.
How do I keep the eyes from falling off?
Press the eyes into the cheese while it’s still hot, right when the mummies come out of the oven. The cheese will be soft and slightly molten, so the eyes will sink in and stick. If you wait until the cheese cools, the surface firms up and the eyes won’t stay. Also, mini chocolate chips tend to stay put better than candy eyes because they’re heavier and have a flat side.
Can I make these in an air fryer?
Absolutely. Preheat your air fryer to 350°F (175°C). Place the mummies in the basket in a single layer, leaving a little space between them. Cook for 6-8 minutes, checking at the 6-minute mark. Air fryers cook faster than ovens, so keep an eye on them. The bottoms might get a bit darker than in the oven, but the texture is actually crispier, which I prefer.
How far in advance can I assemble these?
You can assemble them up to 4 hours ahead of time and keep them covered in the refrigerator. Don’t brush with butter until right before baking. If you need to go further in advance, freeze the assembled, unbaked mummies on a baking sheet, then transfer to a freezer bag. They’ll keep for up to 3 months. Bake from frozen, adding 3-5 minutes to the baking time.
Why did my cheese leak out during baking?
This usually happens for one of three reasons: the cheese cubes were too big, the dough was wrapped too tightly, or the cheese wasn’t patted dry before wrapping. Stick to ½-inch cubes, leave a little room inside the dough for the cheese to expand, and pat the cheese dry with a paper towel before assembling. A little leakage is normal and adds character, but if it’s a lot, try these fixes next time.
Pin This Recipe!
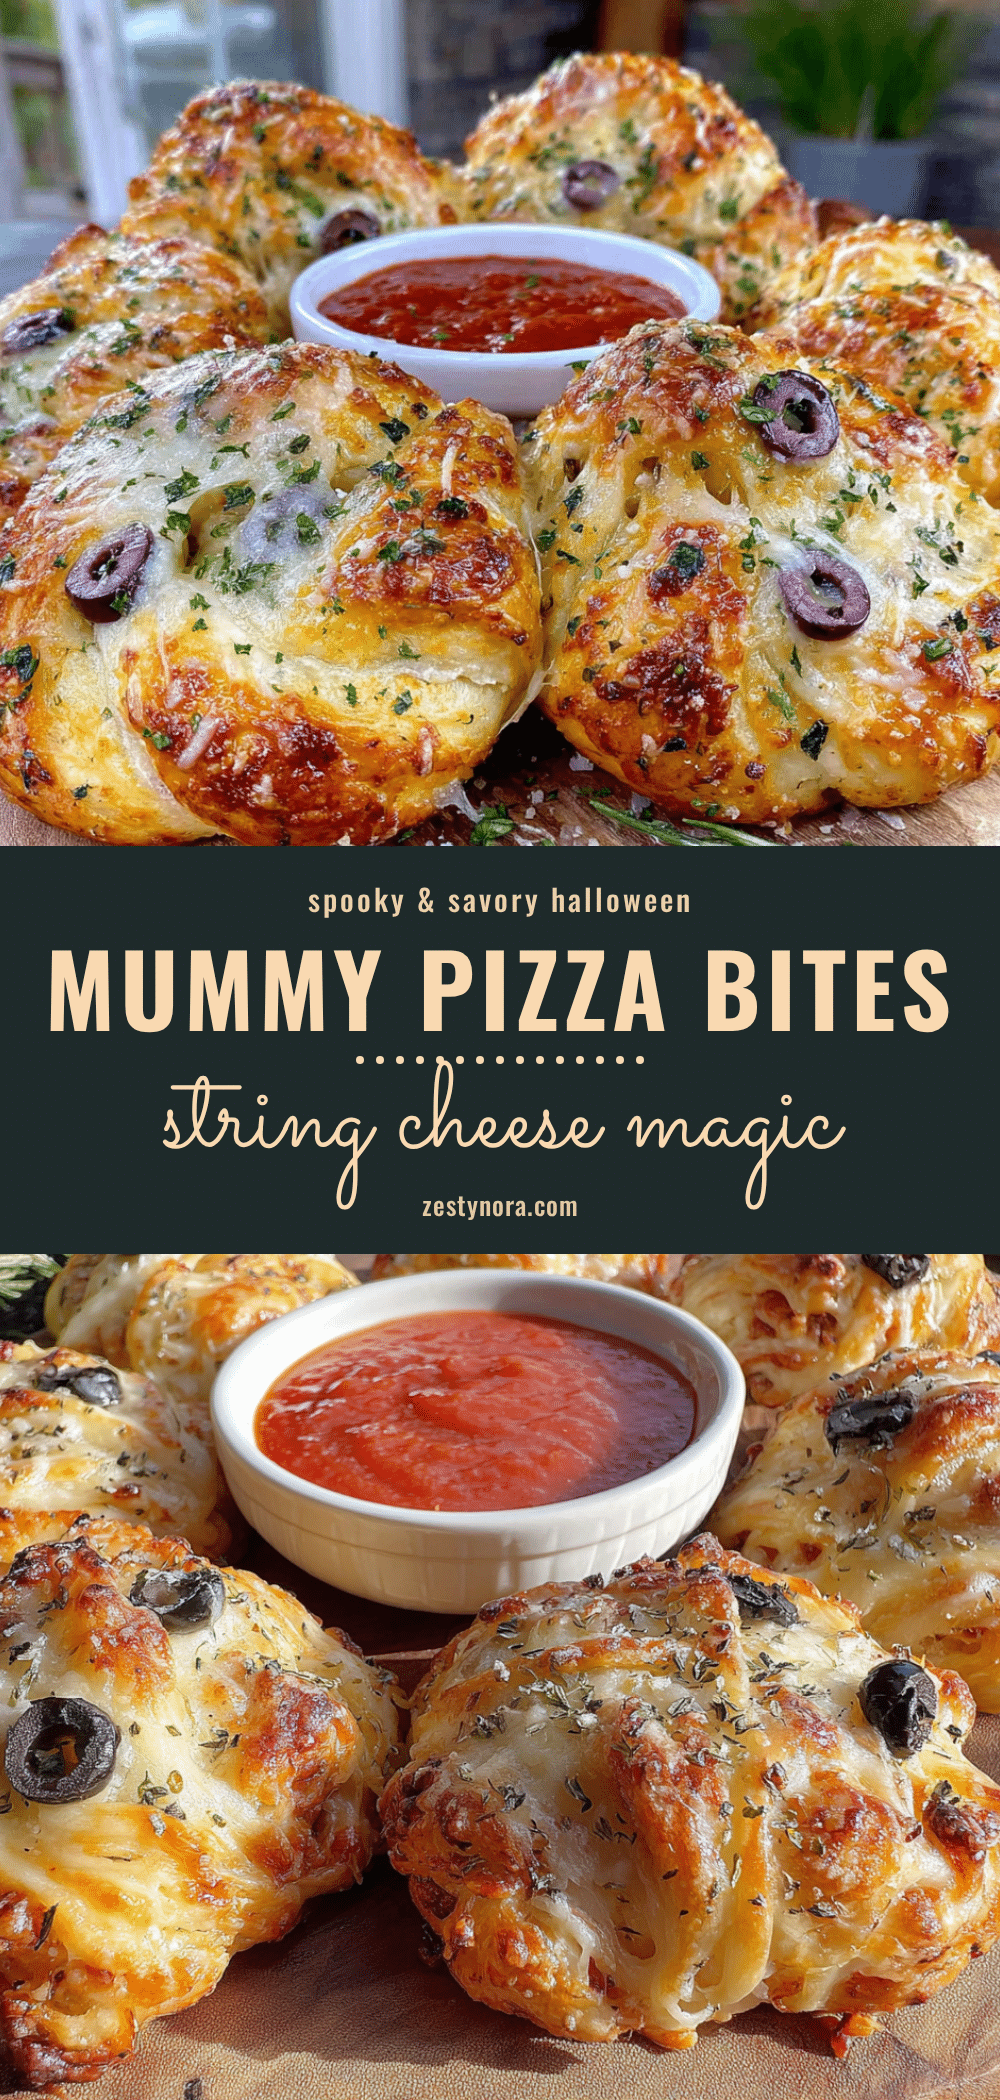
Spooky Mummy Pizza Bites: Easy Halloween Recipe
These spooky mummy pizza bites are a quick and fun Halloween snack made with crescent roll dough, mozzarella, and pepperoni, wrapped to look like little mummies. Perfect for parties or a pre-trick-or-treat dinner, they come together in under 25 minutes and are always a crowd-pleaser.
- Prep Time: 10 minutes
- Cook Time: 12 minutes
- Total Time: 22 minutes
- Yield: 8 servings (2 mummies per serving) 1x
- Category: Appetizer
- Cuisine: American
Ingredients
- 1 can (8 ounces) crescent roll dough
- ¼ cup pizza sauce
- 8 ounces mozzarella cheese, cut into ½-inch cubes
- 16 slices pepperoni
- 32 mini chocolate chips or candy eyes
- 1 tablespoon olive oil or melted butter (optional, for brushing)
- ½ teaspoon garlic powder (optional)
- ½ teaspoon dried oregano or Italian seasoning (optional)
Instructions
- Preheat your oven to 375°F (190°C). Line a baking sheet with parchment paper or a silicone mat.
- Cut the mozzarella into 16 cubes, each about ½ inch in size. Pat dry if using fresh mozzarella.
- Unroll the crescent roll dough onto a clean cutting board. If using perforated dough, press the seams together gently to form a solid sheet.
- Using a sharp knife or pizza cutter, slice the dough lengthwise into 16 thin strips, each about ½ inch wide.
- Spread a tiny amount of pizza sauce (about 1 teaspoon) in a thin line down the center of each dough strip, leaving the ends bare.
- Place one pepperoni slice on the sauced area of each strip, then top with one mozzarella cube.
- Fold the dough strips over the cheese and pepperoni, wrapping like a bandage. Leave a small gap at the top for the face. Pinch the ends underneath to seal.
- Arrange the wrapped mummies on the prepared baking sheet, about 1 inch apart. Tuck any loose dough ends underneath.
- If using, melt the butter and stir in the garlic powder. Brush the tops of each mummy with the butter mixture.
- If desired, sprinkle a tiny pinch of dried oregano over each mummy.
- Bake for 10-12 minutes, until the dough is golden brown and the cheese is bubbly. Rotate the pan halfway through if needed.
- Immediately after removing from the oven, press two mini chocolate chips or candy eyes into the exposed cheese at the top of each mummy.
- Let cool on the baking sheet for 2-3 minutes before serving. Serve warm.
Notes
For best results, use fresh mozzarella cubed rather than shredded. Pat cheese dry to prevent sogginess. Leave small gaps in the dough wrapping for a mummy look. Add eyes immediately after baking while cheese is hot. Can be assembled up to 4 hours ahead and refrigerated, or frozen unbaked for up to 3 months.
Nutrition
- Serving Size: 2 mummies
- Calories: 225
- Sugar: 4.5
- Sodium: 500
- Fat: 13
- Saturated Fat: 6.5
- Carbohydrates: 19
- Fiber: 1
- Protein: 9.5
Keywords: Halloween, mummy, pizza bites, crescent rolls, pepperoni, mozzarella, easy, kid-friendly, party snack


