The Halloween party was in six hours and I’d completely forgotten. My daughter had been talking about it for weeks—the costume parade, the bobbing for apples, the snack table where everyone’s mom brought something spooky. And here I was, staring into a pantry that held exactly three things: a half-empty box of Rice Krispies, a bag of marshmallows that were a little stale, and some butter. No time for a grocery run. No time for elaborate cookie decorating or fondant ghosts. My kid was going to be the one whose mom showed up with a sad bag of store-bought candy corn. Honestly, I felt that familiar knot of panic tighten in my chest. I mean, I’ve been there, right? That moment when you realize you’re the underdog of the Halloween bake-off before it even starts.
Then I remembered a trick my own mom used to pull. She’d make regular Rice Krispie treats, cut them into shapes, and call it a day. But I needed ghosts. And I needed them to look like I’d tried, even though I clearly hadn’t. So I grabbed the marshmallows, melted them down (they were a bit clumpy, let me tell you), stirred in the cereal, and pressed the whole sticky mess into a pan. While it was still warm, I used a small ghost-shaped cookie cutter I’d forgotten I owned—bought it on a whim three years ago at a dollar store. It was a little bent, so some of the ghosts came out lopsided. Perfect. I stuck on mini chocolate chip eyes, and that was it. I dropped them on a plate, ran out the door, and braced myself for the pitying looks from the other moms who’d probably brought Pinterest-perfect mummies and pumpkin pies.
Wouldn’t you know it—the ghosts were gone in ten minutes. The kids loved them. The moms asked for the recipe. And my daughter beamed like I’d won a blue ribbon. The panic turned into this sheepish, amused kind of pride. That’s why these Easy Halloween Rice Krispie Ghosts are still a staple in our house. They’re the recipe that proves you don’t need hours or fancy ingredients to win the day—you just need a little creativity and a willingness to embrace the lopsided ghosts. Maybe you’ve been in that same spot, staring at an empty pantry and a clock that’s ticking too fast. If so, this one’s for you.
Why You’ll Love This Recipe
Let’s be real for a second. Halloween treats can get complicated. You see those gorgeous, multi-layered cake pops or the intricately iced cookies, and you think, “I could never.” But these Easy Halloween Rice Krispie Ghosts are the opposite of that. They’re the kind of recipe that makes you look like a hero without actually having to do much. Here’s why they’ll become your go-to:
- Quick & Easy: From start to finish, you’re looking at about 20 minutes. Seriously. No baking, no chilling, no fuss. Perfect for busy weeknights or when you realize the school party is tomorrow and you’ve got nothing.
- Simple Ingredients: You probably already have everything in your kitchen. Butter, marshmallows, Rice Krispies cereal, and chocolate chips. That’s it. No special trips to a fancy baking store.
- Budget-Friendly: This recipe costs pennies per treat. When you’re feeding a family on a sensible budget, that matters. You can make a huge batch for a fraction of what you’d spend on pre-made Halloween candy.
- Crowd-Pleaser: I’ve brought these to school parties, neighborhood gatherings, and even a work potluck. Kids and adults grab them by the handful. They’re familiar enough to be comforting, but spooky enough to feel festive.
- Kid-Approved and Kid-Made: This is the part I love most. My kids can help with almost every step—stirring the cereal, pressing the mixture, adding the eyes. It’s a perfect Halloween activity that doesn’t end in a huge mess or a meltdown.
- Unbelievably Adorable: Let’s face it, a lopsided ghost with googly eyes is cuter than any perfect cookie. The charm is in the imperfection. They look handmade, which is exactly the point.
What makes this recipe different from all the other ghost treats out there? It’s the texture. Most Rice Krispie treats get rock hard after a few hours. My trick? I use a little extra butter and I don’t over-pack the mixture into the pan. The result is a ghost that’s soft, chewy, and slightly buttery—not a jaw-breaker. Plus, the mini chocolate chip eyes stay put because I press them in while the treat is still warm. No one wants a ghost whose eyes fall off on the way to the party. This is comfort food reimagined for Halloween—faster, simpler, but with the same soul-soothing satisfaction.
What Ingredients You Will Need
This recipe uses simple, wholesome ingredients to deliver that classic Rice Krispie treat texture with a spooky twist. You likely have all of these in your pantry right now, which is the whole point. Let’s break down what you’ll need and why each ingredient matters.
- 3 tablespoons unsalted butter (adds richness and helps keep the treats soft; I use salted butter in a pinch and just skip the extra salt)
- 1 package (10 ounces) regular marshmallows (about 40 large marshmallows; mini marshmallows melt faster if that’s what you have)
- 6 cups Rice Krispies cereal (or any crispy rice cereal; store brands work fine, but the name brand gives the best crunch)
- 1/2 cup mini chocolate chips (for the eyes; you can also use candy eyes, but chocolate chips are cheaper and taste better)
- Optional: 1/4 teaspoon vanilla extract (I add this when I’m feeling fancy—it cuts the sweetness just a little)
- Optional: A pinch of salt (balances the sugar; I always add this because it makes the butter flavor pop)
Now, a few notes from my own kitchen trials. I’ve tried using vegan butter and marshmallows for a dairy-free version, and it works—just know the texture is a bit less chewy. For the cereal, I’m a loyalist to the original Rice Krispies because they hold their shape better. I once tried a generic brand, and the ghosts were a little… sad. They crumbled more. So if you can, stick with the classic.
As for the chocolate chips, I recommend Ghirardelli mini chips for their size and flavor. They’re tiny enough to look like eyes but still give you that chocolate hit. You can also use regular chocolate chips and just cut them in half, but that’s extra work and honestly, who has time for that on a Halloween morning?
One more thing: the marshmallows. Fresh marshmallows are key. If your bag has been sitting in the pantry for months, they’ll be harder to melt and your ghosts might turn out grainy. I learned this the hard way when I used a bag that was past its prime—the mixture never got smooth, and the ghosts looked like they had some kind of rash. Not cute. So grab a fresh bag for best results.
Equipment Needed
You don’t need a fancy kitchen to pull these off. Here’s what you’ll need:
- Large saucepan (non-stick is ideal, but any heavy-bottomed pan works)
- Wooden spoon or silicone spatula (for stirring the marshmallow mixture; metal spoons can scratch your pan)
- 9×13-inch baking pan (for pressing the treats; a slightly smaller pan makes thicker ghosts)
- Parchment paper or wax paper (for lining the pan and for pressing the mixture without sticking)
- Ghost-shaped cookie cutter (about 3 inches tall; you can find these at dollar stores or online)
- Measuring cups and spoons
- Small bowl (for the chocolate chips)
If you don’t have a ghost cookie cutter, don’t panic. You can use a small round cutter and just squish the top into a pointy shape—or even cut them freehand with a knife. I’ve done that before, and the ghosts looked wonderfully homemade. For the pan, I prefer a metal one because it conducts heat better, but glass works too—just let the treats cool a little longer before cutting. And please, please use parchment paper. Trust me on this. I’ve tried greasing the pan with butter, and the treats stuck so badly I had to chisel them out. Not a good look.
Preparation Method
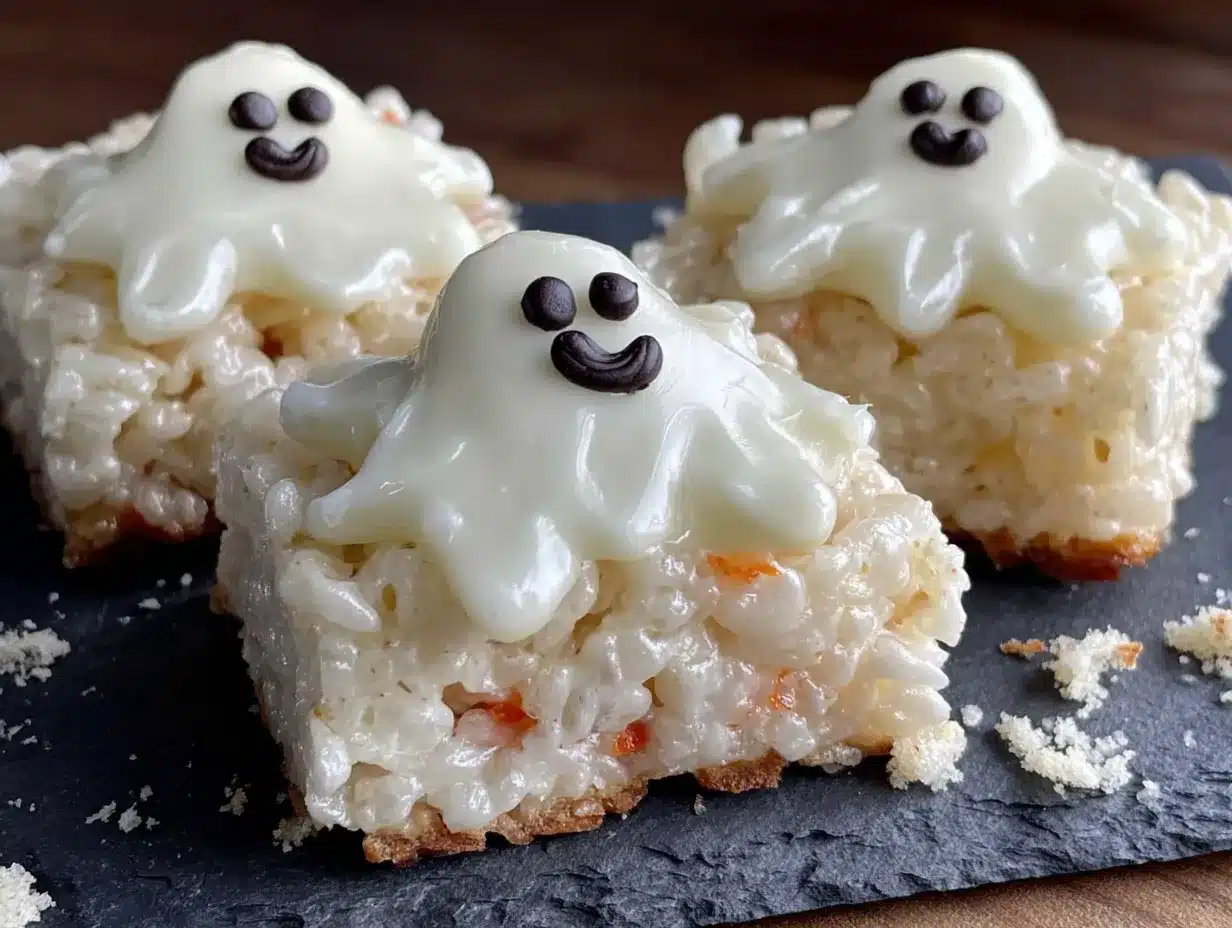
Alright, let’s make some ghosts. This is the fun part. I’ll walk you through every step, including the little tricks I’ve picked up from making these about fifty times.
- Prepare your pan. Line a 9×13-inch baking pan with parchment paper, leaving some overhang on the sides. This makes lifting the treats out super easy later. Lightly grease the parchment with a little butter or non-stick spray. Set aside.
- Melt the butter. In a large saucepan over low heat, melt the 3 tablespoons of butter. Don’t rush this—medium heat can burn the butter. You want it just melted, not sizzling. Swirl the pan a bit to coat the bottom.
- Add the marshmallows. Pour in the entire bag of marshmallows. Stir constantly with your wooden spoon or spatula. The marshmallows will start to puff up and then collapse into a gooey puddle. This takes about 5 minutes. Keep stirring—don’t walk away. If you stop, the marshmallows can scorch on the bottom.
- Add the vanilla and salt (optional). Once the marshmallows are completely melted and smooth, remove the pan from the heat. Stir in the vanilla and salt if you’re using them. The mixture will smell amazing—like a carnival.
- Mix in the cereal. Add the 6 cups of Rice Krispies all at once. Fold gently until the cereal is evenly coated. Don’t overmix, or the cereal will crush and your ghosts will be dense. You want some whole puffs visible.
- Press into the pan. Scrape the mixture into the prepared pan. Using a piece of wax paper or parchment (lightly greased), press the mixture into an even layer. Press firmly but not too hard—you want them compact enough to hold shape, but not so tight that they turn into bricks. This is the step where texture matters.
- Cool slightly. Let the treats cool in the pan for about 10-15 minutes. They need to be firm enough to cut but still warm enough to be pliable. If they cool completely, they’ll crack when you try to cut them.
- Cut the ghosts. Lift the treats out of the pan using the parchment overhang. Place on a cutting board. Use your ghost-shaped cookie cutter to press down firmly and cleanly. Wiggle it slightly to release. If the cutter sticks, dip it in a little powdered sugar or spray it with non-stick spray. Repeat until you’ve cut out as many ghosts as possible. You’ll get about 12-15 ghosts, depending on the size of your cutter.
- Add the eyes. While the ghosts are still slightly warm, press two mini chocolate chips into each one for eyes. Press them in gently but firmly—they’ll sink in a little and stay put as the treat cools. If the treats have cooled too much, the chips won’t stick. In that case, dab a tiny bit of melted chocolate or frosting on the back of each chip.
- Let them set completely. Place the finished ghosts on a wire rack or a plate. Let them cool fully for about 30 minutes. The chocolate chips will set, and the treats will firm up to that perfect chewy texture.
A quick note: if your mixture starts to harden while you’re cutting, pop the whole slab in the microwave for 10 seconds to soften it up. I’ve done this more times than I care to admit. It works like a charm.
Cooking Tips & Techniques
I’ve made these ghosts enough times to have a few battle scars—and a few hard-won lessons. Here’s what I’ve learned so you don’t have to make the same mistakes.
Don’t overheat the marshmallows. This is the number one mistake. If you melt them on too high heat or for too long, they’ll turn into a hard, sugary mess that’s impossible to work with. Low and slow is the way. I once had a batch turn into what looked like a giant, sad candy apple. My daughter called them “angry ghosts.” She wasn’t wrong.
Use a light hand when pressing. I know it’s tempting to press the mixture down like you’re making a sandcastle, but resist. A gentle press gives you soft, chewy ghosts. A hard press gives you hockey pucks. The goal is a treat that bends slightly when you pick it up, not one that could break a tooth.
Work in batches if needed. If your cookie cutter is small, you can reroll the scraps. Gather the leftover pieces, press them together, and cut again. You might get a few more ghosts, though they’ll be a bit patchwork. I call those the “ghost rejects,” and my kids love them anyway.
Timing is everything. Plan to make these the day before your event or the morning of. They’re best within 24 hours. After that, they start to get stale, especially if you live in a humid climate. I learned this the hard way when I made them three days early for a party, and they were as hard as rocks. Not a good look for a ghost.
Multitask smartly. While the marshmallows are melting, line your pan and set out your chocolate chips. Every second counts when you’re working with a mixture that sets quickly. Have everything within arm’s reach before you start.
Variations & Adaptations
One of the best things about this recipe is how easy it is to change up. Here are some variations I’ve tried over the years:
- Spooky Spider Version: Instead of ghosts, use a round cookie cutter and add eight chocolate chip legs. My son’s favorite. They look like little black widows, and they’re surprisingly cute.
- Gluten-Free Option: Use a gluten-free crispy rice cereal. Most brands are naturally gluten-free, but double-check the label. The texture is identical, so no one will know the difference.
- Pumpkin Shapes: Swap the ghost cutter for a pumpkin one and use orange candy melts for the eyes. Perfect for a non-spooky Halloween party or a fall-themed classroom treat.
- Colored Ghosts: Add a few drops of orange or green food coloring to the marshmallow mixture before adding the cereal. It gives the ghosts a fun, eerie tint. I’ve done this for a neon Halloween party, and the kids went wild.
- Dairy-Free Adaptation: Use vegan butter and vegan marshmallows. Dandies brand makes a great marshmallow that melts beautifully. The texture is a bit less chewy, but still delicious.
- Add a Filling: Press half the mixture into the pan, add a layer of peanut butter or Nutella, then top with the remaining mixture. Cut into ghosts after cooling. It’s a bit messy, but oh so good.
My personal favorite variation? I add a pinch of cinnamon to the marshmallow mixture. It gives the ghosts a warm, cozy flavor that pairs perfectly with the chocolate eyes. It’s not traditional, but honestly, it’s become our family standard.
Serving & Storage Suggestions
These ghosts are best served at room temperature. They’re soft, chewy, and the chocolate chips are slightly firm—a perfect contrast. I like to arrange them on a platter lined with black or orange tissue paper for that spooky vibe. You can also stack them in a clear jar tied with a ribbon for a cute Halloween gift.
For storage, place the ghosts in an airtight container at room temperature. They’ll stay fresh for up to 3 days, though they’re best within the first 24-48 hours. If you live in a humid area, add a piece of bread to the container—it absorbs excess moisture and keeps the treats soft. Replace the bread every day.
You can freeze these ghosts too. Place them in a single layer on a baking sheet and freeze until solid, then transfer to a freezer-safe bag. They’ll keep for up to 3 months. To thaw, leave them at room temperature for about 20 minutes. The texture will be slightly softer, but still delicious. I’ve done this for last-minute school parties, and it’s a lifesaver.
A note on flavor development: These ghosts taste best the day they’re made. The marshmallow is still soft, the cereal is still crisp, and the chocolate is fresh. After a day, the cereal starts to soften slightly, but honestly, my kids don’t even notice. They just grab and go.
Nutritional Information & Benefits
Let’s be honest—these are a treat, not a health food. But I do think there’s value in knowing what you’re eating, especially when you’re feeding a family. Here’s a rough estimate per ghost (based on 15 ghosts):
- Calories: ~150
- Fat: 5g
- Carbohydrates: 26g
- Sugar: 14g
- Protein: 1g
These are made with simple ingredients, so there are no artificial colors or preservatives (unless you add food coloring). The butter provides a small amount of vitamin A, and the cereal is fortified with iron and B vitamins. The chocolate chips add a tiny bit of antioxidants from the cocoa. Is it a superfood? No. But for a Halloween treat that brings so much joy, I think it’s a fair trade-off.
If you’re watching sugar intake, you can use a sugar-free marshmallow alternative, but the texture will be different. I’ve tried it, and honestly, it’s not the same. For an occasional holiday treat, I say go for the real thing. Balance is key, right?
Potential allergens: This recipe contains dairy (butter) and may contain gluten depending on the cereal you choose. The chocolate chips may contain soy. Always check labels if you’re serving to someone with allergies.
Conclusion
So there you have it—Easy Halloween Rice Krispie Ghosts that saved my reputation at a school party and have been saving me ever since. They’re quick, they’re cheap, and they’re absolutely adorable in that imperfect, homemade way. I love that this recipe lets me be a fun mom without spending hours in the kitchen. I love that my kids can help. And I love that every single time I make them, someone asks for the recipe.
My challenge to you? Make these for your next Halloween gathering. Don’t stress about perfection. Let the ghosts be lopsided. Let the eyes be a little crooked. That’s where the charm lives. And when someone asks how you made them, just smile and say, “Oh, it’s nothing.” Because honestly? It kind of is.
If you try these, I’d love to hear about it. Drop a comment below, share a photo on Pinterest, or tag me in your post. And if you’ve got your own twist on these ghosts—maybe you add sprinkles or use white chocolate—tell me about that too. Happy Halloween, and happy snacking!
Frequently Asked Questions
Can I make these ghosts ahead of time?
Yes! You can make them up to 2 days in advance. Store them in an airtight container at room temperature. For best texture, add a slice of bread to the container to keep them soft.
My ghosts are too hard. What went wrong?
This usually happens if you overheated the marshmallows or pressed the mixture too firmly into the pan. Next time, use low heat and a gentle hand when pressing. You want them compact, not compressed.
Can I use a different cereal?
Absolutely. You can use any crispy rice cereal, though the texture may vary slightly. Cocoa Krispies make for a fun chocolate version, and Fruity Pebbles give a colorful twist. Just adjust the sweetness accordingly.
How do I get the chocolate chips to stay in place?
Press them in while the treat is still warm. If the mixture has cooled, dip the chocolate chip in a tiny bit of melted chocolate or frosting before pressing. It acts like glue.
Can I freeze these ghosts?
Yes! Freeze them in a single layer on a baking sheet, then transfer to a freezer bag. They’ll keep for up to 3 months. Thaw at room temperature for about 20 minutes before serving.
Pin This Recipe!
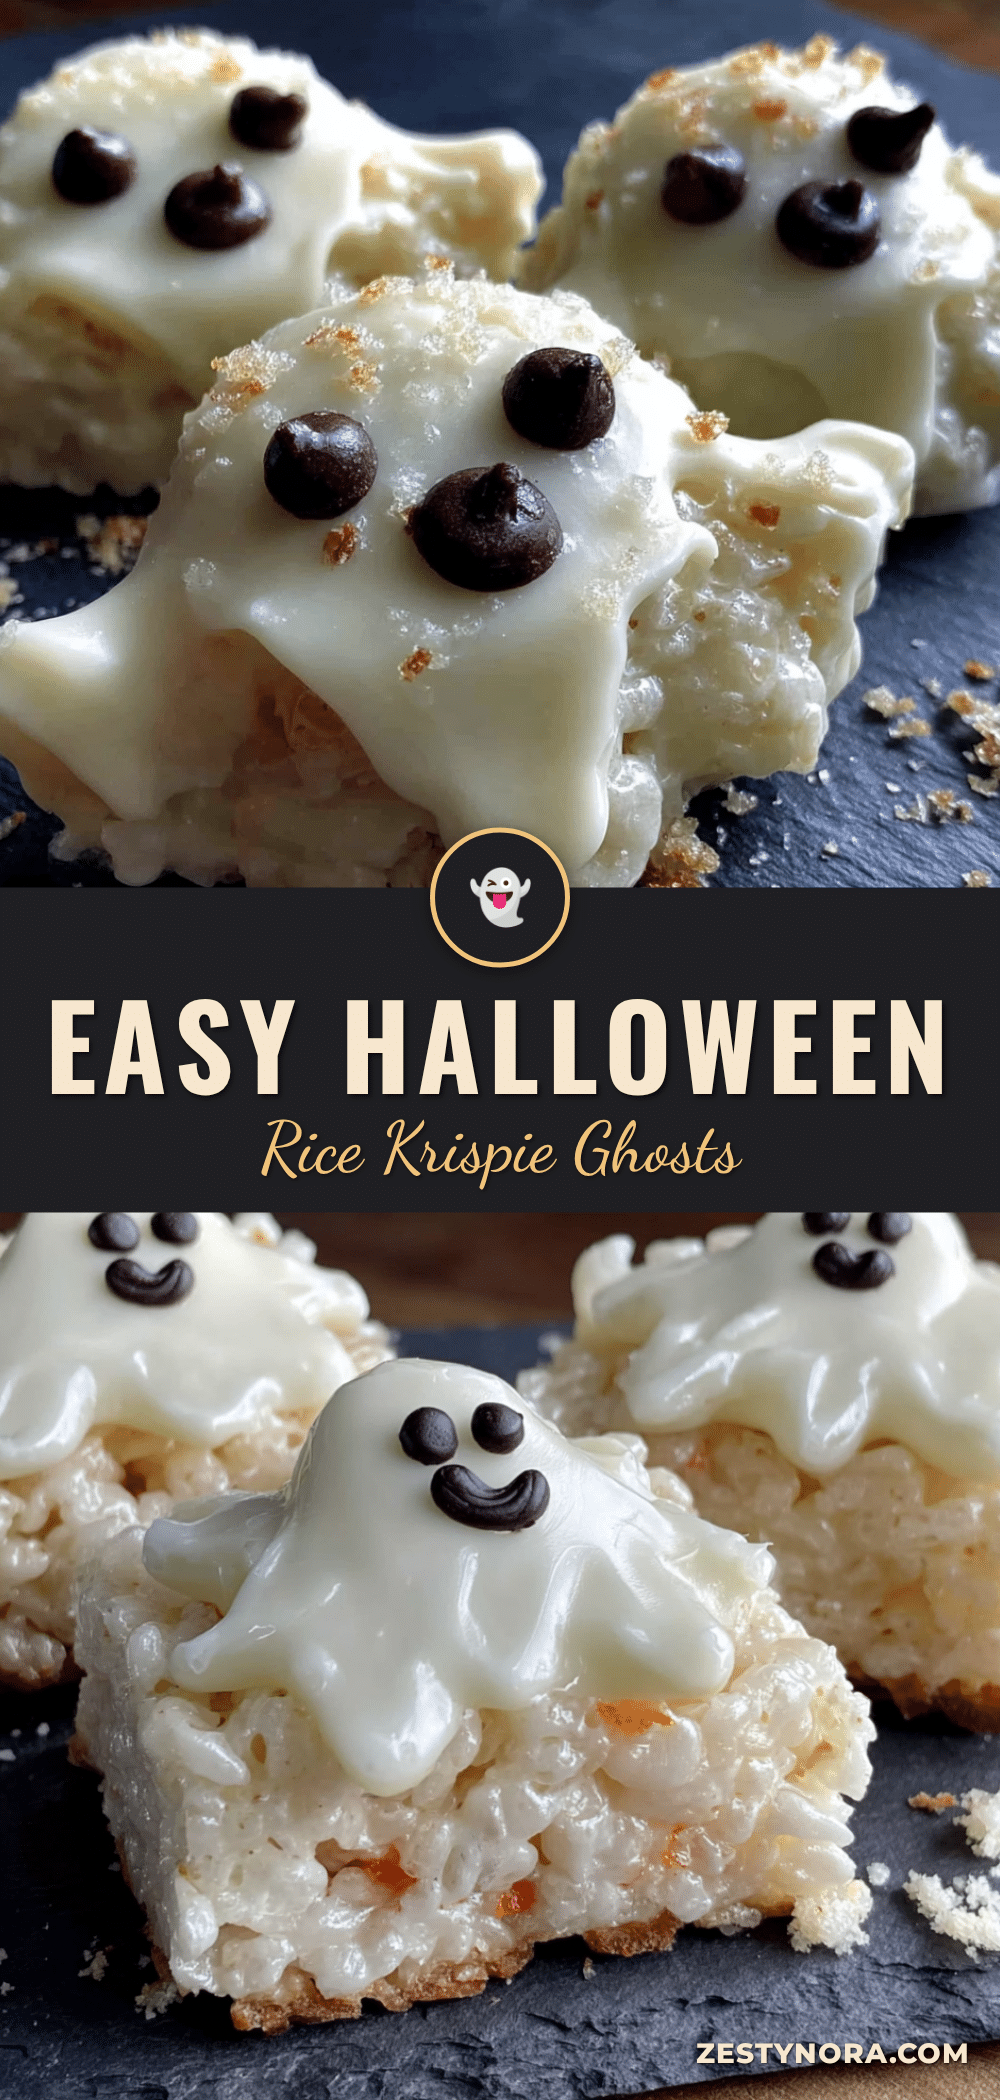
Easy Halloween Rice Krispie Ghosts
Quick and easy Halloween Rice Krispie treats shaped like ghosts with chocolate chip eyes. Perfect for last-minute school parties or spooky gatherings, these no-bake treats are soft, chewy, and budget-friendly.
- Prep Time: 10 minutes
- Cook Time: 10 minutes
- Total Time: 20 minutes
- Yield: 12-15 ghosts 1x
- Category: Dessert
- Cuisine: American
Ingredients
- 3 tablespoons unsalted butter
- 1 package (10 ounces) regular marshmallows (about 40 large marshmallows)
- 6 cups Rice Krispies cereal
- 1/2 cup mini chocolate chips
- Optional: 1/4 teaspoon vanilla extract
- Optional: A pinch of salt
Instructions
- Prepare your pan. Line a 9×13-inch baking pan with parchment paper, leaving some overhang on the sides. Lightly grease the parchment with a little butter or non-stick spray. Set aside.
- Melt the butter. In a large saucepan over low heat, melt the 3 tablespoons of butter. Don’t rush this—medium heat can burn the butter. You want it just melted, not sizzling. Swirl the pan a bit to coat the bottom.
- Add the marshmallows. Pour in the entire bag of marshmallows. Stir constantly with your wooden spoon or spatula. The marshmallows will start to puff up and then collapse into a gooey puddle. This takes about 5 minutes. Keep stirring—don’t walk away. If you stop, the marshmallows can scorch on the bottom.
- Add the vanilla and salt (optional). Once the marshmallows are completely melted and smooth, remove the pan from the heat. Stir in the vanilla and salt if you’re using them.
- Mix in the cereal. Add the 6 cups of Rice Krispies all at once. Fold gently until the cereal is evenly coated. Don’t overmix, or the cereal will crush and your ghosts will be dense. You want some whole puffs visible.
- Press into the pan. Scrape the mixture into the prepared pan. Using a piece of wax paper or parchment (lightly greased), press the mixture into an even layer. Press firmly but not too hard—you want them compact enough to hold shape, but not so tight that they turn into bricks.
- Cool slightly. Let the treats cool in the pan for about 10-15 minutes. They need to be firm enough to cut but still warm enough to be pliable. If they cool completely, they’ll crack when you try to cut them.
- Cut the ghosts. Lift the treats out of the pan using the parchment overhang. Place on a cutting board. Use your ghost-shaped cookie cutter to press down firmly and cleanly. Wiggle it slightly to release. If the cutter sticks, dip it in a little powdered sugar or spray it with non-stick spray. Repeat until you’ve cut out as many ghosts as possible. You’ll get about 12-15 ghosts, depending on the size of your cutter.
- Add the eyes. While the ghosts are still slightly warm, press two mini chocolate chips into each one for eyes. Press them in gently but firmly—they’ll sink in a little and stay put as the treat cools. If the treats have cooled too much, the chips won’t stick. In that case, dab a tiny bit of melted chocolate or frosting on the back of each chip.
- Let them set completely. Place the finished ghosts on a wire rack or a plate. Let them cool fully for about 30 minutes. The chocolate chips will set, and the treats will firm up to that perfect chewy texture.
Notes
Don’t overheat the marshmallows—low and slow is key. Use a light hand when pressing the mixture into the pan for soft, chewy ghosts. If the mixture hardens while cutting, microwave the slab for 10 seconds to soften. These are best within 24 hours. For storage, keep in an airtight container at room temperature for up to 3 days. Add a slice of bread to the container to maintain softness in humid climates. Can be frozen for up to 3 months.
Nutrition
- Serving Size: 1 ghost
- Calories: 150
- Sugar: 14
- Sodium: 115
- Fat: 5
- Saturated Fat: 3
- Carbohydrates: 26
- Protein: 1
Keywords: Halloween treats, Rice Krispie treats, ghost treats, no-bake desserts, easy Halloween recipes, kid-friendly Halloween, spooky snacks


