I was at the hardware store last October, of all places, picking up a new paint scraper. I wasn’t expecting baking advice from the guy behind the counter, a man named Jerry who looked like he hadn’t smiled since the 80s, but there I was, waiting for my change, listening to him describe exactly how to make these witch finger pretzel rods. He said his granddaughter made them every year and they were “the only reason Halloween existed.” I laughed, paid for my scraper, and honestly, I forgot about it until I was staring down a bag of pretzel rods at the grocery store a week later. It felt like a sign. I grabbed the white chocolate, too, and let me tell you, Jerry might be the grumpiest man alive, but he was onto something magical. The whole thing came together in my messy kitchen on a rainy Tuesday, with almond slivers flying everywhere, and I knew I had to share it. Maybe you’ve been there, hunting for a Halloween treat that isn’t just another sugar cookie. These are it.
Why You’ll Love This Recipe
Let’s be real for a second. Halloween treats can be a total hassle. You spend hours on a cake that looks like a monster, and it’s dry by the time the kids come home. These witch finger pretzel rods are the opposite of that. They are ridiculously easy, unbelievably cute, and they taste like a cozy autumn afternoon. I’ve tested these with my own two hands, and I can tell you, they are a crowd-pleaser every single time.
- Quick & Easy: From start to finish, you’re looking at about 30 minutes of active work. Perfect for a last-minute party or a fun Friday night activity with the kids.
- Simple Ingredients: You only need four things: pretzel rods, white chocolate, almonds, and a little green food coloring. No fancy grocery trips required.
- Perfect for Halloween: These are the star of any spooky spread. They look gross in the best way, but they taste like a sweet, salty, crunchy dream.
- Crowd-Pleaser: I’ve seen adults sneak these into their pockets at parties. The salty-sweet combo is just impossible to resist.
- Unbelievably Delicious: The crunch of the pretzel, the creamy white chocolate, and the nutty almond “fingernail” come together for a texture and flavor that is next-level comfort food.
This recipe is different because it uses a simple trick to get that perfect “knuckle” texture without any fancy molds. It’s not just another version of a dipped pretzel; it’s the best version. Honestly, it is the kind of treat that makes you close your eyes after the first bite. It’s comfort food with a spooky twist—fast, simple, but with the same soul-soothing satisfaction of a cozy night in.
What Ingredients You Will Need
This recipe uses simple, wholesome ingredients to deliver that perfect Halloween vibe without any stress. You probably have most of these in your pantry right now.
For the Pretzel Rods
- Pretzel rods, 12-14 count: These are the “fingers.” Look for thick, sturdy rods that won’t break easily when you dip them. I like the Synder’s of Hanover brand for their consistent crunch.
- White chocolate melting wafers, 12 ounces: These melt smoother than white chocolate chips, which can seize up. If you use chips, add a teaspoon of coconut oil to keep them fluid. (Use dairy-free wafers if needed).
- Sliced almonds, about 1/2 cup: These become the creepy fingernails. Go for the “raw” or “natural” sliced almonds for the best shape. You want them to be flat and wide, not slivered.
- Green gel food coloring: A touch of this gives the white chocolate that sickly, witchy hue. Use a gel or paste, not liquid, so you don’t thin out the chocolate.
For the “Blood” Drizzle

- Red candy melts or red chocolate, 1/4 cup: This is optional, but it adds a fantastic “fresh from the cauldron” look. You can also use a simple strawberry glaze.
I recommend using a good quality white chocolate for the best flavor and texture. The cheap stuff can taste waxy. For a fun twist, you can add a drop of peppermint extract to the white chocolate for a cool, minty “witch’s brew” flavor. If you are making these for a nut-free school event, you can skip the almonds and use a small dot of red icing for the nail bed instead.
Equipment Needed
You don’t need a fancy kitchen for this one. Just a few basic tools will get the job done.
- Baking sheet: To hold your pretzel rods while they set. Line it with parchment paper or a silicone baking mat for easy cleanup.
- Microwave-safe bowl or double boiler: For melting the white chocolate. I prefer a glass bowl in the microwave, but a double boiler gives you more control.
- Spatula or spoon: For stirring the chocolate and dipping the pretzels. A small offset spatula is great for spreading.
- Small piping bag or zip-top bag: For drizzling the red “blood” on top. A zip-top bag with a tiny corner snipped off works perfectly.
If you don’t have a microwave, you can melt the chocolate in a heatproof bowl set over a pot of simmering water. Just make sure the bowl doesn’t touch the water. For a budget-friendly option, use a simple butter knife to spread the chocolate instead of a spatula. I’ve done it before, and it works just fine.
Preparation Method
Alright, let’s get spooky. This is where the magic happens. Take your time, and don’t worry if your first finger looks a little wonky. That’s part of the charm.
- Set up your workspace: Line a large baking sheet with parchment paper. This is where your finished witch fingers will go to set. Make sure you have enough space to work without knocking things over.
- Melt the white chocolate: Place the white chocolate melting wafers in a microwave-safe bowl. Microwave in 30-second intervals, stirring well after each, until completely smooth. It usually takes about 1.5 to 2 minutes total. Be careful not to overheat it, or it will seize up into a clumpy mess. I’ve done it, and it’s not fun.
- Add the witchy color: Once the chocolate is smooth, stir in a small amount of green gel food coloring. Start with a tiny dab on a toothpick. Mix it in well. You want a pale, sickly green, not a neon bright. Add more if needed, but go slow. The color will look lighter once it’s on the pretzel.
- Dip the pretzels: Hold a pretzel rod by one end. Dip the other end into the green white chocolate, twisting it gently to coat about two-thirds of the rod. Let the excess chocolate drip back into the bowl. You want a nice, even coat, but it doesn’t have to be perfect. Place the coated pretzel on the prepared baking sheet.
- Create the knuckles: This is the trick. While the chocolate is still wet, use a toothpick or the tip of a small knife to gently drag three or four lines across the chocolate-covered part of the pretzel. These lines create the “knuckles” of the witch finger. Don’t press too hard; you just want to create a slight indentation. Repeat for each pretzel.
- Attach the fingernails: Working one at a time, take a sliced almond and gently press it onto the tip of the coated pretzel. The pointed end of the almond should face outward, like a fingernail. Press it down slightly so it sticks. Repeat for all the pretzels.
- Set the fingers: Let the pretzels sit at room temperature until the chocolate is completely set. This takes about 15-20 minutes. If you are in a hurry, you can pop the baking sheet in the fridge for 10 minutes.
- Add the “blood” (optional): Once the green chocolate is firm, melt the red candy melts in a small bowl. Spoon it into a small piping bag or a zip-top bag with a tiny corner snipped off. Drizzle a small amount of red chocolate over the “cuticle” area of the almond fingernail, letting it drip down slightly. This gives the illusion of a fresh cut. Let this set for another 10 minutes.
Your kitchen is going to smell like a candy shop. The pretzels will look perfectly creepy, and you will feel like a Halloween wizard.
Cooking Tips & Techniques
I have made a lot of mistakes in the kitchen, and I am happy to share them so you don’t have to. Here are the things I learned the hard way.
- Don’t overheat the chocolate: This is the number one rule. White chocolate is sensitive. If it gets too hot, it will turn into a grainy, stiff paste. If that happens, you can try stirring in a teaspoon of vegetable shortening or coconut oil to bring it back, but it is often easier to just start over. Low and slow is the way to go.
- Work in small batches: Don’t dip all your pretzels at once. The chocolate will start to set, and you will be rushing to get the knuckles and nails on. Dip 3-4 pretzels at a time, add the knuckle lines and the almond, and then move on to the next batch. It keeps the process calm and controlled.
- Use a toothpick for fine details: A toothpick is your best friend for this recipe. It is perfect for dragging those knuckle lines and for placing the almond in the exact spot you want it. It gives you much more control than a spoon or a knife.
- Keep the almonds dry: If your almonds are damp or oily, they won’t stick to the chocolate. Make sure they are at room temperature and dry. You can even toast them lightly for a deeper flavor, but let them cool completely before using.
- Multitasking strategy: While the chocolate is melting, you can line your baking sheet and lay out your pretzel rods and almonds. This way, when the chocolate is ready, you can just focus on dipping and decorating.
I once forgot to add the knuckle lines before the chocolate set. I ended up with a batch of very smooth, very boring witch fingers. I learned my lesson. Work fast, but work smart.
Variations & Adaptations
This recipe is a fantastic base for your own creepy creations. Here are a few ways I have played around with it.
- Bloody Zombie Fingers: Skip the green food coloring and leave the white chocolate plain. Use a generous amount of red “blood” drizzle over the entire tip of the pretzel, making it look like a fresh, gory wound. It is a great alternative if you don’t like the idea of green food.
- Dark Chocolate Witches: Use dark chocolate or milk chocolate instead of white chocolate. The dark chocolate gives a more “earthy,” witchy vibe. You can still use the green food coloring, but it will turn a murky, swampy color, which is honestly even cooler. Use a white chocolate drizzle for the “blood” for a high-contrast look.
- Gluten-Free Version: You can easily make these gluten-free by using gluten-free pretzel rods. Most white chocolate is naturally gluten-free, but always check the label. The rest of the recipe stays exactly the same.
- Peppermint Spell: Add 1/4 teaspoon of peppermint extract to the melted white chocolate along with the green color. It gives the pretzels a cool, minty flavor that contrasts beautifully with the salty pretzel. It tastes like a Halloween candy cane.
I tried a version with a pinch of cayenne pepper in the chocolate for a spicy kick. It was… interesting. Not my best work, but if you like sweet and heat, give it a shot.
Serving & Storage Suggestions
These witch finger pretzels are best served at room temperature. The chocolate is firm but not hard, and the pretzel is perfectly crunchy.
- Presentation: Arrange them on a platter standing up in a small jar or a mug for a truly creepy hand-in-a-jar effect. You can also lay them out on a black plate with some fake cobwebs and plastic spiders around them. It makes for a fantastic centerpiece.
- Complementary Dishes: Serve these alongside a bowl of warm caramel dip or a spicy Halloween popcorn mix for a sweet and salty snack board. They also pair wonderfully with a mug of hot apple cider or a creamy pumpkin latte.
- Storage: Store the finished pretzels in an airtight container at room temperature. Do not refrigerate them, as the moisture can cause the chocolate to “bloom” or get a white, dusty look. They will stay fresh for up to 5 days.
- Freezing: You can freeze these for up to 2 months. Place them in a single layer in a freezer-safe container, with parchment paper between the layers. Thaw them at room temperature for about 30 minutes before serving. The texture is still great.
The flavors actually develop a bit over time. The salt from the pretzel seems to mellow into the chocolate, making them taste even better on day two.
Nutritional Information & Benefits
Let’s be honest, these are a treat. But a little knowledge is always helpful.
- Estimated per serving (1 rod): Calories: 180, Fat: 9g, Carbohydrates: 22g, Sugar: 14g, Protein: 3g, Sodium: 200mg.
- Health Benefits: The almonds provide a small dose of healthy fats, vitamin E, and magnesium. The pretzel offers a quick source of energy. It’s not a health food, but it’s a fun snack that can be part of a balanced diet when enjoyed in moderation.
- Dietary Considerations: This recipe is naturally egg-free. To make it dairy-free, use dairy-free white chocolate and candy melts. To make it gluten-free, use gluten-free pretzel rods. It is not suitable for a low-carb diet due to the pretzel and chocolate.
- Potential Allergens: Contains dairy (white chocolate) and tree nuts (almonds). May contain traces of peanuts and soy depending on the brands used.
I always think of these as a “fun first” kind of recipe. They are for making memories, not for hitting your macros. And that is perfectly okay.
Conclusion
These witch finger pretzel rods are exactly what a Halloween treat should be: spooky, fun, and completely delicious. They are so easy to make that you can whip up a batch even on the busiest October weeknight. I love this recipe because it reminds me that the best things in life are often the simplest. A salty pretzel, some sweet chocolate, and a little bit of imagination. That is all you need.
I really hope you give these a try. Don’t be afraid to make them your own. Use dark chocolate, add some sprinkles, or skip the almonds if you want. The most important thing is to have fun with it. If you make them, I would love to hear how they turned out. Drop a comment below and tell me about your spooky creations. Share a photo with your friends, and let’s make this Halloween a little more delicious, together.
Frequently Asked Questions
Can I use white chocolate chips instead of melting wafers?
Yes, you can, but you need to be careful. White chocolate chips contain stabilizers that make them harder to melt smoothly. Add 1 teaspoon of coconut oil or vegetable shortening to the chips before melting to help them stay fluid. Stir constantly and use low heat.
My chocolate seized up and became clumpy. What happened?
This usually happens when the chocolate gets too hot or if a tiny amount of water gets into the bowl. Make sure all your tools are completely dry. If it seizes, you can try stirring in a tablespoon of warm cream or coconut oil, but it is often easier to start fresh with a new batch of chocolate.
How far in advance can I make these for a party?
You can make them up to 3 days in advance. Store them in an airtight container at room temperature. Do not refrigerate them, as the chocolate can develop a white “bloom.” If you need to make them earlier, you can freeze them for up to 2 months.
Can I use a different nut for the fingernails?
Absolutely. If you don’t have sliced almonds or have a nut allergy, you can use a small piece of a cashew or a sunflower seed. For a nut-free version, you can use a small dollop of red icing or a candy corn to create the nail shape.
How do I get the green color to look right?
Use a gel or paste food coloring, not a liquid one. Liquid coloring will thin out your chocolate. Start with a tiny amount on a toothpick and stir it in. You want a pale, sickly green, not a bright neon. The color will look a bit lighter once it sets on the pretzel.
Pin This Recipe!
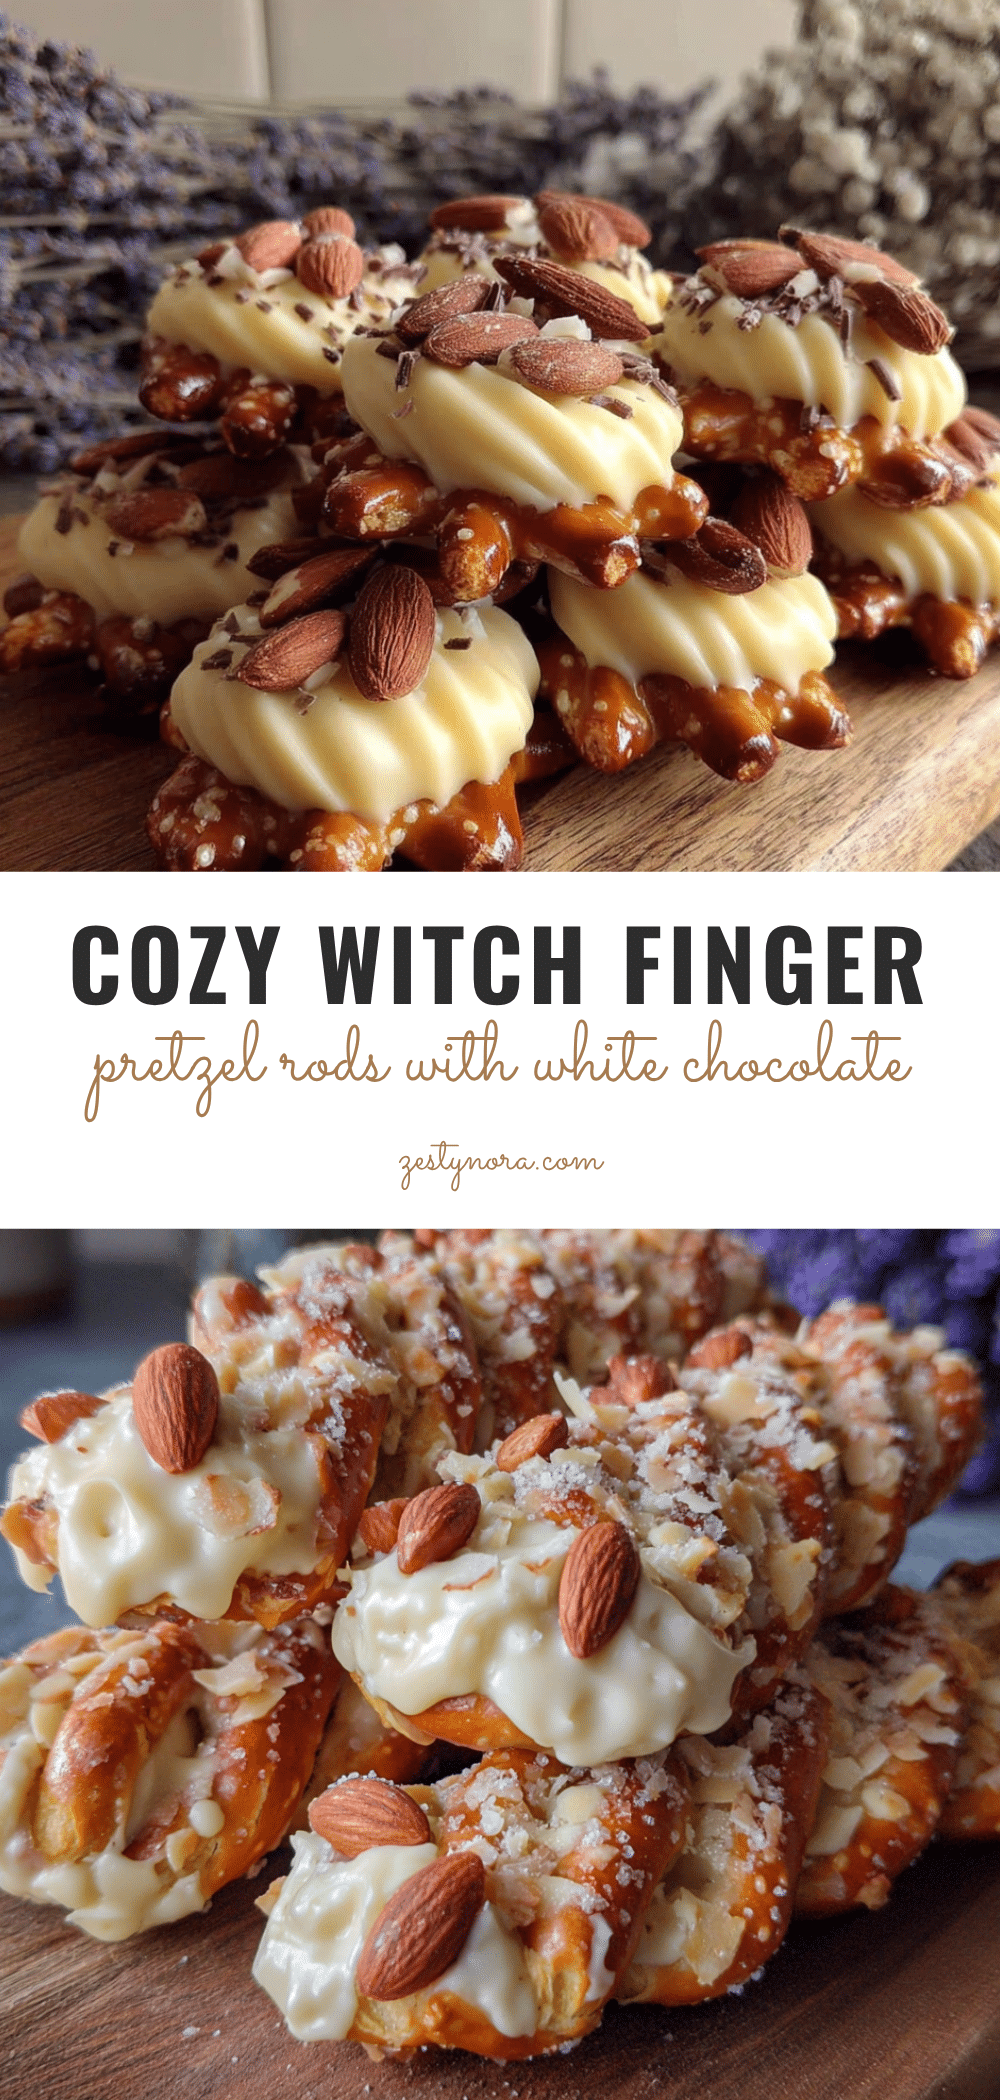
Spooky Witch Finger Pretzel Rods with White Chocolate
These witch finger pretzel rods are ridiculously easy, unbelievably cute, and taste like a cozy autumn afternoon. They are the perfect Halloween treat that looks gross in the best way but tastes like a sweet, salty, crunchy dream.
- Prep Time: 15 minutes
- Cook Time: 5 minutes
- Total Time: 30 minutes (active) + 20 minutes setting time
- Yield: 12-14 servings 1x
- Category: Dessert
- Cuisine: American
Ingredients
- 12–14 pretzel rods (thick and sturdy, like Snyder’s of Hanover)
- 12 ounces white chocolate melting wafers (or white chocolate chips with 1 tsp coconut oil)
- 1/2 cup sliced almonds (raw or natural, flat and wide)
- Green gel food coloring (a small amount)
- 1/4 cup red candy melts or red chocolate (optional, for ‘blood’ drizzle)
Instructions
- Line a large baking sheet with parchment paper.
- Place white chocolate melting wafers in a microwave-safe bowl. Microwave in 30-second intervals, stirring well after each, until completely smooth (about 1.5 to 2 minutes total). Do not overheat.
- Stir in a small amount of green gel food coloring until you achieve a pale, sickly green color. Start with a tiny dab on a toothpick and add more if needed.
- Hold a pretzel rod by one end. Dip the other end into the green white chocolate, twisting gently to coat about two-thirds of the rod. Let excess drip back into the bowl. Place on the prepared baking sheet.
- While the chocolate is still wet, use a toothpick or the tip of a small knife to gently drag three or four lines across the chocolate-covered part to create ‘knuckles.’ Do not press too hard.
- Working one at a time, press a sliced almond onto the tip of the coated pretzel, pointed end outward, to create a fingernail. Repeat for all pretzels.
- Let the pretzels sit at room temperature until the chocolate is completely set (about 15-20 minutes). For faster setting, refrigerate for 10 minutes.
- If using, melt red candy melts in a small bowl. Spoon into a small piping bag or zip-top bag with a tiny corner snipped off. Drizzle a small amount over the ‘cuticle’ area of the almond fingernail, letting it drip slightly. Let set for another 10 minutes.
Notes
Do not overheat white chocolate; it can seize. Work in small batches to keep chocolate fluid. Use gel food coloring, not liquid, to avoid thinning the chocolate. Keep almonds dry for better adhesion. Store in an airtight container at room temperature for up to 5 days; do not refrigerate. Freeze for up to 2 months.
Nutrition
- Serving Size: 1 pretzel rod
- Calories: 180
- Sugar: 14
- Sodium: 200
- Fat: 9
- Saturated Fat: 5
- Carbohydrates: 22
- Fiber: 1
- Protein: 3
Keywords: Halloween treats, witch finger pretzels, white chocolate pretzels, spooky snacks, easy Halloween recipe, pretzel rods, white chocolate, almonds, Halloween party food


