I was standing in the produce aisle last Tuesday, honestly just trying to grab a bag of apples for my daughter’s lunch, when this deep, almost nutty smell drifted over from somewhere. It wasn’t the produce section at all—it was the little rotisserie chicken station, but for one second, my brain went somewhere else entirely. I was eight years old, sitting on a counter stool at my aunt Maggie’s farmhouse, watching her slide a baking dish into the oven. She’d always say, “The secret’s in the browning, kiddo. Don’t rush it.” And I’d watch the butter foam and turn amber in the pan while she chopped sage from her garden. That smell—brown butter and earthy sage—hung in her whole kitchen like a warm blanket. She passed away five years ago, and I still can’t walk past fresh sage without stopping to rub a leaf between my fingers.
So that’s how this recipe happened. I got home, put the apples away, and just stood there in my own kitchen feeling that little ache. You know the one—where you miss someone so much you can almost taste them. I had a honeynut squash sitting on the counter, a little wrinkled but still good, and a stick of butter in the fridge. I figured, why not try to chase that feeling? Let me tell you, the first time I made this cozy brown butter honeynut squash with crispy sage, I actually teared up a little. It wasn’t perfect—I burned the first batch of sage leaves, and the squash was cut unevenly—but that smell, that color, that first bite of caramelized squash with nutty brown butter and crackly sage? I was back in that farmhouse. And honestly, that’s why I keep making it. Not because it’s fancy or complicated, but because it brings someone back to me, one amber-colored bite at a time.
Why You’ll Love This Recipe
I’ve tested this recipe about seven times now, and I can tell you with confidence: this is the one. It’s the kind of side dish that steals the show at Thanksgiving but is simple enough for a random Tuesday when you just need something that feels like a hug on a plate. Here’s why you’re going to love it:
- Quick & Easy: This comes together in about 45 minutes, with only 10 minutes of active prep. Perfect for busy weeknights when you want something that tastes like you spent hours in the kitchen.
- Simple Ingredients: You only need five main ingredients. No weird grocery store hunts for obscure spices or expensive specialty oils.
- Perfect for Fall Gatherings: This dish is a showstopper at Friendsgiving, holiday dinners, or cozy Sunday suppers. It looks impressive but requires almost zero effort.
- Crowd-Pleaser: I’ve served this to my picky-eater nephew and my food-snob neighbor, and both went back for seconds. It’s sweet, savory, and utterly addictive.
- Unbelievably Delicious: The magic is in the brown butter—it transforms simple roasted squash into something deeply nutty, caramelized, and almost butterscotch-like. The crispy sage adds this incredible texture and earthy pop that makes every bite interesting.
What makes this recipe different from every other roasted squash out there? It’s the technique. Most recipes just toss squash in oil and roast it. But browning the butter first changes everything. It adds a toasty, almost hazelnut flavor that you just can’t get any other way. And frying the sage leaves in that same butter until they’re paper-thin and crispy? That’s the kind of detail that turns a simple vegetable into a conversation piece. This isn’t just another roasted squash recipe—it’s your new go-to for when you want to feel like a kitchen genius with minimal effort.
What Ingredients You Will Need
This recipe uses simple, wholesome ingredients to deliver that deep, cozy flavor. Most of these are probably already in your kitchen, which is exactly how I like to cook. Let’s break down what you’ll need and why each ingredient matters.
- Honeynut squash (2 medium, about 1.5 pounds total): These little guys are like butternut squash’s sweeter, more concentrated cousin. They’re smaller, have thinner skin (no peeling required—hallelujah), and their flesh is naturally denser and sweeter. Look for ones that feel heavy for their size with firm, unblemished skin. If you can’t find honeynut, you can use butternut squash cut into smaller chunks, but you’ll want to peel it first.
- Unsalted butter (4 tablespoons, ½ stick): This is the star of the show. I use unsalted so I can control the salt level. The butter gets browned, which means you’re cooking it until the milk solids turn golden and nutty. It’s a total game-changer. I recommend using a good-quality butter like Kerrygold or Plugrà for the richest flavor—trust me, you’ll taste the difference.
- Fresh sage leaves (12-15 leaves): Don’t even think about using dried sage here. Fresh sage is essential for that crispy, crackly texture and that earthy, slightly peppery flavor that pairs so perfectly with brown butter. Look for leaves that are bright green and not wilted. If you have a garden, sage is ridiculously easy to grow, and having it on hand means you’ll make this recipe way more often.
- Maple syrup (1 tablespoon, pure): Just a touch to enhance the natural sweetness of the squash. Use real maple syrup, not pancake syrup. The grade doesn’t matter much here—I use whatever I have, usually Grade A amber. It adds a subtle woodsy sweetness that rounds out the nutty brown butter beautifully.
- Kosher salt (½ teaspoon, plus more for finishing): I use Diamond Crystal kosher salt because it’s less salty by volume than Morton’s, so it’s harder to over-salt. If you’re using Morton’s, cut the amount by about half. Good salt is non-negotiable here—it makes the squash caramelize better and balances the sweetness.
- Black pepper (¼ teaspoon, freshly ground): Freshly ground pepper adds a gentle warmth and a tiny bit of heat that cuts through the richness of the butter. Don’t skip it—it really does make a difference.
- Optional garnish: Flaky sea salt (like Maldon): This is my little secret for making the dish look and taste restaurant-quality. A pinch of flaky salt right before serving adds little bursts of salinity that make the sweet squash and nutty butter sing.
Ingredient Selection Tips: When choosing honeynut squash, look for ones that are about the size of a large avocado. They should feel dense and heavy. If you squeeze them gently, they should be firm, not soft. Store them in a cool, dark place for up to two weeks. For the sage, if your grocery store has it in those little plastic clamshells, try to find one where the leaves look vibrant and not bruised. You can also buy a live sage plant at most grocery stores for the same price and have fresh sage all season long.
Equipment Needed
You don’t need a lot of fancy gear for this recipe, which is part of why I love it. Here’s what you’ll need:
- Rimmed baking sheet (half-sheet pan): A sturdy, rimmed baking sheet is essential for even roasting. I use a Nordic Ware aluminum half-sheet pan—it’s inexpensive, doesn’t warp, and gives you that nice even browning. If you don’t have one, any large rimmed baking sheet will work, just avoid dark nonstick pans as they can cause the squash to brown too quickly.
- Large skillet or sauté pan (10-12 inches): You’ll need this for browning the butter and crisping the sage. A light-colored pan (stainless steel or enameled) is ideal because you can actually see the butter change color. I’ve ruined a batch or two using a dark nonstick pan where I couldn’t tell when the butter was getting too dark.
- Chef’s knife and cutting board: A sharp chef’s knife makes cutting the squash much safer and easier. Honeynut squash is dense, so a dull knife is a recipe for disaster. I use a 8-inch Wüsthof, but any sharp knife will do.
- Parchment paper (optional but recommended): Lining your baking sheet with parchment makes cleanup a breeze and helps prevent the squash from sticking. I use it every time.
- Small bowl: For mixing the maple syrup and salt before tossing with the squash.
- Slotted spoon or tongs: For removing the crispy sage leaves from the hot butter. A slotted spoon works perfectly—just let the excess butter drip back into the pan.
- Measuring spoons: For the maple syrup and salt. Nothing fancy needed.
Budget-Friendly Options: Don’t have a rimmed baking sheet? A regular baking pan with sides will work. No parchment paper? You can lightly grease the pan with a bit of oil. The most important piece of equipment is a pan for browning the butter, and honestly, any skillet will do—just keep a close eye on the color.
Preparation Method
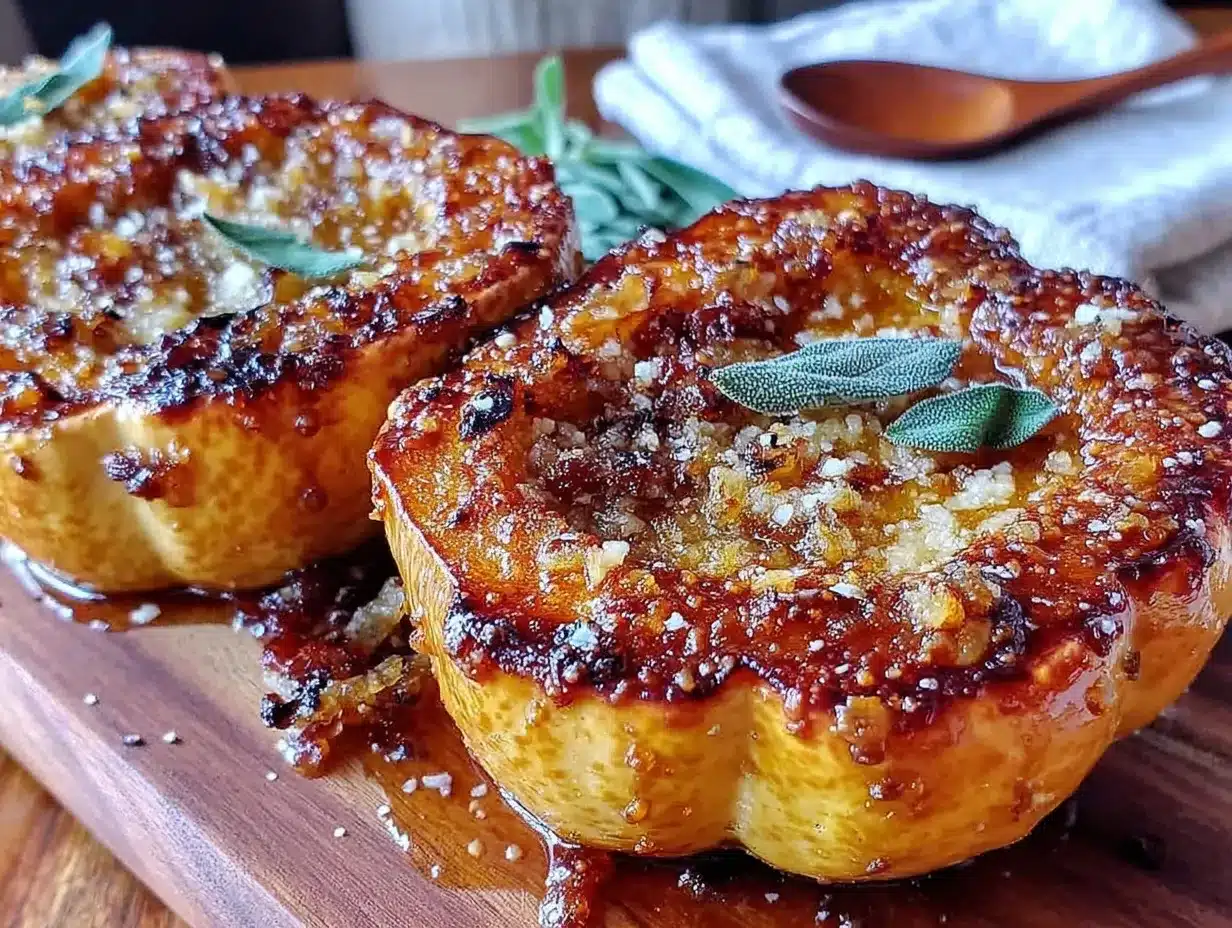
Let’s get cooking. This recipe is straightforward, but there are a few key moments where paying attention makes all the difference. Here’s exactly how to do it.
- Preheat your oven to 400°F (200°C). Position the rack in the middle of the oven. While it’s heating up, line your baking sheet with parchment paper if you’re using it. This gives you a nice clean surface for roasting.
- Prep the squash. Wash the honeynut squash well—remember, we’re not peeling them, so the skin needs to be clean. Using a sharp chef’s knife, carefully cut each squash in half lengthwise. Scoop out the seeds and stringy bits with a spoon. (You can save the seeds and roast them separately if you want—they’re delicious!) Then, cut each half crosswise into ½-inch thick half-moons. Try to keep them roughly the same thickness so they cook evenly. Don’t stress about perfection, but do try to be consistent.
- Season the squash. In a small bowl, whisk together the maple syrup, ½ teaspoon kosher salt, and a few grinds of black pepper. Place the squash slices on the prepared baking sheet. Drizzle the maple mixture over them and use your hands (clean ones!) to toss everything together, making sure each piece gets coated. Spread the squash in a single layer—give them a little space so they roast instead of steam. If they’re crowded, use two sheets.
- Roast the squash. Pop the baking sheet into the preheated oven and roast for 25-30 minutes, flipping the pieces halfway through. You want them to be tender when pierced with a fork and nicely caramelized on the edges. The natural sugars in the squash will concentrate and get a little sticky and golden. Pull them out when they look gorgeous—usually around the 28-minute mark for me.
- Brown the butter while the squash roasts. About 5 minutes before the squash is done, start the brown butter. Place your skillet over medium heat and add the 4 tablespoons of butter. Let it melt completely, then continue cooking, swirling the pan occasionally. The butter will go through a few stages: first it’ll foam up, then the foam will subside, and then you’ll start to see little brown specks forming at the bottom of the pan. This whole process takes about 3-4 minutes. Keep a close eye on it—brown butter can go from perfect to burnt in about 15 seconds. When it smells nutty and the specks are a warm amber color, it’s ready.
- Crisp the sage. As soon as the butter is browned, drop the sage leaves into the hot butter. They’ll sizzle and crisp up almost immediately—about 20-30 seconds. Don’t walk away! Use your slotted spoon or tongs to transfer the crispy sage leaves to a paper towel-lined plate. They’ll crisp up further as they cool. Leave the brown butter in the pan.
- Finish the dish. When the squash is done roasting, transfer it to a serving platter or leave it on the baking sheet if you’re being casual. Drizzle the warm brown butter over the top—use a spatula to scrape every last bit of those toasted milk solids out of the pan. Arrange the crispy sage leaves on top of the squash. Sprinkle with a pinch of flaky sea salt if you have it. Serve immediately while everything is warm and the sage is still crackly.
Pro Tip: If you’re making this for a holiday meal and want to save time, you can roast the squash up to 2 hours ahead and leave it at room temperature. Then just reheat it in a 350°F oven for 5-7 minutes while you brown the butter and crisp the sage fresh. The sage really does need to be made fresh—it loses its crunch quickly.
Cooking Tips & Techniques
I’ve made this recipe enough times to have a few mishaps and a lot of “aha” moments. Here’s what I’ve learned so you don’t have to make the same mistakes.
The biggest mistake I made: The first time I tried this, I added the sage leaves to the butter too early, while it was still just melted and not browned. The sage got soggy and weird, and the butter never properly browned because the sage leaves were in the way, absorbing all the heat. Now I always wait until the butter is fully browned before adding the sage. Patience, people.
Watch the butter like a hawk. I cannot stress this enough. Brown butter happens fast. Once you see those little golden specks forming, you have about 20 seconds before it goes from nutty to burnt. Swirl the pan constantly and trust your nose—when it smells like toasted hazelnuts, you’re there. If you see black specks instead of golden ones, you’ve gone too far. Start over. It’s worth it.
Cut the squash evenly. I know I said this before, but it’s really important. Pieces that are too thin will burn before the thicker pieces are tender. Pieces that are too thick won’t caramelize properly. Aim for ½-inch thick slices, and if some are a little off, just keep an eye on them and pull the smaller ones out early if needed.
Don’t skip the flip. Flipping the squash halfway through roasting ensures even caramelization. If you’re like me and sometimes forget, you’ll end up with squash that’s golden on one side and pale on the other. Still delicious, but not as pretty. Set a timer for 15 minutes—it helps.
Multitasking strategy: Here’s how I time everything so it all comes together at once. Start the squash roasting first. While it’s in the oven, clean up your cutting board and get your butter and sage ready. When the timer goes off to flip the squash, start the brown butter. By the time the butter is browned and the sage is crispy, the squash will be done. It’s a beautiful, synchronized dance of deliciousness.
Variations & Adaptations
One of the things I love about this recipe is how flexible it is. Here are some ways to switch it up based on what you have or who you’re cooking for.
Vegan version: Substitute the butter with a high-quality vegan butter (I like Miyoko’s or Earth Balance) and use coconut oil for crisping the sage. The brown butter flavor won’t be exactly the same, but you’ll still get that nutty, toasty goodness. For the maple syrup, you’re already good—it’s vegan.
Spicy twist: Add a pinch of red pepper flakes to the brown butter right before you drizzle it over the squash. The heat cuts through the sweetness beautifully. I tried this on a whim one night when I wanted something a little more exciting, and now I make it this way half the time. A tiny pinch is all you need—don’t go overboard.
Herb swap: If you don’t have sage or just want to try something different, thyme and rosemary work beautifully here. Use small sprigs of thyme or whole rosemary needles and crisp them in the brown butter the same way you would sage. Rosemary gets especially fragrant and crispy—it’s a lovely variation for winter.
Add some crunch: Toasted pecans or walnuts make a fantastic addition. Just toast a handful of chopped nuts in a dry skillet over medium heat for 3-4 minutes until they smell fragrant, then sprinkle them over the finished dish along with the crispy sage. The nutty flavor plays perfectly with the brown butter.
Make it a meal: This squash is amazing as a side dish, but I’ve also turned it into a full dinner. Serve it over a bed of farro or quinoa with some crumbled goat cheese and a handful of arugula. Drizzle any leftover brown butter over the whole thing as a dressing. It’s hearty, healthy, and absolutely delicious.
Serving & Storage Suggestions
This dish is best served warm, right after you’ve drizzled the brown butter and arranged the crispy sage on top. The contrast between the tender, caramelized squash and the shatteringly crisp sage is pure magic, and that texture window is pretty short—maybe 15-20 minutes. So plan to serve it right away.
What to serve with it: This squash is incredibly versatile. It’s a natural fit alongside roast chicken, pork chops, or a Thanksgiving turkey. I love it with a simple roast chicken and a green salad with a lemony vinaigrette—the brightness of the salad cuts through the richness of the brown butter. For a vegetarian dinner, pair it with a lentil loaf or stuffed acorn squash. It also works beautifully as part of a holiday spread alongside mashed potatoes and green bean casserole.
Storage instructions: If you have leftovers (lucky you!), let the squash cool completely, then transfer it to an airtight container. Store it in the refrigerator for up to 4 days. The crispy sage will lose its crunch, unfortunately, but the squash itself will still be delicious. I actually love leftovers the next day—the flavors meld together, and the squash gets even sweeter.
Reheating: The best way to reheat this is in the oven. Spread the squash on a baking sheet and warm it in a 350°F oven for 5-7 minutes. You can also microwave it in 30-second bursts, but the texture won’t be as nice. If you want to restore some crispiness to the sage, you can quickly fry a few fresh leaves in a little butter—it takes 30 seconds and makes all the difference.
Freezer note: I don’t recommend freezing this dish. The squash will become watery and mushy when thawed, and the brown butter flavor will fade. Make it fresh—it’s so quick, you won’t mind.
Nutritional Information & Benefits
Here’s a rough estimate of the nutritional content per serving (based on 4 servings):
| Nutrient | Amount per Serving |
|---|---|
| Calories | 185 |
| Total Fat | 12g |
| Saturated Fat | 7g |
| Carbohydrates | 20g |
| Fiber | 3g |
| Sugar | 8g |
| Protein | 2g |
| Sodium | 310mg |
| Vitamin A | 180% DV |
| Vitamin C | 25% DV |
Honeynut squash is a nutritional powerhouse. It’s packed with beta-carotene (which your body converts to vitamin A), vitamin C, and fiber. The brown butter adds some saturated fat, but it’s worth it for the flavor and satisfaction—a little goes a long way. This dish is naturally gluten-free and can be made vegan with a simple swap. If you’re watching your sodium, use unsalted butter and go light on the finishing salt. Honestly, this is one of those dishes that feels indulgent but is actually pretty good for you. It’s a win-win in my book.
Conclusion
This cozy brown butter honeynut squash with crispy sage is more than just a side dish—it’s a feeling. It’s the smell of a farmhouse kitchen in autumn. It’s the taste of someone’s love, translated into butter and squash and sage. And the best part? You can make it in under an hour with ingredients you can find at any grocery store.
I really hope you try this recipe. And when you do, don’t be afraid to make it your own. Add a little extra maple syrup if you like things sweeter. Throw in some red pepper flakes if you want heat. Use pecans instead of sage if that’s what you have. The beauty of cooking is that every time you make something, you leave a little bit of yourself in it. That’s what makes it special.
If you make this, I’d love to hear about it. Drop a comment below and tell me how it turned out, or share a photo on Pinterest and tag me. Did you add your own twist? Did it remind you of someone? I want to know. Happy cooking, friends—and don’t rush the butter.
Frequently Asked Questions
Can I use butternut squash instead of honeynut?
Absolutely. Honeynut squash is sweeter and has thinner skin, but butternut works beautifully. Just peel it first and cut it into 1-inch cubes instead of half-moons. You may need to add 5-10 minutes to the roasting time since butternut pieces are typically larger.
Can I make the crispy sage ahead of time?
I don’t recommend it. Crispy sage loses its crunch within an hour or two and becomes chewy. If you’re prepping for a party, roast the squash ahead and reheat it, then make the brown butter and crispy sage fresh right before serving. It takes less than 5 minutes.
Why did my brown butter burn?
It happens to the best of us. Brown butter burns when the milk solids go from golden to black. The key is to keep the heat at medium, not high, and to swirl the pan constantly. Once you see those little golden specks and smell that nutty aroma, pull it off the heat immediately. If you’re nervous, you can even take the pan off the heat a few seconds early—the residual heat will finish the browning.
Is this recipe gluten-free?
Yes, it is naturally gluten-free. There are no flour, grains, or gluten-containing ingredients in this recipe. Just be sure to check your maple syrup label if you have celiac disease—some brands process on shared equipment.
How do I pick a good honeynut squash at the store?
Look for squash that feels heavy for its size—that means it’s dense and full of moisture. The skin should be firm and free of soft spots or mold. A little bit of wrinkling is normal and actually indicates the squash has been stored properly and is nice and sweet. They should be about the size of a large avocado, maybe a little bigger.
Pin This Recipe!
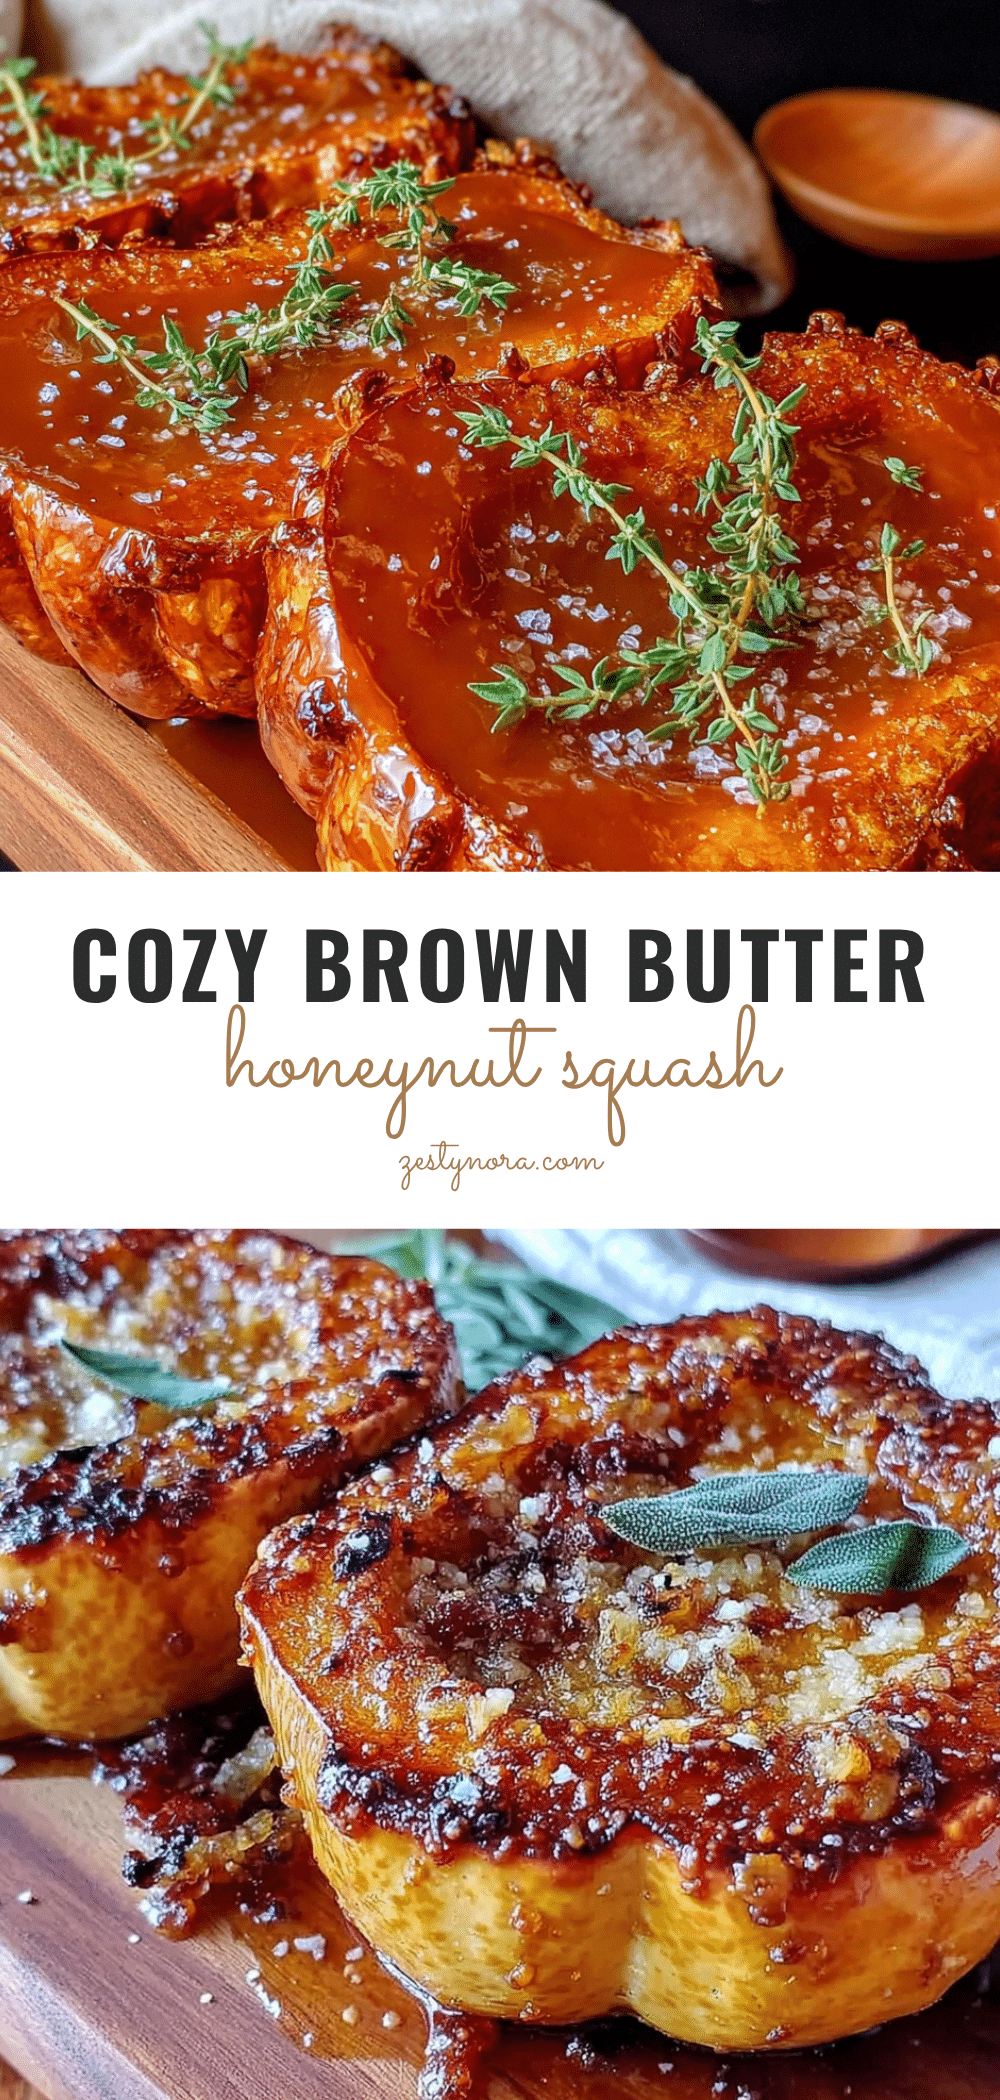
Cozy Brown Butter Honeynut Squash with Crispy Sage

This cozy side dish features roasted honeynut squash drizzled with nutty brown butter and topped with crispy sage leaves. It’s quick, easy, and perfect for fall gatherings.
- Prep Time: 10 minutes
- Cook Time: 35 minutes
- Total Time: 45 minutes
- Yield: 4 servings 1x
- Category: Side Dish
- Cuisine: American
Ingredients
- 2 medium honeynut squash (about 1.5 pounds total)
- 4 tablespoons unsalted butter (½ stick)
- 12–15 fresh sage leaves
- 1 tablespoon pure maple syrup
- ½ teaspoon kosher salt (plus more for finishing)
- ¼ teaspoon freshly ground black pepper
- Flaky sea salt (optional, for garnish)
Instructions
- Preheat your oven to 400°F (200°C). Line a rimmed baking sheet with parchment paper.
- Wash the honeynut squash. Cut each squash in half lengthwise, scoop out seeds and stringy bits, then cut each half crosswise into ½-inch thick half-moons.
- In a small bowl, whisk together maple syrup, ½ teaspoon kosher salt, and black pepper. Place squash slices on the prepared baking sheet, drizzle with the maple mixture, and toss to coat. Spread in a single layer.
- Roast for 25-30 minutes, flipping halfway through, until tender and caramelized.
- About 5 minutes before the squash is done, start the brown butter. Place a skillet over medium heat and add the butter. Cook, swirling occasionally, until the butter foams, the foam subsides, and golden specks appear at the bottom (about 3-4 minutes). Remove from heat immediately.
- Drop the sage leaves into the hot brown butter. They will sizzle and crisp in about 20-30 seconds. Use a slotted spoon to transfer them to a paper towel-lined plate.
- Transfer the roasted squash to a serving platter. Drizzle the warm brown butter over the top, scraping out all the toasted milk solids. Arrange crispy sage leaves on top. Sprinkle with flaky sea salt if desired. Serve immediately.
Notes
For best results, roast the squash up to 2 hours ahead and reheat in a 350°F oven for 5-7 minutes. Make the brown butter and crispy sage fresh just before serving. The crispy sage loses its crunch quickly.
Nutrition
- Serving Size: 1 serving
- Calories: 185
- Sugar: 8
- Sodium: 310
- Fat: 12
- Saturated Fat: 7
- Carbohydrates: 20
- Fiber: 3
- Protein: 2
Keywords: brown butter, honeynut squash, crispy sage, roasted squash, fall side dish, Thanksgiving side


