My friend Jen asked why I couldn’t just use the whole can of pumpkin instead of measuring out exactly one cup. I started to explain why that wouldn’t work—something about moisture ratios and the science of baking. Then I stopped. Honestly, I had no good reason. I’d just always done it that way because that’s what the recipe said. So I dumped the whole 15-ounce can into the bowl, shrugged, and kept mixing. The batter looked a little looser than usual, sure. But I figured, what’s the worst that could happen? A flat loaf? A gummy middle? I’ve had worse baking failures—like that time I confused baking soda with baking powder and made cookies that tasted like metal.
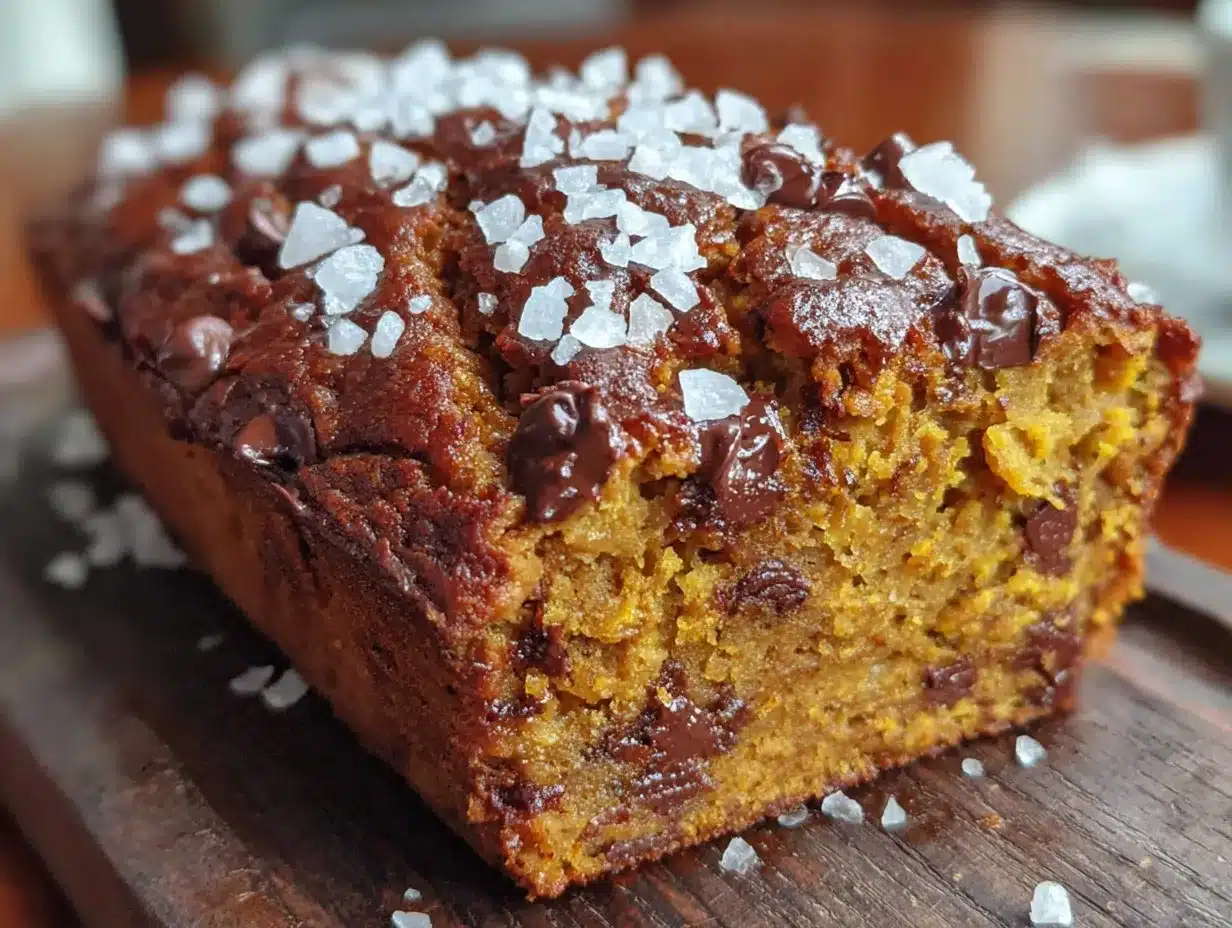
The loaf came out of the oven looking gorgeous. Golden brown, domed perfectly, with chocolate chips peeking through the top like little treasures. I let it cool, sliced into it, and took a bite. And let me tell you, it was the best pumpkin loaf I’d ever made. The extra pumpkin made it incredibly moist without being dense. The chocolate chips melted into little pools of richness. And the flaky sea salt on top? That was Jen’s idea too, by the way. She sprinkled it on before baking and said, “Trust me.” I’m glad I did. Maybe you’ve been there—stuck in a recipe rut, following instructions without questioning them. Sometimes the best thing you can do is listen to the person next to you, even if they’ve never baked a loaf of bread in their life. This loaf taught me that being wrong can taste pretty amazing.
Now I make this Chocolate Chip Pumpkin Loaf every fall, and it never lasts more than two days in my house. It’s the kind of recipe that makes you look like you spent hours in the kitchen when really, it comes together in about fifteen minutes of active work. The hardest part is waiting for it to bake while your whole home smells like cinnamon and cloves. I keep making it because it reminds me that sometimes the best recipes come from breaking the rules—and from having friends who aren’t afraid to challenge you.
Why You’ll Love This Recipe
This isn’t just another pumpkin bread recipe. I’ve tested this loaf at least a dozen times, tweaking the sugar, playing with the spice blend, and yes, using that whole can of pumpkin every single time. Here’s why I think you’ll fall for it too:
- Incredibly Moist: Using the full can of pumpkin gives this loaf a texture that’s almost pudding-like in the center, with a tender crumb that stays fresh for days.
- Perfectly Balanced Flavors: The sweetness of the chocolate chips cuts through the earthy pumpkin, while the sea salt on top adds that savory pop that makes everything more interesting.
- Simple Ingredients: You probably have most of these in your pantry right now. No fancy extracts or hard-to-find spices.
- Great for Hosting: This loaf is a showstopper on any brunch table or dessert spread. Slice it up, arrange it on a wooden board, and watch people go back for seconds.
- Make-Ahead Friendly: You can bake this the night before your gathering. It actually tastes better the next day after the flavors have had time to meld.
- Crowd-Pleaser: I’ve served this to kids, grandparents, and everyone in between. It gets rave reviews every single time.
What makes this recipe different from all the other pumpkin loaves out there? It’s the texture, honestly. Most pumpkin breads are either too dry or too dense. This one hits that sweet spot—light enough to feel like a treat, but hearty enough to be satisfying. And that salt topping? It’s not just for looks. It makes the chocolate taste more chocolatey and the pumpkin more earthy. It’s one of those small tweaks that transforms a good recipe into a great one.
This loaf is the kind of thing you make when you want to impress your guests without spending all day in the kitchen. It feels special—like you put in real effort—but really, you just stirred everything together in one bowl and let the oven do the work. Perfect for a fall dinner party, a Thanksgiving brunch, or honestly, a random Tuesday when you need something cozy.
What Ingredients You Will Need
This recipe relies on simple, pantry-friendly ingredients that work together to create something truly special. Here’s what you’ll need and why each one matters.
- Canned Pumpkin Purée (15 ounces / 425 grams): Use pure pumpkin, not pumpkin pie filling. I prefer Libby’s for its consistent texture and flavor. The whole can goes in—no measuring, no leftovers.
- All-Purpose Flour (1 ¾ cups / 220 grams): Spoon and level your flour for the best results. Scooping directly from the bag can pack in too much flour and make your loaf dry.
- Granulated Sugar (1 cup / 200 grams): Regular white sugar gives the loaf structure and sweetness. You can reduce it to ¾ cup if you prefer a less sweet bread.
- Brown Sugar (½ cup / 100 grams, packed): Light or dark brown sugar works. Dark brown adds more molasses flavor, which pairs beautifully with pumpkin.
- Vegetable Oil (½ cup / 120 ml): Oil keeps this loaf incredibly moist. Canola or avocado oil work too. Melted coconut oil is a good substitute if you prefer.
- Large Eggs (2, at room temperature): Eggs bind everything together and add richness. Let them sit on the counter for 30 minutes before baking for better incorporation.
- Vanilla Extract (2 teaspoons / 10 ml): Pure vanilla adds warmth and depth. Imitation vanilla works in a pinch, but pure is worth the splurge here.
- Baking Soda (1 teaspoon): This is your leavening agent. Make sure it’s fresh—test it by dropping a little into vinegar; it should fizz immediately.
- Baking Powder (½ teaspoon): A little extra lift to keep the loaf from being too dense.
- Salt (½ teaspoon): Salt enhances all the flavors and balances the sweetness.
- Pumpkin Pie Spice (2 teaspoons): You can use store-bought or make your own with 1 teaspoon cinnamon, ½ teaspoon ginger, ¼ teaspoon nutmeg, ¼ teaspoon cloves, and a pinch of allspice.
- Cinnamon (1 teaspoon): Extra cinnamon because pumpkin and cinnamon are best friends.
- Semi-Sweet Chocolate Chips (1 cup / 175 grams): I like Ghirardelli or Guittard for their rich flavor and meltability. Dark chocolate chips work beautifully too.
- Flaky Sea Salt (1 teaspoon, for topping): Maldon or any flaky sea salt. This is non-negotiable—it makes the loaf.
Substitution Notes: For a dairy-free version, this recipe is already dairy-free since it uses oil instead of butter. For a gluten-free option, substitute the all-purpose flour with a good 1:1 gluten-free baking flour blend, like King Arthur’s or Bob’s Red Mill. Add ¼ teaspoon of xanthan gum if your blend doesn’t already include it. You can also swap the chocolate chips for white chocolate or butterscotch chips for a different flavor profile.
Equipment Needed
You don’t need a fancy kitchen to make this loaf. Here’s what you’ll need:
- 9×5-inch Loaf Pan: A standard metal or glass loaf pan works perfectly. If you use a dark non-stick pan, reduce the oven temperature by 25°F to prevent over-browning.
- Large Mixing Bowls: One for dry ingredients, one for wet. I use my grandmother’s old ceramic bowls, but any large bowl will do.
- Whisk: For combining dry ingredients and smoothing out the wet mixture.
- Rubber Spatula: For folding in the chocolate chips and scraping every last bit of batter into the pan.
- Parchment Paper: Lining the pan makes removal a breeze. Leave some overhang on the sides for easy lifting.
- Cooling Rack: A wire rack allows air to circulate around the loaf so it cools evenly and doesn’t get soggy on the bottom.
- Measuring Cups and Spoons: For accurate measurements. I prefer metal measuring cups for dry ingredients and glass for liquids.
If you don’t have a cooling rack, you can use the overturned loaf pan or even a clean dish towel on the counter. Just make sure air can get underneath. And if you don’t have parchment paper, grease the pan thoroughly with butter or oil and dust it with flour—just be prepared for a slightly trickier release.
Preparation Method
Preheat your oven to 350°F (175°C). Position the rack in the center of the oven. Line your 9×5-inch loaf pan with parchment paper, leaving about two inches of overhang on the long sides. This will be your handle later.
Step 1: Combine the Dry Ingredients
In a large bowl, whisk together 1 ¾ cups (220 grams) all-purpose flour, 1 teaspoon baking soda, ½ teaspoon baking powder, ½ teaspoon salt, 2 teaspoons pumpkin pie spice, and 1 teaspoon cinnamon. Whisk for about 20 seconds to ensure everything is evenly distributed. This step aerates the flour and prevents clumps of baking soda from ending up in your final loaf—trust me, nobody wants a bitter bite of baking soda.
Step 2: Mix the Wet Ingredients
In a separate large bowl, combine 1 cup (200 grams) granulated sugar and ½ cup (100 grams) packed brown sugar. Add ½ cup (120 ml) vegetable oil and whisk until smooth. It should look like wet sand. Add 2 large eggs, one at a time, whisking well after each addition. Stir in 2 teaspoons vanilla extract. Now, add the entire 15-ounce can of pumpkin purée—don’t measure, just dump it all in. Whisk until the mixture is completely smooth and uniform. It will be thick and glossy, with a beautiful orange color.
Step 3: Combine Wet and Dry
Pour the wet ingredients into the bowl of dry ingredients. Use a rubber spatula to fold them together gently. Stir until you no longer see streaks of flour, but stop as soon as it comes together. Overmixing will develop the gluten and make your loaf tough. A few small lumps are perfectly fine—they’ll bake out.
Step 4: Fold in the Chocolate Chips
Add 1 cup (175 grams) semi-sweet chocolate chips to the batter. Fold them in with the spatula, using about 10-12 strokes. Reserve about 2 tablespoons of chocolate chips to sprinkle on top of the batter once it’s in the pan—this makes for a prettier finished loaf.
Step 5: Transfer to the Pan
Scrape the batter into your prepared loaf pan. Use the spatula to spread it evenly into the corners. The batter will be thick—almost like a very dense muffin batter. That’s exactly what you want. Sprinkle the reserved chocolate chips over the top, then generously sprinkle about 1 teaspoon of flaky sea salt over everything. Don’t be shy with the salt—it’s what makes this loaf unforgettable.
Step 6: Bake
Place the pan in the preheated oven and bake for 55 to 65 minutes. At the 45-minute mark, check the loaf. If the top is browning too quickly, tent it loosely with aluminum foil. You’ll know the loaf is done when a toothpick inserted into the center comes out clean or with just a few moist crumbs attached. If you hit a melted chocolate chip, try again in a different spot. The internal temperature should read around 200°F (93°C) on an instant-read thermometer.
Step 7: Cool
Let the loaf cool in the pan on a wire rack for 15 minutes. Then, using the parchment paper overhang, lift the loaf out of the pan and transfer it to the cooling rack. Let it cool completely before slicing—about 1 to 2 hours. I know it’s tempting to cut into it warm, but it will be too fragile and might crumble. Patience pays off here.
Cooking Tips & Techniques
Here are some things I’ve learned from making this loaf more times than I care to count.
Don’t Overmix: This is the number one mistake people make with quick breads. Mix just until the flour disappears. Overmixing develops gluten, which makes the loaf dense and rubbery. You want tender, not tough.
Room Temperature Eggs: Cold eggs can seize up your oil and sugar mixture, making it lumpy. Let your eggs sit on the counter for 30 minutes before starting. If you’re in a hurry, place them in a bowl of warm water for 5 minutes.
Check Your Baking Soda: Baking soda loses its potency over time. If you can’t remember when you bought it, test it by dropping a teaspoon into a small bowl of vinegar. If it bubbles vigorously, it’s good. If it just sits there, buy a new box.
The Toothpick Test: Insert your toothpick into the center of the loaf, not the edges. If it comes out with wet batter, it needs more time. If it comes out clean or with a few crumbs, it’s done. Remember that chocolate chips will melt and might give you a false reading—aim for an area without visible chips.
Cool Completely: I learned this the hard way. I once cut into a loaf after 30 minutes, and it fell apart in my hands. The structure of quick breads continues to set as they cool. Slicing too early is like trying to cut jello—it’s just not going to work.
Make It Ahead: This loaf actually tastes better the next day. The flavors meld together, and the moisture distributes evenly throughout the crumb. Bake it the night before your gathering, let it cool completely, wrap it tightly in plastic wrap, and store it at room temperature. Slice it just before serving.
Variations & Adaptations
This recipe is wonderfully flexible. Here are some variations I’ve tried and loved.
Gluten-Free Version: Substitute the all-purpose flour with a high-quality 1:1 gluten-free baking flour blend. I’ve had great success with King Arthur’s Measure for Measure. Add ¼ teaspoon of xanthan gum if your blend doesn’t include it. The texture will be slightly more delicate, but still delicious.
Vegan Adaptation: Replace the two eggs with flax eggs (2 tablespoons ground flaxseed mixed with 6 tablespoons water, let sit for 5 minutes until gelled). Use dairy-free chocolate chips. The loaf will be a bit denser but still wonderfully moist and flavorful.
Spice It Up: Add ¼ teaspoon of cayenne pepper or chipotle powder to the dry ingredients for a subtle heat that plays beautifully with the chocolate and pumpkin. I tried this on a whim last fall, and it was a hit at my Halloween party.
Nutty Crunch: Fold in ½ cup of toasted pecans or walnuts along with the chocolate chips. Toast them first in a dry pan over medium heat for 3-4 minutes until fragrant. This adds a lovely textural contrast.
Streusel Topping: Mix ¼ cup flour, ¼ cup brown sugar, 2 tablespoons cold butter, and ½ teaspoon cinnamon until crumbly. Sprinkle over the batter before baking for a crunchy, buttery top. This turns the loaf into something truly decadent.
Mini Loaves or Muffins: Divide the batter among 4 mini loaf pans (bake for 30-35 minutes) or a 12-cup muffin tin (bake for 18-22 minutes). Adjust the baking time accordingly and check for doneness with a toothpick.
Serving & Storage Suggestions
This loaf is incredibly versatile when it comes to serving. Here’s how I like to do it.
Serving Temperature: Serve at room temperature or slightly warm. If you want to warm individual slices, pop them in a 300°F oven for 5 minutes or microwave for 15 seconds. The chocolate gets all melty again—heavenly.
Presentation Tips for Hosting: Slice the loaf into 1-inch thick pieces and arrange them on a wooden cutting board or a cake stand. Dust with a little extra flaky sea salt just before serving for that fresh salty pop. Pair it with a pot of strong coffee, a chai latte, or a glass of cold milk. For a dessert spread, serve it alongside vanilla ice cream or a dollop of whipped cream.
What to Serve Alongside: This loaf is perfect for brunch with a frittata or a simple fruit salad. For a dessert table, it pairs beautifully with a spiced apple cider or a pumpkin spice latte.
Storage: Wrap the completely cooled loaf tightly in plastic wrap or aluminum foil. Store at room temperature for up to 4 days. Do not refrigerate—the cold air will dry it out. If your kitchen is very warm, you can store it in an airtight container in a cool, dark place.
Freezing: This loaf freezes beautifully. Wrap it tightly in plastic wrap, then a layer of aluminum foil, and freeze for up to 3 months. To thaw, let it sit at room temperature for 2-3 hours still wrapped. You can also freeze individual slices for quick treats—just wrap each slice separately.
Flavor Development: The flavors actually deepen and improve after a day. The pumpkin and spice become more pronounced, and the chocolate chips seem to meld into the bread more evenly. This is one of those rare recipes that’s even better on day two.
Nutritional Information & Benefits
Here’s the approximate nutritional breakdown for one slice (based on 12 slices per loaf):
- Calories: 295
- Fat: 14g
- Carbohydrates: 41g
- Fiber: 3g
- Sugar: 24g
- Protein: 5g
- Sodium: 310mg
Pumpkin is packed with vitamin A (in the form of beta-carotene), which supports eye health and immune function. It’s also a good source of fiber, which helps with digestion and keeps you feeling full. The chocolate chips provide antioxidants called flavonoids, which have been linked to heart health. And the eggs add high-quality protein and essential amino acids.
This loaf is relatively low in saturated fat since it uses vegetable oil instead of butter. For a lower-sugar option, you can reduce the granulated sugar to ¾ cup and use dark chocolate chips, which have less sugar than semi-sweet. The recipe is naturally dairy-free, making it suitable for those with lactose intolerance. It does contain gluten and eggs, so it’s not suitable for celiac or vegan diets without the substitutions mentioned above.
I love that this loaf feels like a treat but has some real nutritional value. It’s the kind of thing you can feel good about serving to your family or bringing to a gathering—delicious and secretly a little wholesome.
Conclusion
This Chocolate Chip Pumpkin Loaf with Sea Salt has earned a permanent spot in my fall baking rotation. It’s the recipe I turn to when I want something that looks impressive but doesn’t require a lot of fuss. The combination of moist pumpkin, melty chocolate, and that salty crunch on top is just unbeatable. Every time I make it, someone asks for the recipe. And every time, I smile and think about Jen and her whole can of pumpkin.
I hope you’ll give this recipe a try, whether you’re hosting a brunch, bringing dessert to a potluck, or just craving something cozy on a cool autumn afternoon. Don’t be afraid to make it your own—swap the chocolate chips for white chocolate, add some nuts, or double the salt if you’re feeling bold. The best recipes are the ones you adapt to your own taste.
I’d love to hear how yours turns out! Leave a comment below and let me know if you tried any variations. Share a photo on Pinterest or Instagram and tag me—I love seeing your creations. And if you loved this recipe, don’t forget to pin it for later. Happy baking, friends!
Frequently Asked Questions
Can I use fresh pumpkin instead of canned?
Yes, you can! Roast a small sugar pumpkin, scoop out the flesh, and purée it in a food processor until smooth. You’ll need about 1 ¾ cups of fresh purée. Just be aware that fresh pumpkin has more water content than canned, so your loaf might be slightly more moist. Drain the purée in a fine-mesh strainer lined with cheesecloth for 30 minutes before using to remove excess liquid.
Why did my loaf sink in the middle?
A sunken middle usually means the loaf was underbaked or the oven temperature was too low. Make sure your oven is properly preheated to 350°F. Also, avoid opening the oven door during the first 40 minutes of baking—the rush of cold air can cause the loaf to collapse. If your loaf is browning too quickly on the outside but still raw in the center, tent it with foil and continue baking.
Can I reduce the sugar in this recipe?
Absolutely. You can reduce the granulated sugar to ¾ cup without significantly affecting the texture. The brown sugar adds moisture, so I wouldn’t reduce that. If you want to cut sugar further, try using ½ cup granulated sugar and ¼ cup of a sugar substitute like monk fruit sweetener. Keep in mind that sugar also contributes to the loaf’s tenderness and browning, so it might be slightly less moist and paler.
How do I get that perfect dome on top?
For a beautifully domed loaf, make sure your baking soda and baking powder are fresh. Also, bake the loaf in the center of the oven, not too close to the top or bottom. Some bakers swear by starting the oven at 375°F for the first 10 minutes, then reducing to 350°F for the remaining time. The initial blast of heat creates steam that pushes the top up. Just don’t forget to lower the temperature, or the top will burn.
Can I make this into pumpkin chocolate chip muffins instead?
Yes! This batter makes about 12 standard muffins. Line a muffin tin with paper liners and fill each cup about ¾ full. Bake at 350°F for 18-22 minutes, or until a toothpick inserted into the center of a muffin comes out clean. Sprinkle the tops with flaky sea salt right when they come out of the oven. Muffins will keep at room temperature in an airtight container for up to 3 days, or freeze for up to 3 months.
Pin This Recipe!
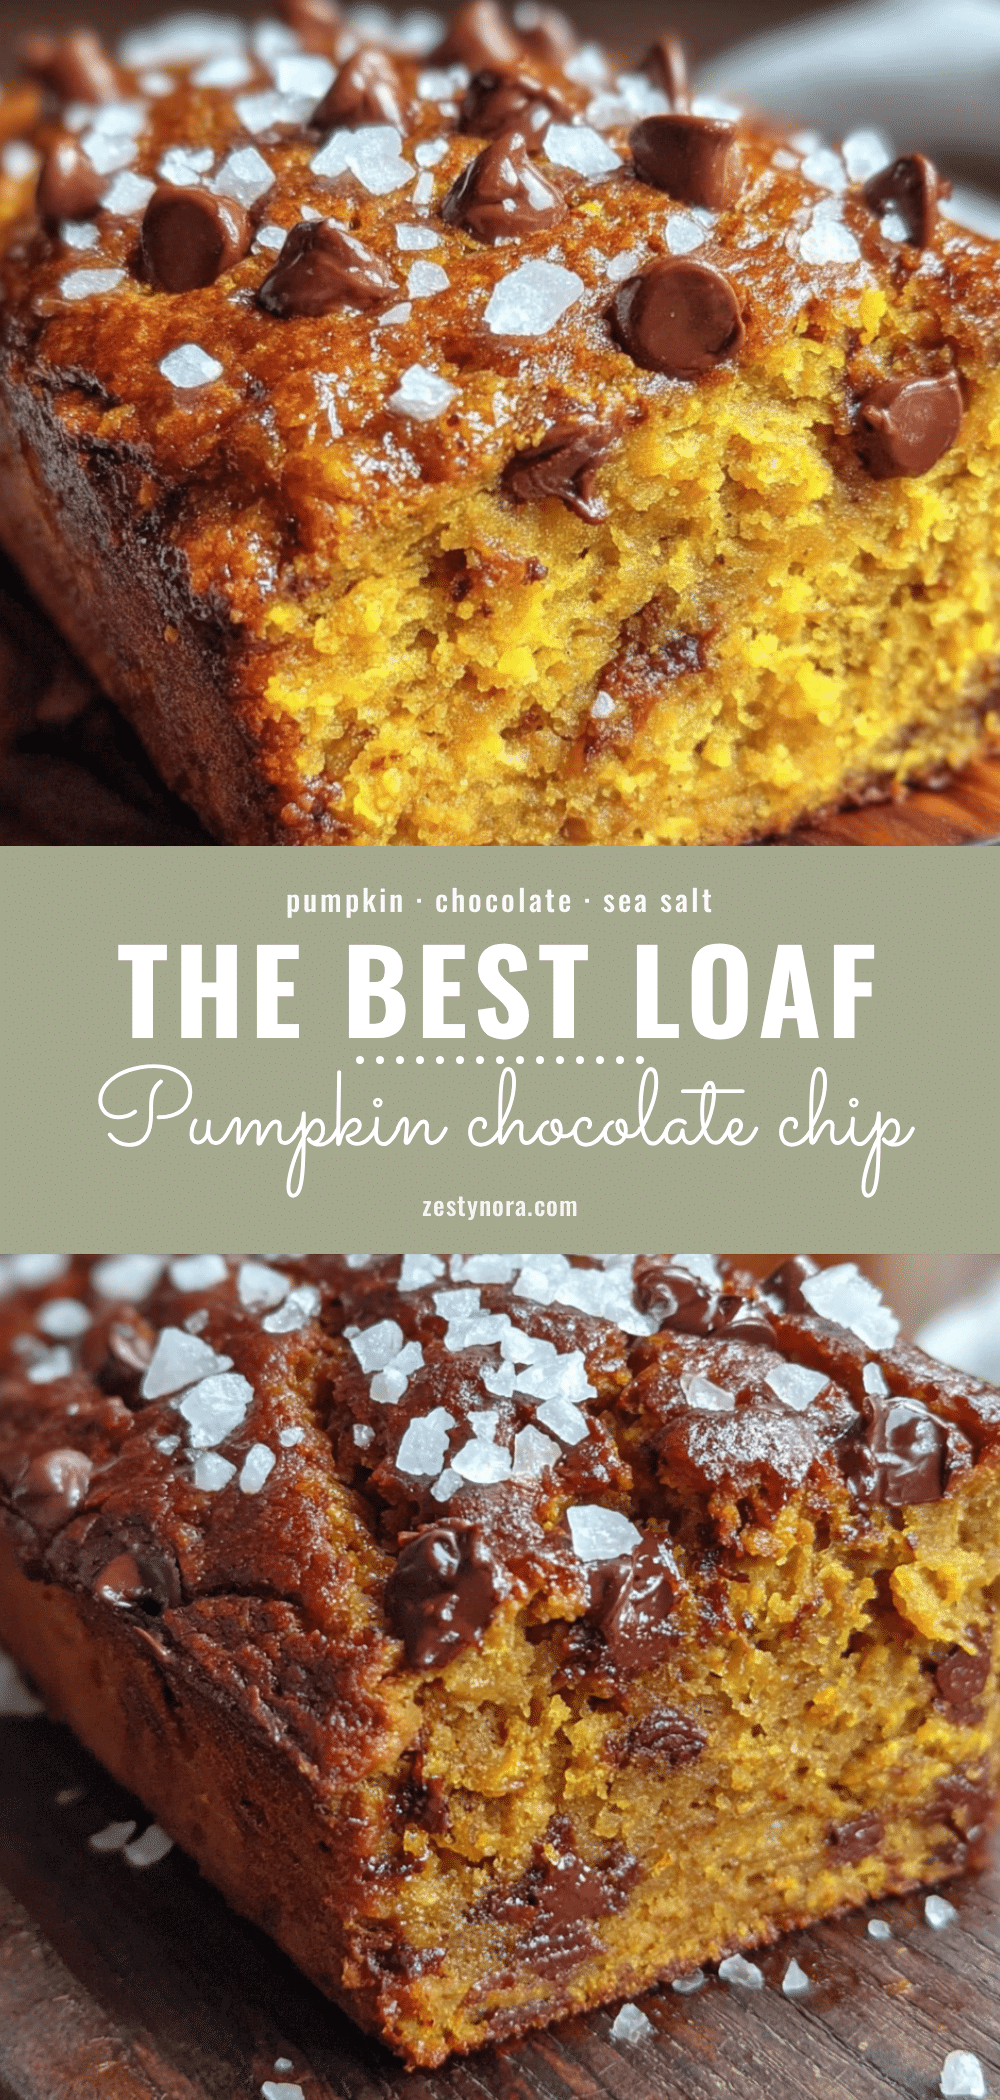
The Best Chocolate Chip Pumpkin Loaf with Sea Salt
This incredibly moist pumpkin loaf is packed with chocolate chips and topped with flaky sea salt. It’s a simple one-bowl recipe that comes together in minutes and tastes even better the next day.
- Prep Time: 15 minutes
- Cook Time: 55 minutes
- Total Time: 1 hour 10 minutes
- Yield: 12 servings 1x
- Category: Dessert
- Cuisine: American
Ingredients
- 1 (15-ounce) can pumpkin purée (425 grams)
- 1 ¾ cups all-purpose flour (220 grams)
- 1 cup granulated sugar (200 grams)
- ½ cup packed brown sugar (100 grams)
- ½ cup vegetable oil (120 ml)
- 2 large eggs, at room temperature
- 2 teaspoons vanilla extract (10 ml)
- 1 teaspoon baking soda
- ½ teaspoon baking powder
- ½ teaspoon salt
- 2 teaspoons pumpkin pie spice
- 1 teaspoon cinnamon
- 1 cup semi-sweet chocolate chips (175 grams)
- 1 teaspoon flaky sea salt (for topping)
Instructions
- Preheat oven to 350°F (175°C). Position rack in center of oven. Line a 9×5-inch loaf pan with parchment paper, leaving about 2 inches of overhang on the long sides.
- In a large bowl, whisk together flour, baking soda, baking powder, salt, pumpkin pie spice, and cinnamon for about 20 seconds.
- In a separate large bowl, combine granulated sugar and brown sugar. Add vegetable oil and whisk until smooth. Add eggs one at a time, whisking well after each. Stir in vanilla extract. Add the entire can of pumpkin purée and whisk until smooth.
- Pour wet ingredients into dry ingredients. Fold together with a rubber spatula until no streaks of flour remain. Do not overmix.
- Fold in chocolate chips, reserving about 2 tablespoons for topping. Use 10-12 strokes.
- Scrape batter into prepared loaf pan and spread evenly. Sprinkle reserved chocolate chips on top, then generously sprinkle flaky sea salt over everything.
- Bake for 55 to 65 minutes. At 45 minutes, check loaf; if top is browning too quickly, tent loosely with aluminum foil. Loaf is done when a toothpick inserted into the center comes out clean or with a few moist crumbs.
- Let loaf cool in pan on a wire rack for 15 minutes. Using parchment overhang, lift loaf out and transfer to cooling rack. Cool completely before slicing, about 1 to 2 hours.
Notes
Using the full can of pumpkin makes the loaf incredibly moist. Do not overmix the batter. The loaf tastes even better the next day after flavors have melded. For a gluten-free version, substitute all-purpose flour with a 1:1 gluten-free baking flour blend and add ¼ teaspoon xanthan gum if needed. For a vegan version, replace eggs with flax eggs and use dairy-free chocolate chips.
Nutrition
- Serving Size: 1 slice
- Calories: 295
- Sugar: 24
- Sodium: 310
- Fat: 14
- Saturated Fat: 4
- Carbohydrates: 41
- Fiber: 3
- Protein: 5
Keywords: pumpkin loaf, chocolate chip pumpkin bread, pumpkin bread with sea salt, fall baking, pumpkin recipe, easy pumpkin bread


