The woman at the community garden plot next to mine watched me wrestling with a butternut squash for what felt like forever. I was trying to cut it cleanly, and honestly, I was losing the battle. She didn’t say anything at first. Then she walked over, handed me her sharpest knife, and said, “Let the knife do the work, not your arm.” Her name was Gloria, and she was in her seventies with the strongest hands I’d ever seen. We got to talking that afternoon, and somewhere between swapping gardening tips and complaining about the squirrels, she mentioned she’d been making these little pumpkin cheesecake bites every fall for thirty years.
She didn’t give me a formal recipe, not really. She just described it while we sat on overturned buckets, picking dirt from under our nails. “A little cream cheese, some pumpkin, warm spices, and don’t you dare skip the vanilla,” she said, pointing her trowel at me for emphasis. I went home that evening and tried to recreate what she’d described. The first batch was a little lopsided, and I accidentally used too much ginger. But the second batch? That was the one. You know that feeling when you take a bite of something and instantly feel wrapped up in a cozy blanket? That’s these mini pumpkin cheesecake bites.
I’ve been making them every fall since, and they’ve become my go-to for those evenings when the house feels too quiet and the air smells like fallen leaves. Maybe you’ve been there—needing something small and sweet that feels like a hug without the commitment of a whole pie. These little bites are exactly that. They’re the kind of thing you make on a Tuesday night just because, and suddenly your whole kitchen smells like Thanksgiving.
Why You’ll Love This Recipe
Let me tell you why these mini pumpkin cheesecake bites have earned a permanent spot in my fall baking rotation. I’ve tested this recipe at least a dozen times, tweaking the ratio of pumpkin to cream cheese, adjusting the spice blend, and even trying different crust options. This version is the one that finally made me stop and say, “Okay, this is it.”
- Quick & Easy: These come together in about 30 minutes of active prep time. No water bath, no complicated techniques. Just mix, assemble, and bake.
- Simple Ingredients: You probably have most of these in your kitchen right now. Canned pumpkin, cream cheese, graham crackers, butter, sugar, and a few warm spices. Nothing fancy, nothing hard to find.
- Perfect for Cozy Nights: These are made for those evenings when you want something sweet but don’t want to tackle a full cheesecake. They’re portion-controlled, which means you can have two without feeling guilty.
- Crowd-Pleaser: I’ve brought these to potlucks, Friendsgivings, and even book club meetings. They disappear fast. Kids love them, adults love them, and people always ask for the recipe.
- Unbelievably Delicious: The texture is what gets me every time. The creamy, tangy cheesecake filling against the buttery graham cracker crust, with that warm pumpkin spice flavor running through everything. It’s comfort food in miniature form.
What makes this recipe different from all the other pumpkin cheesecake recipes out there? It’s the balance. So many versions are either too pumpkin-heavy (tasting more like pumpkin pie) or too cream cheese-heavy (losing that fall flavor entirely). This one hits the sweet spot. The filling is silky smooth, the crust stays crisp, and every bite tastes like autumn. Plus, making them mini means you get that perfect crust-to-filling ratio in every single bite.
What Ingredients You Will Need
This recipe uses simple, wholesome ingredients that come together to create something truly special. Most of these are pantry staples, especially if you do any fall baking at all. I’ve included some notes on what to look for and what substitutions work well.
For the Crust
- Graham cracker crumbs – 1 ½ cups (about 12 full sheets, crushed). You can buy pre-crushed crumbs if you’re short on time, but I prefer crushing my own. The texture is better, and honestly, it’s a great way to work out some frustration after a long day.
- Unsalted butter – 6 tablespoons, melted. I use unsalted so I can control the salt level. If you only have salted butter, just reduce the added salt in the filling.
- Granulated sugar – 2 tablespoons. This adds just a touch of sweetness to the crust. Not too much—the filling is where the real sweetness lives.
- Cinnamon – ½ teaspoon. This is optional, but I love adding a little warmth to the crust. It ties everything together beautifully.
For the Cheesecake Filling
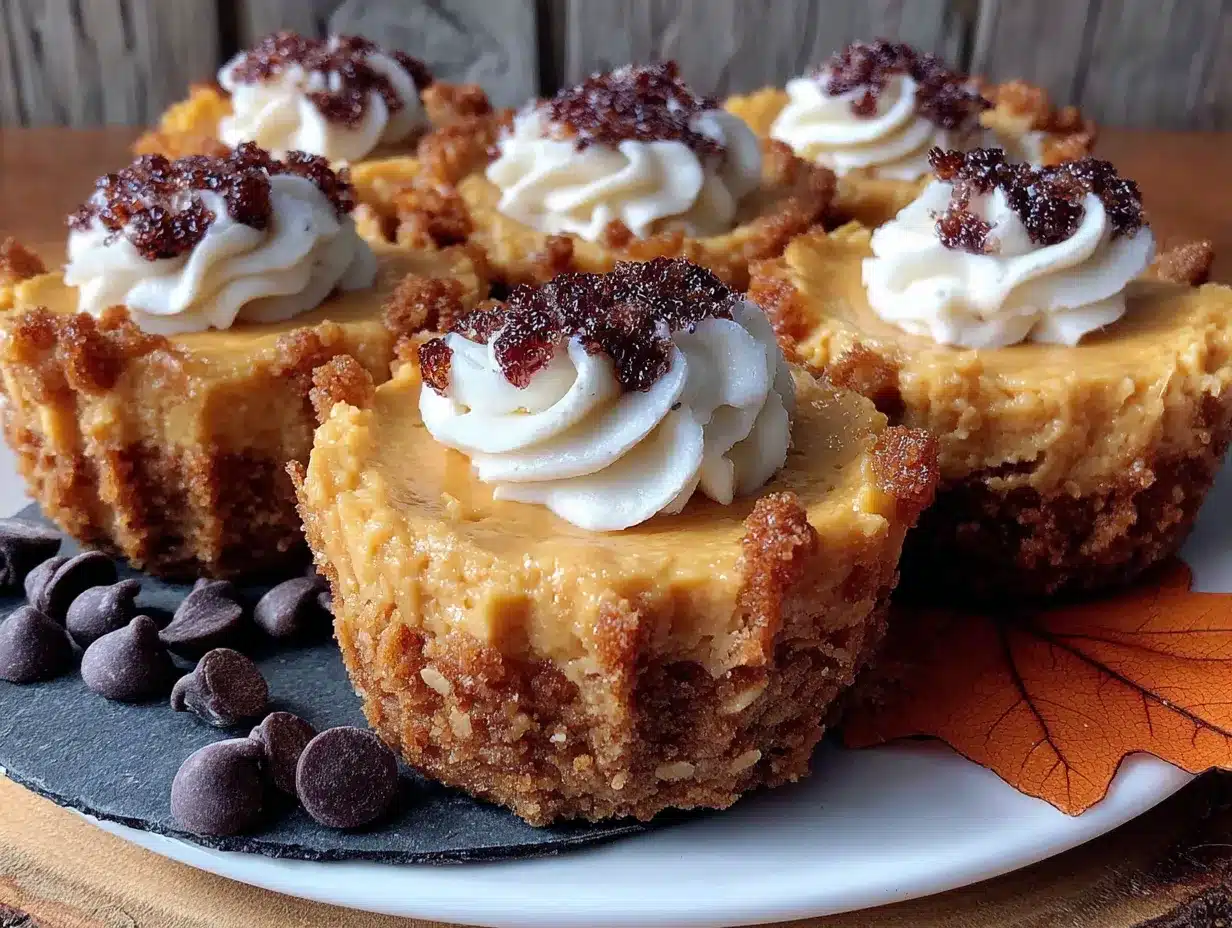
- Cream cheese – 8 ounces, softened to room temperature. This is non-negotiable. Cold cream cheese will give you lumpy filling, and nobody wants that. Let it sit on the counter for at least 30 minutes before you start.
- Pumpkin purée – ¾ cup. Make sure you’re buying pumpkin purée, not pumpkin pie filling. The pie filling has added sugar and spices, which will throw off the balance. I like Libby’s brand, but any 100% pumpkin purée works.
- Granulated sugar – ½ cup. Just regular white sugar. It dissolves easily and keeps the texture smooth.
- Brown sugar – ¼ cup, packed. This adds a deeper, molasses-like sweetness that pairs perfectly with the pumpkin. Light or dark brown sugar both work; dark will give you a richer flavor.
- Large egg – 1, at room temperature. The egg helps the cheesecake set properly. If you forget to take it out ahead of time, place it in a bowl of warm water for 5 minutes.
- Vanilla extract – 1 teaspoon. Pure vanilla is best, but imitation works in a pinch. Gloria would probably smack my hand for saying that, but we’re keeping it real here.
- Pumpkin pie spice – 1 ½ teaspoons. You can use store-bought or make your own. I usually make my own with cinnamon, ginger, nutmeg, allspice, and a tiny pinch of cloves.
- Cinnamon – ½ teaspoon. Extra cinnamon because, well, more cinnamon is never a bad idea.
- Salt – ¼ teaspoon. This balances the sweetness and makes all the flavors pop.
For the Topping (Optional but Recommended)
- Whipped cream – For serving. Homemade is lovely, but store-bought works perfectly.
- Caramel sauce – A drizzle takes these over the top. I’ve used both homemade and store-bought, and both are delicious.
- Extra cinnamon – A light dusting right before serving makes them look beautiful.
Equipment Needed
You don’t need any fancy equipment for these mini pumpkin cheesecake bites, which is part of why I love them. Here’s what you’ll need:
- Muffin tin – A standard 12-cup muffin tin works perfectly. If you have a mini muffin tin, you can make even smaller bites, just reduce the baking time by about 5 minutes.
- Muffin liners – Paper liners make removal so much easier. I like using foil liners for a more festive look, but regular paper liners work great.
- Mixing bowls – You’ll need one medium bowl for the crust and one large bowl for the filling.
- Electric hand mixer or stand mixer – You could mix the filling by hand with some serious elbow grease, but a mixer makes it much smoother and faster.
- Measuring cups and spoons – For accurate measurements. Baking is a science, after all.
- Spatula – For scraping down the sides of the bowl and getting every last bit of filling.
- Small cookie scoop or tablespoon – For evenly portioning the crust and filling. A cookie scoop makes this so much easier and keeps everything uniform.
If you don’t have a mixer, you can use a wooden spoon and some determination. I’ve done it before when my mixer was on the fritz, and it worked fine. Just make sure your cream cheese is extra soft.
Preparation Method
Alright, let’s get baking. I’ve broken this down into clear steps with all the little details that make a difference. Trust me on the timing and the temperatures—I’ve learned these the hard way so you don’t have to.
- Preheat your oven to 325°F (163°C). Line a 12-cup muffin tin with paper liners. This temperature is important—too hot and the cheesecakes will crack, too cool and they won’t set properly.
- Make the crust. In a medium bowl, combine 1 ½ cups of graham cracker crumbs, 2 tablespoons of granulated sugar, and ½ teaspoon of cinnamon. Pour in 6 tablespoons of melted butter and stir with a fork until the mixture looks like wet sand. Every crumb should be coated. If it looks dry, add another tablespoon of melted butter.
- Press the crust into the liners. Divide the crust mixture evenly among the 12 muffin cups. Use the bottom of a small glass or a measuring cup to press it down firmly. This is important—if the crust is too loose, it will fall apart when you try to eat the bites. Press until it’s compact and even. Set the muffin tin aside.
- Beat the cream cheese. In a large bowl, beat 8 ounces of softened cream cheese with an electric mixer on medium speed until it’s smooth and creamy. This takes about 1-2 minutes. Scrape down the sides of the bowl with a spatula. There should be no lumps at all.
- Add the sugars. Add ½ cup of granulated sugar and ¼ cup of packed brown sugar. Beat on medium speed until combined, about 1 minute. Scrape the bowl again.
- Add the pumpkin and egg. Add ¾ cup of pumpkin purée and 1 large egg. Beat on low speed until just combined. Don’t overmix here—overmixing can incorporate too much air, which leads to cracks in the cheesecake.
- Add the flavorings. Add 1 teaspoon of vanilla extract, 1 ½ teaspoons of pumpkin pie spice, ½ teaspoon of cinnamon, and ¼ teaspoon of salt. Beat on low speed until everything is combined. Give the bowl one final scrape and give it a few quick stirs by hand to make sure everything is incorporated.
- Fill the cups. Divide the cheesecake filling evenly among the 12 muffin cups, spooning it over the crust. Each cup should be almost full—the cheesecake will rise slightly but won’t overflow. A small cookie scoop makes this step so much easier and keeps the portions even.
- Bake. Place the muffin tin in the preheated oven and bake for 18-22 minutes. The edges should look set and slightly puffed, but the centers should still jiggle slightly when you gently shake the pan. This jiggle is what gives you that creamy texture. If the centers are completely firm, they’re overbaked.
- Cool completely. Remove the muffin tin from the oven and let it cool on a wire rack for 20 minutes. Then transfer the cheesecake bites (still in their liners) to the refrigerator. Chill for at least 2 hours, but overnight is even better. This step is crucial—the cheesecake needs time to set and develop its flavor.
- Serve. When you’re ready to serve, remove the paper liners (they should peel off easily). Top with whipped cream, a drizzle of caramel sauce, and a light dusting of cinnamon if you’re feeling fancy.
Cooking Tips & Techniques
After making these mini pumpkin cheesecake bites more times than I can count, I’ve picked up a few tricks that make a real difference. Let me share them with you.
Room temperature ingredients are your friend. I know, I know, everyone says this. But it’s true. Cold cream cheese creates lumps that are nearly impossible to get rid of. Cold egg doesn’t incorporate smoothly. Take the time to let everything come to room temperature. Your future self will thank you.
Don’t overmix the filling. This was a hard lesson for me. I used to beat the filling until it was perfectly smooth, thinking I was being thorough. But all that extra mixing incorporated too much air, and my cheesecake bites would puff up in the oven and then collapse, leaving cracks on top. Mix just until everything is combined, then stop.
Watch the baking time closely. Every oven is a little different. I’ve made these in three different ovens, and the baking time has ranged from 17 to 23 minutes. Start checking at 17 minutes. The edges should be set and slightly golden, but the center should still have a slight wobble. If you wait until the center is completely firm, you’ve gone too far.
Let them chill properly. I made the mistake of trying to rush the chilling process once. I put them in the freezer for 30 minutes instead of the fridge for 2 hours. The texture was off—grainy instead of creamy. Be patient. The fridge is your friend here.
Use a water bath if you’re nervous about cracking. I don’t usually bother with a water bath for these mini bites because they’re small enough that cracking isn’t a huge issue. But if you want extra insurance, place the muffin tin inside a larger baking pan and pour hot water into the larger pan until it comes about halfway up the sides of the muffin tin. Just be careful not to get water in the cheesecakes.
Variations & Adaptations
One of the best things about this recipe is how flexible it is. Here are some variations I’ve tried and loved.
Gluten-Free Version: Swap the graham cracker crumbs for gluten-free graham crackers or use crushed gluten-free shortbread cookies. I’ve also used almond flour mixed with a little butter and sugar, and it works beautifully. The texture is slightly different but still delicious.
Dairy-Free Version: Use dairy-free cream cheese (I like the brand Kite Hill) and substitute the butter with coconut oil or a plant-based butter. The texture won’t be exactly the same—dairy-free cream cheese tends to be a bit softer—but the flavor is still fantastic.
Extra Spicy: If you love warm spices like I do, add an extra ½ teaspoon of pumpkin pie spice and a pinch of cardamom. The cardamom adds this floral, almost citrusy note that pairs beautifully with the pumpkin.
Chocolate Lover’s Version: Add ¼ cup of mini chocolate chips to the filling before baking. The chocolate melts into little pockets of richness throughout the cheesecake. I tried this on a whim one rainy Sunday, and it was a game-changer.
Maple Pecan Version: Swap the brown sugar for maple syrup (reduce the granulated sugar to ¼ cup to compensate for the extra liquid) and top each bite with a pecan half before baking. The maple and pecan combination is pure fall perfection.
No Graham Cracker Crust: If you’re out of graham crackers, you can use crushed vanilla wafers, shortbread cookies, or even crushed pretzels for a sweet-salty twist. I’ve done the pretzel version, and it’s surprisingly addictive.
Serving & Storage Suggestions
These mini pumpkin cheesecake bites are versatile when it comes to serving. Here’s how I like to do it.
Serving Temperature: I prefer them cold, straight from the fridge. The texture is firmer and more cheesecake-like. But they’re also lovely at room temperature, especially if you’ve topped them with whipped cream. If you’re serving them at a party, let them sit out for about 15 minutes before serving to take the chill off.
Presentation Ideas: Arrange them on a beautiful platter with a drizzle of caramel sauce and a dusting of cinnamon. Add a few fresh cranberries and a sprig of rosemary for a gorgeous fall presentation. They look stunning on a dessert table.
What to Serve With Them: A cup of hot coffee or spiced chai is my go-to pairing. For a dessert spread, they go beautifully with apple crisp, pumpkin bread, or a simple vanilla ice cream. They’re also lovely after a hearty fall soup or stew.
Storage: Store the cheesecake bites in an airtight container in the refrigerator for up to 5 days. I like to keep them in their paper liners until I’m ready to serve them. The flavors actually deepen and meld together after a day or two in the fridge.
Freezing: These freeze beautifully. Place the cooled, fully set cheesecake bites on a baking sheet and freeze until solid, about 2 hours. Then transfer them to a freezer-safe container or bag, separating layers with parchment paper. They’ll keep for up to 3 months. To thaw, transfer them to the refrigerator overnight.
Reheating: Honestly, I don’t recommend reheating these. They’re meant to be served cold or at room temperature. But if you really want a warm dessert, you can microwave one for about 10 seconds. The texture will be softer, almost like a warm pudding.
Nutritional Information & Benefits
I’m not a nutritionist, but I’ve done my homework on this recipe. Here’s the breakdown per mini cheesecake bite (without toppings).
| Nutrient | Amount per serving |
|---|---|
| Calories | 195 |
| Total Fat | 12g |
| Saturated Fat | 7g |
| Cholesterol | 45mg |
| Sodium | 190mg |
| Total Carbohydrates | 20g |
| Dietary Fiber | 1g |
| Sugars | 14g |
| Protein | 3g |
These little bites are a treat, no doubt about it. But they do have some redeeming qualities. Pumpkin is packed with vitamin A, which is great for your eyes and immune system. It’s also a good source of fiber. The cream cheese provides a bit of calcium and protein. And the warm spices like cinnamon and ginger have anti-inflammatory properties. So while I wouldn’t call these health food, they’re certainly not the worst thing you could eat.
If you’re looking to lighten them up, you can use reduced-fat cream cheese and cut the sugar by a couple of tablespoons. The texture will be slightly less creamy, but they’ll still be delicious.
Conclusion
These mini pumpkin cheesecake bites have become a fall tradition in my kitchen, and I hope they become one in yours too. They’re the kind of recipe that feels special without being fussy, impressive without being complicated. Every time I make them, I think of Gloria and that afternoon in the garden, and I smile.
What I love most about these little bites is how they bring people together. I’ve made them for friends going through hard times, for holiday gatherings, and for quiet nights when I just needed something sweet. They never fail to make the moment feel a little warmer, a little cozier.
I’d love to hear how yours turn out. Did you try any of the variations? Did you come up with your own twist? Drop a comment below and let me know. And if you share them on Pinterest or Instagram, tag me—I love seeing your creations. Happy baking, friends. May your kitchen smell like cinnamon and your heart feel full.
Frequently Asked Questions
Can I use fresh pumpkin instead of canned?
Absolutely. If you have fresh pumpkin, roast it until tender, then purée it in a food processor until smooth. Just make sure to drain off any excess liquid—fresh pumpkin can be more watery than canned. You want the purée to be thick, not runny.
Why did my cheesecake bites crack on top?
Cracks usually happen from overmixing the filling or overbaking. Mix just until the ingredients are combined, and take the cheesecake bites out of the oven while the centers are still slightly jiggly. The carryover heat will finish the cooking process without causing cracks.
Can I make these in a mini muffin tin instead?
Yes! If you use a mini muffin tin, you’ll get about 24 mini bites. Reduce the baking time to about 12-15 minutes. Keep an eye on them—they bake much faster. The same rules apply: edges set, centers slightly jiggly.
Do I have to use a mixer, or can I mix by hand?
You can definitely mix by hand, but your cream cheese needs to be very soft. Let it sit at room temperature for at least an hour. Use a wooden spoon and some elbow grease, and make sure there are no lumps before you add the other ingredients. It takes a little longer, but it works.
Can I make these ahead of time for a party?
These are perfect for making ahead. You can make them up to 3 days in advance and keep them in the refrigerator. They actually taste better after a day or two because the flavors have time to meld. Just add the toppings right before serving.
How do I know when they’re done baking?
The edges should look set and slightly puffed, and the center should jiggle when you gently shake the pan. If you insert a toothpick into the center, it should come out with a few moist crumbs, not wet batter. Trust the jiggle—it’s your best indicator.
Pin This Recipe!
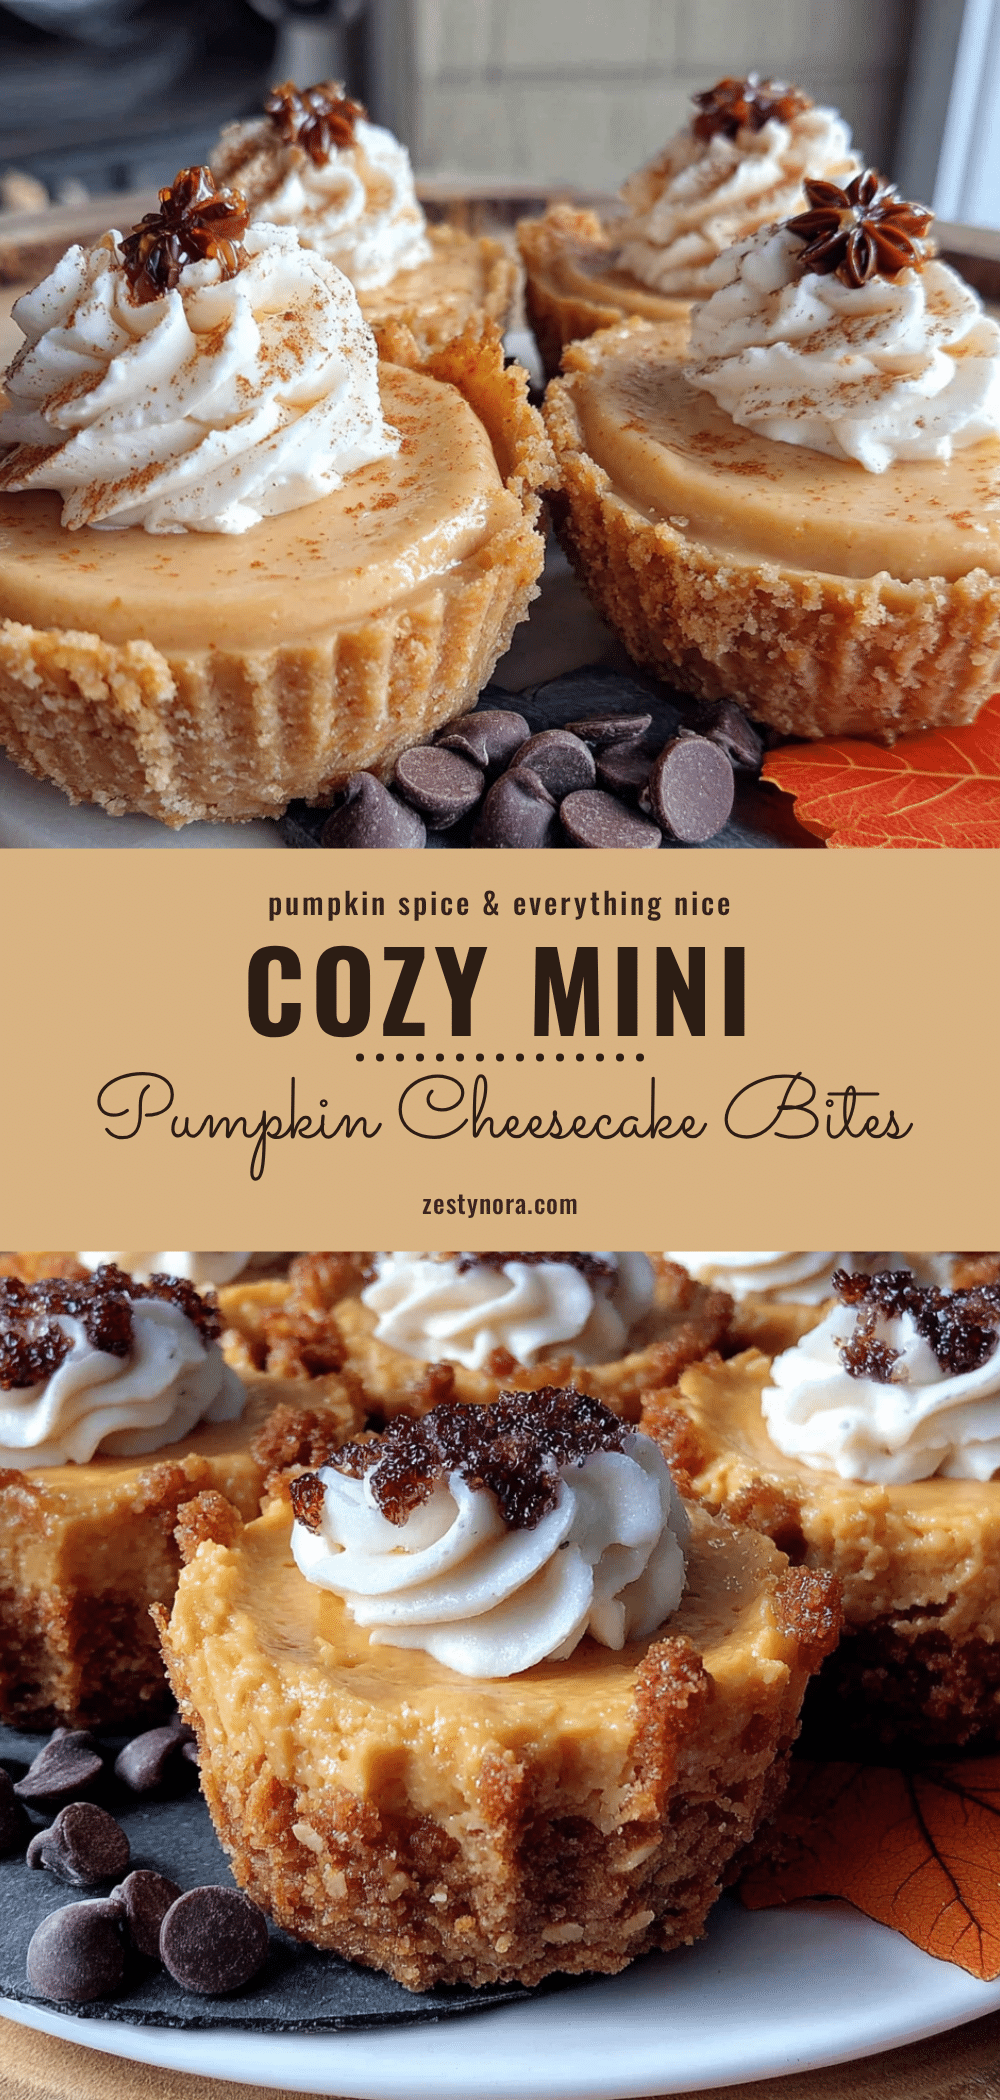
Easy Mini Pumpkin Cheesecake Bites Recipe
These mini pumpkin cheesecake bites are the perfect fall treat—creamy, spiced, and portion-controlled. Made with a buttery graham cracker crust and a silky pumpkin cheesecake filling, they’re quick to prepare and ideal for cozy nights or holiday gatherings.
- Prep Time: 30 minutes
- Cook Time: 20 minutes
- Total Time: 2 hours 50 minutes (includes chilling)
- Yield: 12 servings 1x
- Category: Dessert
- Cuisine: American
Ingredients
- 1 ½ cups graham cracker crumbs (about 12 full sheets, crushed)
- 6 tablespoons unsalted butter, melted
- 2 tablespoons granulated sugar
- ½ teaspoon cinnamon
- 8 ounces cream cheese, softened to room temperature
- ¾ cup pumpkin purée (not pumpkin pie filling)
- ½ cup granulated sugar
- ¼ cup packed brown sugar
- 1 large egg, at room temperature
- 1 teaspoon vanilla extract
- 1 ½ teaspoons pumpkin pie spice
- ½ teaspoon cinnamon
- ¼ teaspoon salt
- Whipped cream, for serving (optional)
- Caramel sauce, for drizzling (optional)
- Extra cinnamon, for dusting (optional)
Instructions
- Preheat your oven to 325°F (163°C). Line a 12-cup muffin tin with paper liners.
- Make the crust: In a medium bowl, combine graham cracker crumbs, 2 tablespoons granulated sugar, and ½ teaspoon cinnamon. Pour in melted butter and stir with a fork until the mixture looks like wet sand.
- Press the crust into the liners: Divide the crust mixture evenly among the 12 muffin cups. Use the bottom of a small glass or measuring cup to press it down firmly and evenly. Set aside.
- Beat the cream cheese: In a large bowl, beat softened cream cheese with an electric mixer on medium speed until smooth and creamy, about 1-2 minutes. Scrape down the sides of the bowl.
- Add the sugars: Add ½ cup granulated sugar and ¼ cup packed brown sugar. Beat on medium speed until combined, about 1 minute. Scrape the bowl again.
- Add the pumpkin and egg: Add pumpkin purée and egg. Beat on low speed until just combined. Do not overmix.
- Add the flavorings: Add vanilla extract, pumpkin pie spice, ½ teaspoon cinnamon, and salt. Beat on low speed until combined. Scrape the bowl and stir by hand to ensure everything is incorporated.
- Fill the cups: Divide the cheesecake filling evenly among the 12 muffin cups, spooning it over the crust. Each cup should be almost full.
- Bake: Place the muffin tin in the preheated oven and bake for 18-22 minutes. The edges should look set and slightly puffed, but the centers should still jiggle slightly when gently shaken.
- Cool completely: Remove from the oven and let cool on a wire rack for 20 minutes. Then transfer the cheesecake bites (still in their liners) to the refrigerator. Chill for at least 2 hours, preferably overnight.
- Serve: When ready to serve, remove the paper liners. Top with whipped cream, a drizzle of caramel sauce, and a light dusting of cinnamon if desired.
Notes
Room temperature ingredients are crucial for a smooth filling. Do not overmix the filling to avoid cracks. Bake until edges are set but centers still jiggle. Chill for at least 2 hours for best texture. For a gluten-free version, use gluten-free graham crackers or almond flour crust. For dairy-free, use dairy-free cream cheese and coconut oil or plant-based butter. Store in an airtight container in the refrigerator for up to 5 days. Freeze for up to 3 months.
Nutrition
- Serving Size: 1 mini cheesecake bi
- Calories: 195
- Sugar: 14
- Sodium: 190
- Fat: 12
- Saturated Fat: 7
- Carbohydrates: 20
- Fiber: 1
- Protein: 3
Keywords: mini pumpkin cheesecake bites, pumpkin cheesecake, fall dessert, mini cheesecake, pumpkin dessert, easy cheesecake recipe


