This was supposed to be a proper lemon herb chicken and rice dish. You know the kind—elegant, company-worthy, the sort of thing you’d serve on a nice platter with a garnish that actually looks intentional. I had the lemons. I had the fresh thyme. I even had the good white wine I’d been saving for a recipe that felt special. But somewhere between my toddler deciding that Tuesday was the day she would refuse every single food she’d loved on Monday, and my husband texting that he’d be home thirty minutes early, the whole plan just fell apart.
I grabbed the wrong butter. Not the unsalted, fancy European stuff I’d set aside—nope. I grabbed the big tub of salted garlic butter my mom had left in my fridge after her last visit. I didn’t even realize it until the butter had melted into the pan and that unmistakable garlicky smell filled the kitchen. The lemons sat there on the counter looking at me like I’d betrayed them. And honestly? I was already exhausted. It was a Wednesday. Or maybe it was Thursday. The days all blur together when you’re feeding little people who change their minds faster than the weather.
I almost dumped it all out and started over. That would have been the sensible thing, right? But the chicken was already sizzling in that garlic butter, and the rice was measured, and I could hear my daughter happily babbling to her stuffed bunny in the next room. So I just kept going. I added the rice right into that garlicky pan, poured in some chicken broth, and crossed my fingers. What came out was nothing like the plan—and better. The rice was rich and savory, the chicken was tender and golden, and my kid, who had been on a hunger strike for two days straight, actually asked for seconds. I mean, I nearly cried right there at the table.
That’s how this recipe was born—not from careful planning, but from a distracted moment and a tub of the wrong butter. And honestly? It’s become the dinner I make when I need something that just works. No fuss, no fancy ingredients, just good food that everyone at the table actually eats. Maybe you’ve been there, standing in your kitchen wondering how you’re going to pull dinner together when nothing is going right. This one’s for you.
Why You’ll Love This Recipe
Let me tell you why this one-pan garlic butter chicken and rice has become my secret weapon for busy weeknights. I’ve tested this recipe more times than I can count—through picky-eater phases, through nights when I had zero energy, through times when I needed dinner to feel like a hug in a bowl.
- Quick & Easy: This whole dish comes together in about 40 minutes, and most of that time is hands-off. You sauté the chicken, add the rice and liquid, and let the oven do the work. Perfect for those afternoons when you’re juggling homework and bath time.
- Simple Ingredients: You probably have most of these in your kitchen right now. Chicken, rice, garlic, butter, broth—nothing fancy, nothing expensive. No special trips to a gourmet store required.
- Perfect for Family Dinners: This is the kind of meal that pleases everyone. The rice is comforting and flavorful, the chicken is tender enough for little hands to manage, and the garlic butter flavor is a crowd-pleaser without being too strong for sensitive palates.
- Crowd-Pleaser: I’ve served this to my own family, to my sister’s family when I was watching her kids, and even to a few neighbors who needed a meal after a long day. It gets rave reviews every single time. Kids especially love the buttery rice.
- Unbelievably Delicious: The secret here is browning the chicken first in that garlic butter. That fond on the bottom of the pan? That’s pure flavor gold. It infuses every grain of rice with savory goodness. Honestly, I sometimes catch myself eating spoonfuls of the rice straight from the pan.
What makes this recipe different from the dozens of other chicken and rice dishes out there? It’s the technique. Browning the chicken in garlic butter first creates a depth of flavor you just can’t get from dumping everything in a pan at once. And cooking it all together in one pan means the rice absorbs all those delicious chicken juices. It’s comfort food reimagined—simpler, faster, but with the same soul-soothing satisfaction. Perfect for impressing your family without stressing yourself out.
What Ingredients You Will Need
This recipe uses simple, everyday ingredients to deliver big flavor without the fuss. Most of these are pantry staples, so you can probably make this tonight without a special shopping trip.
- Chicken Thighs (boneless, skinless): About 1.5 pounds (680 grams). I prefer thighs over breasts here—they stay juicier and more forgiving if you cook them a minute or two too long. Look for thighs that are similar in size so they cook evenly. (If you only have chicken breasts, that works too—just reduce the cooking time by about 5 minutes.)
- Garlic Butter: 4 tablespoons (half a stick or 56 grams). I use the salted garlic butter from the store because it’s what started this whole happy accident. But you can absolutely use regular unsalted butter and add 3-4 cloves of minced fresh garlic. If you’re using unsalted butter, add about 1/2 teaspoon of salt to the dish.
- Long-Grain White Rice: 1 cup (200 grams). I recommend jasmine or basmati for the best texture. They cook up fluffy and separate, not sticky and clumpy. Avoid short-grain rice here—it can get mushy. (Brown rice works too, but you’ll need to increase the liquid by 1/4 cup and cook for about 20 minutes longer.)
- Chicken Broth: 2 cups (480 ml). Use low-sodium if you can, so you control the salt level. I like Swanson’s or Kitchen Basics for consistent flavor. If you only have bouillon cubes, dissolve one cube in 2 cups of hot water.
- Onion: 1 medium yellow onion, diced (about 1 cup or 150 grams). Yellow onion gives the best savory base, but a white onion works fine too. If you’re in a hurry, you can use 1 teaspoon of onion powder instead—just stir it into the broth.
- Garlic Cloves: 3-4 cloves, minced. Fresh garlic is best here, but in a pinch, 1 teaspoon of jarred minced garlic works. (I won’t judge—I’ve been there.)
- Paprika: 1 teaspoon. This adds a warm, slightly sweet flavor and gives the chicken a beautiful golden color. Smoked paprika is lovely if you have it, but regular works great.
- Dried Thyme: 1/2 teaspoon. Thyme and garlic are best friends. If you have fresh thyme, use about 1 teaspoon of the leaves. Oregano is a fine substitute if that’s what you have.
- Salt and Black Pepper: To taste. Start with 1/2 teaspoon of salt and 1/4 teaspoon of pepper, then adjust at the end.
- Fresh Parsley: For garnish (optional but nice). A little sprinkle of green makes the dish look pretty and adds a fresh pop of flavor.
Equipment Needed
You don’t need a lot of fancy equipment for this recipe, which is part of why I love it so much. Here’s what you’ll need:
- Large Oven-Safe Skillet or Dutch Oven: A 12-inch skillet with a lid is ideal. I use my trusty cast-iron skillet for this—it holds heat beautifully and gives the chicken a gorgeous sear. If you don’t have cast iron, any oven-safe skillet or a Dutch oven works perfectly. Just make sure it has a lid. (My first time making this, I used a stainless steel pan and covered it tightly with foil—worked like a charm.)
- Cutting Board and Sharp Knife: For dicing the onion and mincing the garlic. A good chef’s knife makes this job so much faster. I learned the hard way that a dull knife is more dangerous than a sharp one—it slips!
- Measuring Cups and Spoons: For accurate measurements. I cannot stress this enough—especially with the rice and liquid. Getting that ratio right is the difference between perfect rice and a sad, mushy mess.
- Wooden Spoon or Spatula: For stirring and scraping up all that delicious browned goodness from the bottom of the pan. A silicone spatula works too, but I love the feel of a good wooden spoon.
- Tongs: For flipping the chicken. Much easier than trying to use a fork, and they give you better control.
Budget-friendly tip: If you don’t have an oven-safe skillet, you can cook the entire dish on the stovetop. Just reduce the heat to low, cover tightly, and simmer for about 20-25 minutes until the rice is tender and the chicken is cooked through.
Preparation Method
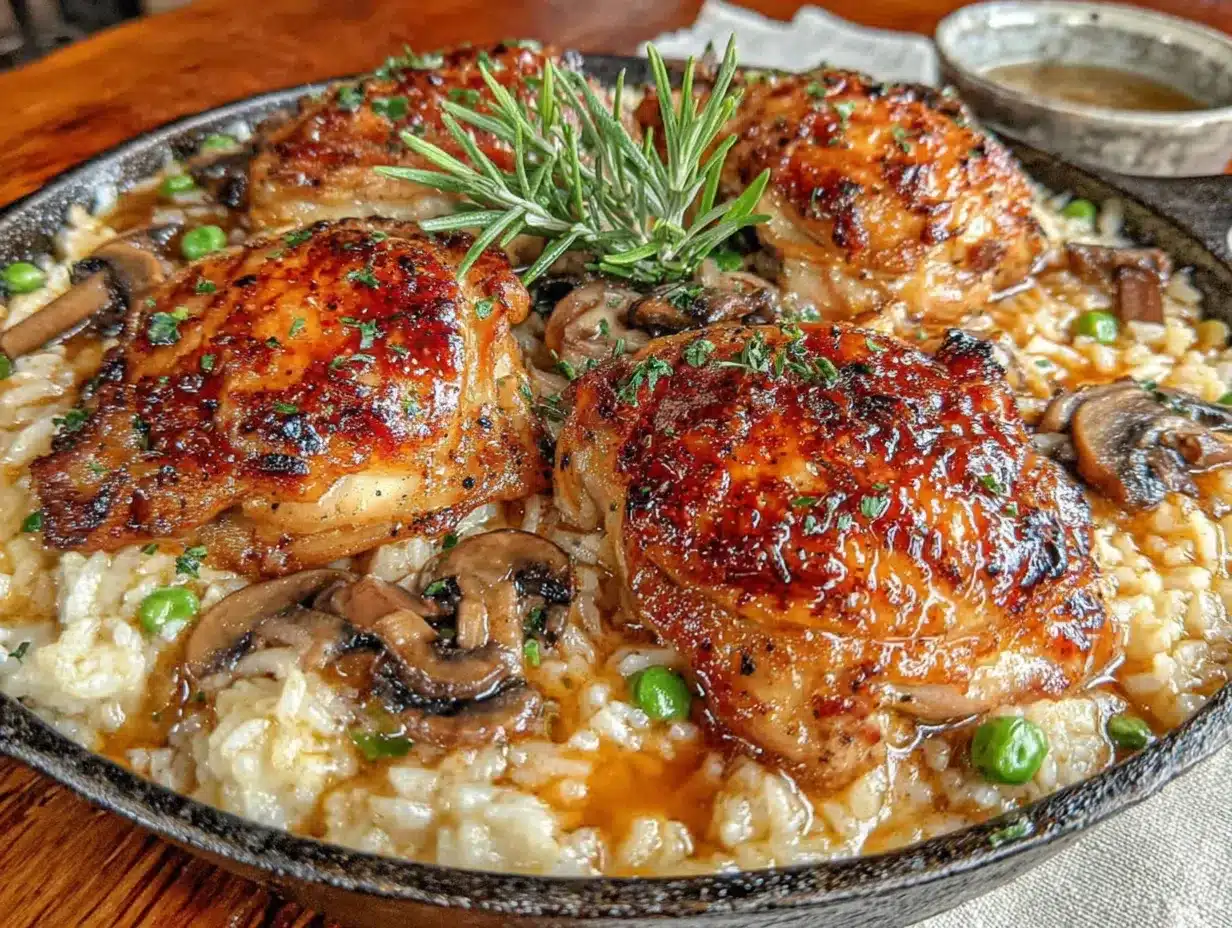
Alright, let’s get cooking! This method is straightforward, but I’ll walk you through each step with the little details that make a big difference.
- Preheat your oven to 375°F (190°C). While it’s heating, pat your chicken thighs dry with paper towels. This is important—dry chicken browns better. Season both sides with salt, pepper, and the paprika. Don’t skip the paprika—it adds so much color and a subtle warmth that the kids won’t even notice.
- Heat your large oven-safe skillet over medium-high heat. Add the garlic butter and let it melt completely. The butter should sizzle when it hits the pan but not burn. If it starts browning too fast, turn the heat down a notch. (I once burned the butter because I walked away to answer my phone—learn from my mistake!)
- Place the chicken thighs in the pan in a single layer. Don’t crowd them—work in batches if needed. Let them cook undisturbed for 4-5 minutes until the underside is golden brown and releases easily from the pan. If it sticks, it’s not ready to flip yet. Give it another minute. Flip and cook for another 3-4 minutes on the second side. The chicken won’t be fully cooked through yet—that’s fine. Transfer the browned chicken to a plate and set aside.
- Reduce the heat to medium. Add the diced onion to the pan with all those lovely browned bits. Cook for 3-4 minutes, stirring occasionally, until the onion is soft and translucent. Scrape up any browned bits from the bottom of the pan—that’s flavor you don’t want to lose.
- Add the minced garlic and cook for just 30 seconds until fragrant. Garlic burns fast, so keep stirring. Your kitchen should smell amazing right about now.
- Pour in the rice and stir to coat it in all that buttery, garlicky goodness. Let it toast for about 1 minute, stirring constantly. This little step makes the rice extra flavorful and helps keep it from getting mushy.
- Pour in the chicken broth and add the dried thyme. Stir everything together, scraping up any last bits from the bottom of the pan. Bring it to a gentle simmer—you should see small bubbles around the edges.
- Nestle the chicken thighs back into the pan, pushing them down into the rice slightly. Any juices that accumulated on the plate should go into the pan too—more flavor!
- Cover the skillet with its lid (or tightly with foil) and transfer it to the preheated oven. Bake for 25-30 minutes, until the rice is tender and has absorbed most of the liquid, and the chicken is cooked through (internal temperature of 165°F or 74°C).
- Remove from the oven and let it rest, covered, for 5 minutes. This resting time is crucial—it lets the rice finish absorbing the steam and makes everything extra tender. After resting, fluff the rice gently with a fork, garnish with fresh parsley if you like, and serve warm.
Cooking Tips & Techniques
After making this dish more times than I can count, I’ve learned a few things that make the difference between good and truly memorable. Here are my best tips:
Don’t skip browning the chicken. I know it adds an extra step, but that golden crust is where the flavor lives. The browned bits left in the pan (called fond) infuse the entire dish with savory richness. If you’re really pressed for time, you can skip it, but you’ll lose about 30% of the flavor. Trust me on this one.
Use the right rice-to-liquid ratio. For long-grain white rice, 1 cup of rice to 2 cups of liquid is perfect. Too much liquid and you get mushy rice. Too little and it’s undercooked. I learned this the hard way when I was rushing and didn’t measure carefully—the rice was crunchy in some spots and gluey in others. Not my finest moment.
Let the pan do the work. Once you put it in the oven, resist the urge to peek. Every time you lift that lid, steam escapes and your cooking time increases. If you’re worried about it burning, set a timer for 20 minutes and check then. Chances are, it’ll be just right.
Season in layers. Salt the chicken first, then add salt to the onions, then season the broth. This builds flavor gradually rather than dumping it all in at the end. You’ll end up with a more balanced dish that doesn’t taste salty in some bites and bland in others.
Make extra for leftovers. This dish reheats beautifully. The flavors actually meld together overnight, making it taste even better the next day. I often double the recipe when I know we’ll have a busy week ahead.
Variations & Adaptations
One of the best things about this recipe is how flexible it is. Here are some ways to make it your own:
- Vegetable-Packed Version: Add a cup of frozen peas and carrots during the last 5 minutes of cooking. Or stir in a handful of fresh spinach right before serving—it wilts into the rice beautifully. My kids don’t even notice the extra veggies this way.
- Creamy Garlic Butter Chicken and Rice: Stir in 1/4 cup of heavy cream or full-fat coconut milk at the end for an extra-rich, creamy version. This is what I make when I need serious comfort food. It’s indulgent but so worth it.
- Spicy Kick: Add 1/2 teaspoon of red pepper flakes along with the garlic, or use a pinch of cayenne pepper in the seasoning. My husband loves this version, though I keep it mild for the kids.
- Cheesy Delight: Sprinkle 1/2 cup of shredded cheddar or mozzarella over the top during the last 5 minutes of baking. Let it melt into the rice for a gooey, irresistible twist. Warning: this version disappears fast.
- Herb Garden Version: Swap the dried thyme for 1 tablespoon of fresh rosemary or oregano, finely chopped. Add it with the broth for a more pronounced herb flavor that pairs beautifully with the garlic butter.
- Dairy-Free Adaptation: Use olive oil or a plant-based butter alternative instead of regular butter. Add extra minced garlic (about 4-5 cloves) to make up for the garlic flavor in garlic butter. It works great—I’ve tested it for a friend with dairy sensitivities.
Serving & Storage Suggestions
This dish is incredibly versatile when it comes to serving. Here’s how I like to enjoy it:
Serving Suggestions: Serve this warm, right from the pan, with a simple side salad or steamed green beans for a complete meal. The rice and chicken are so flavorful that you don’t need much else. I often just put the skillet right on the table with a big spoon and let everyone help themselves—it feels cozy and family-style.
For a heartier meal, pair it with some crusty bread to soak up any extra buttery sauce at the bottom of the pan. Roasted broccoli or a crisp cucumber salad also works beautifully to balance the richness.
Storage Instructions: Store leftovers in an airtight container in the refrigerator for up to 4 days. The rice might absorb some additional moisture as it sits, but the flavor only gets better. I actually look forward to leftovers with this dish.
Freezing Instructions: This freezes well for up to 3 months. Let it cool completely, then transfer to a freezer-safe container. To reheat, thaw overnight in the fridge, then warm in a covered skillet over low heat with a splash of chicken broth or water to loosen the rice. You can also microwave individual portions—just cover with a damp paper towel to keep the rice from drying out.
Reheating Tip: The best way to reheat this is in a covered skillet over medium-low heat with a tablespoon of water or broth. Stir occasionally until heated through. This takes about 8-10 minutes and brings back that fresh-cooked texture better than the microwave.
Nutritional Information & Benefits
While this is definitely a comfort food dish, it does have some redeeming nutritional qualities. Here’s a rough estimate per serving (based on 4 servings):
- Calories: Approximately 520-580 per serving
- Protein: 32-35 grams (thanks to the chicken)
- Carbohydrates: 45-50 grams (from the rice)
- Fat: 22-26 grams (mostly from the butter and chicken skin)
- Fiber: 1-2 grams
Health Benefits: Chicken thighs are a good source of B vitamins, particularly B6 and B12, which support energy metabolism and brain function. Garlic is known for its immune-boosting properties—it contains compounds like allicin that may help fight off colds. And while butter gets a bad rap, it does provide fat-soluble vitamins A, D, E, and K, which help your body absorb nutrients from other foods.
Dietary Considerations: This recipe is naturally gluten-free (just make sure your chicken broth is certified gluten-free). To make it lower in carbs, you can substitute cauliflower rice—just reduce the cooking time to about 15 minutes and check for doneness early. For a lower-fat version, use chicken breast instead of thighs and reduce the butter to 2 tablespoons.
Potential Allergens: This recipe contains dairy (butter). For a dairy-free version, use olive oil or a plant-based butter alternative as mentioned in the variations section.
I believe in balance—this dish is wholesome enough to feel good about serving regularly, especially when paired with vegetables. It’s the kind of meal that nourishes both body and soul, and that’s what family cooking is all about.
Conclusion
This one-pan garlic butter chicken and rice started as a mistake, but it’s become one of those recipes I genuinely look forward to making. There’s something so satisfying about putting a whole meal together in a single pan and watching everyone at the table go quiet because they’re too busy eating to talk. That’s the kind of magic every home cook deserves to experience.
I hope you give this recipe a try, especially on those nights when you need dinner to be easy and delicious. Don’t be afraid to make it your own—swap in your favorite vegetables, add a little heat, or make it extra creamy. The best recipes are the ones that adapt to your family’s tastes.
When you make it, I’d love to hear how it turned out. Leave a comment below and let me know if your kids asked for seconds (mine did, and I nearly cried happy tears). Share a photo if you’re feeling proud—I love seeing your creations. And if you have your own twist on this dish, please share it! After all, the best recipes are the ones we pass along and make our own.
Happy cooking, friends. Here’s to meals that bring everyone to the table.
Frequently Asked Questions
Can I use chicken breasts instead of thighs?
Absolutely! Chicken breasts work well, but they cook faster and can dry out more easily. Reduce the oven cooking time to about 20-22 minutes, and check the internal temperature with a meat thermometer. You want 165°F (74°C). I recommend pounding thicker breasts to an even thickness for the best results.
Why is my rice still crunchy after baking?
Crunchy rice usually means one of two things: not enough liquid, or not enough cooking time. Make sure you’re using exactly 2 cups of broth for 1 cup of rice. Also, check that your oven temperature is accurate—an oven that runs cool can leave rice undercooked. If you’re at high altitude, you may need to add an extra 1/4 cup of liquid and increase cooking time by 5-10 minutes.
Can I make this in a slow cooker or Instant Pot?
For a slow cooker, brown the chicken and onions in a skillet first, then transfer everything to the slow cooker. Cook on low for 4-5 hours or high for 2-3 hours. For an Instant Pot, use the sauté function to brown the chicken and cook the onions, then add the rice and broth. Pressure cook on high for 5 minutes with a natural release. The texture will be slightly different but still delicious!
How do I prevent the rice from getting mushy?
Mushy rice is usually from too much liquid or overcooking. Stick to the 1:2 rice-to-liquid ratio, and don’t stir the rice once it’s in the oven. Stirring can release starch and make the rice gummy. Also, let it rest for exactly 5 minutes after baking—this lets the rice absorb any remaining steam without turning to mush.
Can I add vegetables directly to the pan?
Yes! Add quick-cooking vegetables like frozen peas, corn, or diced bell peppers during the last 10 minutes of baking. For heartier vegetables like carrots or broccoli, sauté them with the onions for a few minutes before adding the rice. This ensures everything cooks evenly and you don’t end up with crunchy carrots in your finished dish.
Pin This Recipe!
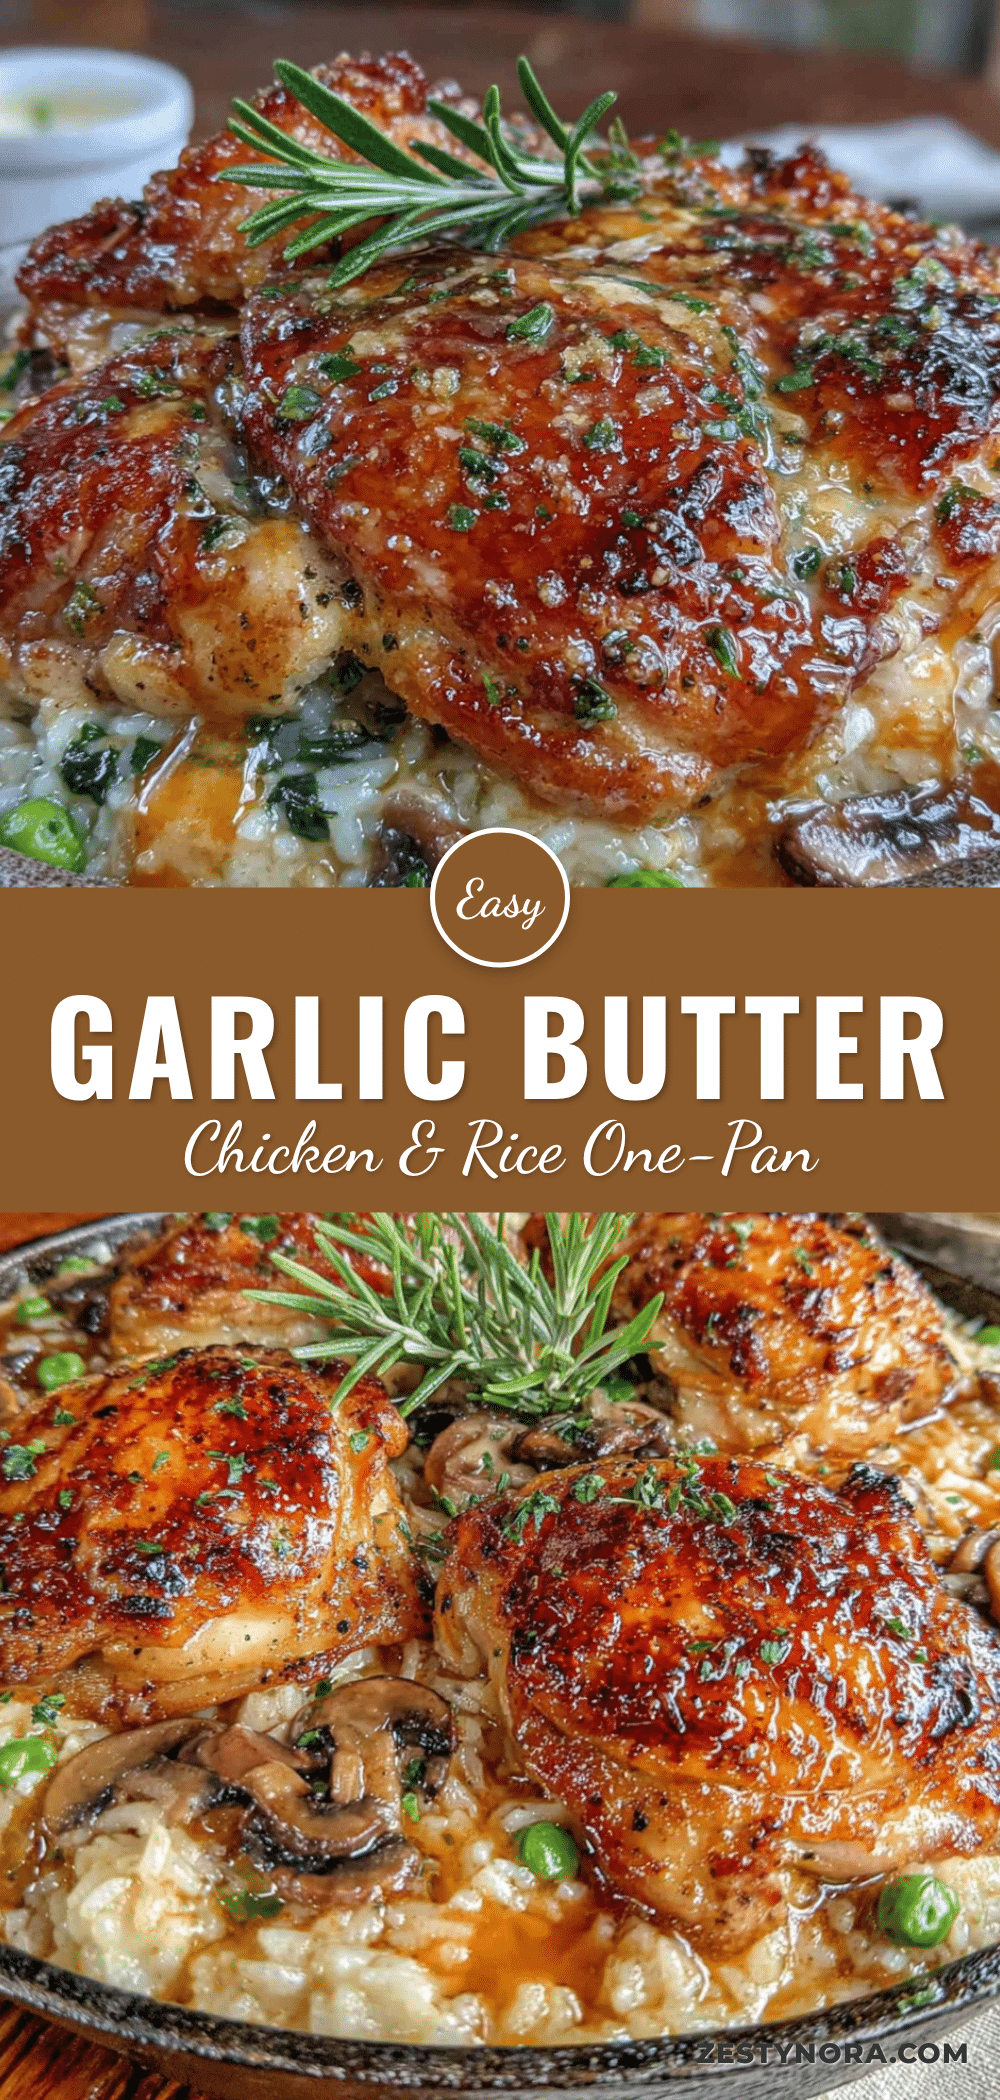
Kid-Approved One-Pan Garlic Butter Chicken and Rice

A comforting one-pan meal featuring juicy chicken thighs and savory rice cooked in garlic butter. Perfect for busy weeknights, this family-friendly dish comes together in about 40 minutes with simple ingredients.
- Prep Time: 15 minutes
- Cook Time: 30 minutes
- Total Time: 45 minutes
- Yield: 4 servings 1x
- Category: Main Course
- Cuisine: American
Ingredients
- 1.5 pounds (680 grams) boneless, skinless chicken thighs
- 4 tablespoons (half a stick or 56 grams) salted garlic butter (or 4 tablespoons unsalted butter + 3–4 cloves minced garlic + 1/2 teaspoon salt)
- 1 cup (200 grams) long-grain white rice (jasmine or basmati recommended)
- 2 cups (480 ml) low-sodium chicken broth
- 1 medium yellow onion, diced (about 1 cup or 150 grams)
- 3–4 cloves garlic, minced
- 1 teaspoon paprika
- 1/2 teaspoon dried thyme (or 1 teaspoon fresh thyme leaves)
- Salt and black pepper to taste (start with 1/2 teaspoon salt and 1/4 teaspoon pepper)
- Fresh parsley for garnish (optional)
Instructions
- Preheat oven to 375°F (190°C). Pat chicken thighs dry with paper towels. Season both sides with salt, pepper, and paprika.
- Heat a large oven-safe skillet over medium-high heat. Add garlic butter and let it melt completely.
- Place chicken thighs in the pan in a single layer. Cook undisturbed for 4-5 minutes until golden brown and releases easily. Flip and cook for another 3-4 minutes. Transfer browned chicken to a plate.
- Reduce heat to medium. Add diced onion to the pan and cook for 3-4 minutes, stirring occasionally, until soft and translucent. Scrape up browned bits from the bottom.
- Add minced garlic and cook for 30 seconds until fragrant.
- Pour in rice and stir to coat in butter mixture. Toast for about 1 minute, stirring constantly.
- Pour in chicken broth and add dried thyme. Stir together, scraping up any remaining bits. Bring to a gentle simmer.
- Nestle chicken thighs back into the pan, pushing them down into the rice slightly. Add any accumulated juices from the plate.
- Cover the skillet with a lid or tightly with foil. Transfer to the preheated oven and bake for 25-30 minutes, until rice is tender and liquid is absorbed, and chicken reaches an internal temperature of 165°F (74°C).
- Remove from oven and let rest, covered, for 5 minutes. Fluff rice gently with a fork, garnish with fresh parsley if desired, and serve warm.
Notes
Don’t skip browning the chicken—it builds flavor. Use the right rice-to-liquid ratio (1:2). Let the pan rest after baking for best texture. Leftovers keep in the fridge for up to 4 days and freeze for up to 3 months. For a dairy-free version, use olive oil or plant-based butter with extra garlic.
Nutrition
- Serving Size: 1 serving (about 1/4
- Calories: 550
- Sugar: 2
- Sodium: 600
- Fat: 24
- Saturated Fat: 10
- Carbohydrates: 48
- Fiber: 1
- Protein: 34
Keywords: one-pan chicken and rice, garlic butter chicken, easy weeknight dinner, family dinner, kid-friendly, comfort food