Third time in a Halloween and the gummy worms keep wiggling. I had planned to make just one batch for the office party, but then my neighbor’s kids showed up, and suddenly I was digging through the pantry for more dirt. Honestly, it started as a lazy Tuesday thing, but by Thursday night, I had made this No-Bake Halloween Dirt Cups with Gummy Worms three times in ten days. I don’t know why I keep making it. Maybe it’s the simplicity. Maybe it’s the fact that I don’t have to turn on the oven and heat up my kitchen in October. Or maybe it’s just the sheer joy of watching a six-year-old’s eyes light up when they see the worms.
The first time, I used dark chocolate cake. It was rich, maybe too rich for a quick snack. The second time, I switched to vanilla, which felt too plain, like a Halloween treat without the spooky factor. The third time, I found the sweet spot. Moist chocolate cake mixed with creamy pudding, topped with crushed Oreos, and those squiggly worms that somehow always end up on the floor. It’s compulsive in the best way. You make it, you see the kids devour it, and you think, “I should probably make this again for the next party.”
There’s something about the texture that pulls you back. The crunch of the cookie crumbs against the soft, creamy pudding. It’s not complicated. It’s not fancy. But it works. Every single time. I’ve tried adding nuts. I’ve tried swapping the pudding for whipped cream. Nothing beats the original combo. It’s the consistency that keeps me coming back to this recipe. I don’t even measure the cake anymore. I just eyeball it, knowing that if it’s too dry, I add a splash of milk. If it’s too wet, I add more crumbs. It’s forgiving. That’s probably why I can’t stop making it.
Last year, I tried to be fancy and made individual terrariums with moss and tiny plastic frogs. It looked cute, but nobody ate it. This year, I’m sticking to the dirt cups. They’re easy to grab, easy to eat, and easy to clean up. I realized that the best part isn’t the presentation. It’s the fact that I can make them while helping with homework or folding laundry. They come together fast. And honestly, that’s what I love most about them. They don’t demand my attention. They just wait in the fridge, ready to be devoured when the hunger strikes. I think that’s why I’m obsessed. It’s low effort, high reward. And the kids love the worms. Let’s face it, kids love worms. It’s a guaranteed win. I’ll keep making them as long as the candy aisle stocks them.
Why You’ll Love This Recipe
This No-Bake Halloween Dirt Cups with Gummy Worms recipe is a staple in my house for a reason. It’s not just about the taste, though the chocolate and cream combo is pretty hard to beat. It’s about the experience. I’ve tested dozens of versions over the years, from using boxed cake mix to baking from scratch, and this one hits the perfect balance of ease and flavor. It’s the kind of treat that feels homemade but requires zero baking skills. You know how sometimes you want something sweet but don’t want to deal with flour everywhere? This is that recipe.
- Quick & Easy: Comes together in under 15 minutes, perfect for busy weeknights or last-minute Halloween parties. You really don’t need any special skills.
- Simple Ingredients: No fancy grocery trips needed; you likely already have everything in your kitchen. Chocolate cake, pudding, Oreos, and worms. That’s it.
- Perfect for Halloween: Great for trick-or-treaters, classroom parties, or spooky movie nights. It fits the theme perfectly without being too childish.
- Crowd-Pleaser: Always gets rave reviews from kids and adults alike. Even the picky eaters usually give it a thumbs up.
- Unbelievably Delicious: The texture and flavor combo is next-level comfort food. The crunch, the cream, the chocolate—it’s all there.
What makes this recipe different from the rest is the simplicity of the assembly. A lot of Halloween treats try too hard to be spooky, with elaborate decorations or weird flavors. This one stays true to classic chocolate pudding cup vibes but dresses them up for the season. It’s reliable. I’ve made this for birthday parties, holidays, and random Tuesday snacks. It never fails. It’s the kind of dessert that makes you close your eyes after the first bite because it just hits the spot. It’s comfort food reimagined for Halloween—fun, fast, but with the same soul-soothing satisfaction as a warm cup of cocoa.
I also love that it’s customizable. You can make it gluten-free if needed, or swap the pudding for a dairy-free alternative. It’s flexible enough to fit almost any diet, which is huge when you’re feeding a group. Plus, the visual appeal is great for social media. Those gummy worms poking out of the “dirt” are iconic. It’s a recipe that looks impressive but is actually super simple. That’s a win-win in my book.
What Ingredients You Will Need
This recipe uses simple, wholesome ingredients to deliver bold flavor and satisfying texture without the fuss. You don’t need a dozen different spices or hard-to-find items. The magic here is in the combination of textures—crunchy, creamy, and chewy. Most of these items are pantry staples, which is why I always have them on hand. If you’re missing one, it’s easy to grab at any store. The key is to use quality ingredients where it counts, especially the chocolate and cream.
- Chocolate Cake: You can use a boxed mix or a homemade one. I prefer a moist chocolate cake. If using boxed, stick to the standard instructions. (I recommend Duncan Hines or a similar brand for consistent moisture.)
- Instant Chocolate Pudding Mix: This is the base of the creaminess. You’ll need two packages (3.4 oz each) to make a rich, thick pudding. (Jell-O or generic brands work fine.)
- Milk: Use cold 2% milk for the best texture. Whole milk makes it richer, but 2% is a good balance. (About 2 cups total for the pudding.)
- Oreo Cookies: These are your “dirt.” You need about 10-12 cookies per batch. (Classic Oreos are best, but dark chocolate Oreos add a nice twist.)
- Heavy Cream: Optional, but I like to whip it slightly to add extra fluffiness to the pudding layer. (About 1/2 cup, whipped to soft peaks.)
- Gummy Worms: The star of the show. Use standard size for the best visual effect. (Haribo or Trolli brands are my go-to.)
- Optional: Mini Chocolate Chips: For extra crunch and chocolate flavor in the dirt layer. (About 1/4 cup.)
One tip I’ve learned over the years is to crush the Oreos properly. You want them fine enough to look like dirt, but not so fine that they turn into paste. A food processor works well, but a ziplock bag and a rolling pin work too. Also, make sure your pudding is fully set before assembling. If it’s still runny, it will make the cake soggy. I usually let it sit in the fridge for at least 30 minutes after mixing. And for the gummy worms, buy them in bulk. You’ll use more than you think, especially if you have kids. They always grab a handful.
Equipment Needed
You don’t need much for this recipe, which is part of its charm. A few basic tools will get you through the process without any hassle. If you don’t have these specific items, you can easily substitute them with what you have on hand.
- Mixing Bowls: You’ll need two medium-sized bowls. One for the cake crumbs and one for the pudding. A large bowl is nice if you’re mixing the cake and pudding together.
- Whisk: Essential for mixing the pudding mix with milk until smooth. A balloon whisk works best for removing lumps.
- Food Processor or Ziplock Bags: For crushing the Oreos. A food processor is faster, but a bag and a rolling pin are great for keeping the mess contained. I’ve crushed cookies in a bag before, and it’s surprisingly therapeutic.
- Serving Cups: Clear plastic or glass cups work best so you can see the layers. Shot glasses are cute for small portions, but regular dessert cups are easier for kids.
- Measuring Cups and Spoons: Standard set for the milk and pudding mix. Precision isn’t super critical here, but it helps to be consistent.
- Spatula: For folding the whipped cream into the pudding or mixing the cake crumbs.
If you don’t have a food processor, don’t worry. A rolling pin works just as well. Just make sure to use a sturdy bag so it doesn’t break. Also, if you’re making a large batch, a stand mixer can help whip the cream faster. But honestly, a hand mixer or even a whisk and some elbow grease works fine. The key is to keep it simple. No fancy gadgets required.
Preparation Method
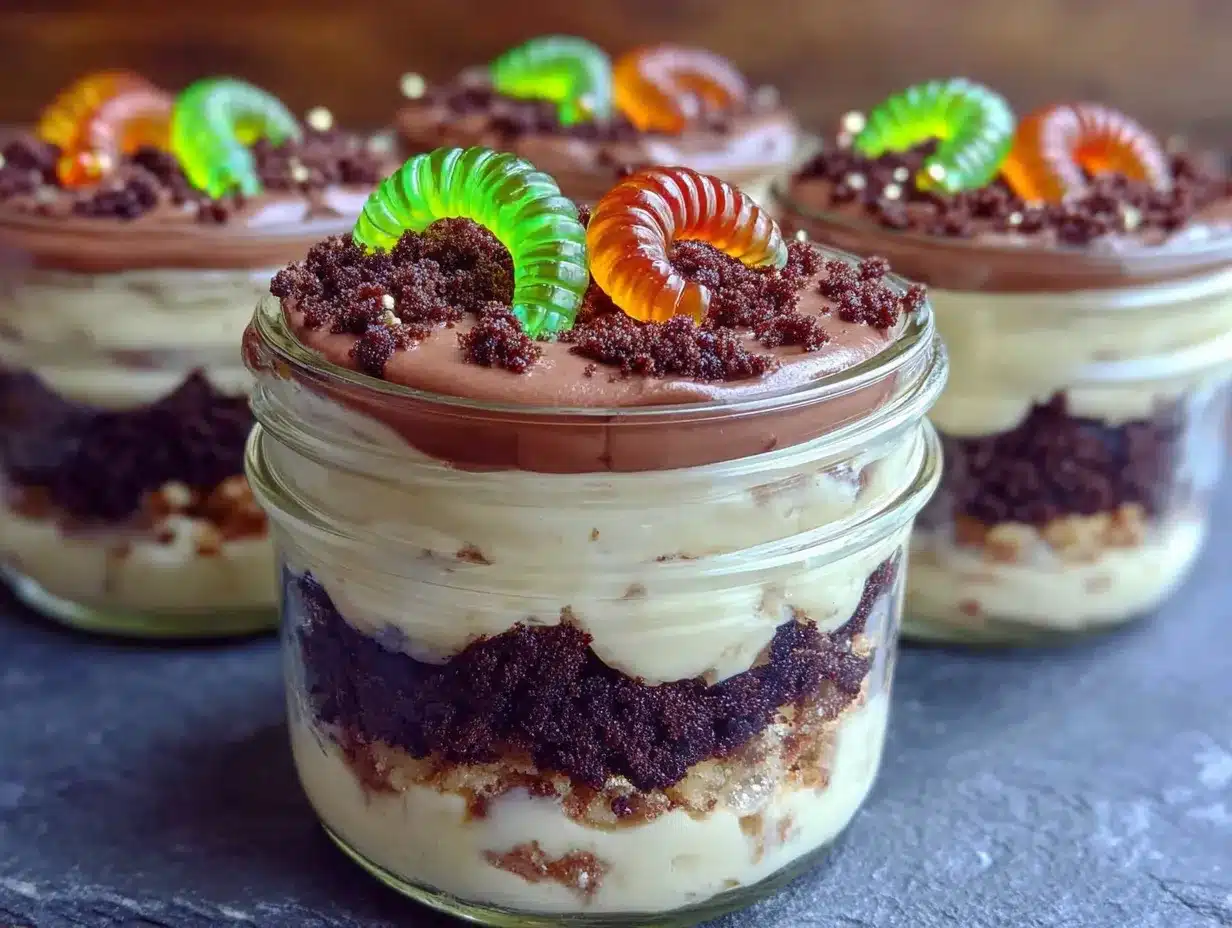
- Prepare the Cake Crumbs: Start by crumbling your chocolate cake. If you’re using a boxed mix, bake it according to the package instructions and let it cool completely. Once cool, break it into small pieces. (This takes about 10 minutes.)
- Crush the Oreos: Place 10-12 Oreo cookies in a food processor and pulse until they resemble fine dirt. Alternatively, put them in a ziplock bag and crush them with a rolling pin. (About 5 minutes.)
- Mix the Pudding: In a medium bowl, whisk together the instant chocolate pudding mix and cold milk. Whisk vigorously for 2 minutes until thick. (5 minutes.)
- Whip the Cream (Optional): If you’re adding whipped cream, whip 1/2 cup of heavy cream until soft peaks form. Fold it into the pudding mixture gently. (3 minutes.)
- Combine Cake and Pudding: In a large bowl, mix the crumbled cake and the pudding mixture. Stir until the cake is evenly coated. It should look like moist chocolate soil. (5 minutes.)
- Assemble the Cups: Spoon the cake-pudding mixture into your serving cups, filling them about 3/4 full. (2 minutes.)
- Add the Dirt: Top each cup with a generous layer of crushed Oreo crumbs. (1 minute.)
- Add the Worms: Stick 2-3 gummy worms into the Oreo crumbs so they hang out like they’re burrowing. (1 minute.)
- Chill: Refrigerate for at least 30 minutes before serving to let the flavors meld. (30 minutes.)
One thing to watch out for is the moisture level of the cake. If your cake is very dry, the pudding might not coat it evenly. Add a splash of milk if needed. Also, don’t over-mix the pudding. You want it smooth, but over-whisking can incorporate too much air, making it fluffy instead of creamy. The goal is a dense, rich texture. And when adding the worms, push them in gently so they don’t break. Kids love pulling them out, so make sure they’re secure enough to stay in place.
Cooking Tips & Techniques
There are a few tricks to making the perfect dirt cup. First, make sure your cake is completely cool before crumbling it. Warm cake will turn into mush when mixed with the pudding. I’ve made this mistake before, and it results in a soupy mess. Second, crush the Oreos to a fine consistency. Large chunks look nice, but they don’t mimic dirt as well. You want that sandy texture. Third, let the pudding set properly. If you rush this step, the layers won’t hold together. I usually make the pudding first and let it sit while I crush the cookies. This saves time and ensures everything is ready at the same time.
Another tip is to use a piping bag for the pudding layer if you want a fancy look. It’s not necessary, but it adds a professional touch. Also, consider adding a layer of chocolate syrup at the bottom of the cup for a surprise center. It’s a nice variation that kids love. And don’t skimp on the worms. They’re the fun part. If you’re making these for a party, have extra worms on hand. Kids will inevitably drop them or use them as stirrers.
One common mistake is using too much milk in the pudding. This makes it too runny. Stick to the package instructions. Also, if you’re using homemade cake, make sure it’s not too dense. A light, fluffy cake works best with the creamy pudding. And finally, chill the cups before serving. Cold pudding tastes better, and it helps the layers set. I usually make them the night before, so they’re ready to go. This also helps the flavors meld, making the taste even better the next day.
Variations & Adaptations
While the classic version is my favorite, there are plenty of ways to twist this recipe. You can make it gluten-free by using gluten-free cake mix and gluten-free Oreos. There are several good brands out now, like Pamela’s or Kinnikinnick. For a dairy-free option, use almond milk for the pudding and dairy-free chocolate chips. It’s surprisingly creamy and still delicious. You can also swap the chocolate cake for red velvet or pumpkin cake for different flavors. Pumpkin cake is great for autumn, and red velvet is festive for other holidays.
Another variation is to add a layer of peanut butter cups. Crush them up and mix them into the dirt layer for a salty-sweet crunch. It’s a game-changer. You can also use different types of worms, like sour worms or gummy snakes, for variety. If you’re making these for adults, you can add a splash of bourbon or coffee liqueur to the pudding for a grown-up twist. It’s subtle but adds depth. And for a healthier option, you can use Greek yogurt instead of pudding. It’s tangy and protein-packed, though the texture is different.
I’ve also tried making these with brownie bits instead of cake. It’s denser and more chocolatey. If you’re a chocolate lover, this is the way to go. You can also add sprinkles to the dirt layer for a pop of color. It’s not traditional, but it looks cute. The key is to experiment and find what works for you. I’ve made this recipe so many times that I’ve tried almost every variation. Some work better than others, but that’s part of the fun. Try one and see what you think.
Serving & Storage Suggestions
These dirt cups are best served chilled. The cold temperature enhances the creamy texture of the pudding and makes the Oreo crumbs crunchier. I like to serve them in small cups for parties, but they’re great as a single-serving snack too. Pair them with a cold glass of milk or a spooky cocktail for adults. They’re also great alongside other Halloween treats, like apple cider or pumpkin soup. For presentation, add a dusting of powdered sugar or cocoa powder on top for a snowy effect. It’s a nice touch that makes them look more festive.
For storage, keep them covered in the fridge for up to 3 days. The cake will absorb moisture from the pudding, so they might get softer over time. If you’re making them ahead, wait to add the worms until just before serving to prevent them from getting soggy. You can also freeze the cake-pudding mixture, but the texture might change slightly upon thawing. I usually just stick to the fridge. If you’re traveling, pack them in a cooler with ice packs. They hold up well for a few hours. And for leftovers, just cover them tightly with plastic wrap. They’re usually gone before they expire, though.
Nutritional Information & Benefits
While these are definitely a treat, they’re not overly heavy. Each cup has roughly 300-400 calories, depending on the size and ingredients used. The chocolate cake provides carbohydrates for energy, while the pudding offers calcium and protein. The Oreos add fat and sugar, so moderation is key. For a healthier twist, you can reduce the sugar in the pudding or use low-fat milk. The gummy worms are mostly sugar, so use them sparingly if you’re watching your intake. Overall, this is a fun, occasional treat rather than a daily snack. It’s great for special occasions like Halloween or birthdays.
If you’re concerned about allergens, be sure to check the labels on the cake mix and Oreos. They often contain wheat, milk, and soy. For nut-free options, stick to standard brands. The recipe is easy to adapt for various dietary needs, which is a big plus. I always try to make sure everyone at the table has something they can enjoy. This recipe is flexible enough to accommodate most diets. And honestly, the joy it brings is worth the occasional indulgence. It’s a treat that brings people together, which is the best benefit of all.
Conclusion
This No-Bake Halloween Dirt Cups with Gummy Worms is a simple, fun, and delicious treat that’s perfect for any Halloween celebration. It’s easy to make, requires minimal cleanup, and always gets a smile from kids and adults alike. I love how versatile it is, allowing you to customize it to your taste or dietary needs. Whether you stick to the classic recipe or try a variation, you’re sure to enjoy the result. So, grab your ingredients, get your worms, and start digging into this spooky delight. I’d love to hear how it turns out for you. Leave a comment below with your favorite variation or tips. Share your photos on social media and tag me. Happy Halloween!
FAQs
Can I make these dirt cups ahead of time?
Yes, you can make them up to 3 days in advance. Store them in the fridge covered with plastic wrap. Add the gummy worms just before serving to keep them fresh.
What can I use instead of chocolate cake?
You can use brownie bits, chocolate cookie crumbs, or even crushed chocolate wafers. Any chocolate-based crumb will work well.
How do I make this recipe gluten-free?
Use a gluten-free chocolate cake mix and gluten-free Oreo cookies. There are several good brands available that work just as well.
Can I use homemade pudding?
Yes, you can use homemade chocolate pudding, but it will take longer to set. Make sure it’s thick and cool before assembling.
What kind of gummy worms work best?
Standard-sized gummy worms work best for visibility. Sour worms or gummy snakes are also fun variations. Avoid tiny worms as they get lost in the dirt.
Pin This Recipe!
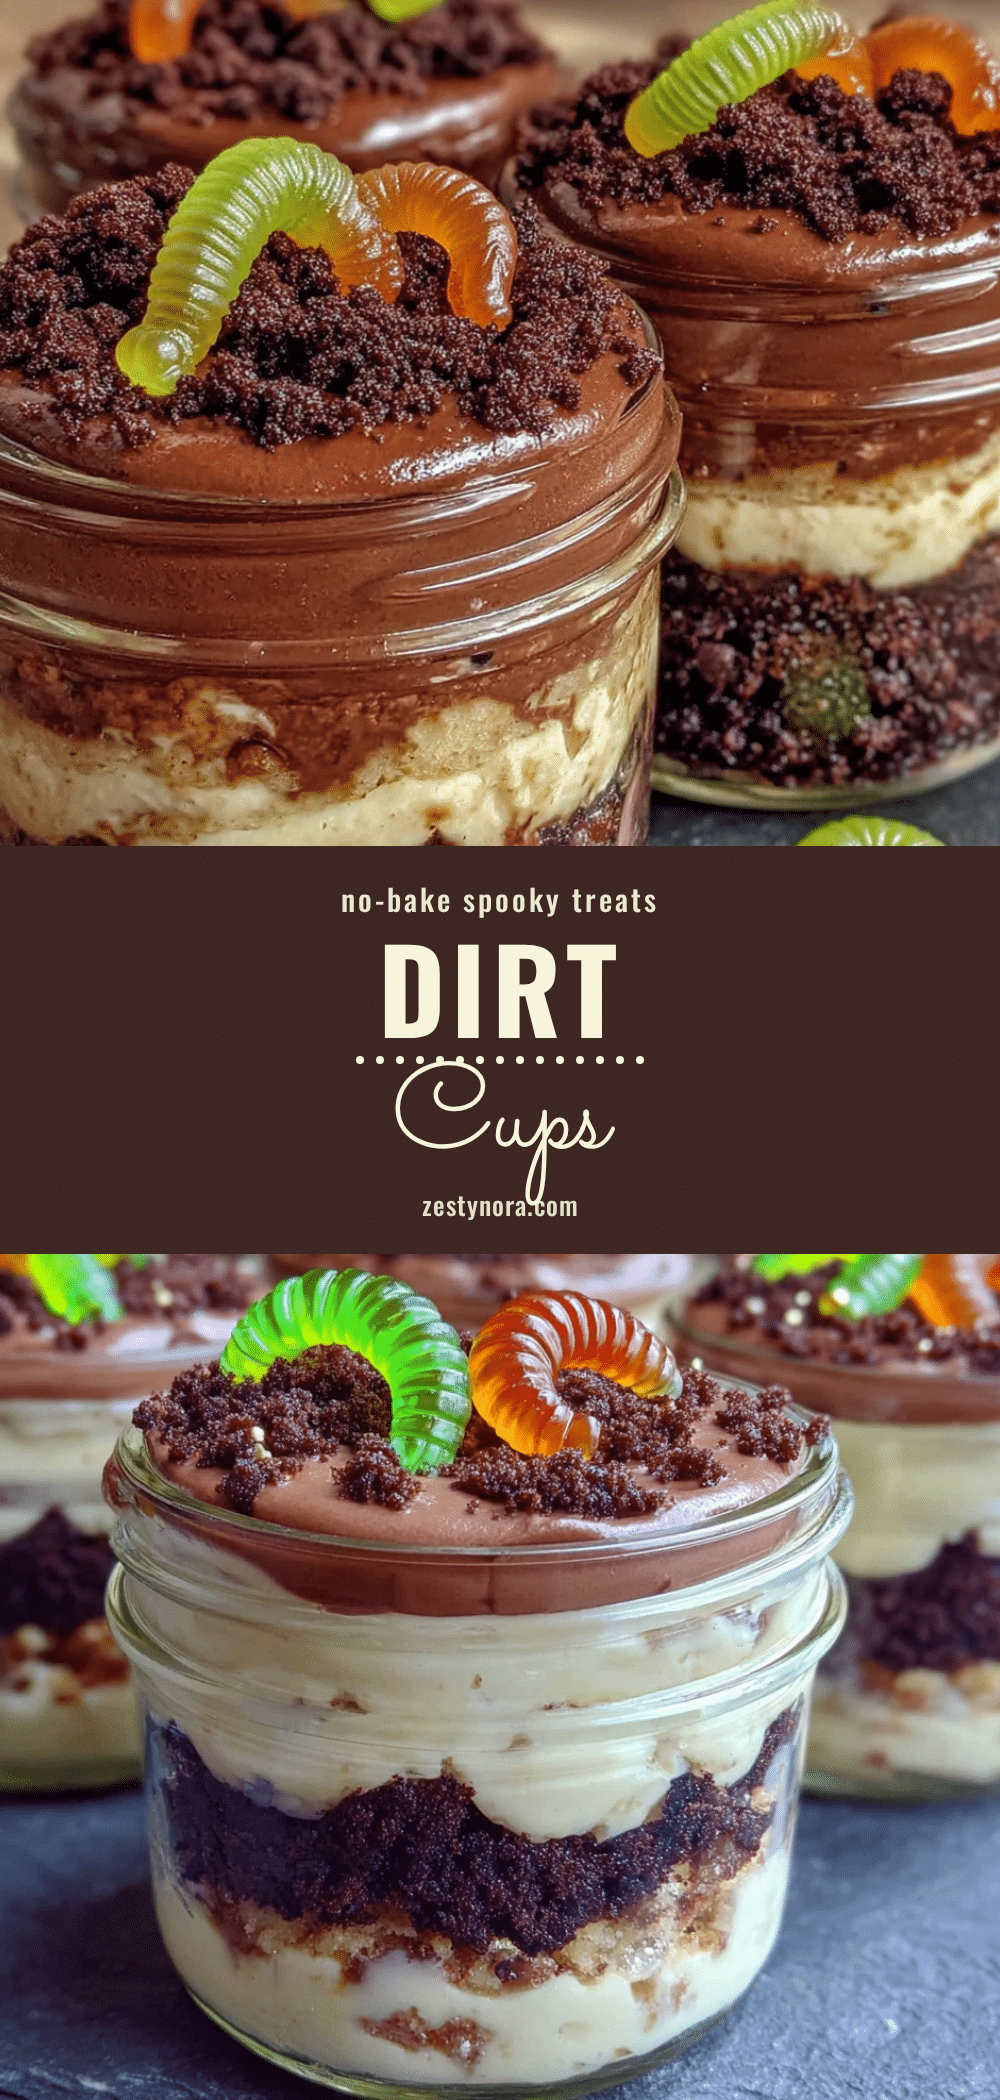
No-Bake Halloween Dirt Cups: 3-Ingredient Easy Treats

A simple, no-bake Halloween dessert featuring moist chocolate cake mixed with creamy pudding, topped with crushed Oreo ‘dirt’ and gummy worms. It’s a quick, crowd-pleasing treat that requires minimal effort and no oven.
- Prep Time: 15 minutes
- Cook Time: 0 minutes
- Total Time: 45 minutes
- Yield: 6 servings 1x
- Category: Dessert
- Cuisine: American
Ingredients
- 1 moist chocolate cake (boxed or homemade), cooled and crumbled
- 2 packages (3.4 oz each) instant chocolate pudding mix
- 2 cups cold 2% milk
- 10–12 Oreo cookies, crushed into fine crumbs
- 1/2 cup heavy cream, whipped to soft peaks (optional)
- Gummy worms, standard size
- 1/4 cup mini chocolate chips (optional)
Instructions
- Crumble the cooled chocolate cake into small pieces.
- Crush the Oreo cookies in a food processor or ziplock bag until they resemble fine dirt.
- In a medium bowl, whisk the instant chocolate pudding mix and cold milk vigorously for 2 minutes until thick. Let sit in the fridge for at least 30 minutes to set.
- If using, whip the heavy cream to soft peaks and gently fold it into the set pudding mixture.
- In a large bowl, combine the crumbled cake and the pudding mixture, stirring until the cake is evenly coated and looks like moist soil.
- Spoon the cake-pudding mixture into serving cups, filling them about 3/4 full.
- Top each cup with a generous layer of crushed Oreo crumbs.
- Insert 2-3 gummy worms into the Oreo crumbs so they appear to be burrowing.
- Refrigerate for at least 30 minutes before serving to allow flavors to meld.
Notes
Ensure the cake is completely cool before crumbling to avoid a soupy texture. Crush Oreos finely to mimic dirt. Let the pudding set fully before assembling. For gluten-free, use GF cake mix and GF Oreos. For dairy-free, use almond milk and dairy-free alternatives. Add worms just before serving to prevent sogginess.
Nutrition
- Serving Size: 1 cup
- Calories: 350
- Sugar: 32
- Sodium: 250
- Fat: 18
- Saturated Fat: 8
- Carbohydrates: 45
- Fiber: 2
- Protein: 6
Keywords: Halloween, no-bake, dessert, easy treats, gummy worms, chocolate pudding, dirt cups, kids party, quick snacks