The alarm is blaring, but my brain is still stuck in dreamland. I want coffee. I want it black, hot, and ready in ten seconds flat. I have the mug in my hand, but the house is cold, and the idea of standing over a sizzling skillet while my eyes are half-closed feels like too much effort. Honestly, who has the energy for that before 7 AM?
I keep thinking about last month when I actually tried to cook breakfast in the morning. It was a disaster. Scrambled eggs turned into rubber, and the toast burned while I was busy trying to find my keys. I ended up eating a granola bar over the sink, feeling defeated before I even left the house. That was the moment I realized my morning routine needed a serious overhaul.
I need something that waits for me. Something that doesn’t judge me for hitting snooze one more time. I need the fluffy freezer breakfast burrito. It’s not just food; it’s a lifeline for busy mornings. It’s the difference between rushing out the door stressed and actually having a moment to breathe.
Let’s face it, life gets chaotic. Work calls, kids need rides, and the dog needs walking. I don’t have time to chop onions or whisk eggs every single day. But I do have time to wrap a tortilla and freeze it. This recipe changed my weekday mornings. It’s simple, it’s forgiving, and it tastes like I actually tried.
There’s a specific comfort in pulling a burrito from the freezer, wrapping it in a damp paper towel, and microwaving it for two minutes. The steam hits your face, and suddenly, the day doesn’t feel so heavy. It’s a small ritual that grounds me.
I still remember the first time I made a batch on a Sunday afternoon. I sat on the kitchen floor, surrounded by tortillas and containers, feeling surprisingly productive. It wasn’t about being perfect; it was about buying myself time. Time to enjoy my coffee. Time to listen to a podcast. Time to just be human before the chaos starts.
That’s why this recipe stuck with me. It’s not fancy. It’s not gourmet. It’s reliable. It’s the kind of meal that says, “I’ve got your back.” And honestly, that’s worth more than any complicated brunch dish ever could.
Why You’ll Love This Recipe
Let’s be real for a second. Most breakfast recipes fail the morning test. They look great in photos but require a chef’s level of skill and patience at 6 AM. This fluffy freezer breakfast burrito is different. It was born out of necessity but perfected through trial and error. I’ve tested enough egg dishes to know that texture is everything. If your eggs are dry, you’ve lost the battle.
Here is why this recipe actually works for real people:
- Quick & Easy: The assembly takes about 15 minutes, but the real magic happens in the freezer. When you need it, it’s ready in under 3 minutes. Perfect for those rushed weeknights or early mornings when you’re running late.
- Simple Ingredients: You don’t need a specialty grocery store. Everything you need is likely already in your fridge or pantry. Eggs, cheese, bread, and tortillas. No obscure spices or hard-to-find items.
- Perfect for Meal Prep: If you hate the idea of cooking every single day, this is your solution. Make a big batch on Sunday, and you’re set for the entire workweek. It’s the ultimate time-saver.
- Crowd-Pleaser: Even my picky eater approves. The combination of soft scrambled eggs, melted cheese, and warm tortilla is universally liked. Kids love the handheld format, and adults love the warmth.
- Unbelievably Delicious: The key is the fluffy texture. We use a specific technique to keep the eggs moist, so they don’t turn into rubber balls in the microwave. It’s next-level comfort food that feels indulgent but is actually quite simple.
What makes this recipe stand out from the rest is the attention to detail in the cooking process. Many people just dump eggs into a pan and hope for the best. Not here. We cook them gently, almost like a custard, to ensure they stay tender. Plus, the addition of a little bit of cream or milk in the eggs makes all the difference.
This isn’t just another breakfast recipe. It’s a system. It’s the kind of meal that makes you feel organized and prepared. It’s comfort food reimagined for the modern, busy life. You get the satisfaction of a homemade meal without the stress of standing over a stove every morning.
What Ingredients You Will Need
This recipe relies on wholesome, accessible ingredients that deliver bold flavor without the fuss. The beauty of this burrito is that it acts as a canvas for whatever you have on hand, but sticking to the basics ensures that perfect, fluffy texture every time.
Here is what you need to gather before you start:
- Eggs: Large eggs, room temperature. I recommend using free-range eggs if you can find them; the yolks are richer and the flavor is noticeably better. You’ll need about 8-10 eggs for a standard batch. Room temperature eggs whisk more evenly, which helps with that fluffy consistency.
- Heavy Cream or Whole Milk: 1/4 cup heavy cream or whole milk. This is the secret weapon. The fat content prevents the eggs from drying out in the microwave. If you’re watching your dairy intake, you can use water, but the texture won’t be as luxurious.
- Butter: Unsalted butter, softened. You need this for greasing the pan. It adds a rich, nutty flavor that oil just can’t match. I prefer European-style butter for its higher fat content, which gives a nicer mouthfeel.
- Shredded Cheese: 1 cup of shredded cheddar or a Mexican blend. Do not buy pre-shredded cheese if you can avoid it. It contains anti-caking agents that prevent it from melting smoothly. Buy a block and shred it yourself; it melts so much better and tastes fresher.
- Flour Tortillas:
- Salt and Pepper: Kosher salt and freshly cracked black pepper. Always season your eggs while they are cooking, not just after. This builds flavor from the inside out. Use about 1/2 teaspoon of salt for the whole batch.
- Optional Add-ins: Diced bell peppers, onions, cooked bacon, or spinach. If you use veggies, make sure they are pre-cooked and drained. Raw veggies release water, which can make your burrito soggy. I usually sauté onions and peppers separately before adding them to the mix.
The key to success here is quality over quantity. You don’t need ten different ingredients. You just need good eggs, good cheese, and good tortillas. If you swap the cheddar for pepper jack, you get a nice kick. If you use spinach, you add a pop of color and nutrition. But the foundation remains the same: simple, high-quality components.
Equipment Needed
You don’t need a fancy kitchen to make these burritos. In fact, keeping the equipment simple is part of the appeal. Here is what you’ll need to get the job done efficiently.
- Non-Stick Skillet: An 8-inch or 10-inch non-stick skillet is essential. Eggs stick easily, and a good non-stick surface ensures they slide out easily for folding. I use a ceramic-coated pan because it’s durable and heats evenly. If you don’t have one, a well-seasoned cast iron skillet works too, but you’ll need to be extra careful with the butter.
- Mixing Bowls: Two medium-sized bowls. One for whisking the eggs and cream, and another for holding the cheese or prepped ingredients. Having two bowls keeps your workspace organized and speeds up the process.
- Whisk: A standard wire whisk. You want to incorporate air into the eggs gently. A fork works in a pinch, but a whisk gives you a more uniform mixture, which leads to fluffier eggs.
- Spatula: A flexible silicone spatula. This is crucial for folding the eggs. You want to gently lift and fold the eggs as they cook, creating soft curds. A rigid spatula will break up the eggs too much.
- Cling Wrap or Parchment Paper: For wrapping the individual burritos. I prefer parchment paper because it’s less likely to stick to the tortilla if any moisture escapes. Cling wrap works fine, but make sure it’s food-grade and tightly sealed.
- Freezer-Safe Bags or Container: Heavy-duty zip-top bags or an airtight container. If using bags, squeeze out as much air as possible to prevent freezer burn. An airtight container is great if you want to stack them neatly.
- Microwave-Safe Plate: For reheating. Make sure it’s large enough to hold the burrito flat. A paper plate works well if you don’t want to use a dish, but a ceramic plate heats more evenly.
Don’t overcomplicate this. If you’re missing a specific tool, improvise. The most important piece of equipment is your patience. Rushing the cooking process is the enemy of fluffy eggs. Take your time, and the tools will do the rest.
Preparation Method
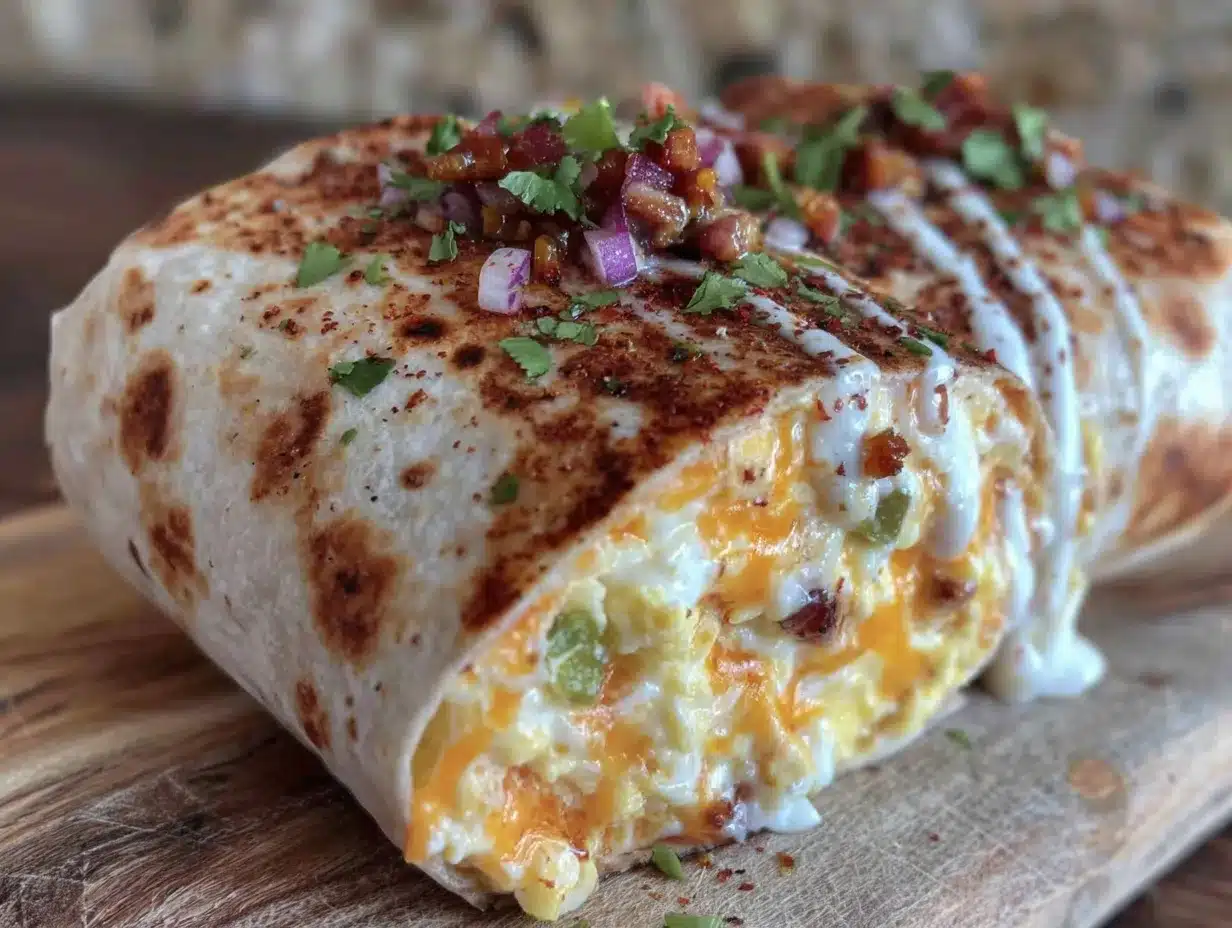
Making these burritos is straightforward, but following the steps closely ensures you get that perfect texture. Here is how to do it right.
- Whisk the Eggs: Crack 8-10 eggs into a medium bowl. Add the heavy cream (or milk), salt, and pepper. Whisk gently but thoroughly until the mixture is uniform and slightly frothy. Do not over-whisk, or you might incorporate too much air, which can make the eggs collapse. Take about 30 seconds for this step.
- Heat the Pan: Place your non-stick skillet over medium-low heat. Add the butter and let it melt. Swirl it around to coat the bottom. The butter should foam but not brown. If it browns, it’s too hot. Lower the heat if needed. This takes about 1-2 minutes.
- Cook the Eggs: Pour the egg mixture into the pan. Let it sit for 10 seconds, then use your silicone spatula to gently push the edges toward the center. Tilt the pan so the uncooked egg flows to the edges. Repeat this process until the eggs are mostly set but still slightly wet and shiny. They should look like soft curds, not a solid omelet. This takes about 3-4 minutes. Remove from heat immediately while they are still moist.
- Warm the Tortillas: While the eggs are cooking, warm the tortillas. You can do this in a dry skillet for 15 seconds per side, or wrap them in a damp paper towel and microwave for 10-15 seconds. Warm tortillas are pliable and won’t crack when you roll them. Cold tortillas are brittle and will break. This is a crucial step you cannot skip.
- Assemble the Burritos: Lay a warm tortilla flat on a clean surface. Place a portion of the scrambled eggs in the center. Sprinkle with cheese and any other add-ins (like cooked veggies or meat). Leave a 2-inch border around the edges. Do not overfill, or the burrito will burst during rolling or freezing.
- Roll the Burritos: Fold the bottom of the tortilla up over the filling. Fold in the left and right sides tightly. Then, roll the burrito away from you, keeping it tight but not crushing the filling. The goal is a secure cylinder. If it’s loose, it will unravel. If it’s too tight, the tortilla might tear.
- Wrap and Freeze: Place the rolled burrito seam-side down on a sheet of parchment paper. Wrap it tightly in the parchment, then place it in a freezer-safe bag or container. Label with the date. You can freeze them for up to 3 months. Lay them flat in the bag to save space.
The key here is moisture management. The eggs should be slightly undercooked before you stop, as they will continue to cook slightly when wrapped and frozen. If you cook them until they are completely dry, they will be rubbery later. Trust the process and pull them off the heat while they look a bit too wet.
Cooking Tips & Techniques
I’ve made enough breakfast burritos to know where things go wrong. Here are some pro tips to ensure your success.
- Low and Slow: The biggest mistake people make is cooking eggs on high heat. High heat makes eggs tough and dry. Keep your heat on medium-low. It takes a bit longer, but the result is tender, creamy eggs. Patience pays off.
- Don’t Skip the Warm Tortilla: I cannot stress this enough. Cold tortillas crack. Warm tortillas stretch. If you forget to warm them, put them in the microwave for 10 seconds before assembling. It’s a small step that makes a huge difference.
- Drain Your Veggies: If you add spinach, mushrooms, or peppers, cook them first and squeeze out excess moisture. Raw veggies release water in the freezer, which turns into ice crystals. When you reheat the burrito, that water turns to steam, making the tortilla soggy. Dry ingredients are your friend.
- Roll Tightly: When rolling, tuck the filling in tight. Use your thumbs to seal the edges as you go. A loose burrito will unravel in the freezer or in your bag. A tight burrito holds its shape and reheats evenly.
- Flash Freeze: If you have space, place the unwrapped burritos on a baking sheet and freeze them for 30 minutes before bagging. This prevents them from sticking together. If you don’t have space, just wrap them individually and layer them with parchment paper in between.
These tips come from hard lessons learned. I once made a batch with raw spinach, and the result was a soggy mess. Since then, I always pre-cook and drain my veggies. It’s worth the extra five minutes. Also, always use a non-stick pan. If you use stainless steel, your eggs will stick, and you’ll lose half your breakfast. Learn from my mistakes so you don’t have to make them.
Variations & Adaptations
This recipe is a template, not a rulebook. Once you master the basics, you can tweak it to suit your taste or dietary needs.
- Spicy Kick: Add diced jalapeños or a dash of cayenne pepper to the eggs. Top with hot sauce or pepper jack cheese. This is great for those who like a bit of heat to wake them up.
- Vegetarian Power: Skip the meat and add roasted sweet potatoes, black beans, and cilantro. Sweet potatoes add a nice sweetness that balances the savory eggs. This version is hearty and filling.
- Protein Boost: Add cooked crumbled sausage or bacon. Bacon adds saltiness and crunch, while sausage adds richness. Just make sure the meat is fully cooked and cooled before adding it to the burrito.
- Gluten-Free: Use certified gluten-free flour tortillas. Many brands now make excellent GF tortillas that hold up well to freezing. Just be careful not to overfill, as GF tortillas can be more fragile.
- Egg-Free Option: For a vegan version, use chickpea flour scrambled with turmeric and nutritional yeast. It mimics the texture and color of eggs surprisingly well. Top with avocado and salsa for a creamy, flavorful bite.
I personally love adding a little bit of crumbled feta cheese to mine. It adds a tangy contrast to the mild cheddar. You can also swap the heavy cream for coconut milk if you’re dairy-free, though the texture will be slightly different. The beauty of this recipe is its flexibility. Don’t be afraid to experiment. You might discover your new favorite combination.
Serving & Storage Suggestions
These burritos are best enjoyed fresh from the freezer, but they store well if you plan ahead.
- Reheating: Remove the burrito from the freezer and unwrap it. Wrap it in a damp paper towel and microwave on high for 1-2 minutes. Let it rest for 30 seconds before eating. The paper towel adds steam, which keeps the tortilla soft. If you don’t have a microwave, you can bake it at 350°F for 15-20 minutes, wrapped in foil.
- Storage: Store in the freezer for up to 3 months. Make sure the packaging is airtight to prevent freezer burn. If you notice ice crystals forming, the burrito might be slightly dry, but it will still be edible.
- Serving: Serve with a side of fresh fruit, a dollop of sour cream, or a sprinkle of fresh cilantro. A simple salsa on the side adds brightness. These burritos are filling, so you might not need much else.
- Flavor Development: The flavors meld together nicely after a day or two in the freezer. The cheese becomes slightly more integrated, and the tortilla absorbs some of the egg moisture. This can be a pro or a con, depending on your preference. Some people like the fresh taste, while others prefer the melded flavor.
I usually make a batch every two weeks. It fits perfectly into my routine. I pull one out the night before and let it thaw in the fridge, or I just microwave it straight from the freezer. Both methods work. The key is to have a plan. Without a plan, breakfast becomes an afterthought. With these burritos, breakfast is a non-negotiable part of my day.
Nutritional Information & Benefits
While these burritos are comfort food, they can be part of a balanced diet. Here is a rough estimate of the nutritional value per burrito (assuming 12 burritos total):
- Calories: Approximately 250-300 calories, depending on the cheese and add-ins.
- Protein: About 15-20 grams. Eggs are a complete protein, making this a great start to your day.
- Carbs: Around 20-25 grams, mostly from the tortilla.
- Fat: 12-15 grams, from the eggs, butter, and cheese.
Eggs are packed with choline, which is good for brain health. Cheese provides calcium and vitamin D. If you add veggies, you get fiber and vitamins. The key is moderation. If you are watching your sodium, use low-sodium cheese and skip the added salt in the eggs. For a lower-carb option, use a low-carb tortilla or wrap the filling in lettuce leaves, though the texture will change.
I love these because they give me energy without the sugar crash of a sweet breakfast. They are savory, satisfying, and steady. That’s what I look for in a morning meal.
Conclusion
The fluffy freezer breakfast burrito is more than just a recipe; it’s a tool for living a less stressful life. It turns the chaotic morning routine into a manageable, even enjoyable, part of your day. You don’t need to be a chef to make this. You just need a few simple ingredients and a little bit of planning.
I encourage you to try this recipe. Experiment with the flavors. Add your favorite veggies or meats. Make it your own. The beauty of this dish is that it grows with you. You’ll find yourself craving different combinations as the seasons change.
I still make these every week. They are my anchor. They remind me that taking care of myself doesn’t have to be complicated. It can be simple, delicious, and efficient. So, grab your whisk, warm your tortillas, and give yourself the gift of a good morning.
Have you tried making breakfast burritos before? What’s your favorite combination? Share your thoughts in the comments below. I’d love to hear what you put in yours. And if you try this recipe, tag me on social media! I love seeing your creations. Let’s make breakfast better, one burrito at a time.
FAQs
Can I freeze these burritos without tortillas?
Yes, you can. You can wrap the egg and cheese mixture in a low-carb wrap, a lettuce leaf, or even just freeze the egg mixture in a muffin tin. However, the tortilla adds a nice texture and helps hold everything together. If you skip it, handle the burrito gently as it may be more fragile.
How do I prevent the tortillas from getting soggy?
The key is to let the fillings cool completely before assembling. Hot fillings create steam, which turns into condensation in the freezer. Also, ensure your veggies are drained well. Wrapping them tightly in parchment paper first, then foil or a bag, helps lock in moisture without making them wet.
Can I use egg whites instead of whole eggs?
Yes, you can use egg whites, but the texture will be less fluffy and more rubbery. Whole eggs have fat, which keeps them tender. If you use egg whites, add a little bit of milk or cream to help with the texture. You might also need to cook them slightly longer.
How long do these burritos stay good in the freezer?
They stay best for up to 3 months. After that, they might start to develop freezer burn or lose flavor. Make sure to label them with the date so you know when to eat them. Rotate your stock and use the oldest ones first.
Can I reheat these in the oven?
Absolutely. Preheat your oven to 350°F. Wrap the frozen burrito in aluminum foil and bake for 20-25 minutes. This method is great if you want a crispier tortilla. Just check it halfway through to ensure it’s heated through. The microwave is faster, but the oven gives a better texture.
Pin This Recipe!
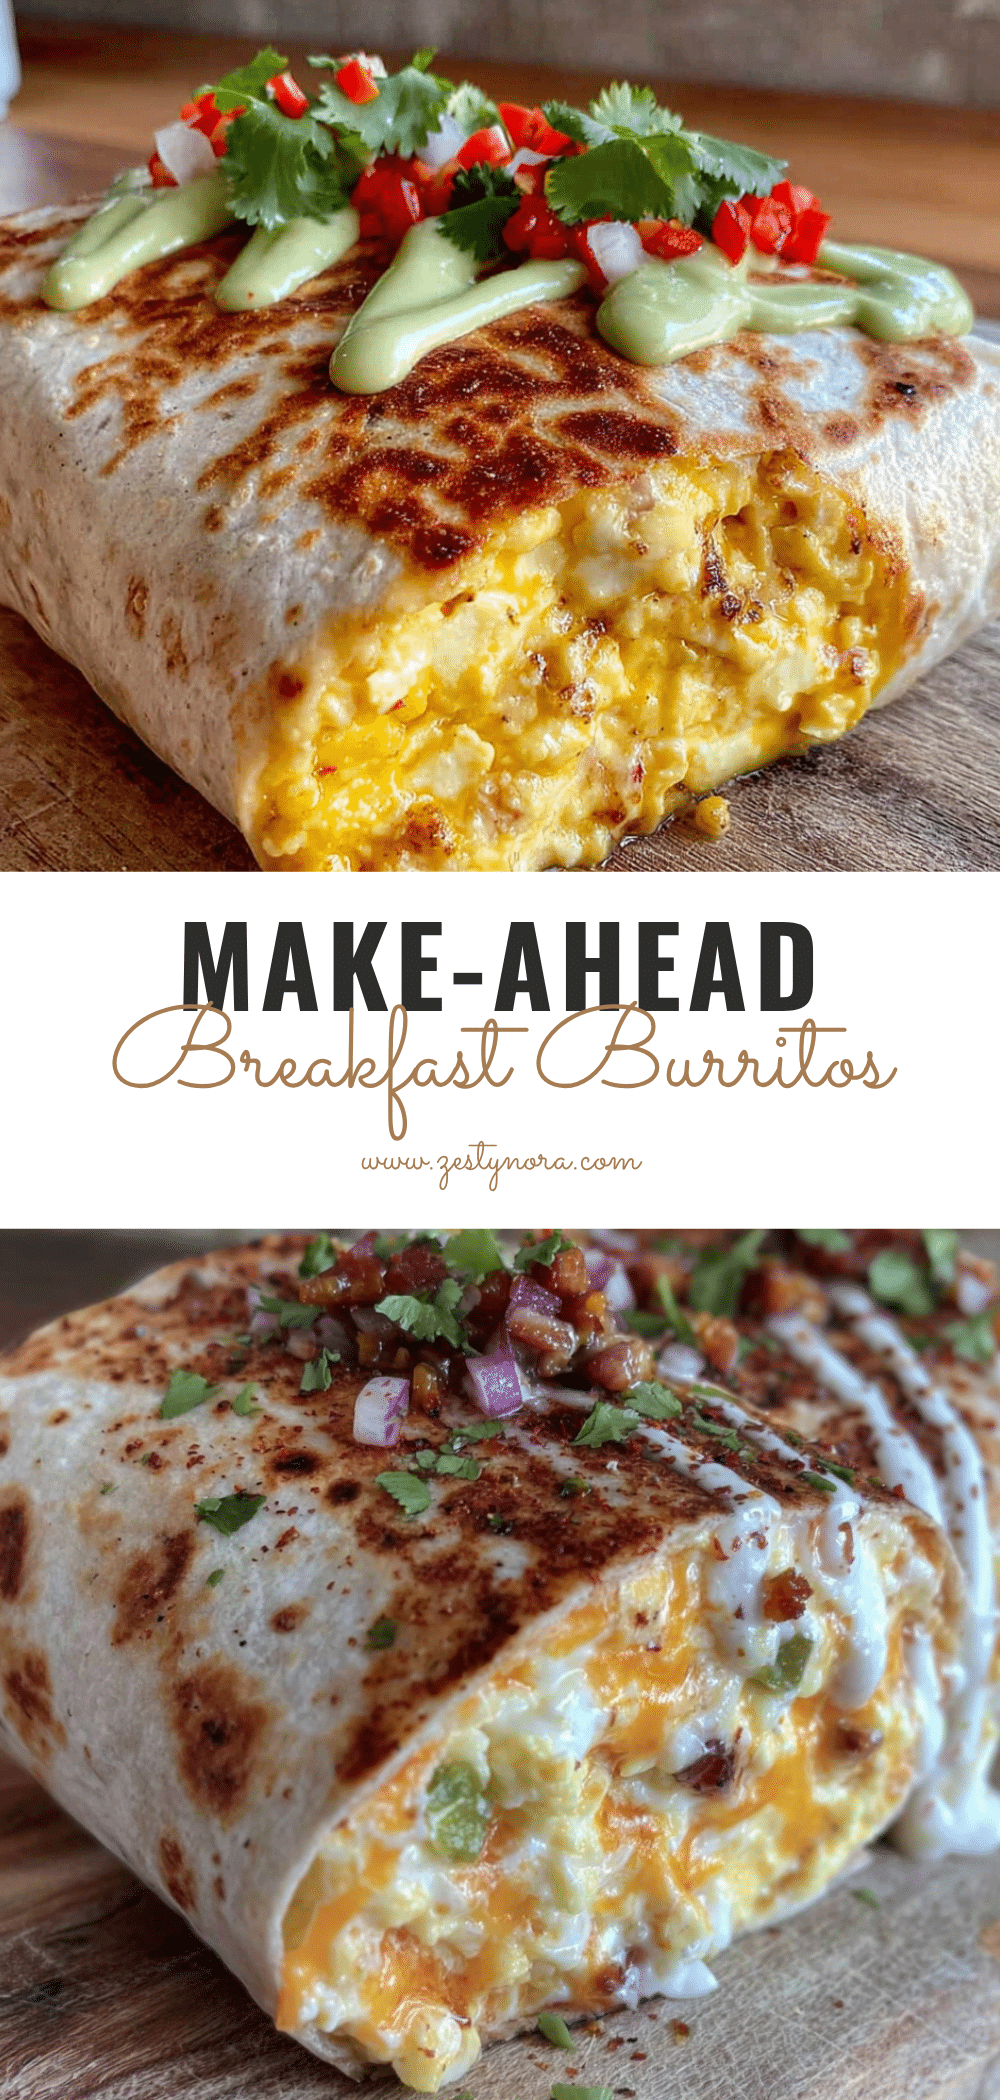
Fluffy Freezer Breakfast Burritos
A reliable, make-ahead breakfast solution featuring soft scrambled eggs, melted cheese, and warm tortillas, designed for busy mornings and easy meal prep.
- Prep Time: 15 minutes
- Cook Time: 5 minutes
- Total Time: 20 minutes
- Yield: 12 servings 1x
- Category: Breakfast
- Cuisine: American
Ingredients
- 8–10 large eggs, room temperature
- 1/4 cup heavy cream or whole milk
- Unsalted butter, softened (for greasing pan)
- 1 cup shredded cheddar or Mexican blend cheese
- 12-inch large flour tortillas
- 1/2 teaspoon kosher salt
- Freshly cracked black pepper
- Optional: Diced bell peppers, onions, cooked bacon, or spinach (pre-cooked and drained)
Instructions
- Whisk eggs, heavy cream, salt, and pepper in a medium bowl until uniform and slightly frothy.
- Heat a non-stick skillet over medium-low heat and melt butter, swirling to coat the bottom without browning.
- Pour egg mixture into the pan; let sit for 10 seconds, then gently push edges toward the center, tilting pan to let uncooked egg flow to edges. Cook until mostly set but still wet and shiny (soft curds), about 3-4 minutes. Remove from heat immediately.
- Warm tortillas in a dry skillet for 15 seconds per side or microwave for 10-15 seconds wrapped in a damp paper towel.
- Lay a warm tortilla flat. Place a portion of scrambled eggs in the center, sprinkle with cheese and optional add-ins, leaving a 2-inch border.
- Fold the bottom of the tortilla up over the filling, fold in the sides tightly, and roll away from you into a secure cylinder.
- Place burrito seam-side down on parchment paper, wrap tightly, and place in a freezer-safe bag or container. Label with date and freeze for up to 3 months.
Notes
Ensure eggs are slightly undercooked before stopping, as they will continue to cook when frozen. Always warm tortillas to prevent cracking. If adding vegetables, pre-cook and drain them to prevent sogginess. Flash freeze burritos on a baking sheet before bagging to prevent sticking.
Nutrition
- Serving Size: 1 burrito
- Calories: 275
- Sugar: 1
- Sodium: 350
- Fat: 13.5
- Saturated Fat: 5
- Carbohydrates: 22.5
- Fiber: 1
- Protein: 17.5
Keywords: breakfast burritos, meal prep, freezer breakfast, easy breakfast, egg burritos, make ahead breakfast, busy mornings