I burned this dish three times before I finally figured out what I was doing wrong.
Not a little scorched on the bottom. I mean, blackened, smoke-alarm-going-off, kitchen-smelling-like-a-campfire burned. The first time, I walked away to fold laundry and came back to a tragedy. The second time, I thought I could rush it by cranking the heat. Nope. The third time, I used the wrong pan and ended up with a crust that could have doubled as a hockey puck.
Here’s the thing though—I kept coming back to it. Not because I’m stubborn (okay, maybe a little), but because even those failed versions had moments of brilliance. That creamy, cheesy bite mixed with the savory beef and tender rice? I knew there was something special hiding in there. I just had to stop getting in my own way.
Turns out, the secret wasn’t more cheese or fancier ingredients. It was patience and a lid. Who knew?
This Easy One-Pan Cheesy Ground Beef and Rice Skillet is now my go-to when I need dinner on the table without a sink full of dishes staring at me. It’s the kind of meal that feels like a hug in a bowl—filling, comforting, and honest. No fuss, no frills, just good food that works.
Why You’ll Love This Recipe
I’ve tested this recipe more times than I care to admit, and every single version taught me something. Here’s why I think you’ll fall for it too:
- One Pan, Minimal Mess: Everything cooks in a single skillet. No boiling rice separately, no draining pasta, no extra pots. Your sink will thank you.
- Budget-Friendly Ingredients: Ground beef, rice, cheese, and pantry staples. This is the kind of meal that stretches your grocery dollar without sacrificing flavor.
- Ready in 30 Minutes: From start to finish, this comes together faster than delivery. Perfect for those nights when everyone is hungry and you’re running on fumes.
- Kid-Approved and Adult-Friendly: My picky eater nephew devours this. So does my dad who claims he doesn’t like “casseroley” things. It’s a crowd-pleaser through and through.
- Endlessly Customizable: Swap the protein, change the cheese, add veggies—this recipe bends to whatever you have on hand. I’ll share my favorite variations later.
What makes this different from other cheesy rice skillets? It’s the technique. Cooking the rice directly in the seasoned beef broth means every grain absorbs that savory flavor. No bland rice hiding under a pile of cheese here. Plus, I add the cheese in two stages—some stirred in for creamy goodness, and some melted on top for that irresistible golden crust.
Honestly, this is the kind of dinner that makes you close your eyes after the first bite. It’s simple, sure, but it’s also deeply satisfying in a way that fancy restaurant food sometimes isn’t. It tastes like home.
What Ingredients You Will Need
This recipe uses simple, wholesome ingredients to deliver bold flavor and satisfying texture without the fuss. Most of these are probably already in your kitchen.
For the Skillet Base
- 1 lb ground beef (80/20 works great—lean enough but still flavorful)
- 1 tablespoon olive oil (or avocado oil, if that’s what you have)
- 1 medium yellow onion, diced (about 1 cup)
- 3 cloves garlic, minced (I use a microplane for even distribution)
- 1 cup long-grain white rice (uncooked; jasmine or basmati work too)
- 2 cups beef broth (low-sodium so you control the salt)
- 1 can (14.5 oz) diced tomatoes, undrained (fire-roasted adds nice depth)
- 1 teaspoon paprika (smoked paprika if you want that subtle smokiness)
- ½ teaspoon dried oregano
- ½ teaspoon salt (plus more to taste)
- ¼ teaspoon black pepper
For the Cheesy Finish
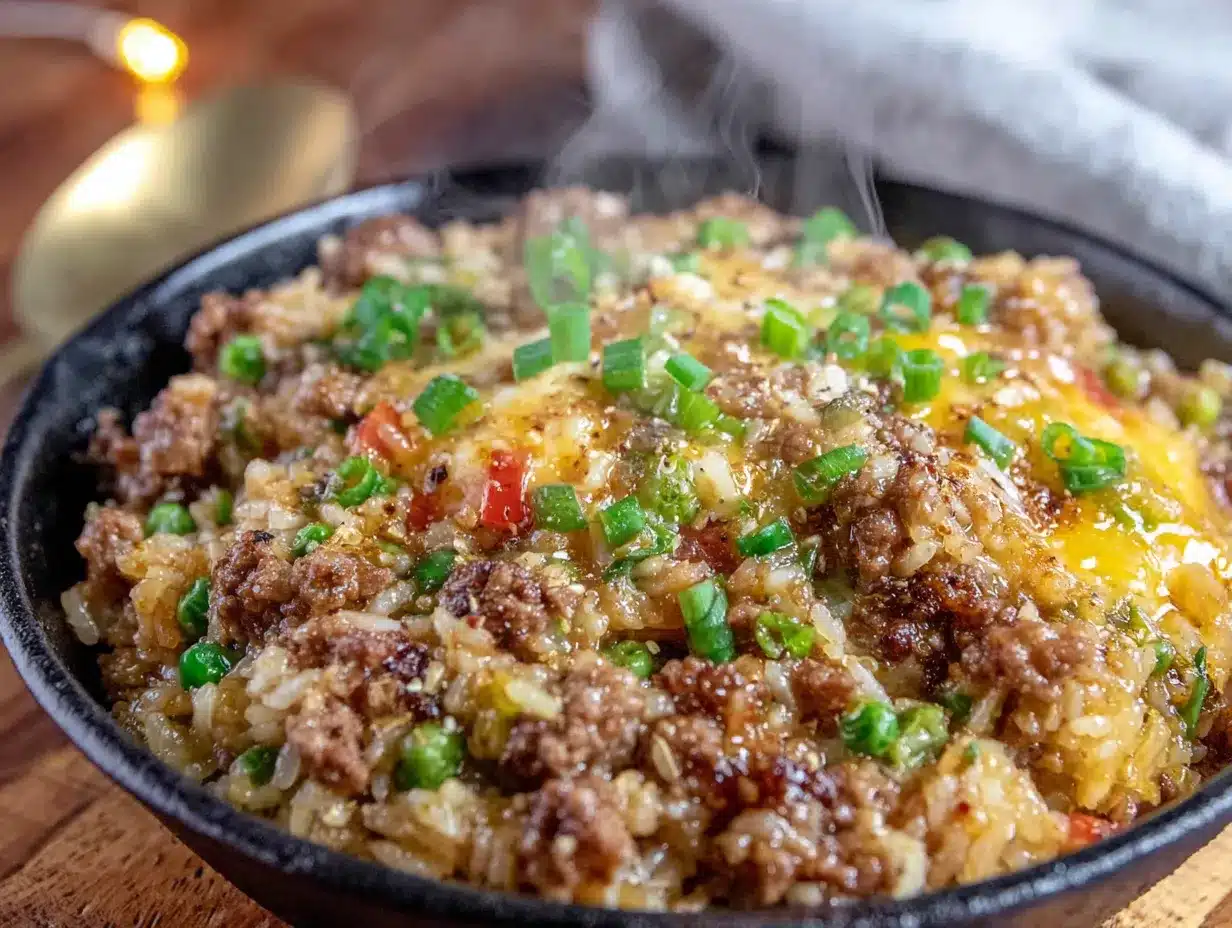
- 1 ½ cups shredded cheddar cheese (sharp cheddar gives the most flavor)
- ½ cup shredded mozzarella (for that stretchy, gooey texture)
- 2 tablespoons cream cheese, softened (optional but trust me on this)
- Fresh parsley or chives for garnish (totally optional but pretty)
Ingredient Tips from My Kitchen: I’ve tried this with ground turkey and it works fine, but beef really gives the richest flavor. If you go with turkey, add an extra tablespoon of oil to compensate for the lower fat content. For the rice, don’t use instant rice—it turns to mush. And please, please use block cheese and shred it yourself. Pre-shredded cheese has anti-caking agents that mess with the meltiness. I learned that the hard way when my first attempt turned out grainy instead of silky.
If you’re dairy-sensitive, you can use a good dairy-free cheddar-style shred. The texture won’t be quite as creamy, but it still hits the spot. I’ve also made this with brown rice, but you’ll need to add about 15 minutes of cooking time and an extra ½ cup of broth.
Equipment Needed
One of the best things about this recipe is how little equipment it requires. Here’s what you’ll need:
- A large deep skillet or Dutch oven (12-inch with a tight-fitting lid is ideal; I use my enameled cast iron and love it)
- Wooden spoon or silicone spatula for stirring (metal can scratch non-stick surfaces)
- Cutting board and sharp knife for the onion and garlic
- Measuring cups and spoons (though honestly, I eyeball the spices now)
- Box grater for shredding your own cheese (worth the extra minute)
- Lid (your pan must have one—this is non-negotiable for the rice to cook properly)
If you don’t have a deep skillet, a regular skillet with high sides works too. You just need enough room for everything to simmer without bubbling over. I’ve even made this in a large saucepan in a pinch. It’s forgiving like that.
Preparation Method
Let me walk you through this step by step. I’ll include all the little things I wish someone had told me the first time.
-
Brown the beef. Heat your skillet over medium-high heat and add the olive oil. Once it shimmers, add the ground beef. Break it apart with your spoon and let it cook undisturbed for about 3 minutes—this gives you nice browning instead of steaming. Then stir and continue cooking until no pink remains, about 5-6 minutes total. Don’t drain all the fat; leave about a tablespoon in the pan for flavor.
-
Sauté the aromatics. Reduce the heat to medium. Add the diced onion to the pan with the beef. Cook for 3-4 minutes until it softens and turns translucent. Add the minced garlic and cook for 30 seconds—just until fragrant. Garlic burns fast, so keep stirring.
-
Toast the rice. Sprinkle the uncooked rice over the beef and onion mixture. Stir it around for about 2 minutes. You’ll notice the rice grains start to turn slightly opaque and you might hear a faint crackling sound. This step is crucial—toasting the rice adds a nutty flavor and helps the grains stay separate instead of turning into paste.
-
Add the liquids and seasonings. Pour in the beef broth and the undrained can of diced tomatoes. Add the paprika, oregano, salt, and pepper. Stir everything together, scraping up any browned bits from the bottom of the pan. Those bits are pure flavor.
-
Bring to a boil, then simmer. Turn the heat to high and bring the mixture to a full boil. This should take about 2-3 minutes. Once it’s boiling, reduce the heat to low, cover the pan with a tight-fitting lid, and let it simmer for 18-20 minutes. Do not lift the lid during this time. I know it’s tempting, but every time you lift that lid, steam escapes and your rice won’t cook properly. Trust the process.
-
Check the rice. After 18 minutes, remove the lid carefully (steam is hot!). The rice should be tender and most of the liquid should be absorbed. If it’s still a bit soupy, cover and cook for 2-3 more minutes. If it looks dry but the rice isn’t done yet, add ¼ cup of water or broth, cover, and cook a few minutes longer.
-
Add the cheese. Remove the pan from the heat. If you’re using cream cheese, drop it in now and stir until it melts into the rice. Then add 1 cup of the shredded cheddar and all the mozzarella. Stir until the cheese is fully melted and everything is creamy and gorgeous. Sprinkle the remaining ½ cup of cheddar on top.
-
Melt the top cheese. Cover the pan again and let it sit off the heat for 2-3 minutes. The residual heat will melt the top cheese into a beautiful golden blanket. If you want a bubbly, slightly browned top, pop the skillet under the broiler for 1-2 minutes—just watch it closely so it doesn’t burn.
-
Rest and serve. Let the skillet sit uncovered for 5 minutes before serving. This allows the rice to absorb any remaining moisture and makes serving easier. Garnish with fresh parsley or chives if you’re feeling fancy, then scoop and enjoy.
Sensory Cues Throughout: When the beef is browning, you’ll smell that rich, savory aroma that makes your stomach growl. When the rice toasts, it’ll smell slightly nutty and toasty. When you lift the lid after simmering, a cloud of steamy, cheesy goodness will hit your face—that’s how you know it’s ready.
Cooking Tips & Techniques
I’ve made every mistake in the book with this recipe, so you don’t have to. Here’s what I’ve learned:
Don’t rush the browning. Let the beef sit in the hot pan without moving it for a few minutes. That deep brown crust is where the flavor lives. If you stir constantly, you end up with gray, sad beef. Let it be.
Toast the rice properly. This isn’t just a fancy step—it genuinely changes the texture. Skipping the toasting step leads to mushy rice. I skipped it once when I was in a hurry and regretted it immediately.
Resist the lid-lifting urge. I know, I know. But every time you peek, you add 5 minutes to the cooking time. Set a timer and walk away. Fold that laundry. Scroll your phone. Just don’t lift the lid.
Low and slow is the way. If your simmer is too vigorous, the liquid will evaporate before the rice is cooked. You want gentle bubbles, not a raging boil. If you see too much steam escaping, turn the heat down a notch.
Grate your own cheese. I mentioned this earlier but it bears repeating. Pre-shredded cheese contains cellulose and other anti-caking agents that prevent smooth melting. Your cheese sauce will be grainy instead of silky. A block of cheddar and a box grater take 60 seconds and make a world of difference.
Let it rest. Those last 5 minutes off the heat aren’t just for show. The rice continues to absorb liquid and the flavors meld together. If you dig in immediately, you’ll get a looser, soupier texture. Patience pays off here.
Variations & Adaptations
This recipe is a fantastic base for experimentation. Here are some variations I’ve tried and loved:
Tex-Mex Version: Swap the oregano for cumin and chili powder. Use pepper jack cheese instead of cheddar. Add a can of drained black beans and a cup of corn kernels when you add the broth. Top with fresh cilantro and a squeeze of lime. This version is incredible with a dollop of sour cream.
Vegetarian Option: Skip the beef and use two cans of black beans or pinto beans instead. Use vegetable broth in place of beef broth. The beans add plenty of protein and fiber, and the dish stays just as satisfying. I’ve made this for my vegetarian sister-in-law and she asked for the recipe.
Low-Carb Adaptation: Replace the rice with cauliflower rice. Cook the cauliflower rice separately and stir it in at the end with the cheese. You’ll lose the one-pan convenience, but you’ll gain a lower-carb option that still delivers on flavor. I’ve done this when I’m watching my carbs and it works well.
Spicy Kick: Add a diced jalapeño with the onions, or stir in ½ teaspoon of red pepper flakes with the spices. Use pepper jack cheese for extra heat. If you like things really spicy, a dash of your favorite hot sauce at the table is perfect.
Veggie-Packed Version: Sauté a diced bell pepper and a zucchini with the onions. Stir in a handful of fresh spinach just before adding the cheese. The spinach wilts into the rice beautifully and adds color and nutrients without overpowering the dish.
My personal favorite variation? The Tex-Mex version with fresh cowboy caviar with smoky grilled corn on the side. Something about that combination just works.
Serving & Storage Suggestions
Serving: Serve this skillet hot, straight from the pan. It’s a meal in itself, but it pairs beautifully with a simple side salad dressed with lemon and olive oil. The brightness cuts through the richness of the cheese. I also love it with 5-minute cucumber salad with easy rice vinegar dressing on the side—the crunch and tang are perfect against the creamy rice.
For a heartier meal, serve it alongside roasted broccoli or green beans. The leftovers are fantastic stuffed into bell peppers and baked, or rolled into tortillas with some hot sauce for lunch the next day.
Storage: Let the skillet cool completely before storing. Transfer leftovers to an airtight container and refrigerate for up to 4 days. The flavors actually deepen overnight, so leftovers might taste even better than the first serving.
Freezing: This freezes well for up to 3 months. Portion into individual containers for easy lunches. Thaw overnight in the refrigerator before reheating.
Reheating: The microwave works in a pinch, but the stovetop is better. Add a splash of broth or water to the pan, cover, and reheat over medium-low heat, stirring occasionally. This takes about 5-7 minutes and revives the creamy texture much better than the microwave. If you’re using the microwave, cover the bowl with a damp paper towel to add moisture.
Flavor Development: Like many one-pot meals, this one gets better after a day in the fridge. The rice absorbs more flavor and the textures meld together. Don’t be surprised if you find yourself looking forward to leftovers.
Nutritional Information & Benefits
Here’s an approximate nutritional breakdown per serving (based on 6 servings):
- Calories: 485
- Protein: 28g
- Carbohydrates: 38g
- Fat: 24g
- Fiber: 2g
- Calcium: 25% of daily value
- Iron: 20% of daily value
Health Highlights: This dish provides a solid amount of protein from the beef and cheese, which helps keep you full and satisfied. The tomatoes add lycopene, an antioxidant linked to heart health. If you use brown rice, you’ll get more fiber and B vitamins. For a lighter version, use ground turkey or chicken, reduced-fat cheese, and brown rice.
Dietary Considerations: This recipe contains dairy and gluten (if your broth contains gluten—check labels). For a gluten-free version, use certified gluten-free broth. For a dairy-free version, use dairy-free cheese alternatives and skip the cream cheese. It’s naturally nut-free and egg-free.
Allergen Note: Always check your broth and diced tomatoes for hidden ingredients if you’re cooking for someone with allergies. Some brands add wheat or other allergens as thickeners.
I’m not a nutritionist, but I try to balance indulgent meals like this with lighter fare during the week. It’s all about moderation, right? This skillet is comfort food, and sometimes that’s exactly what we need.
Frequently Asked Questions
Can I use ground turkey or chicken instead of beef?
Absolutely. Ground turkey or chicken works well, though the flavor will be milder. Add an extra tablespoon of oil since poultry is leaner, and consider adding a splash of Worcestershire sauce or soy sauce for depth. I’ve made it with ground turkey and my family didn’t even notice the swap.
Why is my rice still hard after 20 minutes?
This usually happens for one of three reasons: the heat was too high and the liquid evaporated too quickly, the lid wasn’t tight enough and steam escaped, or you lifted the lid during cooking. Next time, check your heat level and make sure your lid fits snugly. If this happens, add ¼ cup of hot broth, cover tightly, and cook for 5 more minutes.
Can I make this in a slow cooker or Instant Pot?
I’ve tested both. For the Instant Pot, brown the beef using the sauté function, then add the remaining ingredients except the cheese. Cook on high pressure for 5 minutes with a natural release. Stir in the cheese at the end. For a slow cooker, brown the beef first, then add everything except the rice and cheese. Cook on low for 4-6 hours, then stir in cooked rice and cheese before serving. The slow cooker version isn’t truly one-pan, but it works.
How can I make this spicier?
Add a diced jalapeño or serrano pepper when you sauté the onions. Stir in ½ teaspoon of cayenne pepper or red pepper flakes with the other spices. Use pepper jack cheese instead of cheddar. And definitely serve it with your favorite hot sauce on the side. My husband adds sriracha to his bowl and swears by it.
Can I double this recipe?
Yes, but you’ll need a very large skillet or Dutch oven—at least a 14-inch pan or 6-quart pot. The cooking time for the rice may increase slightly, so check for doneness at 22 minutes instead of 18. You might also need to brown the beef in batches to avoid overcrowding the pan. If you’re feeding a crowd, this recipe doubles beautifully for potlucks and family gatherings.
Conclusion
This Easy One-Pan Cheesy Ground Beef and Rice Skillet has become a staple in my kitchen for good reason. It’s the dinner I make when I’m tired, when I’m busy, when I need something reliable that won’t let me down. It’s the meal I turn to when I want to feel like I’ve got it together, even on days when everything feels chaotic.
What I love most about this recipe is how forgiving it is. You can tweak it, stretch it, adapt it to whatever you have in your fridge. It doesn’t demand perfection—it just delivers comfort, every single time. That first bite, with the creamy rice and the melty cheese and the savory beef, reminds me why simple food is often the best food.
I’d love to hear how this turns out for you. Did you add your own twist? Did your kids clean their plates? Did you discover a variation I haven’t tried yet? Drop a comment below and let me know. And if you’re looking for another quick weeknight dinner that delivers on flavor, you might enjoy this best quick garlic butter pasta in 15 minutes—it’s another lifesaver on busy nights.
Happy cooking, friend. Go make something good.
Pin This Recipe!
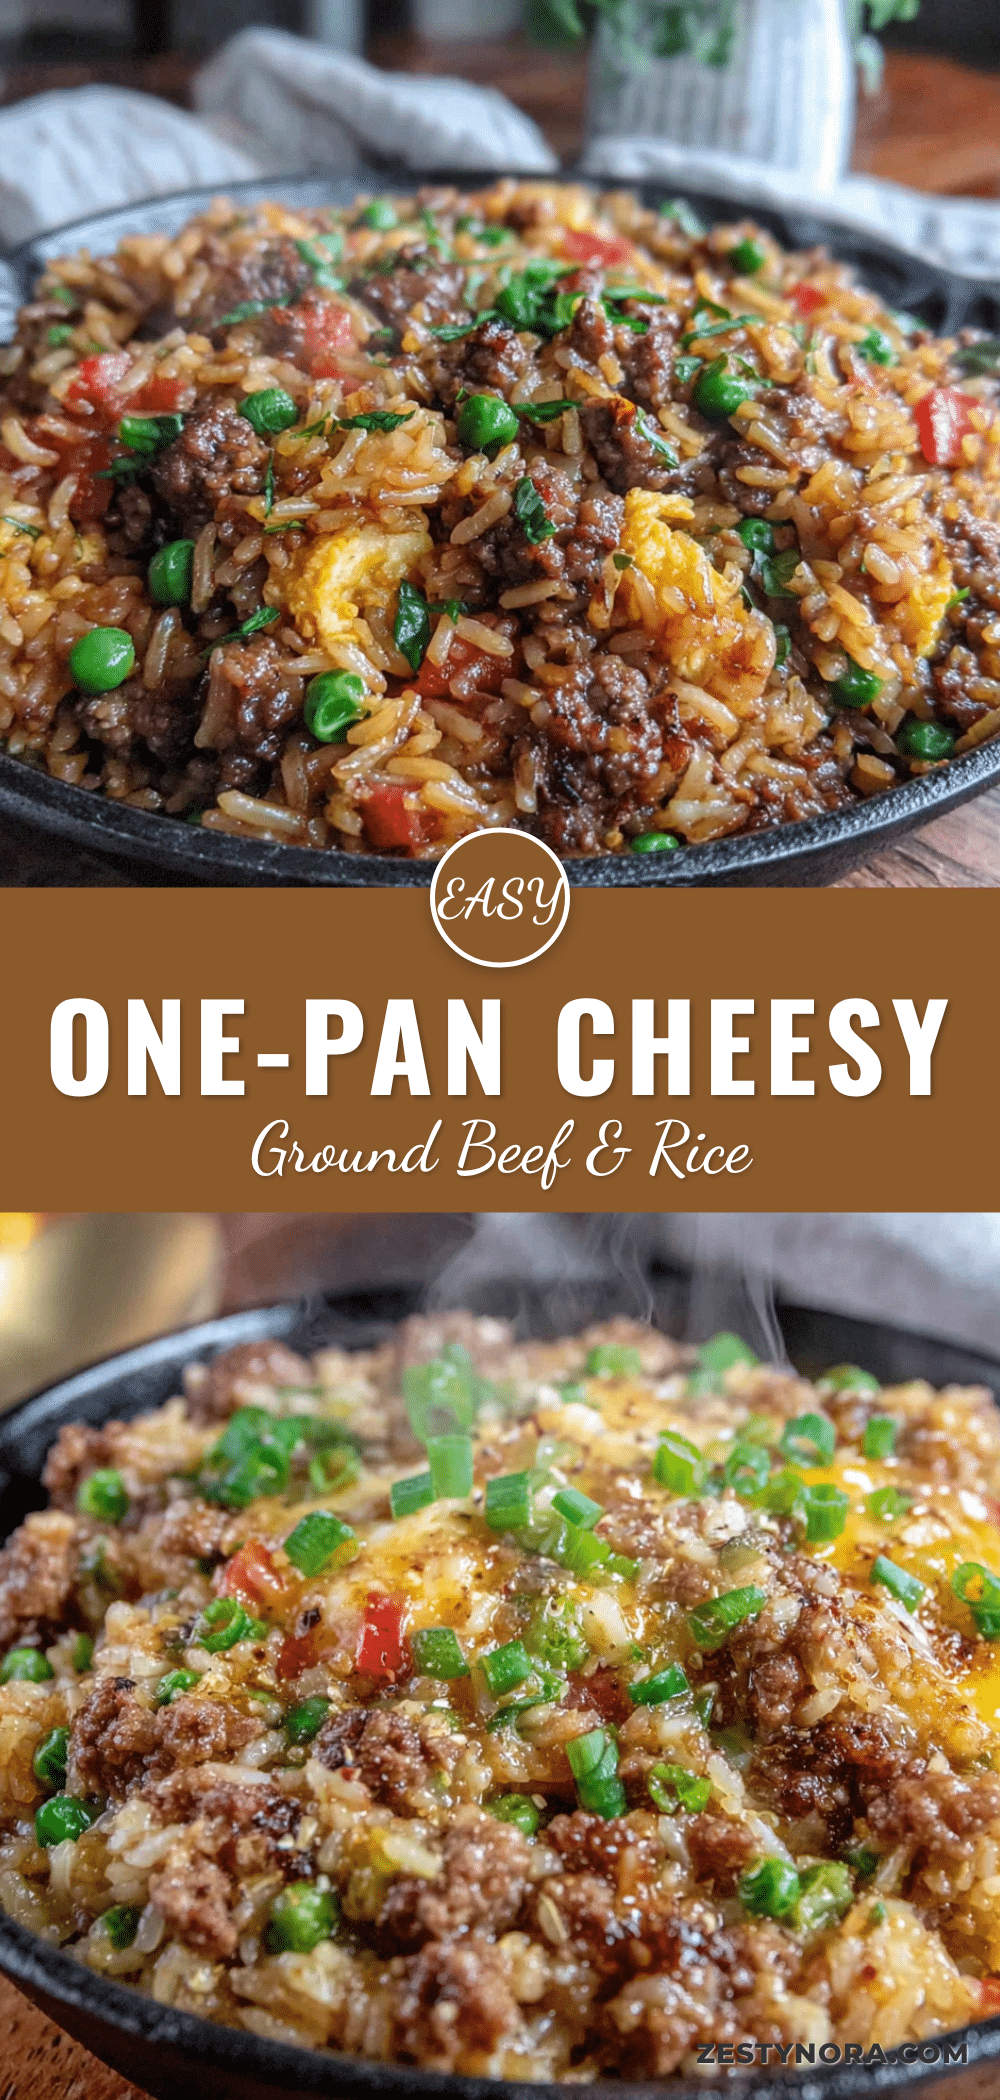
Easy One-Pan Cheesy Ground Beef and Rice Recipe

This Easy One-Pan Cheesy Ground Beef and Rice Skillet is a comforting, budget-friendly dinner ready in 30 minutes. With savory beef, tender rice, and a creamy, golden cheese topping, it’s a crowd-pleasing meal that requires minimal cleanup.
- Prep Time: 10 minutes
- Cook Time: 25 minutes
- Total Time: 35 minutes
- Yield: 6 servings 1x
- Category: Main Course
- Cuisine: American
Ingredients
- 1 lb ground beef (80/20)
- 1 tablespoon olive oil
- 1 medium yellow onion, diced (about 1 cup)
- 3 cloves garlic, minced
- 1 cup long-grain white rice, uncooked
- 2 cups low-sodium beef broth
- 1 can (14.5 oz) diced tomatoes, undrained
- 1 teaspoon paprika
- ½ teaspoon dried oregano
- ½ teaspoon salt
- ¼ teaspoon black pepper
- 1 ½ cups shredded sharp cheddar cheese
- ½ cup shredded mozzarella cheese
- 2 tablespoons cream cheese, softened (optional)
- Fresh parsley or chives for garnish (optional)
Instructions
- Heat a large deep skillet or Dutch oven over medium-high heat and add the olive oil. Once shimmering, add the ground beef. Break it apart and cook undisturbed for about 3 minutes for browning, then stir and cook until no pink remains, about 5-6 minutes total. Leave about a tablespoon of fat in the pan.
- Reduce heat to medium. Add the diced onion and cook for 3-4 minutes until softened and translucent. Add the minced garlic and cook for 30 seconds until fragrant.
- Sprinkle the uncooked rice over the beef and onion mixture. Stir and cook for about 2 minutes until the rice turns slightly opaque and smells nutty.
- Pour in the beef broth and undrained diced tomatoes. Add paprika, oregano, salt, and pepper. Stir, scraping up any browned bits from the bottom of the pan.
- Turn heat to high and bring to a full boil, about 2-3 minutes. Reduce heat to low, cover with a tight-fitting lid, and simmer for 18-20 minutes. Do not lift the lid during this time.
- After 18 minutes, remove the lid carefully. The rice should be tender and most liquid absorbed. If still soupy, cover and cook 2-3 more minutes. If dry but rice not done, add ¼ cup water or broth, cover, and cook a few minutes longer.
- Remove pan from heat. If using cream cheese, stir it in until melted. Add 1 cup shredded cheddar and all the mozzarella. Stir until fully melted and creamy. Sprinkle remaining ½ cup cheddar on top.
- Cover the pan and let sit off heat for 2-3 minutes to melt the top cheese. For a browned top, broil for 1-2 minutes, watching closely.
- Let the skillet sit uncovered for 5 minutes before serving. Garnish with fresh parsley or chives if desired.
Notes
Don’t lift the lid while rice simmers to ensure proper cooking. Grate your own cheese for best melting. Let the dish rest 5 minutes before serving for best texture. For variations, try Tex-Mex with cumin and pepper jack, or add veggies like bell pepper and spinach.
Nutrition
- Serving Size: 1 serving (about 1.5
- Calories: 485
- Sugar: 4
- Sodium: 680
- Fat: 24
- Saturated Fat: 12
- Carbohydrates: 38
- Fiber: 2
- Protein: 28
Keywords: one-pan meal, cheesy ground beef and rice, easy dinner, 30-minute meal, budget-friendly, comfort food, skillet dinner