Pulling a baking sheet out of the oven with one hand while trying to keep a toddler from unspooling the entire roll of parchment paper with the other. That was the scene. Somewhere in the middle of that chaos, I realized I had a bowl of chopped apples, a block of cream cheese that needed using up, and exactly zero patience for a fussy layered dessert. So I threw things together. I layered a buttery shortbread crust, a simple cheesecake filling, and those apples tossed in cinnamon and sugar. Then I drizzled homemade salted caramel over the top because, honestly, when is that a bad idea?
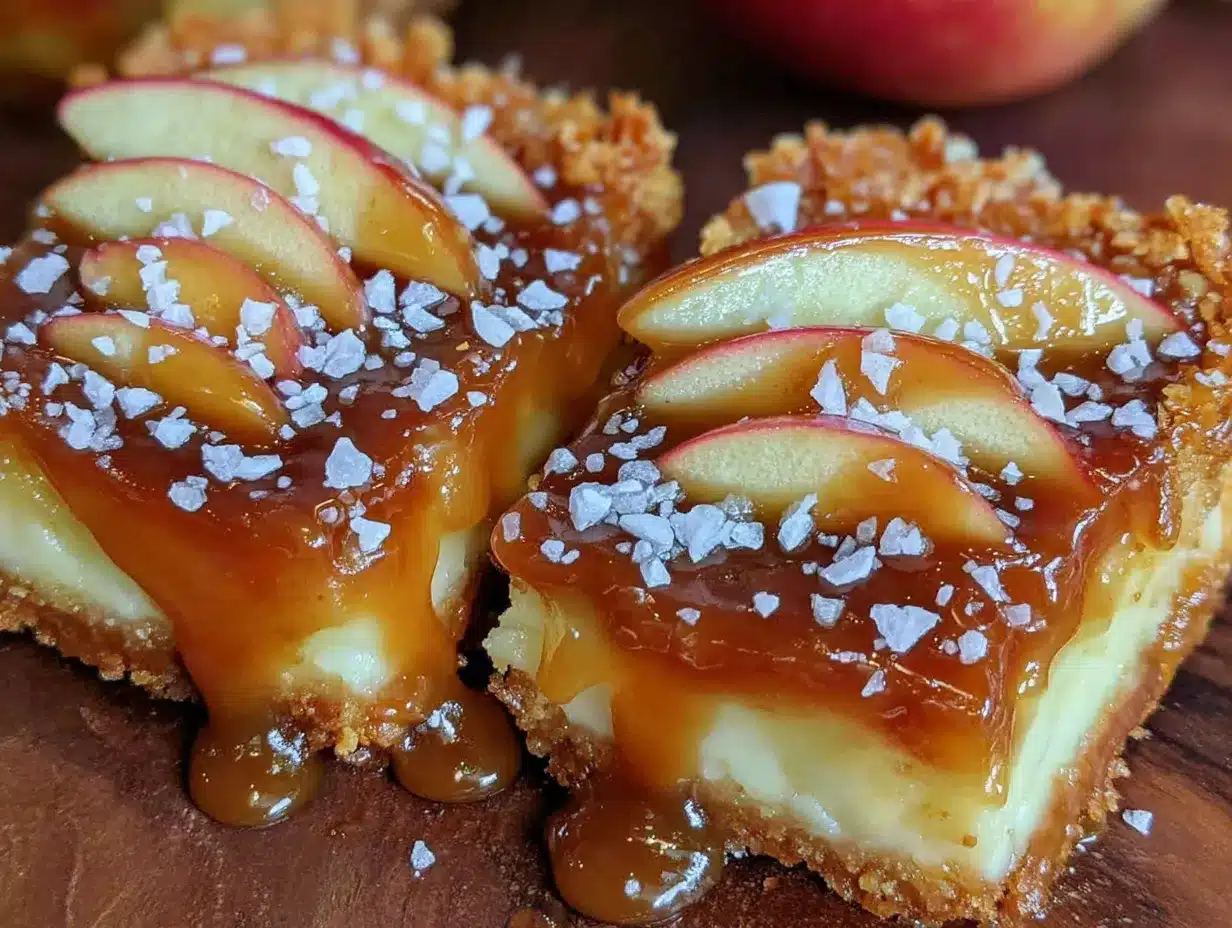
What came out of that oven was something I did not expect. The edges were crisp, the center was creamy, and the apples had softened into these little jammy pockets of fall flavor. My husband ate three. The toddler ate the caramel off the top and called it a win. I stood at the counter eating one straight from the pan, and that is when I knew this recipe was not a throwaway. It was the kind of dessert that makes you look like you planned it all along. These perfect salted caramel apple cheesecake bars have become my go-to for everything from weeknight cravings to holiday dessert tables. They are simple enough for a Tuesday but fancy enough to impress anyone who takes a bite.
Why You’ll Love These Salted Caramel Apple Cheesecake Bars
I have tested this recipe more times than I care to admit. I tried different crusts, different apple varieties, and even a version where I forgot the salt in the caramel (do not do that). After all that trial and error, I can confidently say these bars are the best version. They hit every single note you want in a fall dessert.
- Quick & Easy : The whole thing comes together in about 20 minutes of active prep. The oven does the rest of the work. No water baths, no complicated techniques, no stress.
- Simple Ingredients : You probably have most of these in your kitchen right now. Butter, sugar, flour, cream cheese, apples, and a few pantry staples. No fancy grocery runs required.
- Perfect for Fall Gatherings : These bars are made for Thanksgiving, Friendsgiving, potlucks, or cozy Sunday dinners. They travel well and disappear fast.
- Crowd-Pleaser : I have brought these to family dinners, work events, and neighbor drop-offs. Every single time, someone asks for the recipe. Kids love the caramel, adults love the cheesecake layer, and everyone loves the crunch.
- Unbelievably Delicious : The combination of buttery shortbread, tangy cream cheese, tender cinnamon apples, and that salty-sweet caramel drizzle is next-level comfort food. It is the kind of dessert that makes you close your eyes after the first bite.
What makes these bars different from other apple cheesecake desserts is the texture. The crust stays crisp even after a day in the fridge. The cheesecake layer is dense but creamy, not too sweet. And the apples are cooked just enough to soften without turning into mush. Then that salted caramel ties everything together with a little crunch of sea salt on top. It is comfort food reimagined — faster, easier, but with the same soul-soothing satisfaction. Perfect for impressing guests without stress, or turning a simple evening into something memorable.
What Ingredients You Will Need
This recipe uses simple, wholesome ingredients to deliver bold flavor and satisfying texture without the fuss. Most of these are pantry staples, which makes these bars dangerously easy to whip up on a whim.
For the Shortbread Crust
- 1 ½ cups all-purpose flour — spooned and leveled for accuracy
- ½ cup granulated sugar — adds just enough sweetness to the base
- ½ cup unsalted butter, cold and cubed — I use Kerrygold for the rich flavor, but any good unsalted butter works
- ¼ teaspoon salt — balances the sweetness
For the Cheesecake Layer
- 16 oz cream cheese, softened — full-fat is best here for that creamy texture (Philadelphia is my go-to)
- ½ cup granulated sugar
- 2 large eggs, room temperature — room temperature eggs blend more smoothly into the batter
- 1 teaspoon vanilla extract — pure vanilla makes a difference, but imitation works in a pinch
- 2 tablespoons all-purpose flour — helps stabilize the cheesecake layer so it does not crack
For the Apple Layer
- 3 medium apples, peeled, cored, and diced — I prefer Honeycrisp or Granny Smith for the perfect balance of sweet and tart
- 2 tablespoons granulated sugar
- 1 teaspoon ground cinnamon
- ¼ teaspoon ground nutmeg — optional but adds warmth
For the Salted Caramel Sauce
- ½ cup unsalted butter
- 1 cup packed brown sugar — light or dark both work, dark gives a deeper flavor
- ½ cup heavy cream — do not substitute with milk here, it will not thicken properly
- 1 teaspoon vanilla extract
- ½ teaspoon flaky sea salt — plus more for sprinkling on top (I love Maldon for this)
If you are looking for a dairy-free option, you can use dairy-free cream cheese and a plant-based butter stick, though the texture will be slightly less rich. For a gluten-free version, swap the all-purpose flour with a 1:1 gluten-free baking flour blend. I have tested it with King Arthur Measure for Measure and it worked beautifully.
Equipment Needed
You do not need a professional bakery setup for these bars. Just a few basic tools you probably already own.
- 9×13-inch baking pan — glass or metal both work, just avoid dark nonstick pans which can over-brown the crust
- Parchment paper — for easy lifting and cleanup
- Electric hand mixer or stand mixer — for the cheesecake layer (a whisk and some elbow grease works too, but your arm will thank you for the mixer)
- Medium saucepan — for the caramel sauce
- Mixing bowls — one large, one medium
- Sharp knife and cutting board — for dicing the apples
- Rubber spatula — for scraping every last bit of cheesecake batter
I have made these bars with a cheap baking pan and a hand mixer that sounded like it was dying, and they still turned out amazing. Do not overthink the equipment. If you have a pan and a bowl, you are good to go.
Preparation Method
Preheat your oven to 350°F (175°C). Line your 9×13-inch baking pan with parchment paper, leaving a little overhang on the long sides. This makes lifting the bars out later so much easier.
Make the Shortbread Crust
- In a medium bowl, whisk together the flour, sugar, and salt.
- Add the cold, cubed butter. Use a pastry cutter or your fingertips to work the butter into the flour mixture until it looks like coarse crumbs with some pea-sized butter pieces remaining. Do not overwork it — those little butter pockets create a flaky texture.
- Press the mixture evenly into the bottom of your prepared pan. Use the bottom of a measuring cup to really pack it down firmly.
- Bake for 15-18 minutes, until the edges are just starting to turn golden. The center will look slightly pale and that is fine. Set aside to cool slightly while you make the filling.
Prepare the Apple Layer
- In a small bowl, toss the diced apples with the sugar, cinnamon, and nutmeg. Let them sit while you make the cheesecake batter. This helps draw out some of the moisture so the apples do not make the bars soggy.
Make the Cheesecake Layer
- In a large bowl, beat the softened cream cheese with an electric mixer until smooth and creamy, about 2 minutes. Scrape down the sides of the bowl.
- Add the sugar and beat until combined, another minute.
- Add the eggs one at a time, beating on low speed after each addition until just combined. Do not overmix or the cheesecake can crack.
- Mix in the vanilla extract and the 2 tablespoons of flour until smooth.
- Pour the cheesecake batter over the warm crust and spread it evenly with a spatula.
- Spoon the cinnamon apples evenly over the cheesecake layer. Press them down gently so they sit in the batter rather than on top.
Bake the Bars
- Bake at 350°F for 30-35 minutes. The edges should look set and slightly puffed, but the center will still jiggle slightly when you shake the pan. That is perfect — it will set as it cools.
- Remove from the oven and let cool completely on a wire rack. Then refrigerate for at least 3 hours, or overnight. This step is non-negotiable. Chilling helps the bars set firmly so you get clean slices.
Make the Salted Caramel Sauce
- While the bars chill, make the caramel. In a medium saucepan over medium heat, melt the butter.
- Stir in the brown sugar and heavy cream. Bring to a gentle simmer, stirring constantly.
- Let it bubble for 3-4 minutes, stirring occasionally, until it thickens slightly and turns a rich amber color.
- Remove from heat and stir in the vanilla extract and flaky sea salt. Let it cool to room temperature. It will thicken more as it cools.
Assemble and Serve
- Once the bars are fully chilled, lift them out of the pan using the parchment overhang.
- Slice into squares using a sharp knife. Wipe the knife clean between cuts for neat edges.
- Drizzle the salted caramel sauce over the top and sprinkle with a little extra flaky sea salt.
The first time I made these, I was impatient and sliced them after only an hour in the fridge. They were a mess. Gooey, falling apart, delicious but not presentable. Learn from my mistake. Give them the full chill time. Your patience will reward you with perfect, clean slices every time.
Cooking Tips & Techniques
After making these bars more times than I can count, I have picked up a few tricks that make a real difference.
Use cold butter for the crust. I know it is tempting to use softened butter because it is easier to mix, but cold butter creates that shortbread texture you want. The little pieces of butter melt in the oven and create steam pockets, which makes the crust tender and flaky instead of dense.
Do not overmix the cheesecake batter. This is the most common mistake I see. Overmixing incorporates too much air, which causes the cheesecake to puff up in the oven and then sink and crack as it cools. Mix just until the ingredients come together. A few tiny lumps are fine.
Room temperature ingredients matter. Cold cream cheese and cold eggs will give you a lumpy batter no matter how long you beat it. Let your cream cheese sit out for about an hour, and place your eggs in a bowl of warm water for 5 minutes if you forgot to take them out earlier.
Watch the caramel carefully. Caramel can go from perfect to burnt in about 30 seconds. Keep the heat at medium, stir constantly, and trust the visual cues. When it turns a deep amber and coats the back of a spoon, it is done. If you see smoke, you have gone too far.
Let the bars chill completely before slicing. I cannot stress this enough. Warm cheesecake is soft and unstable. Cold cheesecake slices like a dream. If you are in a rush, you can pop them in the freezer for an hour, but the fridge is better for texture.
Variations & Adaptations
One of the best things about this recipe is how flexible it is. I have played around with different versions depending on what I have on hand or who I am feeding.
Gluten-Free Version : Swap the all-purpose flour in both the crust and the cheesecake layer with a 1:1 gluten-free baking flour. I have tested this with Bob’s Red Mill and King Arthur, and both worked well. The crust will be slightly more crumbly, but still delicious.
Dairy-Free Version : Use dairy-free cream cheese and plant-based butter. The texture will be a little less creamy, but the flavor is still fantastic. Just make sure your dairy-free cream cheese is softened properly, as some brands are firmer than others.
Pear Variation : Swap the apples for ripe but firm pears. Bosc or Anjou pears work beautifully. Reduce the sugar slightly since pears are naturally sweeter than apples. I made this version last fall and it was a huge hit at a Friendsgiving dinner.
Nutty Crust : Add ½ cup of finely chopped pecans or walnuts to the shortbread crust. Press them in with the crust mixture for added crunch and a toasty flavor that pairs perfectly with the apples and caramel.
Spice It Up : Add a pinch of cardamom or ginger to the apple mixture for a warm, aromatic twist. I love cardamom with apples — it adds an unexpected layer of flavor that feels sophisticated without being complicated.
Serving & Storage Suggestions
These bars are best served chilled or at room temperature. I personally love them straight from the fridge with a generous drizzle of caramel and a sprinkle of flaky salt. The contrast between the cold, creamy cheesecake and the warm, sticky caramel is just perfect.
For a full dessert spread, serve these bars alongside a scoop of vanilla bean ice cream or a dollop of freshly whipped cream. They also pair beautifully with a cup of hot coffee or a spiced chai latte. If you are hosting a fall gathering, arrange them on a platter with some soft pumpkin chocolate chip cookies and a homemade peach cobbler with buttermilk biscuit topping for a dessert table that will have everyone talking.
Storage : Store leftover bars in an airtight container in the refrigerator for up to 5 days. Keep the caramel sauce separate and drizzle it on just before serving to prevent the bars from getting soggy.
Freezing : These bars freeze beautifully. Slice them into individual portions, wrap each one tightly in plastic wrap, and place them in a freezer-safe bag. They will keep for up to 3 months. To thaw, transfer a bar to the fridge overnight or let it sit at room temperature for about 30 minutes. Add fresh caramel and salt after thawing.
Reheating : If you prefer warm bars, pop a slice in the microwave for 15-20 seconds. The cheesecake will soften and the apples will warm through, but the crust will lose some of its crunch. For a better texture, reheat in a 300°F oven for 5-7 minutes.
One thing I have noticed is that the flavors actually get better after a day in the fridge. The apples continue to soften and meld with the cheesecake, and the caramel soaks into the top layer just a little. Day-old bars are honestly my favorite.
Nutritional Information & Benefits
Let’s be real — these are a treat. But knowing what is in them helps you enjoy them mindfully.
| Nutrient | Per Serving (1 bar) |
|---|---|
| Calories | 385 |
| Total Fat | 22g |
| Saturated Fat | 13g |
| Cholesterol | 85mg |
| Sodium | 210mg |
| Total Carbohydrates | 44g |
| Dietary Fiber | 2g |
| Sugars | 32g |
| Protein | 5g |
Health Benefits : Apples are a good source of fiber and vitamin C. The cinnamon in the apple layer has anti-inflammatory properties and can help regulate blood sugar. Cream cheese provides calcium and protein, though it is also high in saturated fat, so moderation is key.
Dietary Considerations : This recipe contains gluten, dairy, and eggs. For gluten-free and dairy-free alternatives, check the variations section above. These bars are not suitable for vegan diets as written, though a vegan cream cheese and egg substitute could be explored.
Allergens : Contains wheat, dairy, and eggs. May contain traces of tree nuts if using the nutty crust variation.
I believe in enjoying dessert without guilt. These bars are a celebration of fall flavors, meant to be shared and savored. One bar is plenty satisfying, and the richness means you will not be reaching for a second one right away. Or maybe you will. I do not judge.
Conclusion
These perfect salted caramel apple cheesecake bars are everything I want in a fall dessert. They are simple enough for a weeknight baking project but impressive enough to bring to any holiday gathering. The buttery crust, the creamy cheesecake, the tender cinnamon apples, and that glossy salted caramel on top — every layer works together in perfect harmony.
I love how forgiving this recipe is. You do not need to be a pastry chef to pull it off. You just need a little patience for the chilling time and a willingness to drizzle caramel over pretty much anything. If you want to switch up the apples or add a handful of nuts, go for it. That is the beauty of a good base recipe — it welcomes your personal touch.
I would love to hear how these turn out for you. Did you try a variation? Did you double the caramel like I always do? Drop a comment below and let me know. And if you are looking for more fall baking inspiration, do not miss our perfect sourdough discard pumpkin muffins or these most moist chocolate zucchini bundt cake with cream cheese glaze. Happy baking, friends!
Frequently Asked Questions
Can I use store-bought caramel sauce instead of making my own?
Absolutely. If you are short on time, a high-quality store-bought salted caramel sauce works perfectly. Just warm it slightly before drizzling so it spreads easily over the bars.
What kind of apples work best for these bars?
Honeycrisp and Granny Smith are my top choices. Honeycrisp adds natural sweetness and holds its shape well. Granny Smith provides a tart contrast to the sweet caramel and cheesecake. You can also use Fuji or Braeburn in a pinch.
Can I make these bars ahead of time for a party?
Yes, and I actually recommend it. These bars taste even better after a day in the fridge. Make them up to two days in advance, keep them covered in the refrigerator, and add the caramel drizzle just before serving.
Why did my cheesecake layer crack?
Cracks usually happen from overmixing the batter or overbaking. Mix just until the ingredients come together, and pull the bars out of the oven while the center still jiggles slightly. The residual heat will finish the cooking process without drying it out.
Can I double this recipe for a larger crowd?
Yes, but you will need a larger pan or two separate 9×13 pans. If using one larger pan, increase the baking time by about 10 minutes and check for doneness by gently shaking the pan. The center should still have a slight wobble.
Pin This Recipe!
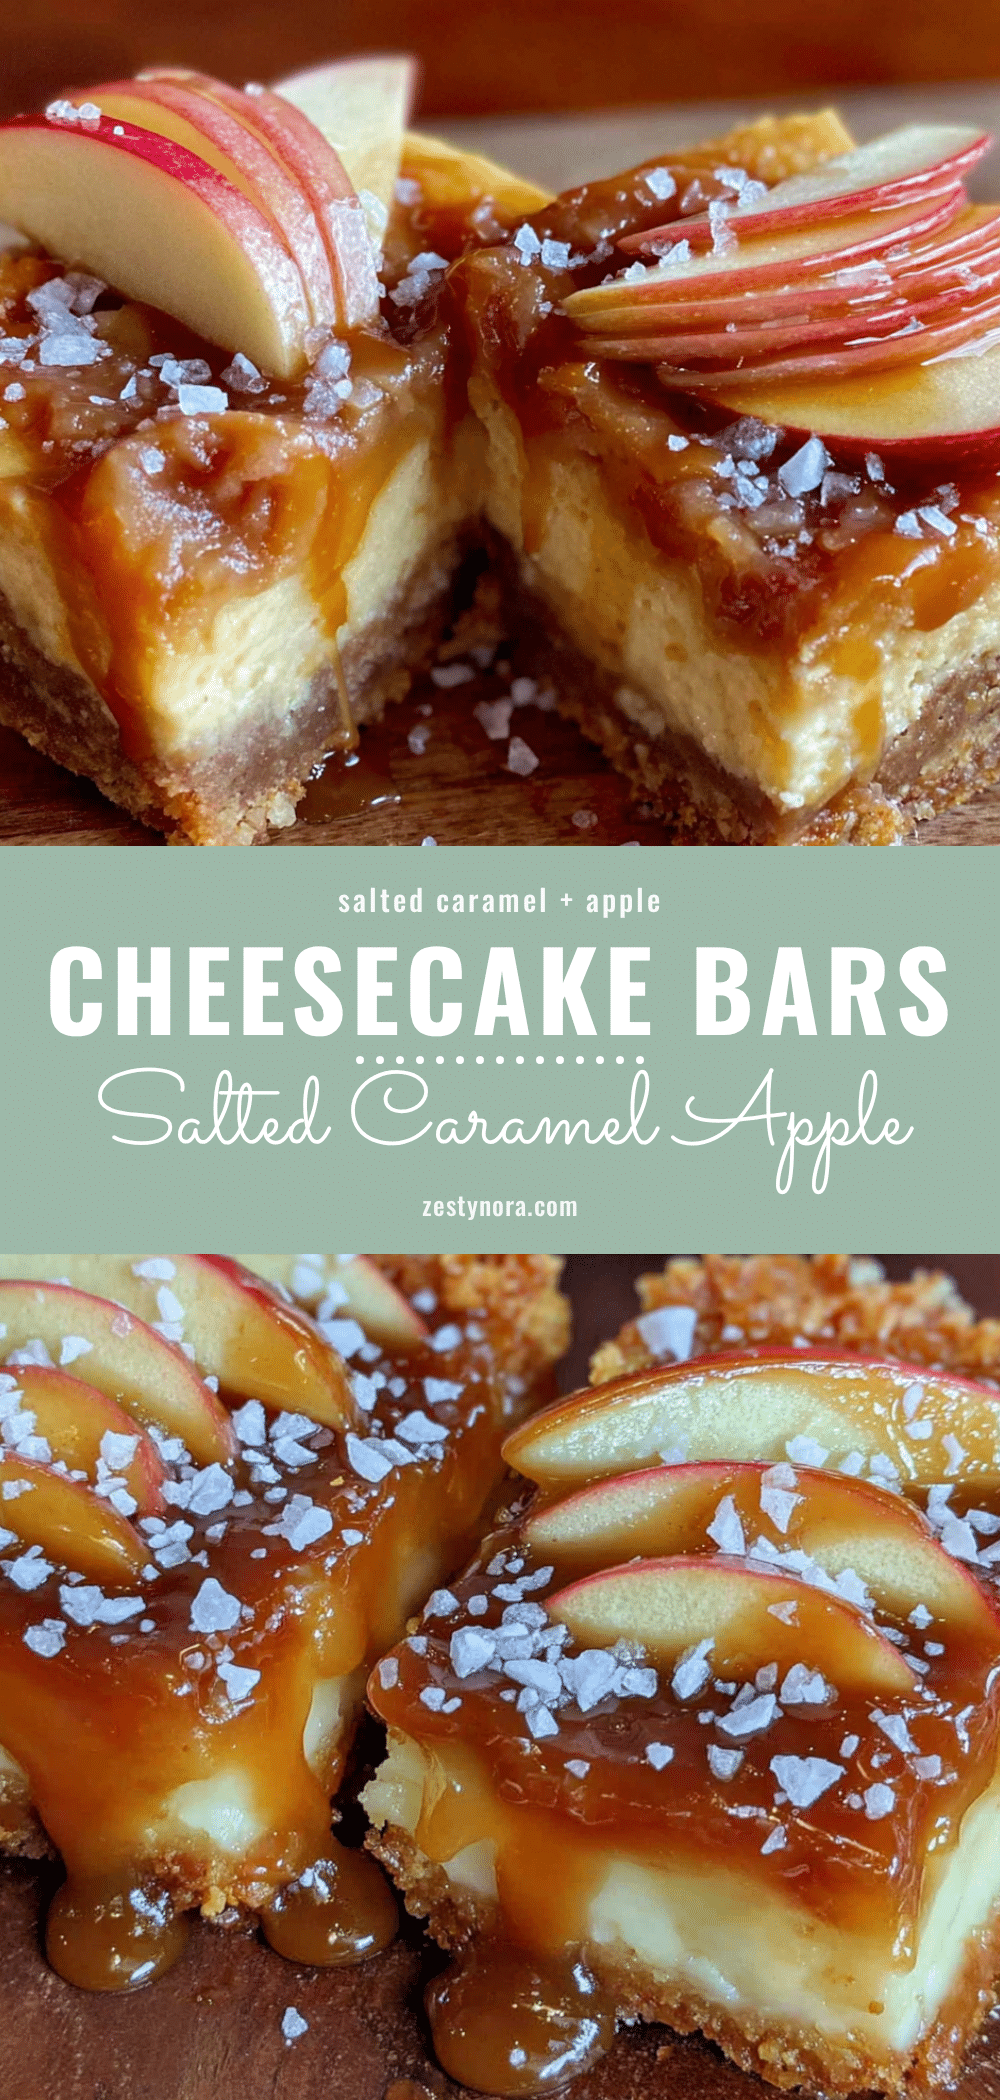
Perfect Salted Caramel Apple Cheesecake Bars Easy Recipe
These salted caramel apple cheesecake bars feature a buttery shortbread crust, creamy cheesecake filling, tender cinnamon apples, and a homemade salted caramel drizzle. They are simple enough for a weeknight but impressive enough for holiday gatherings.
- Prep Time: 20 minutes
- Cook Time: 30 minutes
- Total Time: 3 hours 50 minutes (includes chilling)
- Yield: 12 servings 1x
- Category: Dessert
- Cuisine: American
Ingredients
- 1 ½ cups all-purpose flour
- ½ cup granulated sugar
- ½ cup unsalted butter, cold and cubed
- ¼ teaspoon salt
- 16 oz cream cheese, softened
- ½ cup granulated sugar
- 2 large eggs, room temperature
- 1 teaspoon vanilla extract
- 2 tablespoons all-purpose flour
- 3 medium apples, peeled, cored, and diced (Honeycrisp or Granny Smith)
- 2 tablespoons granulated sugar
- 1 teaspoon ground cinnamon
- ¼ teaspoon ground nutmeg (optional)
- ½ cup unsalted butter
- 1 cup packed brown sugar (light or dark)
- ½ cup heavy cream
- 1 teaspoon vanilla extract
- ½ teaspoon flaky sea salt, plus more for sprinkling
Instructions
- Preheat oven to 350°F (175°C). Line a 9×13-inch baking pan with parchment paper, leaving overhang on the long sides.
- Make the shortbread crust: In a medium bowl, whisk together flour, sugar, and salt. Add cold cubed butter and work into the flour mixture using a pastry cutter or fingertips until coarse crumbs form with some pea-sized butter pieces. Press evenly into the prepared pan. Bake for 15-18 minutes until edges are just golden. Set aside to cool slightly.
- Prepare the apple layer: In a small bowl, toss diced apples with sugar, cinnamon, and nutmeg. Let sit while making the cheesecake batter.
- Make the cheesecake layer: In a large bowl, beat softened cream cheese with an electric mixer until smooth, about 2 minutes. Add sugar and beat until combined, about 1 minute. Add eggs one at a time, beating on low after each addition until just combined. Mix in vanilla extract and 2 tablespoons flour until smooth.
- Pour cheesecake batter over the warm crust and spread evenly. Spoon cinnamon apples over the cheesecake layer, pressing them down gently.
- Bake at 350°F for 30-35 minutes until edges are set and slightly puffed, but center still jiggles slightly. Cool completely on a wire rack, then refrigerate for at least 3 hours or overnight.
- Make the salted caramel sauce: In a medium saucepan over medium heat, melt butter. Stir in brown sugar and heavy cream. Bring to a gentle simmer, stirring constantly. Let bubble for 3-4 minutes until thickened and amber. Remove from heat and stir in vanilla extract and flaky sea salt. Cool to room temperature.
- Once bars are fully chilled, lift out using parchment overhang. Slice into squares. Drizzle with salted caramel sauce and sprinkle with extra flaky sea salt.
Notes
Chill bars completely before slicing for clean cuts. Use cold butter for the crust. Do not overmix cheesecake batter. Room temperature ingredients matter. Watch caramel carefully to avoid burning. Bars taste even better after a day in the fridge.
Nutrition
- Serving Size: 1 bar
- Calories: 385
- Sugar: 32
- Sodium: 210
- Fat: 22
- Saturated Fat: 13
- Carbohydrates: 44
- Fiber: 2
- Protein: 5
Keywords: salted caramel apple cheesecake bars, apple cheesecake bars, fall dessert, easy cheesecake bars, caramel apple bars


