“Can you make that chicken again? The one with the sticky sauce?” My nephew asked me this last summer, and honestly, I had to think for a second. I make a lot of chicken, you know? But he described it perfectly—”the one where the sauce gets all sweet and garlicky on the corn too.” That’s when I realized this Easy Honey Garlic Chicken Thighs with Corn recipe had become a quiet favorite in my house.
I didn’t plan for it to become a regular thing. It started on a Tuesday night when I had chicken thighs in the fridge and a bag of frozen corn in the freezer. I wanted something that felt like a real dinner but didn’t require a trip to the store. The honey garlic combo is one of those flavor pairings that just works—sweet, savory, and a little bit of that garlic punch that makes everything taste like you tried harder than you actually did.
The first time I made it, I was honestly just throwing things together. I seared the chicken thighs skin-side down until they were golden and crispy, then pulled them out and built the sauce right in the same pan. The corn goes in at the end, soaking up all that honey garlic goodness while the chicken finishes cooking. It’s the kind of meal that feels special but is really just smart weeknight cooking.
I’ve made this dish more times than I can count now, and it never gets old. There’s something about that moment when the honey hits the hot pan and the whole kitchen smells like caramelized garlic. It’s not fancy. It’s not complicated. But it’s exactly the kind of dinner that makes you feel like you’ve got it all figured out.
Why You’ll Love This Recipe
This Easy Honey Garlic Chicken Thighs with Corn has earned its spot in my regular dinner rotation, and I think you’ll see why after just one try. It’s one of those recipes that delivers big flavor without demanding much from you.
- Quick & Easy: From start to finish, you’re looking at about 30 minutes. That’s faster than takeout delivery, and way more satisfying.
- Simple Ingredients: Everything here is stuff you probably already have. Honey, soy sauce, garlic, chicken thighs, and corn. No fancy grocery runs required.
- Perfect for Busy Weeknights: This is the dinner you make when you’re tired but still want something that tastes like you put in effort. It’s weeknight magic.
- Crowd-Pleaser: Kids love the sweet honey glaze, and adults appreciate the savory garlic depth. I’ve served this to picky eaters and foodie friends alike, and it always gets cleaned up.
- One-Pan Wonder: Less cleanup means more time to relax. The chicken and corn cook together in the same skillet, so you’re not juggling multiple pans.
What makes this recipe different is the technique. Instead of just dumping everything in a pan, you sear the chicken first to get that crispy skin, then build the sauce around it. The corn goes in at just the right moment so it absorbs the honey garlic glaze without getting mushy. It’s a small detail, but it makes a big difference in texture and flavor.
Honestly, this is the kind of meal that makes you close your eyes after the first bite. It’s comfort food that comes together fast—sweet, sticky, savory, and completely satisfying. Perfect for those nights when you need dinner to be both easy and memorable.
What Ingredients You Will Need
This recipe uses simple, honest ingredients to create something that tastes way more complex than it is. Here’s what you’ll need to grab:
For the Chicken
- 4 bone-in, skin-on chicken thighs (about 1.5 pounds) — The skin gets beautifully crispy, and the bone keeps the meat juicy. You can use boneless thighs, but reduce cooking time by about 5 minutes.
- 1 tablespoon olive oil — For searing. Avocado oil works great too.
- Salt and black pepper — To season the chicken. Don’t be shy here.
- 1/2 teaspoon garlic powder — Adds an extra layer of garlic flavor that complements the fresh garlic in the sauce.
For the Honey Garlic Sauce

- 1/3 cup honey — Use a good quality honey for the best flavor. I like local wildflower honey when I can find it.
- 1/4 cup low-sodium soy sauce — Regular soy sauce works too, but low-sodium gives you more control over the saltiness. Tamari or coconut aminos are great gluten-free swaps.
- 4 cloves garlic, minced — Fresh garlic is non-negotiable here. The jarred stuff just won’t give you the same punch.
- 1 tablespoon rice vinegar — Adds a little acidity to balance the sweetness. Apple cider vinegar works in a pinch.
- 1 teaspoon sesame oil — Optional, but it adds a lovely nutty depth. Skip it if you don’t have it.
- 1/2 teaspoon red pepper flakes — For a tiny bit of heat. Leave it out if you’re sensitive to spice.
For the Corn
- 3 cups frozen corn kernels — No need to thaw. Frozen corn is actually sweeter than fresh most of the year. If using fresh, cut it off 4-5 ears of corn.
- 1 tablespoon butter — Adds richness and helps the corn get those gorgeous golden spots.
- Salt and pepper to taste
For Garnish
- 2 green onions, sliced — For freshness and color.
- 1 tablespoon sesame seeds — Optional, but pretty and adds a little nuttiness.
I usually grab my chicken thighs from a local butcher when I can, but grocery store packs work just fine. For the honey, I’ve found that lighter, milder honeys let the garlic shine through better than dark, robust ones. And honestly, don’t skip the fresh garlic—it’s the backbone of this whole dish.
Equipment Needed
You don’t need much for this recipe, which is part of why I love it. Here’s what you’ll want to have on hand:
- Large skillet or cast iron pan (12-inch) — A heavy-bottomed pan gives you the best sear. I use my trusty cast iron, but any oven-safe skillet works. If you don’t have one, a regular non-stick pan will do—just watch the heat so the honey doesn’t burn.
- Tongs — For flipping the chicken without piercing the skin. Trust me, you want those juices to stay put.
- Small bowl — For mixing the sauce ingredients together before adding them to the pan.
- Cutting board and knife — For mincing garlic and slicing green onions.
- Measuring spoons and cups — Because eyeballing honey can get sticky real fast.
If you don’t have a cast iron skillet, don’t worry. I’ve made this in a stainless steel pan and even a non-stick skillet with good results. Just make sure whatever you use can handle medium-high heat without scorching the honey. And if you’re using a non-stick pan, avoid metal utensils—you’ll thank me later.
Preparation Method
Let me walk you through this step by step. It’s easier than you think, and I’ve included all the little details that make it work every single time.
- Pat the chicken thighs dry with paper towels. This is crucial for getting that crispy skin. Season both sides generously with salt, pepper, and garlic powder. Let them sit at room temperature for about 10 minutes while you prep everything else.
- In a small bowl, whisk together the honey, soy sauce, minced garlic, rice vinegar, sesame oil, and red pepper flakes. Set it aside. Give it a taste—it should be sweet with a nice savory kick. Adjust the heat if you want more or less spice.
- Heat your large skillet over medium-high heat and add the olive oil. Wait until the oil is shimmering but not smoking—about 2 minutes. You want it hot enough that the chicken sizzles immediately when it hits the pan.
- Place the chicken thighs skin-side down in the skillet. Don’t crowd them—leave a little space between each piece. Cook without moving them for 6-7 minutes, until the skin is deep golden brown and crispy. The skin should release easily from the pan when it’s ready; if it sticks, give it another minute.
- Flip the chicken thighs using your tongs. Cook for another 4-5 minutes on the second side. The chicken should be golden all over and cooked through to about 165°F internally. Transfer the chicken to a plate and tent loosely with foil.
- Reduce the heat to medium and add the butter to the pan. Once it melts, add the frozen corn. Cook for 3-4 minutes, stirring occasionally, until the corn is heated through and starting to get a few golden brown spots. Season with a pinch of salt and pepper.
- Pour the honey garlic sauce into the pan with the corn. Stir everything together and let it bubble for about 1 minute. The sauce will start to thicken slightly.
- Return the chicken thighs to the pan, nestling them into the corn and sauce. Spoon some of the sauce over the tops of the chicken. Let everything cook together for 2-3 minutes, until the sauce is sticky and glossy and the chicken is heated through.
- Remove from heat and sprinkle with sliced green onions and sesame seeds. Let it rest for about 5 minutes before serving—this lets the sauce set up a little and makes everything even more flavorful.
A few things I’ve learned the hard way: Don’t skip the resting time after searing the chicken. If you add the sauce too early, the honey can burn before the corn is ready. And when you’re stirring the corn, be gentle—you want those kernels to stay whole and pop in your mouth, not turn into mush.
Cooking Tips & Techniques
After making this dish more times than I can count, I’ve picked up a few tricks that make a real difference. Let me share them so you don’t have to learn the hard way like I did.
Get that skin really crispy. The key is patience. Don’t move the chicken for the first 6-7 minutes. Let it sit there and develop that deep golden crust. If you try to flip it too early, the skin will tear and stick. Trust the process—when it’s ready, it will release from the pan like magic.
Watch your heat with the honey. Honey burns faster than you think. Once you add the sauce to the pan, keep an eye on it. If the heat is too high, the honey will turn dark and bitter instead of golden and sweet. Medium heat is your friend here. If you see the sauce getting too dark too fast, pull the pan off the burner for a minute.
Don’t overcrowd the pan. I made this mistake the first time. I tried to cook all four thighs at once in a pan that was too small, and they steamed instead of seared. Give each piece a little breathing room. If your pan is smaller, cook the chicken in two batches. It’s worth the extra few minutes.
Use a meat thermometer. I know, I know, it’s one more thing to wash. But chicken thighs are forgiving, and you don’t want to overcook them. 165°F is the sweet spot. If you don’t have a thermometer, look for clear juices when you pierce the thickest part of the thigh.
Let the corn get a little char. Those golden brown spots on the corn aren’t just pretty—they add a subtle smoky sweetness that plays beautifully with the honey garlic sauce. Don’t stir the corn constantly; let it sit for a minute between stirs to develop those caramelized bits.
Double the sauce if you love it. Honestly, I sometimes make 1.5 times the sauce recipe because I want extra for drizzling over rice or dipping bread into. Just be careful not to oversauce the pan—you still want everything to get sticky and concentrated, not soupy.
Variations & Adaptations
One of the best things about this recipe is how easy it is to tweak based on what you have or what you’re in the mood for. Here are some variations I’ve tried and loved:
Spicy Honey Garlic Version: If you like heat, add a tablespoon of sriracha or gochujang to the sauce. I did this once when I had a cold and wanted something that would clear my sinuses, and it was incredible. The spicy-sweet combo is addictive. For another spicy option, try my Perfect Habanero Peach Hot Sauce on the side—it’s a game-changer.
Gluten-Free Adaptation: Simply swap the soy sauce for tamari or coconut aminos. Everything else in the recipe is naturally gluten-free. I’ve made it this way for friends with celiac disease, and they couldn’t tell the difference.
Vegetable Swap: Don’t have corn? Try this with broccoli florets, bell peppers, or snap peas. Add them to the pan after the chicken comes out and cook until tender-crisp before adding the sauce. Each vegetable brings its own personality to the dish.
Oven Method: If you want to go hands-off, sear the chicken in an oven-safe skillet, then add the corn and sauce and transfer the whole thing to a 375°F oven for 15-20 minutes. The sauce caramelizes beautifully in the oven, and you get a different texture on the corn.
Lighter Version: Use boneless, skinless chicken thighs and skip the searing step. Just cook them through in the pan, then add the corn and sauce. You’ll lose the crispy skin, but it’s still delicious and comes together in about 20 minutes.
Herb Twist: Add a tablespoon of fresh thyme or rosemary along with the garlic. The herbaceous notes pair beautifully with the honey and corn. I tried this with thyme from my garden last summer, and it was a lovely change of pace.
If you love the honey garlic flavor combination, you might also enjoy my Sticky Peach Bourbon BBQ Chicken Thighs—it uses a similar technique but with a fruity, smoky twist that’s perfect for summer grilling.
Serving & Storage Suggestions
This dish is incredibly versatile when it comes to serving. Here’s how I like to enjoy it and how to keep leftovers tasting great.
Serving Temperature: Serve this dish hot, right out of the pan. The honey garlic sauce is at its best when it’s warm and sticky. I like to let it rest for about 5 minutes after cooking so the sauce thickens up a bit more.
What to Serve With It: Steamed jasmine rice is my go-to—it soaks up all that honey garlic sauce perfectly. Buttered noodles, quinoa, or even crusty bread work great too. For a lighter option, serve it over a bed of mixed greens or alongside a simple cucumber salad. My 5-Minute Cucumber Salad with Easy Rice Vinegar Dressing is a refreshing side that cuts through the richness beautifully.
Presentation Tips: I like to arrange the chicken thighs on a platter with the corn piled around them. Drizzle any remaining sauce from the pan over everything, then finish with the green onions and sesame seeds. It’s simple but looks like you put in way more effort than you did.
Storage: Store leftovers in an airtight container in the refrigerator for up to 4 days. The flavors actually get better as they sit, so don’t be surprised if day-two leftovers taste even better than the first serving.
Reheating: The best way to reheat this is in a skillet over medium heat with a splash of water or chicken broth. This helps the sauce loosen up without burning. Microwave works in a pinch, but the chicken skin won’t be crispy. If you’re reheating in the microwave, cover the dish with a damp paper towel to keep the chicken moist.
Freezing: This dish freezes well for up to 3 months. Let it cool completely, then transfer to a freezer-safe container. To thaw, move it to the refrigerator overnight. Reheat in a skillet as described above. The corn might be a little softer after freezing, but the flavor is still fantastic.
How Flavors Develop: I’ve noticed that the honey garlic sauce becomes even more complex after a day in the fridge. The garlic mellows out, and the honey gets deeper and richer. If you can plan ahead, making this a day in advance is actually a great strategy for busy nights.
Nutritional Information & Benefits
Here’s a rough breakdown of what you’re getting in each serving (based on 4 servings, using bone-in chicken thighs):
- Calories: Approximately 480-520 per serving
- Protein: 32-35g
- Fat: 22-26g (including healthy fats from chicken skin and olive oil)
- Carbohydrates: 38-42g (mostly from honey and corn)
- Fiber: 3-4g
- Sugar: 22-26g (natural sugars from honey and corn)
- Sodium: 680-720mg (can be reduced with low-sodium soy sauce)
Health Benefits: Chicken thighs are a great source of high-quality protein, B vitamins, and minerals like selenium and phosphorus. The skin contains healthy fats that help your body absorb fat-soluble vitamins. Corn provides fiber, vitamin C, and antioxidants like lutein and zeaxanthin that support eye health. Garlic has been studied for its immune-boosting and anti-inflammatory properties. Honey offers natural sweetness with antimicrobial benefits.
Dietary Considerations: This recipe is naturally dairy-free (if you skip the butter garnish or use a dairy-free alternative) and nut-free. For a gluten-free version, simply use tamari instead of soy sauce. It’s not low-carb due to the honey and corn, but you can reduce the honey to 2 tablespoons for a lower-sugar option.
Potential Allergens: Soy (from soy sauce). If you have a soy allergy, use coconut aminos or a soy-free tamari alternative.
I’m not a nutritionist, but I’ve found that this dish fits nicely into a balanced diet when paired with vegetables and whole grains. It’s satisfying enough to keep you full without weighing you down.
Conclusion
This Easy Honey Garlic Chicken Thighs with Corn has become one of those recipes I turn to again and again. It’s the kind of dinner that feels like a hug in a bowl—warm, comforting, and exactly what you need after a long day.
What I love most about this recipe is how forgiving it is. You can tweak the sauce, swap the vegetables, adjust the spice level, and it still turns out amazing. It’s a blueprint for a great weeknight dinner, not a rigid formula. And honestly, that’s the kind of cooking I think we all need more of.
I’d love to hear how this turns out for you. Did you add extra garlic? Swap the corn for something else? Serve it over rice or noodles? Drop a comment below and let me know your version. And if you share it on social media, tag me—I want to see those sticky, golden chicken thighs in all their glory.
Until next time, happy cooking. And remember, the best meals are the ones you make without overthinking them.
Frequently Asked Questions
Can I use chicken breasts instead of thighs?
Absolutely. Boneless, skinless chicken breasts will work, but they’ll cook faster and dry out more easily. Reduce the searing time to about 4 minutes per side, and check for doneness at 160°F (they’ll carry over to 165°F as they rest). You might want to pound them to an even thickness first for consistent cooking.
Can I use canned corn instead of frozen?
Yes, but drain it well first. Canned corn is already cooked, so you’ll just need to heat it through and get some color on it. Reduce the cooking time for the corn to about 2 minutes. Fresh corn cut off the cob is also fantastic—grill the ears first for a smoky flavor if you have time.
How do I prevent the honey garlic sauce from burning?
Keep your heat at medium or medium-low once you add the sauce. Honey burns quickly at high heat. If you notice the sauce getting too dark too fast, remove the pan from the burner for a minute. Also, make sure you have enough liquid in the pan—the soy sauce and any juices from the chicken help prevent burning.
Can I make this in a slow cooker?
You can, but you’ll lose the crispy skin. Sear the chicken in a skillet first, then transfer everything (including the corn and sauce) to a slow cooker. Cook on low for 4-5 hours or high for 2-3 hours. The sauce will be thinner, so you might want to thicken it with a cornstarch slurry at the end (1 tablespoon cornstarch mixed with 2 tablespoons cold water).
How do I make this recipe spicier?
There are a few ways. Add 1-2 teaspoons of sriracha or gochujang to the sauce, or increase the red pepper flakes to 1 full teaspoon. You can also add a finely chopped fresh chili (like serrano or Thai bird chili) along with the garlic. For a smoky heat, try adding a pinch of chipotle powder.
Pin This Recipe!
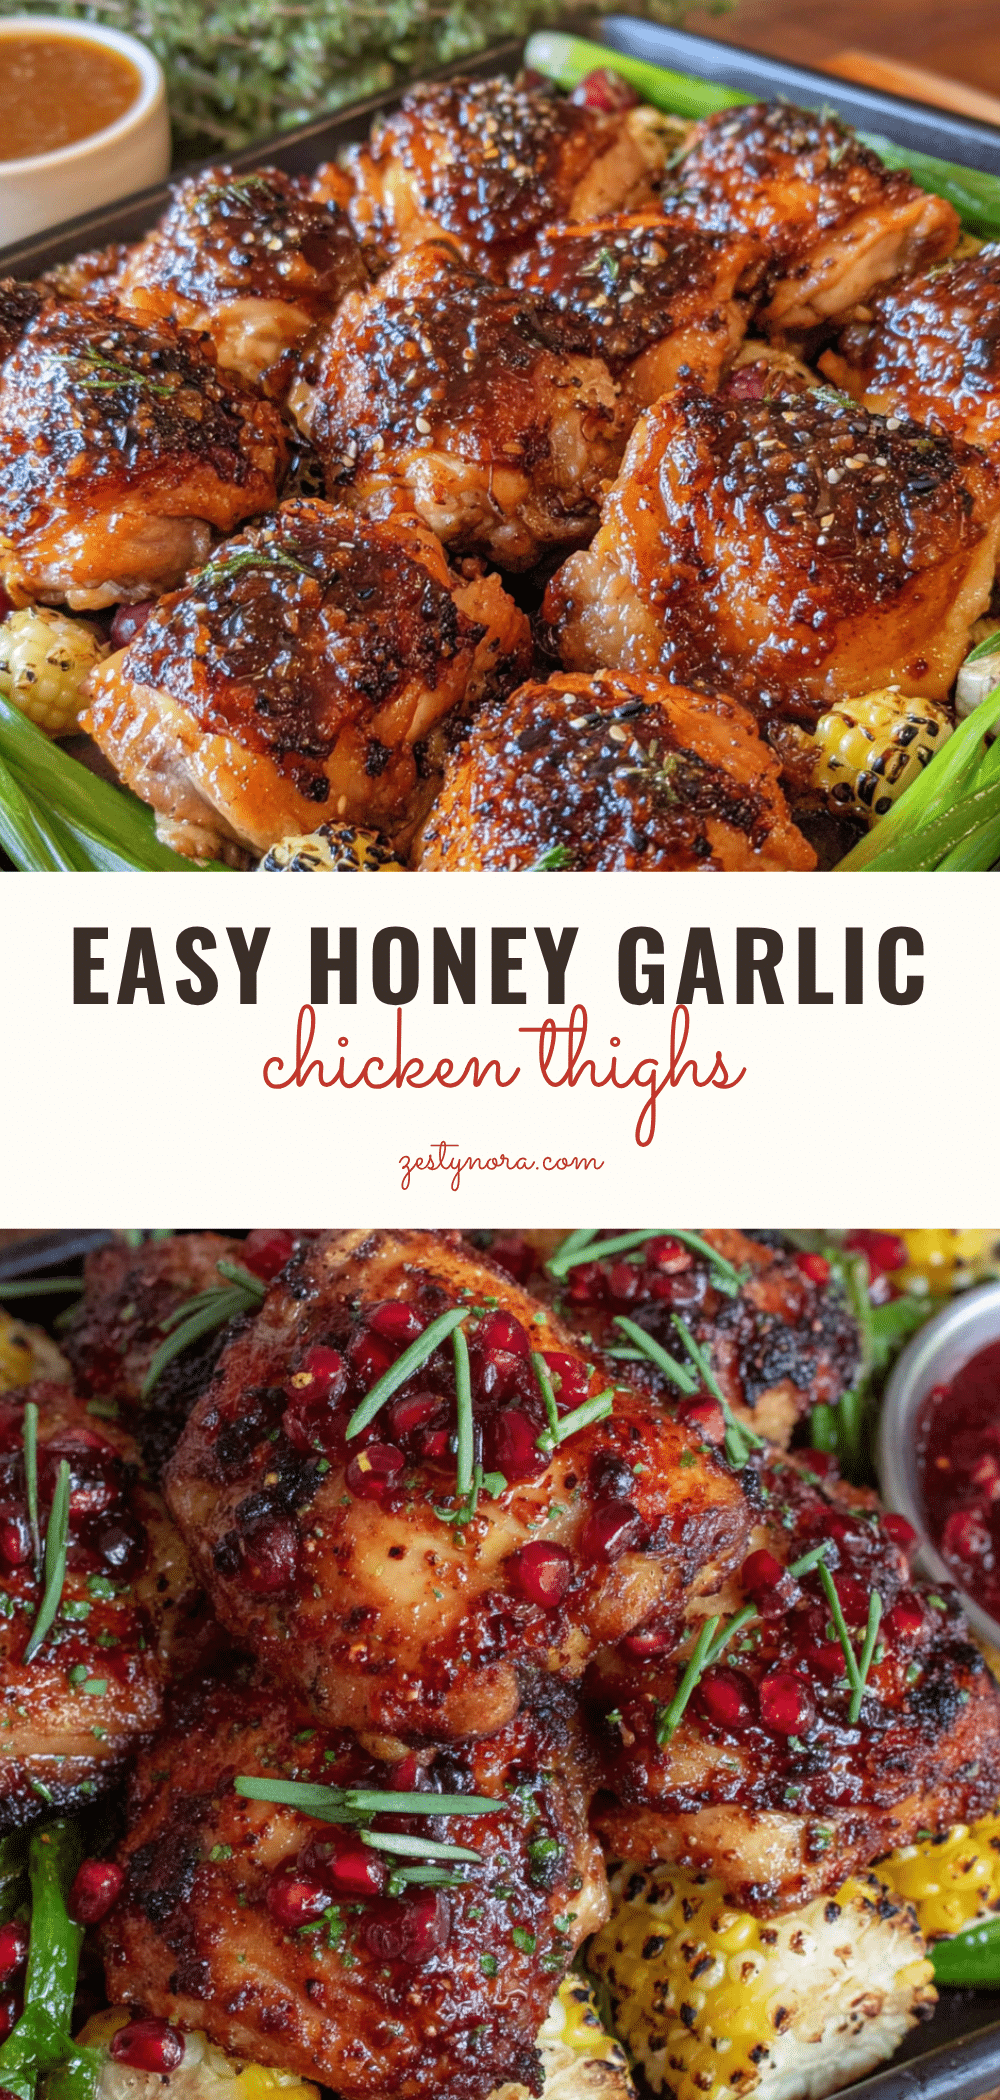
Easy Honey Garlic Chicken Thighs with Corn

A quick and easy weeknight dinner featuring crispy chicken thighs in a sweet and savory honey garlic sauce, with corn that soaks up all the sticky goodness. Ready in about 30 minutes with simple ingredients.
- Prep Time: 10 minutes
- Cook Time: 20 minutes
- Total Time: 30 minutes
- Yield: 4 servings 1x
- Category: Main Course
- Cuisine: American
Ingredients
- 4 bone-in, skin-on chicken thighs (about 1.5 pounds)
- 1 tablespoon olive oil
- Salt and black pepper to taste
- 1/2 teaspoon garlic powder
- 1/3 cup honey
- 1/4 cup low-sodium soy sauce
- 4 cloves garlic, minced
- 1 tablespoon rice vinegar
- 1 teaspoon sesame oil (optional)
- 1/2 teaspoon red pepper flakes
- 3 cups frozen corn kernels
- 1 tablespoon butter
- Salt and pepper to taste
- 2 green onions, sliced
- 1 tablespoon sesame seeds (optional)
Instructions
- Pat the chicken thighs dry with paper towels. Season both sides generously with salt, pepper, and garlic powder. Let them sit at room temperature for about 10 minutes.
- In a small bowl, whisk together the honey, soy sauce, minced garlic, rice vinegar, sesame oil, and red pepper flakes. Set aside.
- Heat a large skillet over medium-high heat and add the olive oil. Wait until the oil is shimmering but not smoking, about 2 minutes.
- Place the chicken thighs skin-side down in the skillet. Cook without moving them for 6-7 minutes, until the skin is deep golden brown and crispy.
- Flip the chicken thighs using tongs. Cook for another 4-5 minutes on the second side, until the chicken is golden and cooked through to 165°F internally. Transfer the chicken to a plate and tent loosely with foil.
- Reduce the heat to medium and add the butter to the pan. Once it melts, add the frozen corn. Cook for 3-4 minutes, stirring occasionally, until the corn is heated through and starting to get golden brown spots. Season with a pinch of salt and pepper.
- Pour the honey garlic sauce into the pan with the corn. Stir everything together and let it bubble for about 1 minute, until the sauce starts to thicken slightly.
- Return the chicken thighs to the pan, nestling them into the corn and sauce. Spoon some of the sauce over the tops of the chicken. Let everything cook together for 2-3 minutes, until the sauce is sticky and glossy and the chicken is heated through.
- Remove from heat and sprinkle with sliced green onions and sesame seeds. Let it rest for about 5 minutes before serving.
Notes
For extra crispy skin, don’t move the chicken for the first 6-7 minutes. Watch the heat when adding honey sauce to prevent burning. Double the sauce if you love extra for drizzling. Leftovers keep in the refrigerator for up to 4 days and freeze well for up to 3 months.
Nutrition
- Serving Size: 1 serving (1 chicken
- Calories: 500
- Sugar: 24
- Sodium: 700
- Fat: 24
- Saturated Fat: 6
- Carbohydrates: 40
- Fiber: 3.5
- Protein: 33
Keywords: honey garlic chicken, chicken thighs, corn, one-pan dinner, weeknight dinner, easy chicken recipe


