That first cold, sweet bite — the way the vanilla wafers have softened just enough to feel like cake, the silky pudding wrapping around every slice of banana — still takes me straight to my Aunt Carol’s kitchen in the middle of a sweltering July afternoon. She wasn’t one for fussy desserts. But put a pan of this banana pudding icebox cake in front of a crowd, and she’d just smile. She knew.
I remember standing next to her counter, watching her layer those wafers like she was building something important. “No oven needed,” she’d say, wiping her hands on her apron. “That’s the secret.” And honestly? She wasn’t wrong. This isn’t just a dessert; it’s a solution for every potluck, every family reunion, every time you need to feed twelve people without breaking a sweat.
This easy no-bake banana pudding icebox cake for a crowd is the kind of recipe that gets passed down because it works. It’s forgiving. It’s flexible. And it tastes like the best kind of nostalgia — the kind you can make in your own kitchen, no stress attached. I’ve made this for birthday parties, church suppers, and lazy Sunday afternoons, and it never fails to disappear.
So let me show you exactly how to build this beauty. I promise, once you taste that first forkful, you’ll understand why this is the dessert that keeps showing up.
Why You’ll Love This Recipe
I’ve tested this recipe more times than I can count — tweaking the pudding consistency, experimenting with different wafer brands, and even sneaking in a few wild variations. And after all that trial and error, I can tell you with complete confidence: this version is the one.
- No oven required. Seriously. The hardest part is waiting for it to chill. That makes it perfect for hot summer days or when your oven is already full of other dishes.
- Simple ingredients. You probably have most of these in your kitchen right now. Bananas, vanilla wafers, pudding mix, milk, and whipped topping. That’s it.
- Perfect for a crowd. This recipe makes a generous 9×13 pan that easily serves 12-15 people. It’s my go-to for potlucks, holiday gatherings, and game day spreads — especially when paired with something savory like our best buffalo chicken football dip ring for a sweet and salty combo.
- Make-ahead magic. You can assemble this the night before and just pull it out when you’re ready. The flavors actually get better as they meld together in the fridge.
- Crowd-pleaser. Kids love it. Adults love it. Even the picky eaters at my family reunions go back for seconds.
What makes this different from other banana pudding recipes? It’s the layering technique. I don’t just dump everything in a bowl. I take the time to build distinct layers so every bite has the perfect ratio of creamy pudding, soft banana, and slightly softened wafer. It’s a small detail that makes a huge difference.
This isn’t just another dessert recipe. It’s the one that makes people close their eyes after the first bite. It’s comfort food at its finest — easy, nostalgic, and absolutely delicious.
What Ingredients You Will Need
This recipe uses simple, wholesome ingredients to deliver that classic banana pudding flavor without any fuss. Most of these are pantry staples, which is exactly what you want when you’re feeding a crowd.
- 2 boxes (3.4 oz each) instant vanilla pudding mix — I prefer Jell-O brand for consistent results. Don’t use cook-and-serve; instant is key for the right texture.
- 4 cups cold whole milk — Whole milk gives the richest, creamiest pudding. You can use 2% in a pinch, but avoid skim milk — it won’t set up as nicely.
- 1 (14 oz) can sweetened condensed milk — This is my secret ingredient. It adds sweetness and a silky texture that takes the pudding over the top.
- 1 teaspoon vanilla extract — Pure vanilla extract makes a difference. Skip the imitation stuff if you can.
- 1 (8 oz) container frozen whipped topping, thawed — Cool Whip works great here. You can also use homemade whipped cream, but Cool Whip holds up better for make-ahead desserts.
- 1 (12 oz) box vanilla wafers — Nilla Wafers are my go-to. They soften perfectly without turning into complete mush.
- 6-7 ripe but firm bananas — You want bananas that are yellow with a few brown spots. Too green and they won’t be sweet enough; too ripe and they’ll turn mushy in the layers.
For the optional garnish:
- Additional vanilla wafers — for crushing on top or decorating the edges.
- 1-2 bananas, sliced — for topping right before serving (to prevent browning).
- Caramel sauce or chocolate shavings — if you want to get fancy.
One thing I’ve learned from making this recipe dozens of times: the quality of your bananas matters. Look for ones that are fragrant and slightly soft to the touch but still hold their shape when sliced. If you can only find green bananas, let them sit on the counter for a day or two before using them.
Equipment Needed
You don’t need any fancy equipment for this recipe. That’s part of the beauty.
- 9×13-inch baking dish — Glass or ceramic works best. I use a Pyrex dish and it’s perfect for seeing the layers.
- Large mixing bowl — For whisking the pudding.
- Whisk or electric mixer — A whisk works fine, but an electric mixer makes the pudding come together faster and smoother.
- Sharp knife and cutting board — For slicing bananas evenly.
- Rubber spatula — For spreading layers and scraping every last bit of pudding.
- Plastic wrap or aluminum foil — For covering the dish while it chills.
If you don’t have a 9×13 dish, you can use a large trifle bowl or even two 8×8 square pans. Just adjust the layering accordingly. I’ve also made this in disposable aluminum pans for picnics — works like a charm and saves on cleanup.
Preparation Method
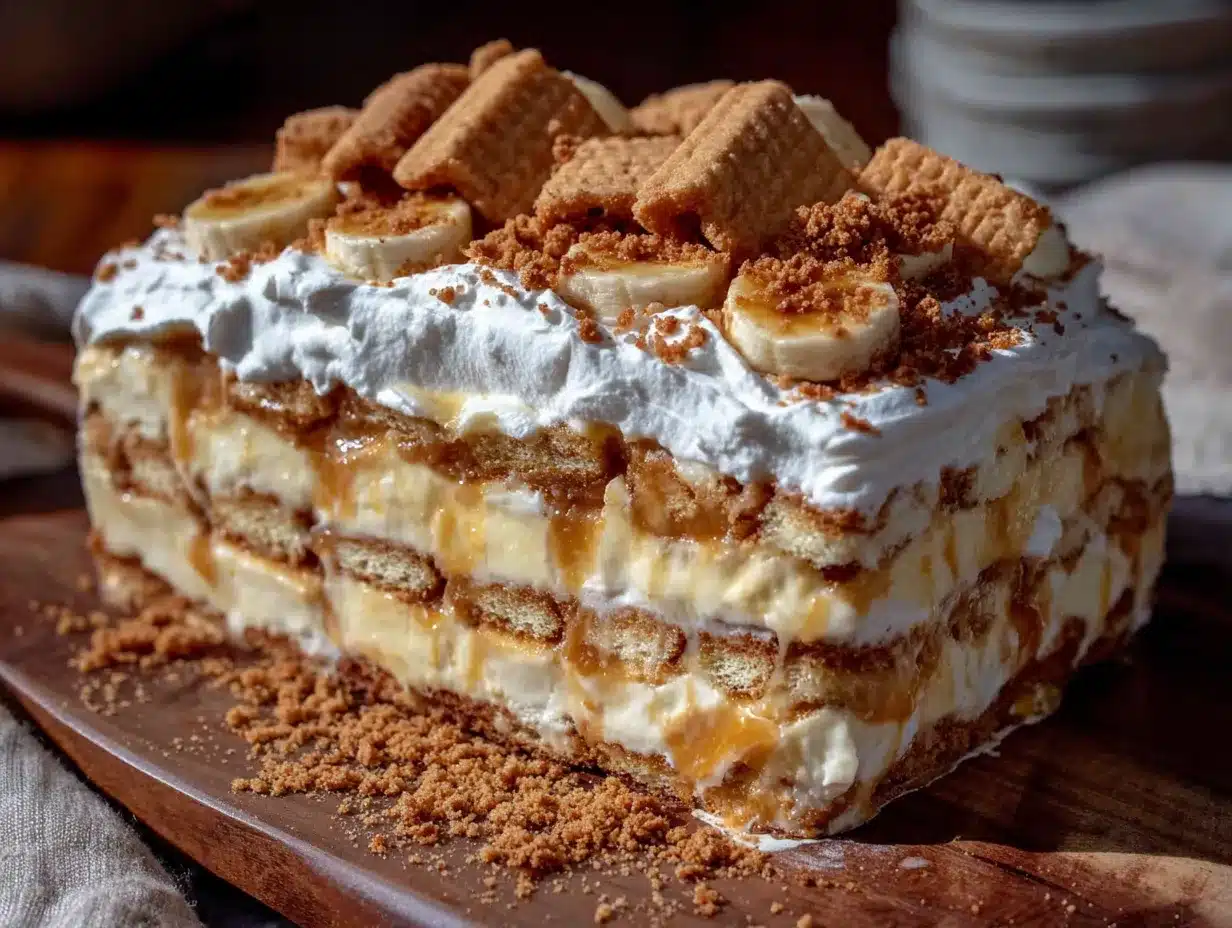
Let’s build this beautiful dessert. Take your time with the layers — it makes all the difference.
- Make the pudding base. In a large mixing bowl, whisk together the instant vanilla pudding mix and 4 cups cold milk. Whisk vigorously for about 2 minutes until the pudding starts to thicken. It will be loose at first, then suddenly get creamy. Let it sit for 5 minutes to fully set.
- Add the sweetened condensed milk and vanilla. Pour in the can of sweetened condensed milk and the teaspoon of vanilla extract. Whisk until completely smooth and combined. This step adds that extra richness that makes this dessert unforgettable.
- Fold in the whipped topping. Gently fold the thawed whipped topping into the pudding mixture using a rubber spatula. Don’t stir too aggressively — you want to keep the mixture light and airy. Fold until you don’t see any white streaks remaining.
- Layer the wafers. Spread a thin layer of the pudding mixture (about 1 cup) on the bottom of your 9×13 dish. This helps the wafers stick. Then arrange a single layer of vanilla wafers on top, covering the bottom completely. Don’t overlap them too much — just a nice, even layer.
- Add the bananas. Slice 3 bananas into ¼-inch rounds. Arrange the banana slices evenly over the wafer layer. Try to cover the wafers as much as possible so every bite gets banana.
- Spread half the pudding mixture. Gently spread half of the remaining pudding mixture over the bananas. Use the spatula to spread it evenly, being careful not to disturb the banana layer underneath.
- Repeat the layers. Add another layer of vanilla wafers on top of the pudding, followed by the remaining sliced bananas. Then spread the rest of the pudding mixture over the top, using the spatula to smooth it out evenly.
- Top with remaining whipped topping (optional). If you reserved some whipped topping for garnish, spread it over the final pudding layer. You can also leave it plain — either way works beautifully.
- Crush some wafers for garnish. Take a handful of extra vanilla wafers and crush them by hand or in a zip-top bag. Sprinkle the crumbs over the top for a beautiful finish.
- Chill, chill, chill. Cover the dish tightly with plastic wrap and refrigerate for at least 6 hours, but overnight is best. The wafers need time to soften into cake-like layers. Trust me on this — don’t rush the chilling time.
Pro tip: If you’re short on time, you can speed things up by chilling the assembled dessert for 4 hours, but the texture won’t be quite as perfect. Overnight is where the magic happens.
Cooking Tips & Techniques
After making this recipe more times than I can count, here are the things I wish someone had told me from the start.
Don’t overmix the pudding. I learned this the hard way. Whisk the instant pudding just until it thickens. Overmixing can make it grainy. Let it rest for those 5 minutes — that’s where the magic happens.
Slice bananas right before layering. Bananas brown quickly once cut. Slice them as you go, and don’t slice all of them at once. I usually slice enough for one layer, arrange them, then slice the next batch. It keeps everything looking fresh and pretty.
Use a sharp knife for clean banana slices. A dull knife will squish the bananas. A sharp chef’s knife gives you clean, even rounds that look professional.
Let the wafers do their thing. I know it’s tempting to dig in after a few hours, but the wafers really need that overnight rest. They should be soft but still have a tiny bit of texture — like a perfect slice of cake. If you cut into it too soon, you’ll get crunchy wafers and separate layers.
Keep the dish level. When you’re spreading the pudding, make sure your dish is on a flat surface. An uneven surface will cause the layers to slide around. I learned this when I made it on a slightly tilted counter — what a mess!
Plan your timing. This dessert needs to chill for at least 6 hours, so plan accordingly. I usually make it the night before a gathering and just pull it out 15 minutes before serving. It’s the ultimate make-ahead dessert.
Variations & Adaptations
This recipe is incredibly forgiving. Here are some variations I’ve tried and loved.
Chocolate banana version. Swap one box of vanilla pudding for instant chocolate pudding mix. The chocolate and banana combo is absolutely divine. I made this for a birthday party and it was gone in 20 minutes.
Peanut butter twist. Add ½ cup creamy peanut butter to the pudding mixture when you add the sweetened condensed milk. Whisk until smooth. The peanut butter adds a rich, nutty flavor that pairs perfectly with bananas. This version reminds me of a banana split — so good!
Gluten-free adaptation. Use gluten-free vanilla wafers (Kinnikinnick makes a great option) and make sure your pudding mix is certified gluten-free. Everything else in the recipe is naturally gluten-free, so this swap is easy.
Lighter version. Use sugar-free pudding mix, skim milk, and light whipped topping. You can also reduce the sweetened condensed milk by half. It won’t be quite as rich, but it’s still delicious and cuts the calories significantly.
Berry banana version. Layer fresh strawberries or raspberries along with the bananas. The tartness of the berries balances the sweetness beautifully. I tried this last summer and it’s become a seasonal favorite.
Individual servings. Instead of a 9×13 dish, layer everything in small mason jars or dessert cups. These are perfect for picnics, parties, or just portion control. Plus, they look adorable on a dessert table.
Serving & Storage Suggestions
This dessert is best served cold, straight from the fridge. Let it sit at room temperature for about 10-15 minutes before serving — it takes the chill off and makes the flavors more pronounced.
Presentation tips: Garnish the top with fresh banana slices (dip them in lemon juice first to prevent browning), extra crushed wafers, and a drizzle of caramel sauce if you’re feeling fancy. A sprinkle of cinnamon adds a warm note that complements the vanilla.
What to serve with it: This dessert is rich enough to stand alone, but a dollop of fresh whipped cream or a scoop of vanilla ice cream takes it over the top. For a complete spread, serve it alongside something savory like our fresh cowboy caviar with smoky grilled corn for a perfect sweet-savory balance.
Storage: Cover the dish tightly with plastic wrap or transfer leftovers to an airtight container. It will keep in the refrigerator for up to 3 days. After that, the bananas start to break down and the texture gets a bit mushy. Honestly, I’ve never had leftovers last longer than 2 days — it disappears too fast!
Can you freeze it? Technically yes, but I don’t recommend it. Freezing changes the texture of the pudding and the bananas. If you absolutely must freeze it, do so before adding the banana layers. Thaw in the refrigerator overnight, then add fresh bananas before serving.
Flavor development: The flavors actually improve after 24 hours in the fridge. The vanilla and banana meld together beautifully, and the wafers reach that perfect cake-like texture. Day-old banana pudding icebox cake is honestly better than fresh.
Nutritional Information & Benefits
Let’s be real — this is a treat, not a health food. But here’s what you’re working with per serving (based on 15 servings):
- Calories: Approximately 380-420 per serving
- Fat: 14g
- Carbohydrates: 58g
- Protein: 6g
- Sugar: 38g
- Fiber: 2g
Health highlights: Bananas are a great source of potassium, vitamin B6, and fiber. They also provide natural energy, which is why this dessert is perfect for active kids (and adults!). The milk adds calcium and protein, and the eggs in the pudding mix contribute a small amount of protein too.
Dietary considerations: This recipe contains dairy and gluten (from the wafers). It can be made gluten-free with the right substitutions. It’s not suitable for vegans as written, but you can use plant-based milk, dairy-free pudding mix, and coconut whipped cream for a vegan version.
My personal take: I believe in balance. This dessert is about joy, celebration, and connection. One serving won’t derail your healthy eating goals — it’s about savoring the moment. I pair it with lighter meals during the day and enjoy every single bite without guilt.
Conclusion
This easy no-bake banana pudding icebox cake for a crowd is more than just a recipe — it’s a solution. It’s the dessert you turn to when you need something impressive without the stress. It’s the dish that brings people together, that sparks memories of summer barbecues and family reunions.
I love this recipe because it’s forgiving. You can swap ingredients, adjust the layers, and it still turns out amazing. It’s the kind of dessert that makes you look like a rockstar in the kitchen with minimal effort. And honestly? That’s my favorite kind of recipe.
Now I want to hear from you. Have you tried making this banana pudding icebox cake? What variations did you use? Drop a comment below and let me know how it turned out. And if you loved it, share this recipe with a friend who needs a crowd-pleasing dessert in their life. Happy no-baking, friends!
Frequently Asked Questions
Can I use homemade pudding instead of instant?
You can, but it changes the texture. Instant pudding is designed to set up firmly without cooking, which is perfect for this no-bake cake. Homemade pudding tends to be thinner and may not hold the layers as well. If you want to try it, cook the pudding until very thick and let it cool completely before assembling.
How do I keep the bananas from turning brown?
The pudding mixture actually helps prevent browning by coating the banana slices. For extra protection, you can brush the banana slices with a little lemon juice or pineapple juice before layering. Just don’t use too much — you don’t want the fruit flavor to overpower the dessert.
Can I make this dessert dairy-free?
Absolutely! Use unsweetened almond milk or oat milk for the pudding, dairy-free whipped topping (like CocoWhip), and check that your vanilla wafers are dairy-free. Some brands contain milk, so read the labels carefully. The texture will be slightly different but still delicious.
How far in advance can I make this?
You can assemble this dessert up to 24 hours before serving. In fact, it’s better the next day! Any longer than that and the bananas start to break down. If you need to make it further ahead, prepare the pudding mixture and store it separately, then assemble with fresh bananas the day before your event.
Can I use a different type of cookie?
Of course! Shortbread cookies, graham crackers, or even ladyfingers work well. Each gives a different texture and flavor. Shortbread makes it richer, graham crackers add a honey note, and ladyfingers make it lighter. I’ve even used chocolate wafer cookies for a chocolate-banana version that’s absolutely divine.
Pin This Recipe!
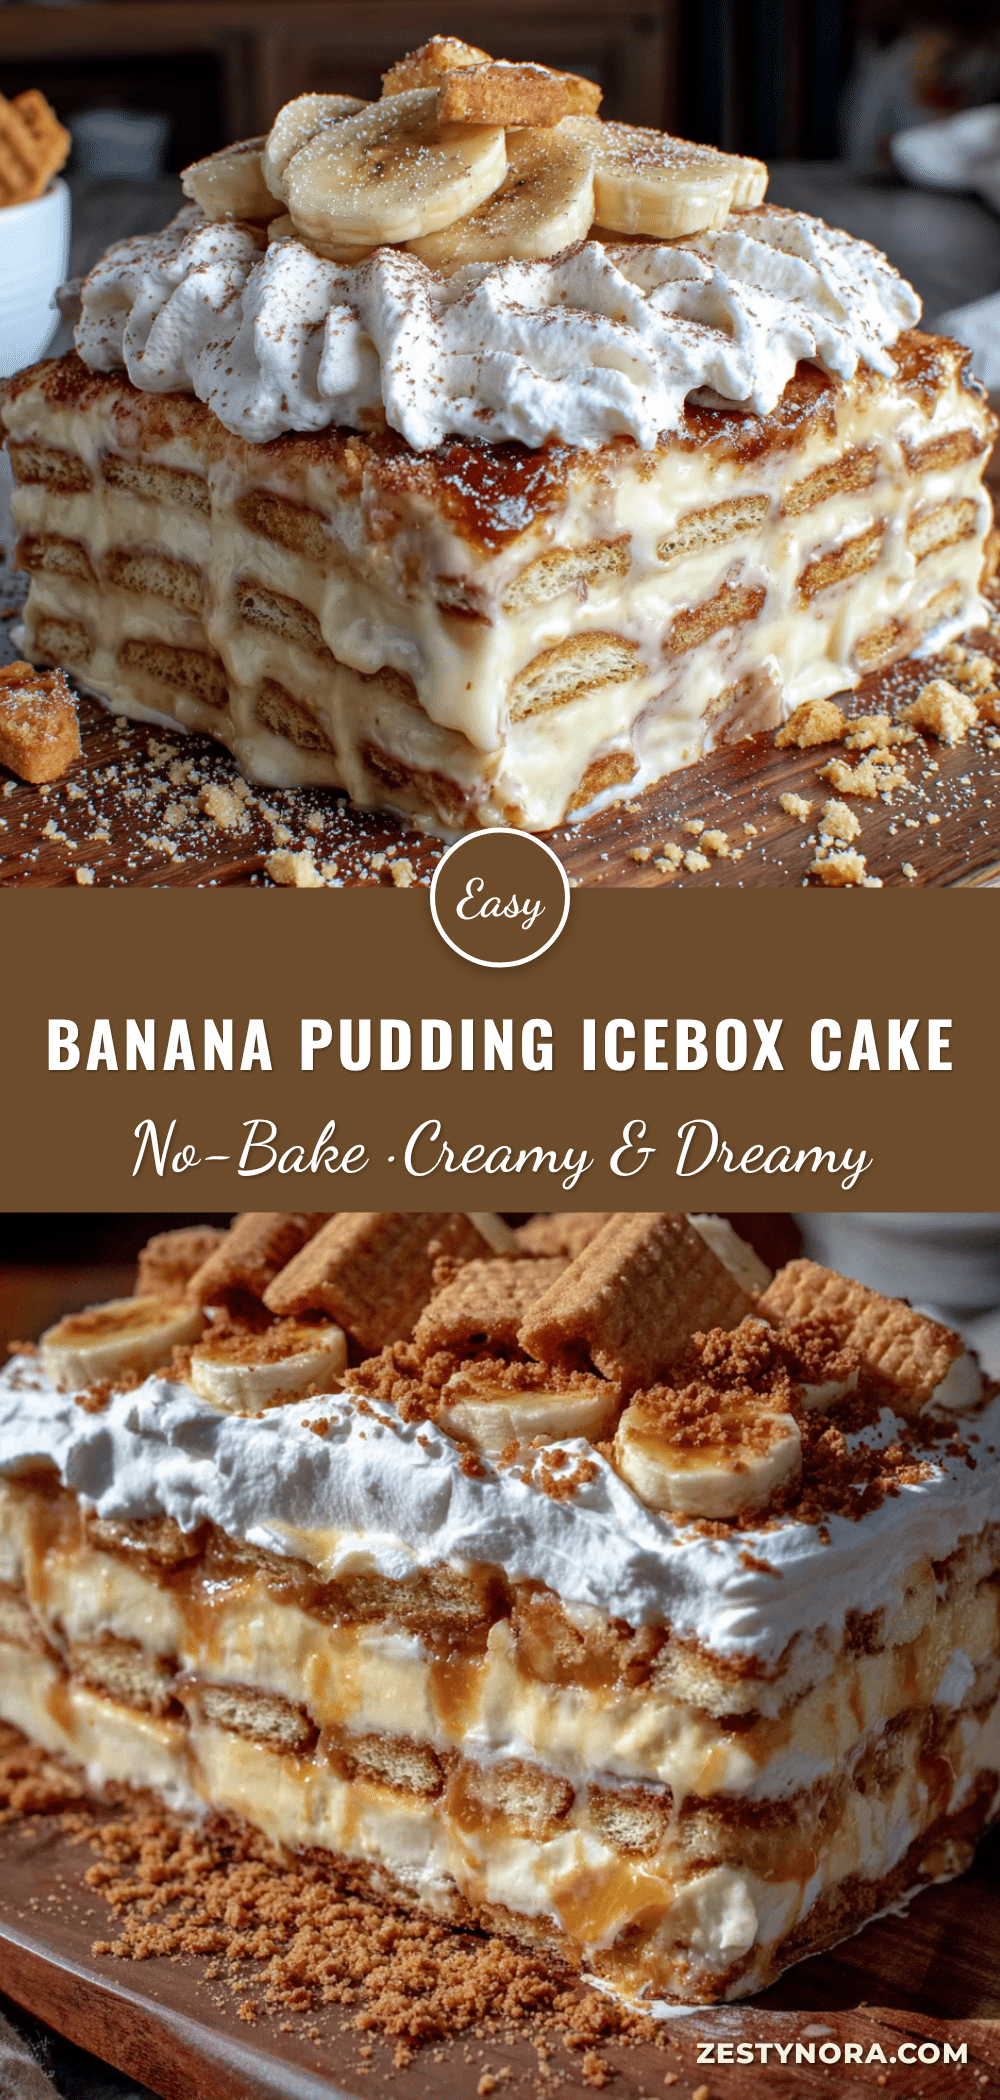
Easy No-Bake Banana Pudding Icebox Cake for a Crowd
This easy no-bake banana pudding icebox cake for a crowd is the perfect make-ahead dessert for potlucks, family reunions, and any gathering. Layers of creamy vanilla pudding, ripe bananas, and softened vanilla wafers create a nostalgic, crowd-pleasing treat that requires no oven.
- Prep Time: 20 minutes
- Cook Time: 0 minutes
- Total Time: 6 hours 20 minutes (includes chilling)
- Yield: 12-15 servings 1x
- Category: Dessert
- Cuisine: American
Ingredients
- 2 boxes (3.4 oz each) instant vanilla pudding mix
- 4 cups cold whole milk
- 1 (14 oz) can sweetened condensed milk
- 1 teaspoon vanilla extract
- 1 (8 oz) container frozen whipped topping, thawed
- 1 (12 oz) box vanilla wafers
- 6–7 ripe but firm bananas
- Additional vanilla wafers for garnish (optional)
- 1–2 bananas, sliced for topping (optional)
- Caramel sauce or chocolate shavings (optional)
Instructions
- Make the pudding base: In a large mixing bowl, whisk together the instant vanilla pudding mix and 4 cups cold milk. Whisk vigorously for about 2 minutes until the pudding starts to thicken. Let it sit for 5 minutes to fully set.
- Add the sweetened condensed milk and vanilla: Pour in the can of sweetened condensed milk and the teaspoon of vanilla extract. Whisk until completely smooth and combined.
- Fold in the whipped topping: Gently fold the thawed whipped topping into the pudding mixture using a rubber spatula until no white streaks remain.
- Layer the wafers: Spread a thin layer of the pudding mixture (about 1 cup) on the bottom of a 9×13-inch dish. Arrange a single layer of vanilla wafers on top, covering the bottom completely.
- Add the bananas: Slice 3 bananas into ¼-inch rounds. Arrange the banana slices evenly over the wafer layer.
- Spread half the pudding mixture: Gently spread half of the remaining pudding mixture over the bananas.
- Repeat the layers: Add another layer of vanilla wafers, followed by the remaining sliced bananas. Spread the rest of the pudding mixture over the top.
- Top with remaining whipped topping (optional): If you reserved some whipped topping for garnish, spread it over the final pudding layer.
- Crush some wafers for garnish: Take a handful of extra vanilla wafers and crush them. Sprinkle the crumbs over the top.
- Chill: Cover the dish tightly with plastic wrap and refrigerate for at least 6 hours, but overnight is best.
Notes
For best results, chill overnight to allow wafers to soften into cake-like layers. Slice bananas right before layering to prevent browning. Use ripe but firm bananas for best texture.
Nutrition
- Serving Size: 1 serving (based on
- Calories: 400
- Sugar: 38
- Sodium: 320
- Fat: 14
- Saturated Fat: 8
- Carbohydrates: 58
- Fiber: 2
- Protein: 6
Keywords: no-bake dessert, banana pudding, icebox cake, crowd dessert, potluck dessert, easy dessert, make-ahead dessert


