I ruined peppermint bark cookie cups three times before I understood the problem. The first batch came out of the pan in pieces—the cookie crumbled like dry sand. The second batch looked beautiful until I bit into one and got a mouthful of bitter, burned chocolate. The third batch? Those actually tasted good, but they stuck to the mini muffin tin so badly I had to soak the whole thing overnight and start over. I almost gave up on the whole idea. But here’s the thing—I couldn’t stop thinking about the concept. A crunchy chocolate cookie cup filled with creamy peppermint bark? That sounded like the kind of holiday treat worth fighting for. And honestly, I knew there had to be a way to make it work without spending hours chilling dough or fighting with stuck pans.
So I went back to basics. I stripped down what I knew about cookie chemistry and started testing. The no-chill dough was non-negotiable for me—I wanted these to be the kind of recipe you could whip up on a Tuesday night when the holiday baking urge hit unexpectedly. And I wanted them to taste like Christmas in a single bite, with that perfect snap of peppermint and the rich creaminess of white chocolate on top of a dark chocolate cookie base. After four more rounds of testing (and one memorable batch where I forgot the butter entirely), I finally cracked it. These Easy Peppermint Bark Cookie Cups are the result of all that trial and error, and they’re exactly what I hoped for—simple to make, impossible to mess up, and absolutely delicious. Trust me on this one.
Why You’ll Love This Recipe
These cookie cups are the kind of recipe that makes you look like a holiday baking hero without any of the stress. Let me tell you why they work so well.
- No-Chill Dough : You read that right. No waiting around for the dough to firm up in the fridge. Mix, press, and bake. That’s it. This is the kind of recipe that respects your time.
- Simple Ingredients : Butter, sugar, cocoa powder, flour, eggs—all pantry staples. You probably have everything you need right now, except maybe the candy canes and white chocolate chips.
- Perfect for Holiday Parties : These little cups are bite-sized, beautiful, and easy to grab. Set them out on a platter and watch them disappear. They’re also great for cookie exchanges or gift boxes.
- Crowd-Pleaser : Kids love the crunch of the peppermint, adults appreciate the rich chocolate base, and everyone goes back for seconds. I’ve yet to meet someone who doesn’t like these.
- Unbelievably Delicious : The combination of dark chocolate cookie, creamy white chocolate filling, and crunchy peppermint candy is pure magic. Each bite has a different texture and flavor that comes together perfectly.
What makes these different from every other holiday cookie recipe out there? It’s the technique. Instead of making separate bark and cookies, I combined them into one seamless treat. The cookie cup acts as the vessel for the bark filling, so you get both in every single bite. No more choosing between a chocolate cookie and a piece of peppermint bark—you get both at once. And because the dough doesn’t need to chill, you can go from craving to cookie in under 30 minutes. That’s the kind of efficiency that saves holiday baking sanity.
These cookie cups are the kind of treat that makes you close your eyes after the first bite. It’s comfort food reimagined for the holidays—faster, easier, but with the same soul-soothing satisfaction. Perfect for impressing guests without stress, or turning a simple Tuesday night into something memorable.
What Ingredients You Will Need
This recipe uses simple, wholesome ingredients to deliver big flavor without any fuss. Here’s what you’ll need to gather before you start.
For the Cookie Cups
- 1/2 cup unsalted butter, softened (I use Kerrygold for the richest flavor)
- 1/2 cup granulated sugar
- 1/4 cup packed light brown sugar
- 1 large egg, room temperature
- 1 teaspoon vanilla extract
- 1 cup all-purpose flour
- 1/3 cup unsweetened cocoa powder (I prefer Dutch-process for deeper color)
- 1/2 teaspoon baking soda
- 1/4 teaspoon salt
For the Peppermint Bark Topping

- 1 cup white chocolate chips (use a good brand like Ghirardelli for smooth melting)
- 1/2 teaspoon peppermint extract (not mint—peppermint has that distinct holiday flavor)
- 1/3 cup crushed candy canes or peppermint candies (about 4-5 large candy canes)
- Optional: 1 tablespoon coconut oil (helps the white chocolate melt smoothly)
Ingredient Selection Tips: For the best texture, use room temperature butter and egg. Cold ingredients won’t cream together properly, and your cookie cups might turn out dense instead of tender. If you only have salted butter, reduce the added salt to 1/8 teaspoon. For the cocoa powder, Dutch-process gives a darker, more intense chocolate flavor, but regular unsweetened cocoa works fine too. Just know the color will be lighter.
Substitution Guidance: Need a dairy-free option? Use plant-based butter and dairy-free white chocolate chips. For a gluten-free version, swap the all-purpose flour with a 1:1 gluten-free baking flour blend. The texture will be slightly different, but still delicious. If you don’t have candy canes, you can use any hard peppermint candy—just crush them in a sealed bag with a rolling pin. And if white chocolate isn’t your thing, dark or milk chocolate chips work beautifully in the filling too.
Equipment Needed
You don’t need a fancy kitchen to make these cookie cups. Here’s what you’ll actually use.
- Mini muffin tin : This is non-negotiable. A standard 24-cup mini muffin tin works perfectly. If you only have a 12-cup tin, just bake in batches.
- Electric mixer : Hand mixer or stand mixer—either works. You could mix by hand with a wooden spoon, but it takes some elbow grease to get the dough smooth.
- Small cookie scoop or teaspoon : For portioning the dough evenly into the muffin cups. A 1-tablespoon scoop is ideal.
- Shot glass or small measuring spoon : This is my secret tool for pressing the dough into the muffin cups to create the cup shape. A 1/2 tablespoon measuring spoon works perfectly too.
- Rolling pin or food processor : For crushing the candy canes. I prefer the sealed bag and rolling pin method—less cleanup.
- Small microwave-safe bowl : For melting the white chocolate chips. You can also use a double boiler if you’re fancy, but the microwave is faster.
- Cooling rack : Essential for letting the cookie cups cool completely before adding the filling.
I’ve made these with both a non-stick and a regular mini muffin tin. The non-stick version definitely makes removal easier, but a regular tin works fine if you grease it well. Speaking of which—don’t skip greasing the tin, even if it’s non-stick. Trust me on this one. I learned the hard way.
Preparation Method
Let me walk you through this step by step. I promise it’s easier than it sounds.
- Preheat your oven to 350°F (175°C). Grease a 24-cup mini muffin tin generously with butter or non-stick spray. I use a pastry brush to make sure every nook and cranny is covered.
- Cream the butter and sugars. In a large mixing bowl, beat the softened butter, granulated sugar, and brown sugar together on medium speed until light and fluffy. This takes about 2-3 minutes. You’ll know it’s ready when the mixture looks pale and slightly increased in volume. Don’t rush this step—proper creaming is what gives the cookies their tender texture.
- Add the egg and vanilla. Crack in the room temperature egg and add the vanilla extract. Beat on low speed until just combined. Scrape down the sides of the bowl with a spatula to make sure everything is evenly mixed.
- Mix the dry ingredients. In a separate bowl, whisk together the flour, cocoa powder, baking soda, and salt. This ensures the baking soda is evenly distributed so your cookies rise uniformly.
- Combine wet and dry. Gradually add the dry ingredients to the wet mixture, mixing on low speed until just combined. The dough will be soft and slightly sticky—that’s exactly what you want. Don’t overmix, or the cookies will be tough.
- Portion the dough. Using a small cookie scoop or teaspoon, drop about 1 tablespoon of dough into each greased mini muffin cup. You should have enough for exactly 24 cups.
- Press the dough into cups. Here’s the trick: Use a shot glass or the back of a 1/2 tablespoon measuring spoon to press the dough firmly into the bottom and up the sides of each muffin cup. You want to create a well in the center—like a tiny cookie bowl. Make sure the dough is even thickness all around, about 1/4 inch thick. If the dough sticks to your pressing tool, lightly grease it with butter or spray.
- Bake for 8-10 minutes. The edges should look set and the centers will still look slightly soft. Don’t overbake! They’ll continue cooking in the hot pan. The cookies will puff up slightly during baking, which is why pressing them down before baking is so important.
- Reshape the cups immediately. As soon as the pan comes out of the oven, use your shot glass or measuring spoon to press down the centers again. This reinforces the cup shape while the cookies are still warm and pliable. Let them cool in the pan for 5 minutes, then carefully transfer to a cooling rack to cool completely.
- Melt the white chocolate. Place the white chocolate chips in a small microwave-safe bowl. Microwave in 30-second intervals, stirring after each, until smooth and fully melted. If the chocolate seems too thick, stir in 1 tablespoon of coconut oil to thin it out. Add the peppermint extract and stir until combined.
- Fill the cookie cups. Once the cookie cups are completely cool, spoon about 1 teaspoon of melted white chocolate into each cup. You want the filling to come just to the top of the cookie edge—not overflow.
- Add the peppermint crunch. While the white chocolate is still wet, sprinkle crushed candy canes generously over the top. Press them in gently so they stick. Let the cups sit at room temperature until the white chocolate sets, about 30 minutes. If you’re in a hurry, pop them in the fridge for 10 minutes.
Sensory Cues: At step 2, the butter-sugar mixture should look like wet sand that holds its shape when pressed. At step 8, the cookie cups should smell intensely chocolatey and the edges should look slightly cracked. The white chocolate at step 10 should be thick but pourable—if it’s too thick to stir, add a little more coconut oil.
Cooking Tips & Techniques
I’ve made these cookie cups more times than I care to count, and I’ve learned a few things along the way. Here are my best tips for perfect results every time.
Don’t skip the reshaping step. This is probably the most important tip I can give you. The cookie cups will puff up during baking, and if you don’t press them down again right out of the oven, you’ll end up with flat cookies instead of cups. I use the same shot glass I used before baking—it’s the perfect size. Work quickly while the cookies are still hot, because they firm up fast.
Watch your baking time carefully. These cookies go from perfectly baked to overdone in about 60 seconds. You want them to look set around the edges but still soft in the center. They’ll continue cooking from the residual heat of the pan after you take them out. If you overbake them, the cookie cups will be hard and crumbly instead of tender and chewy.
Crush the candy canes finely but not to powder. You want small pieces that still have some crunch—about the size of coarse sand. If you crush them too fine, they’ll dissolve into the white chocolate and you’ll lose that satisfying crunch. I put the candy canes in a sealed ziplock bag and gently tap them with a rolling pin. A few big pieces are fine—they add nice texture.
Let the cookie cups cool completely before adding the filling. I know it’s tempting to rush this step, but warm cookies will melt the white chocolate into a puddle. You want the filling to sit on top of the cookie, not soak into it. Give them at least 20 minutes on a cooling rack before you start filling.
Use good quality white chocolate. Cheap white chocolate chips often contain stabilizers that prevent them from melting smoothly. I’ve had the best results with Ghirardelli or Guittard brands. If your white chocolate seizes up (turns grainy and clumpy), it’s usually because it got too hot or a drop of water got into the bowl. Start over with fresh chips and melt them more gently next time.
Make a test batch first. If you’re new to making cookie cups, I recommend baking just 4-6 cups as a test run. This way you can check the timing and texture before committing to the full batch. I learned this after ruining an entire 24-cup batch with overbaked cookies. Live and learn, right?
Variations & Adaptations
One of the best things about this recipe is how easy it is to adapt. Here are some of my favorite variations.
Dark Chocolate Peppermint Cups: For an even richer flavor, swap the white chocolate filling for dark chocolate chips (60-70% cocoa). The bitterness of the dark chocolate pairs beautifully with the sweet peppermint crunch. This version is also less sweet overall, which some people prefer.
Gluten-Free Version: Use a 1:1 gluten-free baking flour blend in place of the all-purpose flour. I’ve tested this with Bob’s Red Mill 1:1 Baking Flour and the results were excellent. The texture is slightly more delicate, so be extra gentle when removing the cups from the pan.
Vegan Option: Replace the butter with plant-based butter (I like Miyoko’s), use a flax egg (1 tablespoon ground flaxseed mixed with 3 tablespoons water), and choose dairy-free white chocolate chips. The dough will be a bit softer, so you might need to chill it for 15 minutes before pressing into the pan.
Chocolate Mint Version: Use mint extract instead of peppermint extract for a different flavor profile. Mint is slightly sweeter and less sharp than peppermint. You can also add a few drops of green food coloring to the white chocolate for a festive look.
Holiday Sprinkle Variation: Instead of crushed candy canes, top the white chocolate with red and green holiday sprinkles. This is perfect if you don’t have candy canes on hand or if you want a less minty version. Kids especially love the colorful sprinkles.
My Personal Favorite: I once made a batch with half white chocolate and half dark chocolate swirled together in the filling. I melted both separately, then spooned a little of each into the cups and swirled them with a toothpick. The result was gorgeous and tasted incredible. It’s a bit more work, but worth it for special occasions.
Serving & Storage Suggestions
These cookie cups are best served at room temperature, which lets the white chocolate filling stay creamy and the cookie base stay tender. If you’ve stored them in the fridge, let them sit out for about 15 minutes before serving. The texture really suffers when they’re cold—the cookie gets hard and the chocolate loses its creaminess.
Presentation Ideas: Arrange the cookie cups on a festive platter or in a holiday-themed tin. For an extra touch, dust them with a tiny bit of powdered sugar just before serving. They look beautiful on a cookie tray alongside other holiday treats like my Cozy Apple Cider Donut Loaf Cake or Perfect Mini Caramel Apple Tartlets. The combination of flavors makes for an incredible holiday dessert spread.
Complementary Beverages: These cookie cups pair perfectly with a hot cup of coffee, a mug of hot chocolate, or a glass of cold milk. For an adult twist, serve them alongside peppermint hot cocoa or a creamy eggnog. The minty flavor of the cookies complements the richness of the drinks beautifully.
Storage Instructions: Store the cookie cups in an airtight container at room temperature for up to 5 days. If you need to stack them, place a sheet of parchment paper between layers to prevent the white chocolate from sticking. Do not refrigerate them unless absolutely necessary—the fridge dries out the cookies and makes the white chocolate crack.
Freezer Instructions: You can freeze the unfilled cookie cups for up to 3 months. Bake and cool them completely, then place them in a single layer on a baking sheet and freeze until solid. Transfer to a freezer-safe bag or container. When you’re ready to serve, thaw them at room temperature, then fill with white chocolate and crushed candy canes. Do not freeze the filled cups—the white chocolate will separate and become grainy when thawed.
Flavor Development: These cookie cups actually taste better the next day. The flavors meld together overnight, and the cookie softens slightly, becoming more tender. If you can resist eating them all right away, make them a day ahead for the best flavor.
Nutritional Information & Benefits
Let’s be real—these are a treat, not a health food. But here’s what you should know about what’s in each cookie cup.
Estimated Nutritional Values (per cookie cup):
| Nutrient | Amount |
|---|---|
| Calories | 145 |
| Total Fat | 8g |
| Saturated Fat | 5g |
| Cholesterol | 25mg |
| Sodium | 85mg |
| Total Carbohydrates | 18g |
| Dietary Fiber | 1g |
| Sugars | 13g |
| Protein | 2g |
Health Benefits of Key Ingredients: Cocoa powder is rich in antioxidants called flavonoids, which can help reduce inflammation and improve heart health. Peppermint has been shown to aid digestion and can help soothe an upset stomach. While these cookie cups aren’t exactly a health food, they do contain ingredients that offer some nutritional value beyond just empty calories.
Dietary Considerations: This recipe contains dairy (butter, white chocolate), eggs, and gluten (flour). For those with allergies, see the variations section for dairy-free, egg-free, and gluten-free options. The recipe is naturally nut-free, making it safe for school bake sales or parties where nut allergies are a concern.
Potential Allergens: Dairy, eggs, wheat/gluten. The white chocolate may contain soy lecithin, so check the label if you have soy sensitivities.
My Personal Take: I believe in balance. These cookie cups are a special treat for the holiday season, not an everyday snack. Enjoy them mindfully, savor each bite, and don’t stress about the numbers. Life is too short to skip dessert, especially when it tastes this good.
Conclusion
These Easy Peppermint Bark Cookie Cups are everything I wanted them to be—simple to make, beautiful to look at, and absolutely delicious to eat. The no-chill dough means you can make them on a whim, and the cookie cup format means every single bite has that perfect combination of chocolate cookie and creamy peppermint bark. It’s the kind of recipe that makes you look like you spent hours in the kitchen when really, you were done in under 30 minutes.
I love how customizable these are. You can swap the white chocolate for dark, use different toppings, or even make them vegan or gluten-free. The basic technique is so forgiving that you can really make this recipe your own. That’s what cooking is all about, isn’t it? Taking a good recipe and making it yours.
I’d love to hear how these turn out for you. Did you try a fun variation? Did your family gobble them up as fast as mine did? Drop a comment below and let me know. And if you’re looking for more holiday baking inspiration, don’t miss my Brown Butter Salted Caramel Apple Blondies or Cozy Pumpkin Cream Cheese Swirl Muffins. Happy baking, friends—and remember, the best cookies are the ones made with love (and a little bit of peppermint crunch).
Frequently Asked Questions
Can I use a regular muffin tin instead of a mini muffin tin?
You can, but the baking time will change significantly. For a regular muffin tin, use about 3 tablespoons of dough per cup and bake for 12-15 minutes. The cups will be much larger, so you’ll need to adjust the filling amount too. I prefer the mini version because they’re perfectly bite-sized for parties and cookie trays.
Why did my cookie cups stick to the pan?
This usually happens for one of three reasons: you didn’t grease the pan well enough, you let the cookies cool completely in the pan, or the pan isn’t non-stick. Make sure to grease every cup thoroughly, even if your pan says non-stick. And remove the cookies from the pan after 5 minutes of cooling—they’ll stick if left too long.
Can I make the dough ahead of time?
Yes! You can make the dough up to 2 days ahead and store it in the refrigerator. Let it sit at room temperature for about 15 minutes before pressing it into the muffin tin—cold dough is harder to shape. You can also freeze the unbaked dough balls for up to 3 months. Thaw in the refrigerator overnight before baking.
My white chocolate seized up. What went wrong?
White chocolate is finicky. It seizes when it gets too hot (above 110°F) or when even a tiny drop of water gets into the bowl. Always use a completely dry bowl and utensils. Melt it in short 30-second bursts in the microwave, stirring thoroughly between each. If it does seize, you can try adding a teaspoon of coconut oil or vegetable shortening and stirring vigorously—sometimes that saves it.
How do I crush candy canes without making a mess?
Put the candy canes in a sturdy ziplock bag and seal it completely. Place the bag on a cutting board and gently tap it with a rolling pin or the bottom of a heavy pan. Start with gentle taps and work your way up—you want crushed pieces, not powder. If you go too hard, you’ll end up with candy dust everywhere. For the best results, crush just before using so the candy stays crunchy.
Pin This Recipe!
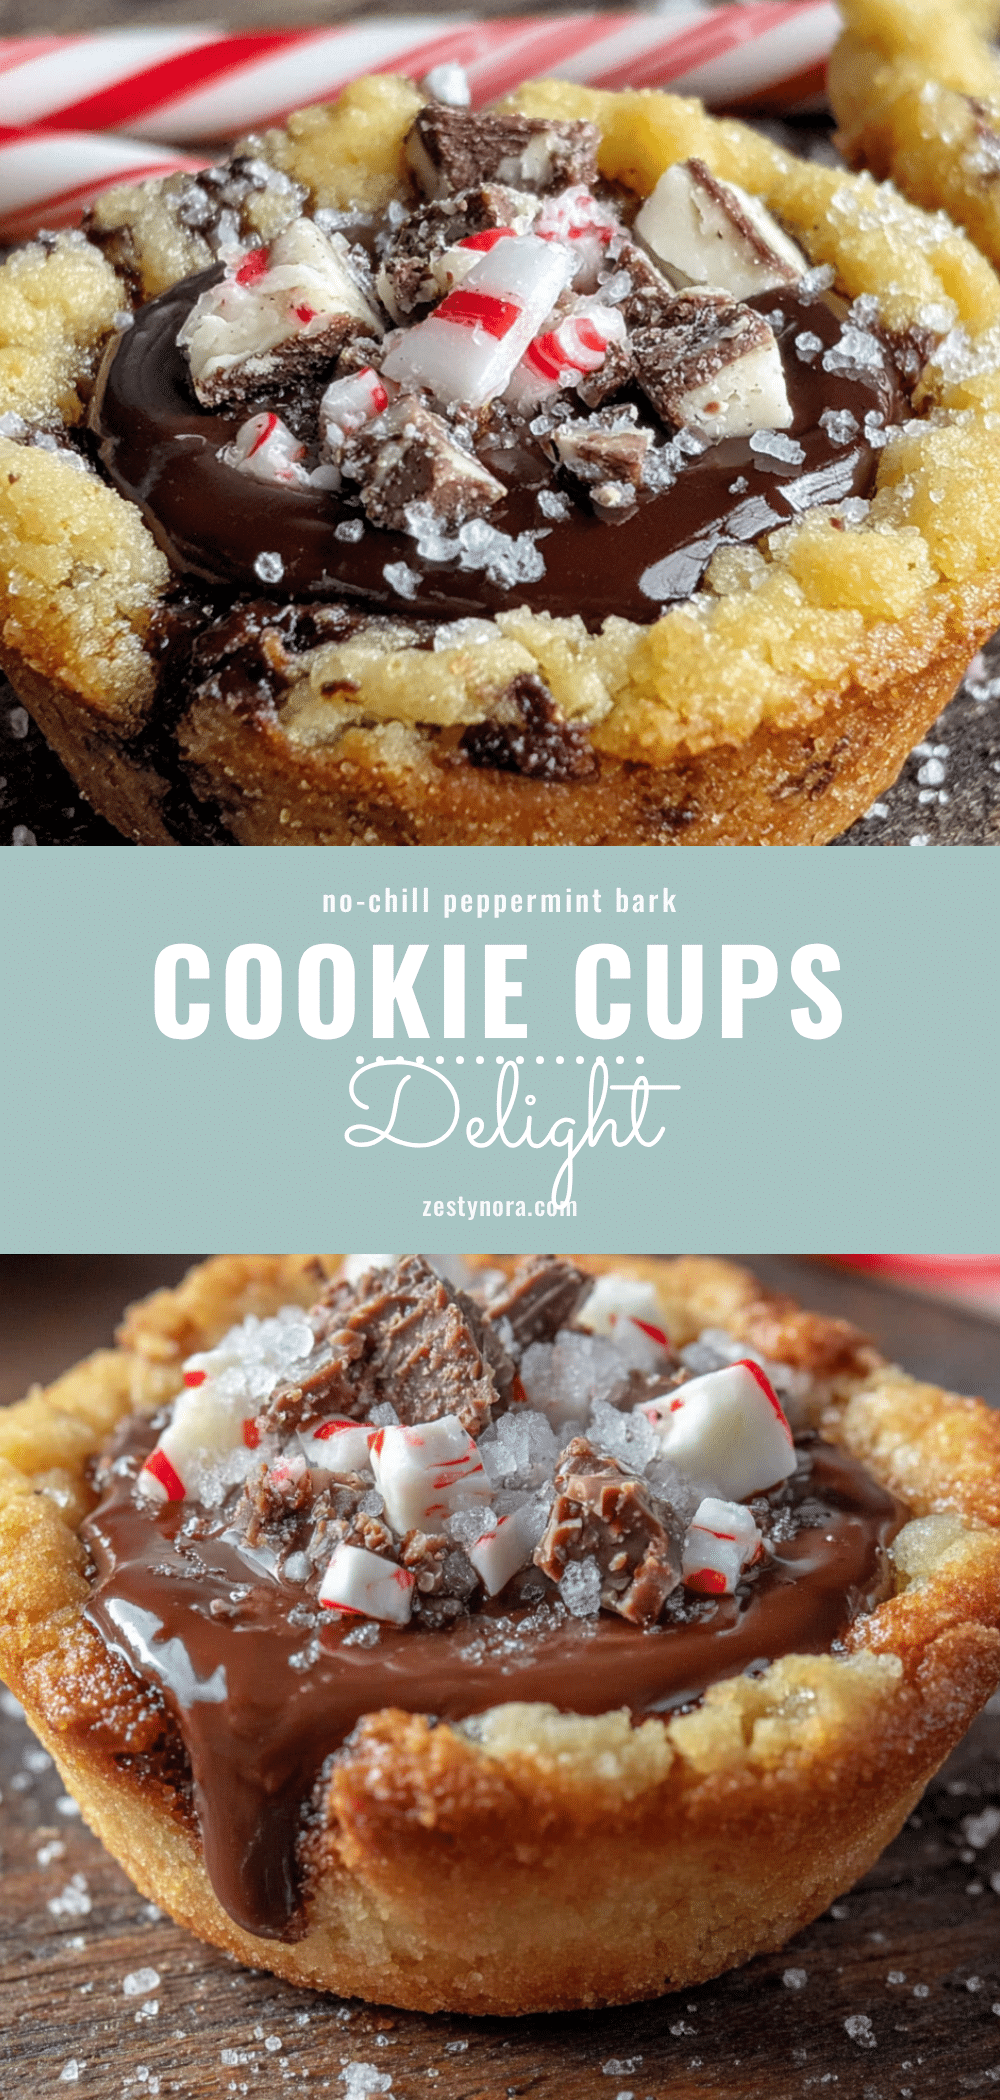
Easy Peppermint Bark Cookie Cups with No-Chill Dough

A crunchy chocolate cookie cup filled with creamy peppermint bark, made with a no-chill dough for quick holiday baking. Perfectly bite-sized and impossible to mess up.
- Prep Time: 15 minutes
- Cook Time: 10 minutes
- Total Time: 25 minutes
- Yield: 24 servings 1x
- Category: Dessert
- Cuisine: American
Ingredients
- 1/2 cup unsalted butter, softened
- 1/2 cup granulated sugar
- 1/4 cup packed light brown sugar
- 1 large egg, room temperature
- 1 teaspoon vanilla extract
- 1 cup all-purpose flour
- 1/3 cup unsweetened cocoa powder (Dutch-process preferred)
- 1/2 teaspoon baking soda
- 1/4 teaspoon salt
- 1 cup white chocolate chips
- 1/2 teaspoon peppermint extract
- 1/3 cup crushed candy canes or peppermint candies
- 1 tablespoon coconut oil (optional, for smoother melting)
Instructions
- Preheat oven to 350°F (175°C). Grease a 24-cup mini muffin tin generously with butter or non-stick spray.
- In a large mixing bowl, beat softened butter, granulated sugar, and brown sugar together on medium speed until light and fluffy, about 2-3 minutes.
- Add room temperature egg and vanilla extract. Beat on low speed until just combined. Scrape down sides of bowl.
- In a separate bowl, whisk together flour, cocoa powder, baking soda, and salt.
- Gradually add dry ingredients to wet mixture, mixing on low speed until just combined. Dough will be soft and slightly sticky.
- Using a small cookie scoop or teaspoon, drop about 1 tablespoon of dough into each greased mini muffin cup (24 cups total).
- Use a shot glass or the back of a 1/2 tablespoon measuring spoon to press dough firmly into bottom and up sides of each cup, creating a well. Ensure even thickness, about 1/4 inch.
- Bake for 8-10 minutes until edges are set and centers still look slightly soft. Do not overbake.
- Immediately after removing from oven, use shot glass or measuring spoon to press down centers again to reinforce cup shape. Cool in pan for 5 minutes, then transfer to cooling rack to cool completely.
- Place white chocolate chips in a small microwave-safe bowl. Microwave in 30-second intervals, stirring after each, until smooth and fully melted. Stir in coconut oil if needed. Add peppermint extract and stir.
- Once cookie cups are completely cool, spoon about 1 teaspoon of melted white chocolate into each cup, filling to just below the top edge.
- While white chocolate is still wet, sprinkle crushed candy canes generously over top. Press gently to adhere. Let sit at room temperature until set, about 30 minutes (or refrigerate 10 minutes).
Notes
Don’t skip reshaping the cups immediately after baking. Watch baking time carefully—cookies go from perfect to overdone in about 60 seconds. Crush candy canes finely but not to powder. Let cookie cups cool completely before adding filling. Use good quality white chocolate for smooth melting. Make a test batch first if new to cookie cups.
Nutrition
- Serving Size: 1 cookie cup
- Calories: 145
- Sugar: 13
- Sodium: 85
- Fat: 8
- Saturated Fat: 5
- Carbohydrates: 18
- Fiber: 1
- Protein: 2
Keywords: peppermint bark cookie cups, no-chill dough, holiday cookies, chocolate peppermint, easy Christmas cookies, bite-sized desserts


