Late October, and the only thing I want is this no-bake pumpkin pie with gingersnap crust. The kitchen light is off. The oven is cold. There’s a decent chance I’m still in the slippers I wore to walk the dog at dawn. And honestly? That’s exactly the right energy for this dessert.
I didn’t set out to make a no-bake pie because I was being clever. I set out to make one because I had a can of pumpkin, a box of gingersnaps, and absolutely zero patience for blind-baking a crust at eight o’clock on a Tuesday night. The first time I made this, I remember standing over the bowl, folding the creamy filling together, and thinking — this is either going to be a total disaster or the kind of thing I make every single fall. Turns out, it was the latter.
There’s something about skipping the oven that makes this feel almost rebellious. Like you’re getting away with something. The gingersnap crust is crunchy and spiced, the filling is silky and set, and it all comes together without turning on a single burner. (Well, okay, maybe you melt some butter. That’s it. That’s the only heat.)
This isn’t a pie you stress over. It’s a pie you make when you want something that tastes like you spent hours in the kitchen — but you actually spent those hours curled up on the couch instead. And that, right there, is the whole point.
Why You’ll Love This Recipe
Let me tell you why this no-bake pumpkin pie with gingersnap crust has become my most-requested fall dessert. It’s not complicated. It’s not fussy. It’s just genuinely good, and people can feel that.
- No Oven Required — This is a game-changer if you’re already roasting a turkey or side dishes. Your oven gets a break, and you still get pie. I’ve tested this on a holiday table next to a creamy slow cooker chicken and wild rice soup and nobody even noticed the pie was no-bake.
- Simple Ingredients — You probably have most of these already. Pumpkin puree, cream cheese, whipped topping, and those gingersnap cookies that somehow multiply in the pantry every fall.
- Make-Ahead Friendly — This pie actually gets better after a night in the fridge. The flavors meld together, the crust firms up perfectly, and you can cross “dessert” off your list a full day before the party.
- Crowd-Pleaser — I’ve served this to pumpkin pie purists and to people who swear they don’t like pumpkin desserts. Both groups asked for seconds. The gingersnap crust does something magical — it adds warmth and spice without overpowering the filling.
- Unbelievably Delicious — The texture is what gets people. It’s creamy but not heavy, firm but not dense. Every bite has that little crunch from the crust and that silky smoothness from the filling. It’s comfort food, but make it effortless.
What makes this recipe different from other no-bake pumpkin pies is the crust. Most recipes use a graham cracker base, which is fine. But gingersnaps? They bring a deep, molasses-y warmth that pairs perfectly with pumpkin. Plus, the crust doesn’t get soggy — it stays crisp and holds its shape even after chilling. I’ve tested this with several brands of gingersnaps, and I personally love using Anna’s Ginger Thins for their delicate snap and strong ginger flavor.
This is the kind of dessert that makes you close your eyes after the first bite. It’s familiar but surprising. Simple but special. And honestly? It’s the pie I bring to every Friendsgiving, every potluck, every holiday gathering where I want to impress without stress.
What Ingredients You Will Need
This recipe uses straightforward ingredients that work together to create something truly special. Here’s what you’ll need and why each one matters.
For the Gingersnap Crust
- 2 cups (200g) gingersnap cookies, finely crushed — About 30-35 cookies depending on the brand. I use Anna’s Ginger Thins for a lighter, crispier crust, but any crunchy gingersnap works. Avoid soft-baked cookies here — they won’t hold the crust together.
- 6 tablespoons (85g) unsalted butter, melted — This binds the crumbs and adds richness. If you use salted butter, skip the added salt in the crust.
- 2 tablespoons (25g) granulated sugar — Just a touch to balance the spice of the gingersnaps. You can reduce this if your cookies are already sweet.
- Pinch of salt — Enhances all the flavors and keeps the crust from tasting flat.
For the Pumpkin Filling
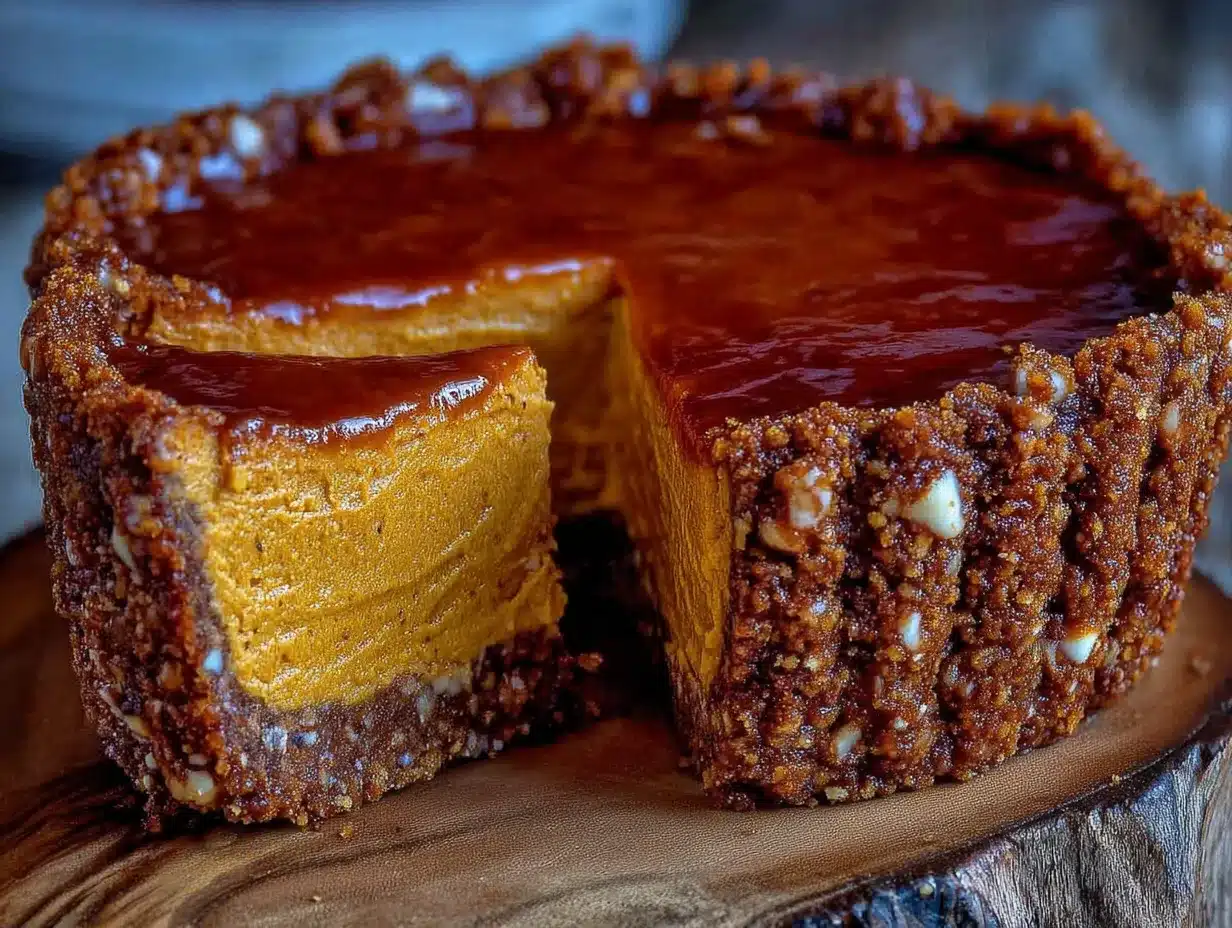
- 1 can (15 oz or 425g) pumpkin puree — Not pumpkin pie filling. Look for 100% pure pumpkin. I prefer Libby’s for its consistent texture and deep color.
- 8 oz (226g) cream cheese, softened to room temperature — This gives the filling structure and tang. Full-fat cream cheese works best here — low-fat versions can make the filling too soft.
- 1 cup (200g) granulated sugar — Sweetens the filling without overpowering the pumpkin.
- 1 teaspoon vanilla extract — Adds depth and rounds out the spices.
- 1 teaspoon ground cinnamon — The backbone of pumpkin spice. Use fresh cinnamon for the best flavor.
- ½ teaspoon ground ginger — Complements the gingersnap crust beautifully.
- ¼ teaspoon ground nutmeg — Freshly grated if you have it. It makes a noticeable difference.
- ¼ teaspoon ground cloves — Just a pinch. Cloves are strong, so don’t overdo it.
- 1 ½ cups (360ml) heavy whipping cream — Whipped to stiff peaks for a light, airy filling. You can also use 2 cups of frozen whipped topping (like Cool Whip) if you’re short on time.
For the Topping (Optional but Recommended)
- ½ cup (120ml) heavy whipping cream — For homemade whipped cream.
- 1 tablespoon powdered sugar — Sweetens the cream without making it grainy.
- ¼ teaspoon vanilla extract — Because everything is better with vanilla.
- Crushed gingersnap cookies and a sprinkle of cinnamon — For garnish.
Ingredient Tips from My Kitchen: If you’re using a stand mixer, make sure your cream cheese is truly at room temperature — about 30 minutes on the counter. Cold cream cheese creates lumps that won’t smooth out. For the whipped cream, chill your bowl and beaters for 10 minutes before whipping. It makes a noticeable difference in volume and stability.
You can substitute the heavy cream with coconut cream for a dairy-free option, though the texture will be slightly less firm. And if you can’t find gingersnaps, graham crackers with an extra teaspoon of ground ginger and a tablespoon of molasses mixed into the melted butter will get you close.
Equipment Needed
You don’t need a fancy kitchen to make this pie. Here’s what I use every time:
- 9-inch pie dish — Glass or ceramic works best. Metal can sometimes make the crust stick. I use a deep-dish glass pie plate because it shows off those beautiful layers.
- Food processor or rolling pin — For crushing the gingersnaps. A food processor gives you an even crumb in seconds, but a zip-top bag and a rolling pin work just as well. (And honestly, smashing cookies is kind of therapeutic.)
- Electric mixer or stand mixer — For whipping the cream and beating the cream cheese. A hand mixer works perfectly fine — I used one for years before upgrading to my KitchenAid.
- Large mixing bowls — You’ll need at least two: one for the crust and one for the filling.
- Rubber spatula — For folding the whipped cream into the pumpkin mixture. A gentle hand here is key.
- Measuring cups and spoons — For accuracy. Baking is science, after all.
- Plastic wrap — To cover the pie while it chills.
Budget-Friendly Tip: If you don’t own a pie dish, a 9-inch springform pan works beautifully. The removable sides make for a stunning presentation. You can also use individual ramekins for mini pies — just reduce the chilling time to about 3 hours.
Maintenance Note: If you use a glass pie dish, avoid running it under cold water while it’s still warm from washing. Sudden temperature changes can cause glass to crack. Let it cool naturally, then wash with warm soapy water.
Preparation Method
Step 1: Make the Gingersnap Crust
Place your gingersnap cookies in a food processor and pulse until you get fine, even crumbs. You should have about 2 cups. If you’re using the bag-and-rolling-pin method, seal the cookies in a zip-top bag and smash away until no large pieces remain. Pour the crumbs into a medium bowl, add the sugar and salt, and stir to combine. Pour in the melted butter and mix with a fork until every crumb is moistened. The mixture should look like wet sand and hold together when you squeeze it in your fist.
Transfer the mixture to your pie dish. Press it firmly into the bottom and up the sides. I use the bottom of a flat measuring cup to get an even, compact layer — it makes a huge difference in how the crust holds together. Pay special attention to the edges where the crust meets the dish. Place the crust in the refrigerator to chill while you make the filling. At least 20 minutes, or up to 2 hours.
Step 2: Whip the Cream
Pour the heavy whipping cream into a chilled bowl. Using an electric mixer, beat on medium-high speed until soft peaks form — about 2-3 minutes. Add the powdered sugar and vanilla, then continue beating until stiff peaks form. Be careful not to over-whip, or you’ll end up with butter. You’ll know it’s ready when you lift the beaters and the cream holds its shape without drooping. Set the whipped cream aside in the refrigerator while you make the base.
Step 3: Make the Pumpkin Base
In a large bowl, beat the softened cream cheese with an electric mixer until smooth and creamy — about 2 minutes. Scrape down the sides of the bowl with a rubber spatula. Add the sugar and beat for another minute until fluffy. Add the pumpkin puree, vanilla, cinnamon, ginger, nutmeg, and cloves. Beat on medium speed until everything is well combined and silky. Taste the mixture at this point. It should be well-spiced and not too sweet. Adjust the spices if needed — I sometimes add an extra ¼ teaspoon of cinnamon because I can’t help myself.
Step 4: Fold Everything Together
Remove the whipped cream from the refrigerator. Add about one-third of it to the pumpkin mixture and stir gently with your spatula to lighten the base. This step is important — it makes the final folding much easier. Then add the remaining whipped cream and fold it in with gentle, sweeping motions. Fold until no white streaks remain. Don’t over-mix, or you’ll deflate all that air you worked so hard to create. The filling should be light, mousse-like, and a beautiful pale orange color.
Step 5: Assemble and Chill
Remove the chilled crust from the refrigerator. Spoon the filling into the crust and spread it evenly with your spatula. Give the pie dish a few gentle taps on the counter to release any air bubbles. Smooth the top. Cover the pie loosely with plastic wrap — make sure the wrap doesn’t touch the surface of the filling, or it’ll leave marks.
Refrigerate for at least 6 hours, but overnight is best. This is not the time to rush. The filling needs that full chilling time to set properly. If you try to cut it too early, you’ll end up with a delicious but messy puddle. Trust me — I’ve made that mistake on a cozy pumpkin cream cheese swirl muffins kind of morning and regretted it.
Step 6: Serve
When you’re ready to serve, whip up the topping cream if you’re using it. Spread or pipe it over the pie. Sprinkle with crushed gingersnaps and a light dusting of cinnamon. Slice with a sharp knife, wiping it clean between cuts for neat slices. Serve cold.
Cooking Tips & Techniques
I’ve made this no-bake pumpkin pie with gingersnap crust more times than I can count, and I’ve learned a few things along the way. Here are the tips that make a real difference.
Don’t skip the crust chilling step. I know it’s tempting to rush, but a warm crust will start melting the cream cheese filling as soon as you pour it in. That leads to a soggy bottom and a crust that falls apart when you slice. Twenty minutes in the fridge is non-negotiable.
Room temperature cream cheese is your friend. Cold cream cheese creates lumps that no amount of beating will fix. Leave it out for at least 30 minutes before you start. If you forgot, cut it into small cubes and microwave for 10-second intervals until soft but not warm.
Whip the cream to stiff peaks. Soft peaks will deflate when you fold them into the pumpkin mixture, and you’ll end up with a dense filling. Stiff peaks give you that light, mousse-like texture that makes this pie so special. But don’t go past stiff peaks — if the cream looks grainy or separates, you’ve gone too far.
Fold, don’t stir. When combining the whipped cream with the pumpkin mixture, use a gentle folding motion. Cut through the center, scrape along the bottom, and bring the spatula up and over. Rotate the bowl as you go. This preserves all the air you whipped into the cream.
Chill overnight for best results. Six hours is the minimum, but 12-24 hours gives you a perfectly sliceable pie. The flavors also develop and deepen overnight. I actually prefer the pie on day two.
One mistake I made early on: I used pumpkin pie filling instead of pure pumpkin the first time. The pie was cloyingly sweet and never set properly. Always check the label — it should say “100% pure pumpkin” and nothing else.
Timing strategy: Make the crust the night before and keep it in the fridge. The next morning, make the filling and assemble the pie. By dinner time, it’s ready to serve. This breaks the work into manageable chunks and makes the whole process feel effortless.
Variations & Adaptations
One of the best things about this recipe is how easily it adapts to different tastes and dietary needs. Here are some variations I’ve tried and loved.
Gluten-Free Version
Use gluten-free gingersnap cookies. Many brands make them now, and they work exactly the same way. I’ve tested this with Partake Foods’ gingersnaps and the crust turned out perfectly crisp. The filling is naturally gluten-free, so this is an easy swap.
Dairy-Free Version
Substitute the cream cheese with a dairy-free version — I like Kite Hill’s plain cream cheese style spread. Use coconut cream in place of heavy whipping cream. Chill the can of coconut cream overnight, then scoop out the solid white part and whip it just like regular cream. The texture is slightly different — a bit lighter — but the flavor is still wonderful.
Pumpkin Spice Latte Twist
Add 1 tablespoon of instant espresso powder dissolved in 1 teaspoon of hot water to the pumpkin mixture. The coffee flavor enhances the spices and adds a subtle mocha note. This version is always a hit at fall brunches.
Individual Mini Pies
Use 6-8 small ramekins or mason jars instead of a single pie dish. The crust gets pressed into the bottom of each jar, then the filling goes on top. These are perfect for parties — everyone gets their own little dessert. Reduce the chilling time to about 3 hours since the portions are smaller.
Maple Pecan Variation
Add ¼ cup of pure maple syrup to the pumpkin mixture and reduce the granulated sugar to ¾ cup. Top the finished pie with toasted pecans and a drizzle of maple syrup. The maple flavor pairs beautifully with the gingersnap crust.
Serving & Storage Suggestions
This pie is best served cold, straight from the refrigerator. I like to let it sit at room temperature for about 10 minutes before slicing — it takes the chill off without softening the filling too much. Use a sharp knife and wipe it clean between cuts for the neatest slices.
What to serve with it: A dollop of fresh whipped cream is classic, but I also love a drizzle of salted caramel sauce or a scoop of vanilla bean ice cream. The cold, creamy pie with the warm caramel is a combination I can’t resist. For a cozy fall spread, pair this pie with a warm mug of apple cider or a creamy pumpkin spice cake pop for a double dose of autumn flavor.
Storage: Cover the pie tightly with plastic wrap or transfer it to an airtight cake carrier. It will keep in the refrigerator for up to 5 days. The crust stays surprisingly crisp for the first two days, then gradually softens. By day four, it’s still delicious but the texture is more like a cheesecake base. Not a bad thing, just different.
Freezing: This pie freezes beautifully. Make it in a disposable aluminum pie pan, wrap it tightly in plastic wrap, then a layer of foil, and freeze for up to 3 months. Thaw overnight in the refrigerator before serving. Don’t add the whipped cream topping until after thawing.
How flavors develop: Honestly, this pie is even better on day two. The spices meld together, the filling firms up perfectly, and the crust has just enough time to absorb a little moisture from the filling without getting soggy. If you can plan ahead, make it a day before you need it.
Nutritional Information & Benefits
Here’s the estimated nutritional breakdown for one slice of this no-bake pumpkin pie with gingersnap crust (based on 8 servings):
| Nutrient | Amount per Serving |
|---|---|
| Calories | 385 |
| Total Fat | 24g |
| Saturated Fat | 14g |
| Carbohydrates | 40g |
| Fiber | 2g |
| Sugar | 28g |
| Protein | 4g |
| Vitamin A | 190% DV |
| Calcium | 6% DV |
| Iron | 8% DV |
Health Benefits: Pumpkin is packed with vitamin A, which supports eye health and immune function. It’s also a good source of fiber and antioxidants. The gingersnaps provide a small amount of ginger, which has anti-inflammatory properties and can aid digestion. The cream cheese and heavy cream add calcium and protein, though this is definitely a treat-yourself dessert rather than a health food.
Dietary Considerations: This recipe contains dairy and gluten. See the variations section for dairy-free and gluten-free alternatives. It is nut-free as written, making it a good option for school events or gatherings where allergies are a concern.
My personal philosophy? Dessert should make you happy. This pie does that. It’s not about counting every calorie — it’s about sharing something delicious with people you love. And if you want a second slice? Go for it.
Conclusion
This no-bake pumpkin pie with gingersnap crust is everything I want in a fall dessert. It’s easy enough for a Tuesday night, special enough for Thanksgiving, and forgiving enough that you can’t really mess it up. The gingersnap crust adds warmth and crunch, the filling is creamy and spiced, and the whole thing comes together without turning on the oven.
I love this recipe because it reminds me that simple can be spectacular. You don’t need complicated techniques or fancy equipment. You just need good ingredients, a little patience for the chilling time, and the willingness to share.
I’d love to hear how yours turns out. Did you add extra cinnamon? Try the maple pecan version? Serve it at a Friendsgiving that turned into a full-blown feast? Drop a comment below and let me know. And if you snap a photo, tag me — I want to see your beautiful pie.
Now go make some room in your fridge, crush some cookies, and treat yourself to the easiest, most delicious pumpkin pie of the season. You’ve earned it.
Frequently Asked Questions
Can I use pumpkin pie filling instead of pure pumpkin?
No, I don’t recommend it. Pumpkin pie filling is already sweetened and spiced, which will throw off the balance of this recipe. The filling may not set properly because of the added sugars and stabilizers. Stick with 100% pure pumpkin puree for the best results.
How long does this pie need to chill?
At least 6 hours, but overnight is ideal. The filling needs that time to firm up so you can slice it cleanly. If you’re in a rush, you can speed things up by placing the pie in the freezer for 2-3 hours, but watch it carefully — you don’t want it to freeze solid.
Can I make this pie ahead of time?
Absolutely. This pie is actually better when made a day ahead. The flavors meld together and the texture becomes perfectly firm. You can make it up to 2 days in advance and keep it covered in the refrigerator.
My crust keeps falling apart. What am I doing wrong?
Two things to check: First, make sure you’re pressing the crust firmly enough into the dish. Use the bottom of a flat measuring cup to compact it. Second, make sure the butter-to-crumb ratio is right. The mixture should feel like wet sand and hold together when squeezed. If it’s too dry, add another tablespoon of melted butter.
Can I freeze this pie?
Yes! Wrap the fully chilled pie (without any toppings) tightly in plastic wrap, then a layer of foil. Freeze for up to 3 months. Thaw overnight in the refrigerator before serving. Add fresh whipped cream and garnishes after thawing.
Pin This Recipe!
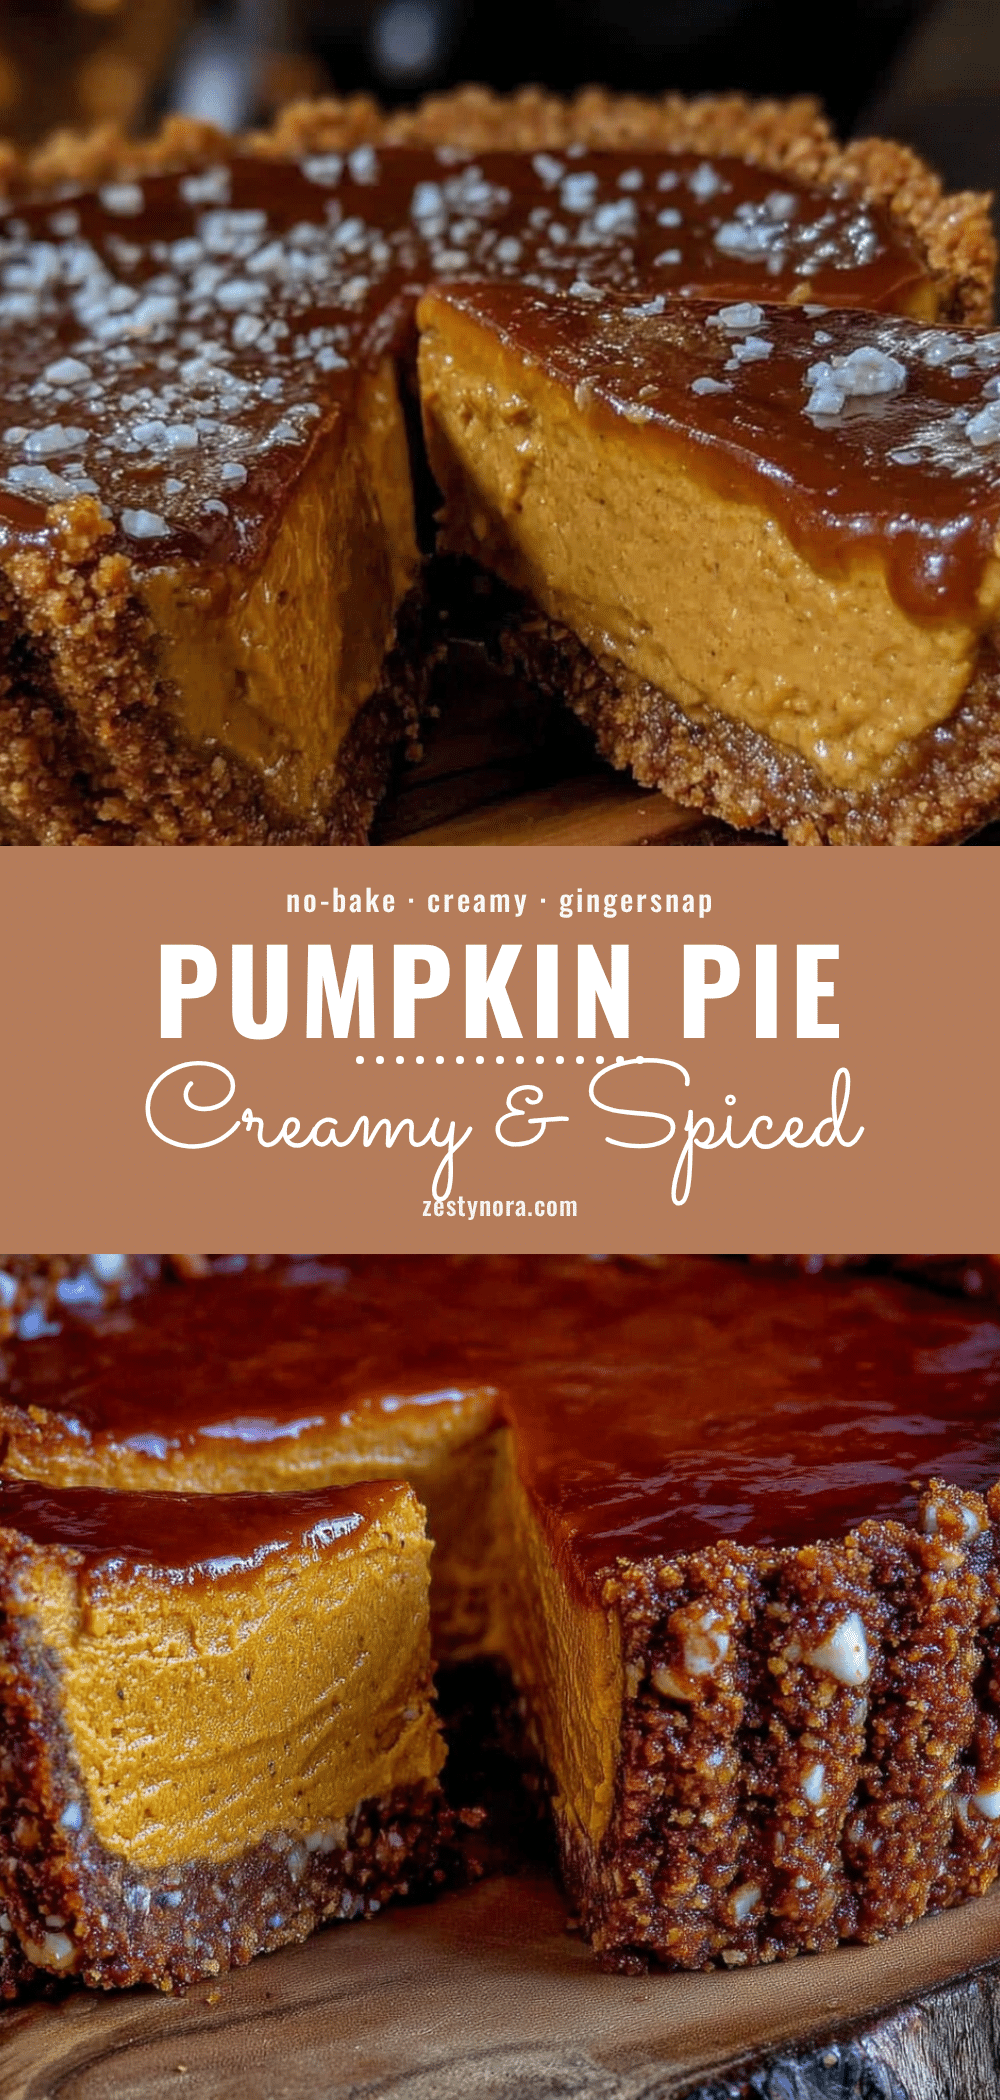
Best No-Bake Pumpkin Pie with Gingersnap Crust
A creamy, spiced no-bake pumpkin pie with a crunchy gingersnap crust that comes together without turning on the oven. Perfect for fall gatherings and make-ahead desserts.
- Prep Time: 30 minutes
- Cook Time: 0 minutes
- Total Time: 6 hours 30 minutes (includes chilling)
- Yield: 8 servings 1x
- Category: Dessert
- Cuisine: American
Ingredients
- 2 cups (200g) gingersnap cookies, finely crushed (about 30–35 cookies)
- 6 tablespoons (85g) unsalted butter, melted
- 2 tablespoons (25g) granulated sugar
- Pinch of salt
- 1 can (15 oz or 425g) pumpkin puree (100% pure pumpkin)
- 8 oz (226g) cream cheese, softened to room temperature
- 1 cup (200g) granulated sugar
- 1 teaspoon vanilla extract
- 1 teaspoon ground cinnamon
- ½ teaspoon ground ginger
- ¼ teaspoon ground nutmeg
- ¼ teaspoon ground cloves
- 1 ½ cups (360ml) heavy whipping cream
- ½ cup (120ml) heavy whipping cream (for topping)
- 1 tablespoon powdered sugar (for topping)
- ¼ teaspoon vanilla extract (for topping)
- Crushed gingersnap cookies and a sprinkle of cinnamon (for garnish)
Instructions
- Make the crust: Pulse gingersnap cookies in a food processor until fine crumbs form. In a medium bowl, combine crumbs, 2 tablespoons sugar, and a pinch of salt. Pour in melted butter and mix until moistened. Press firmly into a 9-inch pie dish. Chill for at least 20 minutes.
- Whip the cream: In a chilled bowl, beat 1 ½ cups heavy cream on medium-high speed until soft peaks form. Add powdered sugar and vanilla, then beat until stiff peaks form. Refrigerate.
- Make the pumpkin base: In a large bowl, beat cream cheese until smooth. Add 1 cup sugar and beat until fluffy. Add pumpkin puree, 1 teaspoon vanilla, cinnamon, ginger, nutmeg, and cloves. Beat until well combined.
- Fold together: Add one-third of the whipped cream to the pumpkin mixture and stir gently. Fold in remaining whipped cream until no white streaks remain.
- Assemble: Spoon filling into chilled crust. Smooth the top. Cover loosely with plastic wrap and refrigerate for at least 6 hours, preferably overnight.
- Serve: Whip remaining ½ cup heavy cream with 1 tablespoon powdered sugar and ¼ teaspoon vanilla. Spread or pipe over pie. Garnish with crushed gingersnaps and cinnamon. Slice and serve cold.
Notes
Chill the crust for at least 20 minutes before adding filling. Use room temperature cream cheese to avoid lumps. Whip cream to stiff peaks for best texture. Fold gently to keep filling light. Chill overnight for best results. Can be made up to 2 days ahead. Freezes well for up to 3 months.
Nutrition
- Serving Size: 1 slice (1/8 of pie)
- Calories: 385
- Sugar: 28
- Fat: 24
- Saturated Fat: 14
- Carbohydrates: 40
- Fiber: 2
- Protein: 4
Keywords: no-bake pumpkin pie, gingersnap crust, pumpkin dessert, fall dessert, easy pumpkin pie, no-bake dessert, Thanksgiving pie