Fourth time in two weeks I made a Game Day Loaded Cheeseburger Board, and this time I finally figured out the bun situation. The first attempt? Soggy bottoms. Tragic. Second time, I over-toasted them, and they shattered like glass when anyone tried to bite down. Third time, I got distracted by the pre-game show and burned the bacon. But that fourth board? That was the one where everything clicked—the buns stayed crisp, the cheese pooled perfectly, and people actually stopped talking to eat.
I didn’t set out to become the person who obsesses over a single appetizer for weeks. But here’s the thing about feeding a crowd during a game: you need something that feels special but doesn’t chain you to the kitchen. A regular burger platter works, sure. But a loaded cheeseburger board? It’s interactive. It’s messy. It’s exactly what people want when they’re half-watching the screen and half-talking trash. I wanted a spread that could handle that chaos without falling apart.
So I kept tweaking. Kept testing. Kept eating way too many mini burgers in the name of research. This version finally hit the sweet spot—crispy edges, melty cheese, and all the fixings arranged so everyone can build their own perfect bite. It’s the kind of recipe that makes you look like you planned ahead, even though you were probably just as panicked as everyone else when the game started.
Why You’ll Love This Recipe
This isn’t just another snack board. It’s a full-on experience that solves the biggest game day problem: feeding a hungry crowd without spending the entire game in the kitchen. Here’s why this one works:
- Build-Your-Own Fun: Everyone gets to customize their perfect bite. Picky eaters? No problem. They can skip the pickles and load up on extra bacon.
- Make-Ahead Friendly: Most components can be prepped hours before kickoff. Just assemble and pop in the oven when guests arrive.
- No Fancy Equipment Needed: You don’t need a griddle or a flat top. A sheet pan and your oven do all the heavy lifting.
- Crowd-Controlled Portions: No more wrestling over the last slider. Everything’s laid out, and everyone gets their fair share.
- Actually Feels Like A Meal: Unlike chips and dip, this board has protein, veggies, and carbs. People leave full, not just snack-satisfied.
I’ve tested this board for three different game days now, and the feedback is always the same—people ask for the recipe before the fourth quarter ends. It’s the kind of spread that makes you look like a hero without actually working that hard.
What Ingredients You Will Need
This recipe uses simple, grocery-store ingredients that come together to create something way more impressive than the sum of their parts. Most of these are probably already in your fridge or pantry.
For The Mini Burgers
- 1 ½ pounds ground beef (80/20 blend) – The fat content matters here. Leaner beef dries out in the oven, so stick with 80/20 for juicy results.
- 1 tablespoon Worcestershire sauce – Adds that savory, umami depth that makes burgers taste like burgers.
- 1 teaspoon garlic powder – Not optional in my book. It rounds out the flavor without being overpowering.
- 1 teaspoon onion powder – Works with the garlic to create that classic burger seasoning profile.
- 1 teaspoon salt – Use kosher salt if you have it. It distributes more evenly.
- ½ teaspoon black pepper – Freshly ground if you can manage it.
- 12 slider buns (Hawaiian rolls work great) – Sweet buns balance the savory beef and salty cheese perfectly.
For The Toppings Board

- 8 slices cheddar cheese (or American, or both) – I use a mix. Cheddar for flavor, American for that perfect melt.
- 8 slices cooked bacon (halved) – Thick-cut bacon holds up better. Thin bacon gets lost in the shuffle.
- 1 cup shredded lettuce – Iceberg gives the best crunch. Romaine works too, but skip the fancy greens here.
- 1 large tomato (sliced thin) – Roma tomatoes are less watery than beefsteak. Pat them dry with a paper towel before slicing.
- ½ cup dill pickle slices – Spears or chips, your call. I like the extra crunch of chips.
- ½ cup red onion (thinly sliced) – Soak them in cold water for 10 minutes if you want to mellow the bite.
For The Dipping Sauces
- ½ cup ketchup – Classic. Non-negotiable.
- ¼ cup yellow mustard – Adds that tangy kick.
- ¼ cup mayonnaise – For mixing your own special sauce.
- 1 tablespoon sriracha (optional) – For the heat-seekers.
I’ve tried making these burgers with ground turkey, and honestly, it’s not the same. The fat content just isn’t there to keep them moist during the oven bake. If you need a leaner option, add a tablespoon of olive oil to the meat mixture. It helps, but it’s not perfect.
Equipment Needed
- Large sheet pan (half-sheet size) – This is your main workhorse. A rimmed sheet pan catches any grease drips.
- Mixing bowl – For combining the burger meat with seasonings.
- Sharp knife and cutting board – For prepping all those toppings.
- Small bowls or ramekins – For holding the sauces and smaller toppings.
- Large serving board or platter – A wooden cutting board, a large ceramic platter, or even a clean sheet pan works.
- Parchment paper – Makes cleanup a breeze and prevents sticking.
- Spatula – For flipping burgers if you’re using a skillet instead of the oven.
If you don’t have a large serving board, don’t stress. I’ve used a clean baking sheet lined with parchment paper more times than I can count. It’s not fancy, but it works. Just arrange everything directly on the paper and let people dig in.
Preparation Method
Let’s walk through this step by step. I’ve included timestamps and sensory cues so you know exactly what to look for at each stage.
Step 1: Prep The Burger Patties (10 minutes)
In a large mixing bowl, combine the ground beef, Worcestershire sauce, garlic powder, onion powder, salt, and pepper. Use your hands to mix gently—overworking the meat makes tough burgers. Form the mixture into 12 small patties, about 2 inches wide and ½ inch thick. Press a small indent in the center of each patty with your thumb. This helps them cook evenly and prevents them from puffing up into meatballs.
Step 2: Cook The Bacon (15 minutes)
While the patties rest, lay the bacon strips on a parchment-lined sheet pan. Bake at 400°F (200°C) for 12-15 minutes, until crispy and deep golden brown. Transfer to a paper towel-lined plate to drain. Once cool, break each strip in half. The bacon should snap when bent—if it’s still bendy, give it another 2 minutes.
Step 3: Cook The Burger Patties (12 minutes)
Preheat your oven to 425°F (220°C). Place the patties on a parchment-lined sheet pan, spacing them about 1 inch apart. Bake for 6 minutes, then flip each patty using a spatula. Bake for another 4-6 minutes, depending on your preferred doneness. For medium, the internal temperature should read 160°F (71°C). The patties should be browned on the edges and firm to the touch but still juicy in the center.
Step 4: Toast The Buns (5 minutes)
Split the slider buns in half and place them cut-side up on a separate sheet pan. Pop them in the oven (still at 425°F) for 3-5 minutes, until the edges are golden and the centers are warm. Watch them closely—buns go from toasted to burnt fast. You want them crisp enough to hold up to the toppings but still soft in the middle.
Step 5: Assemble The Board (10 minutes)
Place your serving board or platter in the center of your table. Arrange the toasted buns in a row or cluster. Place the cooked patties on one side of the board. Layer the cheese slices over the patties while they’re still hot—the residual heat will melt the cheese perfectly. Arrange the bacon, lettuce, tomato, pickles, and red onion in separate piles around the board. Fill small bowls with ketchup, mustard, mayonnaise, and sriracha, and tuck them into any empty spaces.
Step 6: Serve Immediately
Let everyone build their own burgers. The beauty of this board is that people can grab a bun, add a patty, and pile on exactly what they want. No assembly line required. Just dig in.
Cooking Tips & Techniques
I’ve made this board enough times to know exactly where things can go wrong. Here are the lessons I learned the hard way so you don’t have to.
Don’t skip the thumbprint indent. I know it sounds fussy, but patties without that little dimple puff up into round balls in the oven. You end up with a burger that rolls off the bun. Press that indent, and you’ll get flat, even patties every time.
Toast the buns, but don’t overdo it. The first time I made this board, I thought “extra toasty” meant better. It didn’t. The buns shattered when anyone tried to bite into them. You want golden edges, not dark brown. Three minutes at 425°F is usually perfect.
Let the patties rest for 2 minutes after baking. This is crucial. If you slap the cheese on immediately and serve, all the juices run out onto the board. Let them sit for just two minutes, then add the cheese. The patties stay juicy, and the cheese melts perfectly from the residual heat.
Prep everything before you start cooking. This is one of those recipes where having all your ingredients prepped makes the whole process smooth. Chop the veggies, slice the cheese, cook the bacon, and measure out the sauces before you even touch the ground beef. Trust me on this one.
Use a meat thermometer if you’re unsure. I’ve been cooking burgers for years, and I still use one. 160°F (71°C) is the sweet spot for ground beef. Anything less is risky, anything more is dry.
Variations & Adaptations
This board is endlessly customizable. Here are a few ways to switch it up depending on your crowd or what’s in your fridge.
The Spicy Version: Add 1 tablespoon of sriracha or chopped jalapeños to the ground beef mixture. Top the patties with pepper jack cheese instead of cheddar. Serve with a side of spicy mayo (just mix mayo with sriracha and a squeeze of lime).
The Low-Carb Board: Skip the buns entirely and serve the patties on a bed of lettuce cups. Use large romaine or butter lettuce leaves as wraps. Load up on extra bacon, cheese, and pickles. The flavors are all there—you just lose the bread.
The Turkey Burger Version: Substitute ground turkey for the beef. Add 1 tablespoon of olive oil and 1 extra tablespoon of Worcestershire sauce to keep the patties moist. Cook to 165°F (74°C) internal temperature. The texture is slightly different, but the toppings do a lot of heavy lifting.
The Breakfast Board: Swap the burger patties for breakfast sausage patties. Use cheddar or American cheese. Add scrambled eggs and hash browns to the board. Serve with maple syrup for dipping. It’s a game changer for morning games or brunch gatherings.
I tried a version with caramelized onions once, and honestly, it was amazing. The sweetness of the onions played off the salty bacon and tangy pickles perfectly. If you have the time, caramelize a couple of onions and add them as a topping. It’s worth the extra 20 minutes.
Serving & Storage Suggestions
This board is best served immediately while the patties are hot and the buns are still crisp. But let’s be real—sometimes the game goes into overtime and people eat in waves. Here’s how to handle it.
Serve at room temperature for up to 30 minutes. The patties will stay warm enough for about half an hour if you keep them covered loosely with foil. After that, the cheese starts to firm up and the buns get soft.
For leftovers, store components separately. This is key. If you store an assembled burger, the bun gets soggy and the lettuce wilts. Instead, separate the patties, buns, and toppings into individual containers. The patties will keep in the fridge for up to 3 days. The buns are best stored at room temperature in a sealed bag.
Reheat patties in a skillet or oven. Skip the microwave—it turns them rubbery. Heat a skillet over medium heat, add a splash of water, and cover with a lid. Steam the patties for 2-3 minutes until warmed through. Or pop them in a 350°F (175°C) oven for 5 minutes.
The toppings don’t store well. Lettuce and tomato get sad after a day in the fridge. Plan to use them up within 24 hours. Pickles and onions will last longer, but they lose their crunch.
If you’re making this for a party, I recommend setting out only what you think people will eat in the first hour. Keep the rest of the components in the fridge and replenish as needed. It keeps everything fresh and prevents waste.
Nutritional Information & Benefits
Let’s be honest—this isn’t a health food. But it’s real food made from real ingredients, and that counts for something. Here’s a rough breakdown per serving (one burger with bun and standard toppings):
- Calories: Approximately 450-500
- Protein: 28g
- Fat: 28g
- Carbohydrates: 28g
- Fiber: 2g
- Sugar: 6g
The beef provides a solid dose of iron and B vitamins, which are important for energy production. The lettuce and tomato add a bit of fiber and vitamin C. The cheese offers calcium and protein. Is it a balanced meal? Not exactly. But for a game day treat, it’s a lot better than processed snacks and frozen appetizers.
If you’re watching your sodium, use low-sodium cheese and skip the added salt in the burger mixture. The Worcestershire sauce and bacon bring plenty of saltiness on their own.
This recipe is naturally gluten-free if you use gluten-free buns. It’s also easy to make dairy-free by using dairy-free cheese and skipping the mayo-based sauces.
Conclusion
This Game Day Loaded Cheeseburger Board has officially become my go-to for any gathering where people need to eat with their hands and keep their eyes on the screen. It’s forgiving, it’s flexible, and it always gets the job done. Whether you’re hosting a Super Bowl party, a playoff watch, or just a casual Saturday with friends, this board delivers the kind of food that makes people happy.
I love that this recipe doesn’t pretend to be something it’s not. It’s not fancy. It’s not fussy. It’s just really good burgers, arranged in a way that makes everyone feel like they’re getting exactly what they want. And honestly, that’s the best kind of party food.
If you make this board, let me know how it goes! Drop a comment below with your favorite topping combinations or any tweaks you made. Did you add pickled jalapeños? Swap the cheddar for blue cheese? I want to hear about it. Share this recipe with your fellow game day hosts, and tag me in your board photos—I love seeing how everyone makes it their own.
Now go make that board. Your guests are waiting.
Frequently Asked Questions
Can I make this recipe ahead of time?
Yes, most components can be prepped in advance. Cook the patties and bacon up to 2 days ahead and store them in the fridge. Slice the veggies and store them in separate containers. Toast the buns just before serving for the best texture. Assemble the board right before guests arrive.
What if I don’t have a sheet pan?
A large cast-iron skillet or a rimmed baking dish works fine. You just need something with edges to catch any grease. If you’re cooking in batches, keep the cooked patties warm in a 200°F (95°C) oven while you finish the rest.
Can I use frozen burger patties?
You can, but fresh patties taste significantly better. Frozen patties often have added fillers and less fat, which means they cook up drier. If you’re in a pinch, thaw them completely and season generously before cooking.
How do I keep the buns from getting soggy?
Toast them well and don’t assemble the burgers until the last minute. Let guests build their own burgers so the buns stay crisp until they’re ready to eat. If you’re pre-assembling, add the patty and cheese first, then let people add wet toppings like tomato and pickles themselves.
What’s the best way to reheat leftover patties?
A skillet over medium heat with a splash of water and a lid works best. Steam them for 2-3 minutes until warmed through. The oven at 350°F (175°C) for 5 minutes also works. Avoid the microwave—it makes the patties rubbery and dry.
Pin This Recipe!
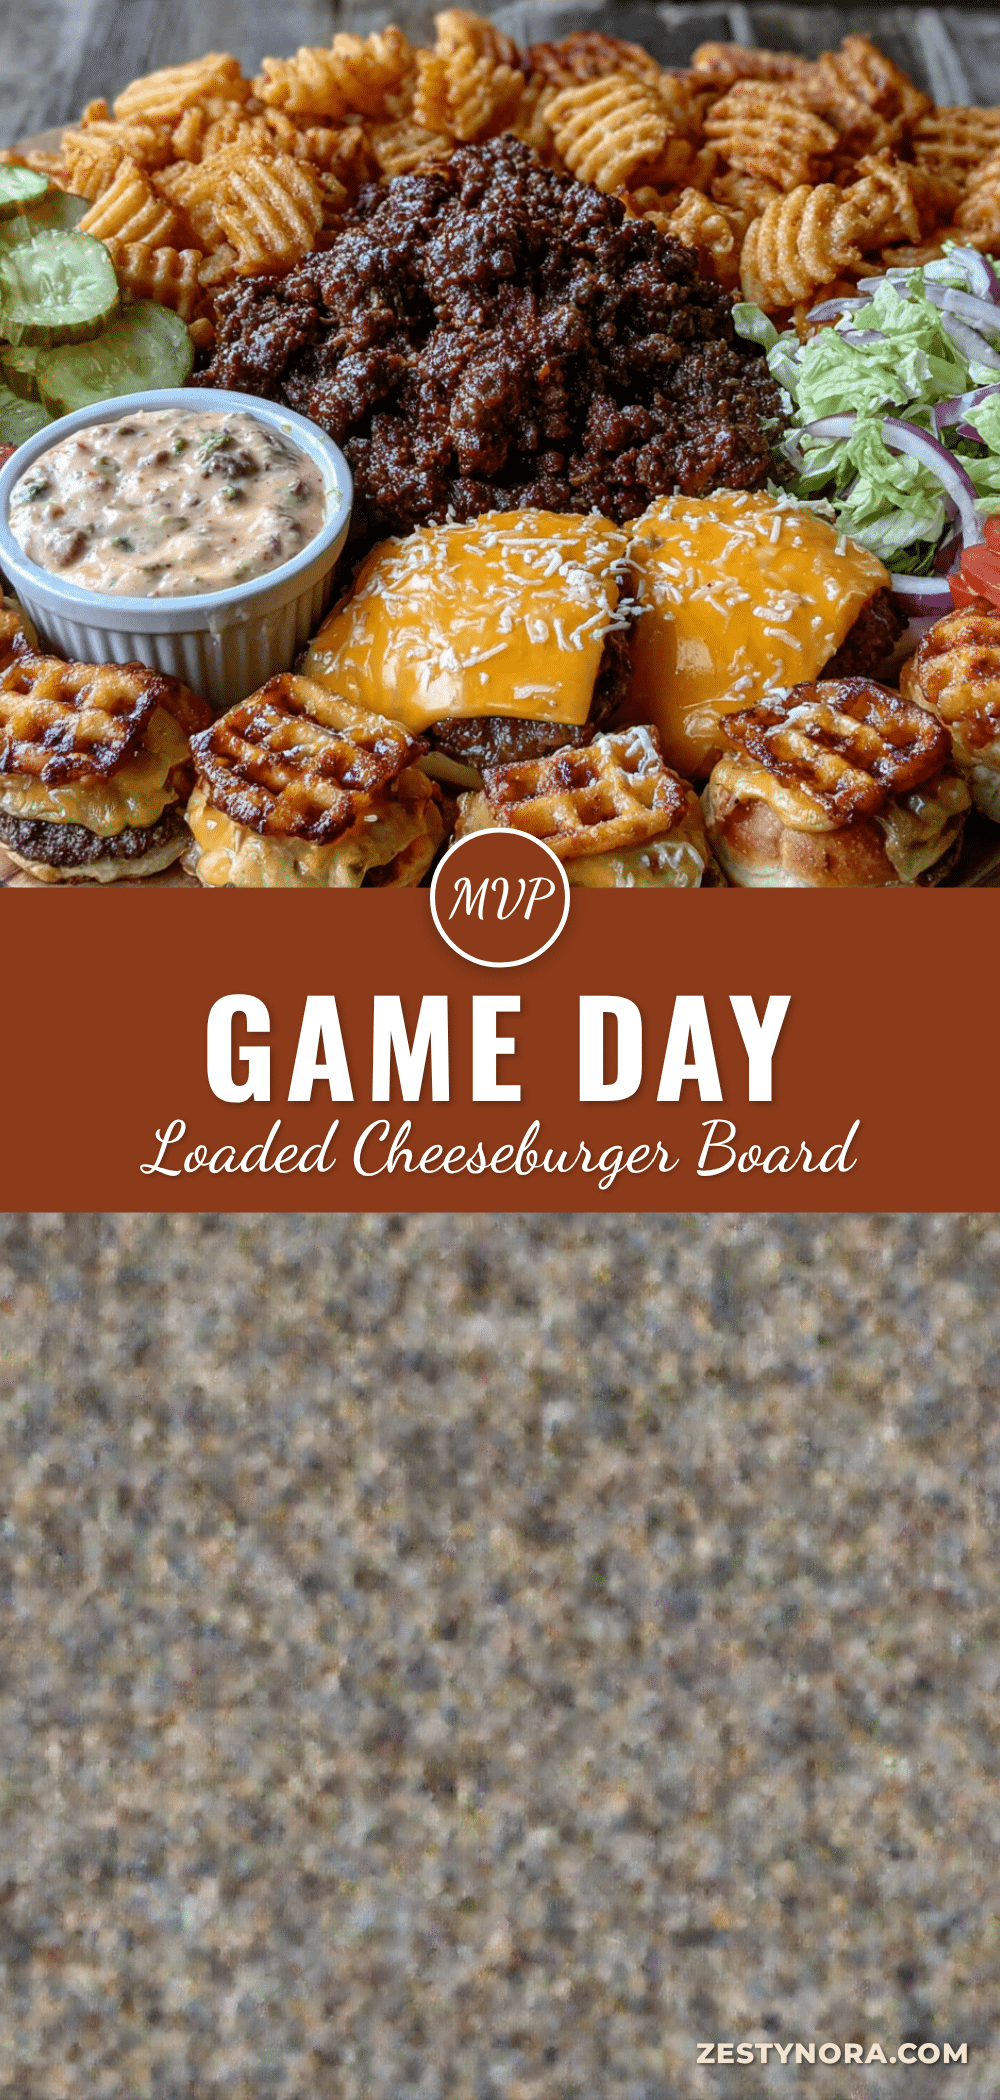
Game Day Loaded Cheeseburger Board
A build-your-own burger board with mini patties, crispy bacon, melted cheese, and all the fixings, perfect for feeding a crowd during game day without spending the whole time in the kitchen.
- Prep Time: 20 minutes
- Cook Time: 30 minutes
- Total Time: 50 minutes
- Yield: 12 servings 1x
- Category: Appetizer
- Cuisine: American
Ingredients
- 1 ½ pounds ground beef (80/20 blend)
- 1 tablespoon Worcestershire sauce
- 1 teaspoon garlic powder
- 1 teaspoon onion powder
- 1 teaspoon salt
- ½ teaspoon black pepper
- 12 slider buns (Hawaiian rolls work great)
- 8 slices cheddar cheese (or American, or both)
- 8 slices cooked bacon (halved)
- 1 cup shredded lettuce
- 1 large tomato (sliced thin)
- ½ cup dill pickle slices
- ½ cup red onion (thinly sliced)
- ½ cup ketchup
- ¼ cup yellow mustard
- ¼ cup mayonnaise
- 1 tablespoon sriracha (optional)
Instructions
- In a large mixing bowl, combine the ground beef, Worcestershire sauce, garlic powder, onion powder, salt, and pepper. Use your hands to mix gently. Form the mixture into 12 small patties, about 2 inches wide and ½ inch thick. Press a small indent in the center of each patty with your thumb.
- Lay the bacon strips on a parchment-lined sheet pan. Bake at 400°F (200°C) for 12-15 minutes, until crispy and deep golden brown. Transfer to a paper towel-lined plate to drain. Once cool, break each strip in half.
- Preheat your oven to 425°F (220°C). Place the patties on a parchment-lined sheet pan, spacing them about 1 inch apart. Bake for 6 minutes, then flip each patty. Bake for another 4-6 minutes, until the internal temperature reaches 160°F (71°C) for medium.
- Split the slider buns in half and place them cut-side up on a separate sheet pan. Toast in the oven at 425°F (220°C) for 3-5 minutes, until the edges are golden and the centers are warm.
- Place your serving board or platter in the center of your table. Arrange the toasted buns in a row or cluster. Place the cooked patties on one side of the board. Layer the cheese slices over the patties while they’re still hot. Arrange the bacon, lettuce, tomato, pickles, and red onion in separate piles around the board. Fill small bowls with ketchup, mustard, mayonnaise, and sriracha, and tuck them into any empty spaces.
- Serve immediately and let everyone build their own burgers.
Notes
Don’t skip the thumbprint indent in the patties to prevent puffing. Toast buns just until golden to avoid shattering. Let patties rest for 2 minutes after baking before adding cheese. Prep all ingredients before starting to cook. Use a meat thermometer for best results.
Nutrition
- Serving Size: 1 burger with bun an
- Calories: 475
- Sugar: 6
- Sodium: 800
- Fat: 28
- Saturated Fat: 10
- Carbohydrates: 28
- Fiber: 2
- Protein: 28
Keywords: game day, cheeseburger board, slider, party food, appetizer, build-your-own burger