I didn’t set out to make a Labor Day dessert. Honestly, I was trying to use up a box of white cake mix and some strawberries that were about two hours from turning. The whole red, white, and blue thing happened by accident—or maybe by the sheer force of summer fruit refusing to be ignored. I poked holes in that cake, poured over some Jell-O, and thought, “Well, this is either going to be a mess or the thing everyone fights over at the picnic.” It took about ten minutes of watching the berry syrup soak in to realize I had stumbled onto something. This wasn’t just cake. This was the cake that makes people close their eyes while they chew. The kind where someone inevitably says, “Wait, can I get the recipe?” before they’ve even swallowed. And the best part? It looks like you spent hours on it. You didn’t. But nobody has to know that.
Why You’ll Love This Recipe
Let’s be real for a second. Most holiday desserts are a performance. You’re stressing over layers, worrying about frosting temperatures, and praying the thing doesn’t slide off the cake stand before anyone takes a photo. This red, white, and blue poke cake is the opposite of that. It’s the dessert that says, “I have my life together,” without actually requiring you to have your life together.
- Quick & Easy: This comes together in about 20 minutes of active work. The oven does the heavy lifting, and the fridge does the rest.
- Simple Ingredients: You probably have most of this in your pantry right now. No specialty stores. No hunting for obscure extracts.
- Perfect for Labor Day: It’s the unofficial end-of-summer celebration cake. It’s cool, creamy, and screams “America” without being tacky about it.
- Crowd-Pleaser: I’ve watched kids ignore the s’mores bar to get another slice of this. Adults do the same thing, they’re just quieter about it.
- Unbelievably Delicious: The texture is what gets you. It’s not dry like some poke cakes can be. The Jell-O soaks in just enough to make every bite juicy without turning the cake into mush. The whipped topping and fresh fruit on top add that cool, creamy finish that makes summer desserts so satisfying.
What makes this different from every other poke cake recipe out there? It’s the balance. I tested this three times to get the Jell-O-to-cake ratio right. Too much liquid and you’re eating pudding with crumbs. Too little and what’s the point? This version hits that sweet spot where every single bite has a little bit of berry flavor, a little bit of cream, and a whole lot of “I’m making this again next weekend.”
This is the kind of dessert that makes you feel like summer isn’t quite over yet. It’s comfort food dressed up in its holiday best, but it still feels like home.
What Ingredients You Will Need
This recipe uses simple, mostly pantry-staple ingredients to deliver that bold, fruity flavor and creamy texture without any fuss. You don’t need a culinary degree to pull this off, just a box of cake mix and a little patience while it chills.
- 1 box white cake mix (plus ingredients called for on the box—usually eggs, oil, and water). I prefer Betty Crocker or Duncan Hines for consistent results.
- 1 (3 oz) box strawberry Jell-O (this gives you that bright red layer)
- 1 (3 oz) box berry blue Jell-O (for the blue layer—look for this in the summer months or order online)
- 2 cups boiling water (divided—1 cup for each Jell-O flavor)
- 1 cup cold water (divided—1/2 cup for each Jell-O flavor)
- 1 (8 oz) container frozen whipped topping, thawed (like Cool Whip, or make your own stabilized whipped cream)
- Fresh strawberries, sliced (about 1 cup, for the red topping)
- Fresh blueberries (about 1 cup, for the blue topping)
A few notes on ingredients: If you can’t find berry blue Jell-O, you can use blue raspberry or even make your own blue gelatin using unflavored gelatin and blue food coloring mixed with berry juice. Just keep the liquid amounts the same. For the whipped topping, I’ve tried homemade stabilized whipped cream and it works beautifully, but Cool Whip holds up better if you’re transporting this cake to a picnic. If you want a lighter option, you can use sugar-free Jell-O and light whipped topping—the texture stays the same, and honestly, most people won’t notice the difference.
Equipment Needed
You don’t need a bakery-level kitchen for this. Here’s what you’ll actually use:
- 9×13-inch baking pan (glass or metal both work, but glass gives you a more even bake)
- Mixing bowls (one for the cake batter, two small ones for the Jell-O)
- Electric hand mixer or stand mixer (for the cake batter—a whisk works too, but your arm will get tired)
- Wooden spoon or spatula (for poking holes—the handle end works perfectly)
- Measuring cups and spoons
- Wire cooling rack
- Rubber spatula (for spreading the whipped topping)
If you don’t have a 9×13 pan, you can use two 8-inch round pans, but you’ll need to adjust the baking time and be more careful with the Jell-O pouring so it doesn’t run off the sides. I’ve also made this in a disposable aluminum pan for easy transport to potlucks—just watch the baking time as those tend to cook a little faster.
Preparation Method
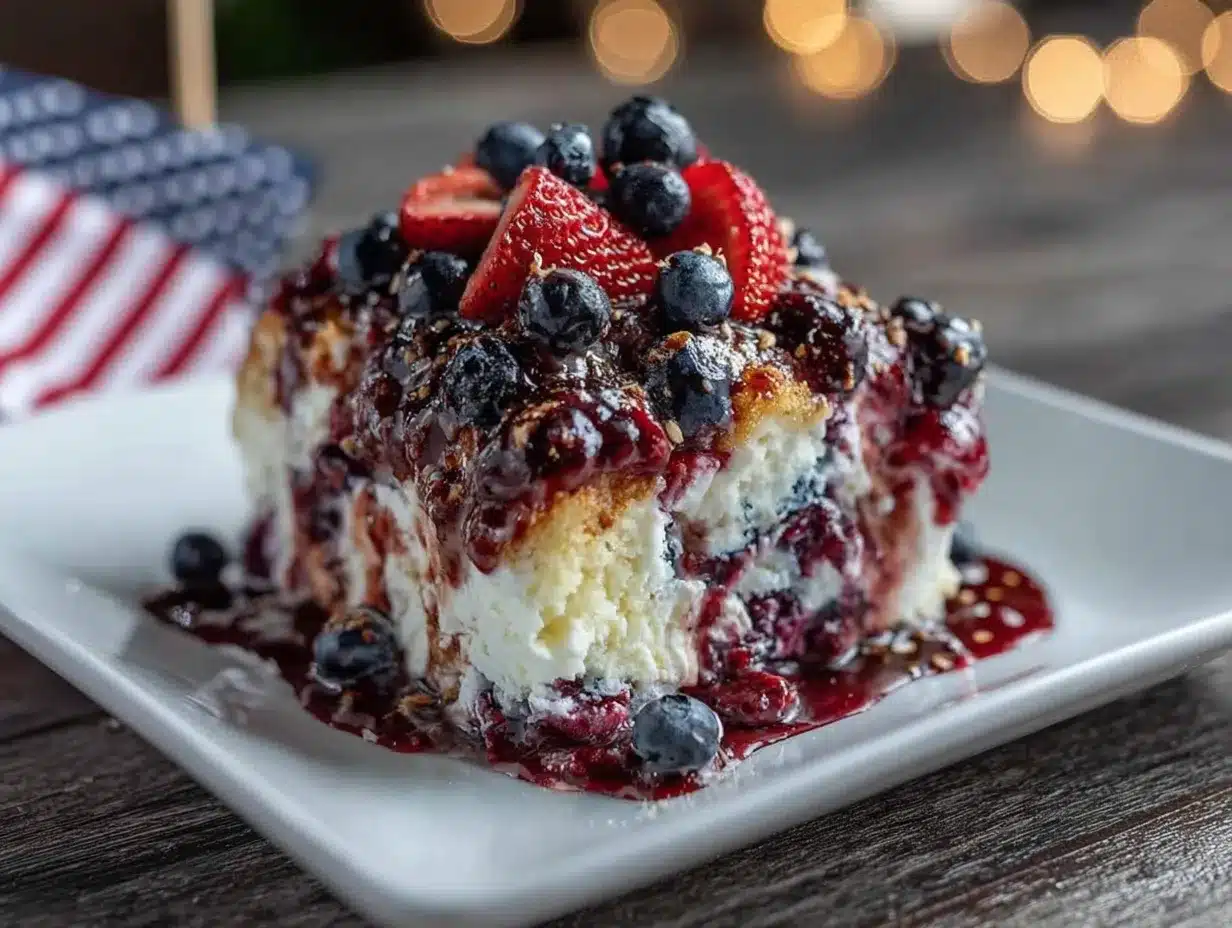
Alright, let’s make this cake. I’ll walk you through it step by step, including the little things I learned the hard way so you don’t have to.
Step 1: Bake the cake.
Preheat your oven to 350°F (175°C). Grease your 9×13 pan well—I use butter or non-stick spray. Prepare the white cake mix according to the package directions. Usually that means mixing the cake mix with eggs, oil, and water until smooth. Pour the batter into the prepared pan and bake for about 25-30 minutes, or until a toothpick inserted in the center comes out clean. Let the cake cool in the pan on a wire rack for about 15-20 minutes. You want it still warm but not hot.
Step 2: Prepare the Jell-O mixtures.
While the cake cools, make the Jell-O. In a small bowl, dissolve the strawberry Jell-O in 1 cup of boiling water. Stir for about 2 minutes until completely dissolved. Add 1/2 cup of cold water and stir. Do the same with the berry blue Jell-O in a separate bowl. Set both aside to cool slightly—they need to be liquid but not hot when you pour them over the cake.
Step 3: Poke the holes.
This is the most satisfying part. Using the handle of a wooden spoon (or a chopstick, or a skewer), poke holes all over the warm cake. Space them about 1 inch apart. Don’t be shy—poke all the way to the bottom of the cake. The more holes, the more Jell-O gets absorbed. I usually do about 20-25 holes.
Step 4: Pour the Jell-O.
Now, here’s the trick. You want to pour the red Jell-O over one half of the cake and the blue Jell-O over the other half. I do this slowly, letting the liquid soak in before adding more. If you pour too fast, it’ll run off the sides and pool in the pan. Go slow, let it absorb, and watch the colors spread. You’ll see the cake start to look like a tie-dye project—this is exactly what you want.
Step 5: Chill the cake.
Cover the pan with plastic wrap and refrigerate for at least 2 hours, but 4 hours is better. Overnight is ideal. The Jell-O needs time to set and really soak into every crumb. If you try to add the whipped topping too early, it’ll just slide off. Trust me, I learned this one the hard way.
Step 6: Add the whipped topping.
Once the cake is fully chilled and the Jell-O has set, spread the thawed whipped topping evenly over the entire cake. Use a rubber spatula and go gently so you don’t disturb the cake underneath.
Step 7: Decorate with fruit.
Now for the fun part. Arrange sliced strawberries on the red side of the cake and blueberries on the blue side. You can get creative here—I like to make a little star pattern in the middle with the blueberries, but honestly, just scattering them looks beautiful too. The fresh fruit adds that pop of color and freshness that makes this cake feel like a real celebration.
Step 8: Chill again (optional but recommended).
Pop the decorated cake back in the fridge for another 30 minutes to let everything set together. This makes slicing much cleaner.
Cooking Tips & Techniques
I’ve made this cake about six times now, and I’ve picked up a few things along the way that make a real difference.
Don’t skip the cooling step. I know you’re eager to poke holes and pour Jell-O, but if the cake is too hot, the Jell-O will just run right through and pool at the bottom. You want the cake warm enough to absorb the liquid but not so hot that it can’t hold it. About 15-20 minutes of cooling is the sweet spot.
Use a straw for cleaner holes. Okay, this sounds weird, but hear me out. A drinking straw (like a plastic one from a fast food place) makes perfect holes and doesn’t tear up the cake the way a fork can. Plus, you can blow through it to clear out any cake crumbs before pouring the Jell-O.
Watch your Jell-O temperature. If your Jell-O mixture is too hot when you pour it, it can make the cake soggy in spots. If it’s too cool, it might start setting before it soaks in. I aim for “warm to the touch but not hot”—about the temperature of a warm bath.
My biggest failure: The first time I made this, I used a fork to poke the holes. Big mistake. The fork just mashed the cake down and created these weird craters. The holes weren’t deep enough, and the Jell-O barely soaked in. I ended up with a dry cake with weird red and blue spots on top. It looked like a science experiment gone wrong. Use a round tool, not a fork. Learn from my mistakes.
Multitasking tip: While the cake is baking, make your Jell-O mixtures. While the cake is cooling, wash and slice your strawberries. By the time you’re ready to assemble, everything is ready to go. This recipe moves fast once you start, so having everything prepped makes it stress-free.
Variations & Adaptations
This cake is surprisingly flexible. Here are a few ways I’ve changed it up depending on what I had on hand or who I was serving.
Dietary Variations: Use a gluten-free white cake mix and confirm your Jell-O is gluten-free (most are). For a lighter version, use sugar-free Jell-O and light whipped topping. I’ve made it this way for a friend who was watching her sugar intake, and honestly, nobody could tell the difference.
Seasonal Swaps: In the summer, fresh raspberries and blackberries make a gorgeous substitute for the strawberries and blueberries. In the fall, I’ve used cherry Jell-O with sliced apples and cranberry Jell-O with pomegranate arils. The technique stays the same, but the flavor profile changes completely.
Flavor Twists: Instead of strawberry and berry blue, try raspberry and lime for a Fourth of July vibe, or cherry and blueberry for a deeper flavor. You can even use lemon Jell-O on one side for a citrusy kick—it pairs beautifully with the whipped topping.
Different Cooking Methods: I’ve made this in a 9×13 disposable pan for easy transport, and it works perfectly. Just reduce the baking time by about 5 minutes since disposable pans heat up faster. You can also bake the cake in two 8-inch rounds and stack them for a layer cake version—just be careful with the Jell-O so it doesn’t make the cake too soft to stack.
My personal favorite variation: I once made this with a lemon cake mix instead of white, used raspberry and blueberry Jell-O, and topped it with fresh raspberries and blueberries. The lemon adds this bright, tangy note that cuts through the sweetness perfectly. It’s become my go-to for summer barbecues.
Serving & Storage Suggestions
This cake is best served cold, straight from the fridge. The texture is perfect when it’s well-chilled—the Jell-O has set, the whipped topping is firm, and the fruit is fresh and cold. I usually take it out about 10 minutes before serving to take the edge off the chill, but it’s not required.
Storage: Cover the pan tightly with plastic wrap or foil and store in the refrigerator for up to 4 days. The cake actually gets better on day two as the flavors meld together. After that, the fruit starts to release moisture and the whipped topping can get a little weepy, so try to finish it within a few days.
Freezing: You can freeze this cake, but I recommend doing it before adding the fresh fruit. Wrap the cake (with whipped topping) tightly in plastic wrap, then foil, and freeze for up to 3 months. Thaw in the refrigerator overnight, then add fresh fruit before serving. The texture holds up surprisingly well.
Reheating: Don’t. This is a cold dessert. If you want a warm cake, make a different recipe. This one is meant to be enjoyed chilled.
How flavors develop: The Jell-O continues to soak into the cake over the first 24 hours. By day two, every single bite has that fruity flavor running through it. The whipped topping also firms up nicely, making for cleaner slices. If you can, make this a day ahead—your future self will thank you.
This cake pairs beautifully with a scoop of vanilla ice cream or a dollop of fresh whipped cream. For a complete Labor Day spread, serve it alongside a grilled peach caprese salad with prosciutto for that sweet-savory balance, or a fresh peach dump cake with brown sugar streusel if you want to double down on the fruit desserts. And if you’re looking for something savory to balance all that sweetness, a creamy slow cooker chicken and wild rice soup is a surprisingly good pairing for a summer evening.
Nutritional Information & Benefits
Let’s be honest—this is a dessert, not a health food. But here’s the approximate breakdown per serving (based on 12 servings):
- Calories: 310
- Fat: 12g
- Carbohydrates: 48g
- Protein: 3g
- Sugar: 34g
- Fiber: 1g
Health benefits: The fresh berries provide a good dose of vitamin C and antioxidants. Blueberries are known for their anti-inflammatory properties, and strawberries are packed with fiber and vitamin C. So while the cake itself isn’t exactly a superfood, the fruit topping does add some nutritional value. If you use sugar-free Jell-O and light whipped topping, you can cut the calories and sugar by about 30% without sacrificing much in terms of taste or texture.
Dietary considerations: This recipe contains gluten (from the cake mix) and dairy (from the whipped topping). For a gluten-free version, use a gluten-free cake mix. For a dairy-free version, use coconut whipped topping or a dairy-free whipped cream alternative. The Jell-O itself is typically gluten-free and dairy-free, but always check the label to be sure.
Potential allergens: Wheat/gluten, dairy, and possibly soy (depending on your cake mix and whipped topping brand).
Conclusion
This red, white, and blue poke cake is exactly what a Labor Day dessert should be—festive without being fussy, delicious without being complicated, and impressive without requiring a single fancy technique. It’s the kind of cake that makes people think you spent hours in the kitchen, when really, you just baked a box mix and poured some Jell-O over it. And honestly? That’s the beauty of it.
I love this recipe because it reminds me that sometimes the best things come from simple ideas. You don’t need a pastry degree or a kitchen full of gadgets to make something that brings people together. You just need a little creativity, a willingness to poke holes in cake, and the understanding that summer deserves a sweet ending.
So go ahead—make this for your Labor Day barbecue. Customize it with your favorite Jell-O flavors, pile on the fresh fruit, and watch it disappear. And when someone asks for the recipe, just smile and say, “It’s easier than you think.”
I’d love to hear how yours turns out! Drop a comment below with your favorite variation, or share a photo of your cake. Don’t forget to pin this recipe for next summer—you’ll thank me when Labor Day rolls around again.
Frequently Asked Questions
Can I make this cake ahead of time?
Absolutely. In fact, I recommend it. Make the cake, add the Jell-O, and refrigerate overnight. Add the whipped topping and fresh fruit the next day, about 2-3 hours before serving. The cake tastes better on day two, and it saves you a ton of stress on the day of your party.
Can I use homemade whipped cream instead of Cool Whip?
Yes, but with a caveat. Homemade whipped cream is less stable and can start to separate after a few hours. If you’re serving the cake within 2-3 hours, go for it. If you need it to hold up for a longer picnic or potluck, stick with Cool Whip or stabilized whipped cream (add a little gelatin or cream cheese to your heavy cream).
What if I can’t find berry blue Jell-O?
Berry blue Jell-O is sometimes hard to find outside of summer. You can substitute blue raspberry Jell-O, or make your own by mixing unflavored gelatin with blueberry juice and a drop of blue food coloring. Just keep the liquid measurements the same—1 cup boiling water and 1/2 cup cold water.
Can I use a different cake flavor?
Definitely. White cake is classic because it lets the Jell-O colors show through, but lemon cake works beautifully with the berries, and vanilla cake is always a safe bet. I wouldn’t recommend chocolate cake for this—the flavors clash with the fruit Jell-O, and the dark color hides the red and blue layers.
How do I get clean slices?
Use a sharp knife and wipe it clean between each cut. For the cleanest slices, chill the cake for at least 4 hours (overnight is best) before cutting. Run the knife under hot water, dry it, then slice. Wipe the blade clean between every cut. It takes a little extra effort, but the presentation is worth it.
Pin This Recipe!
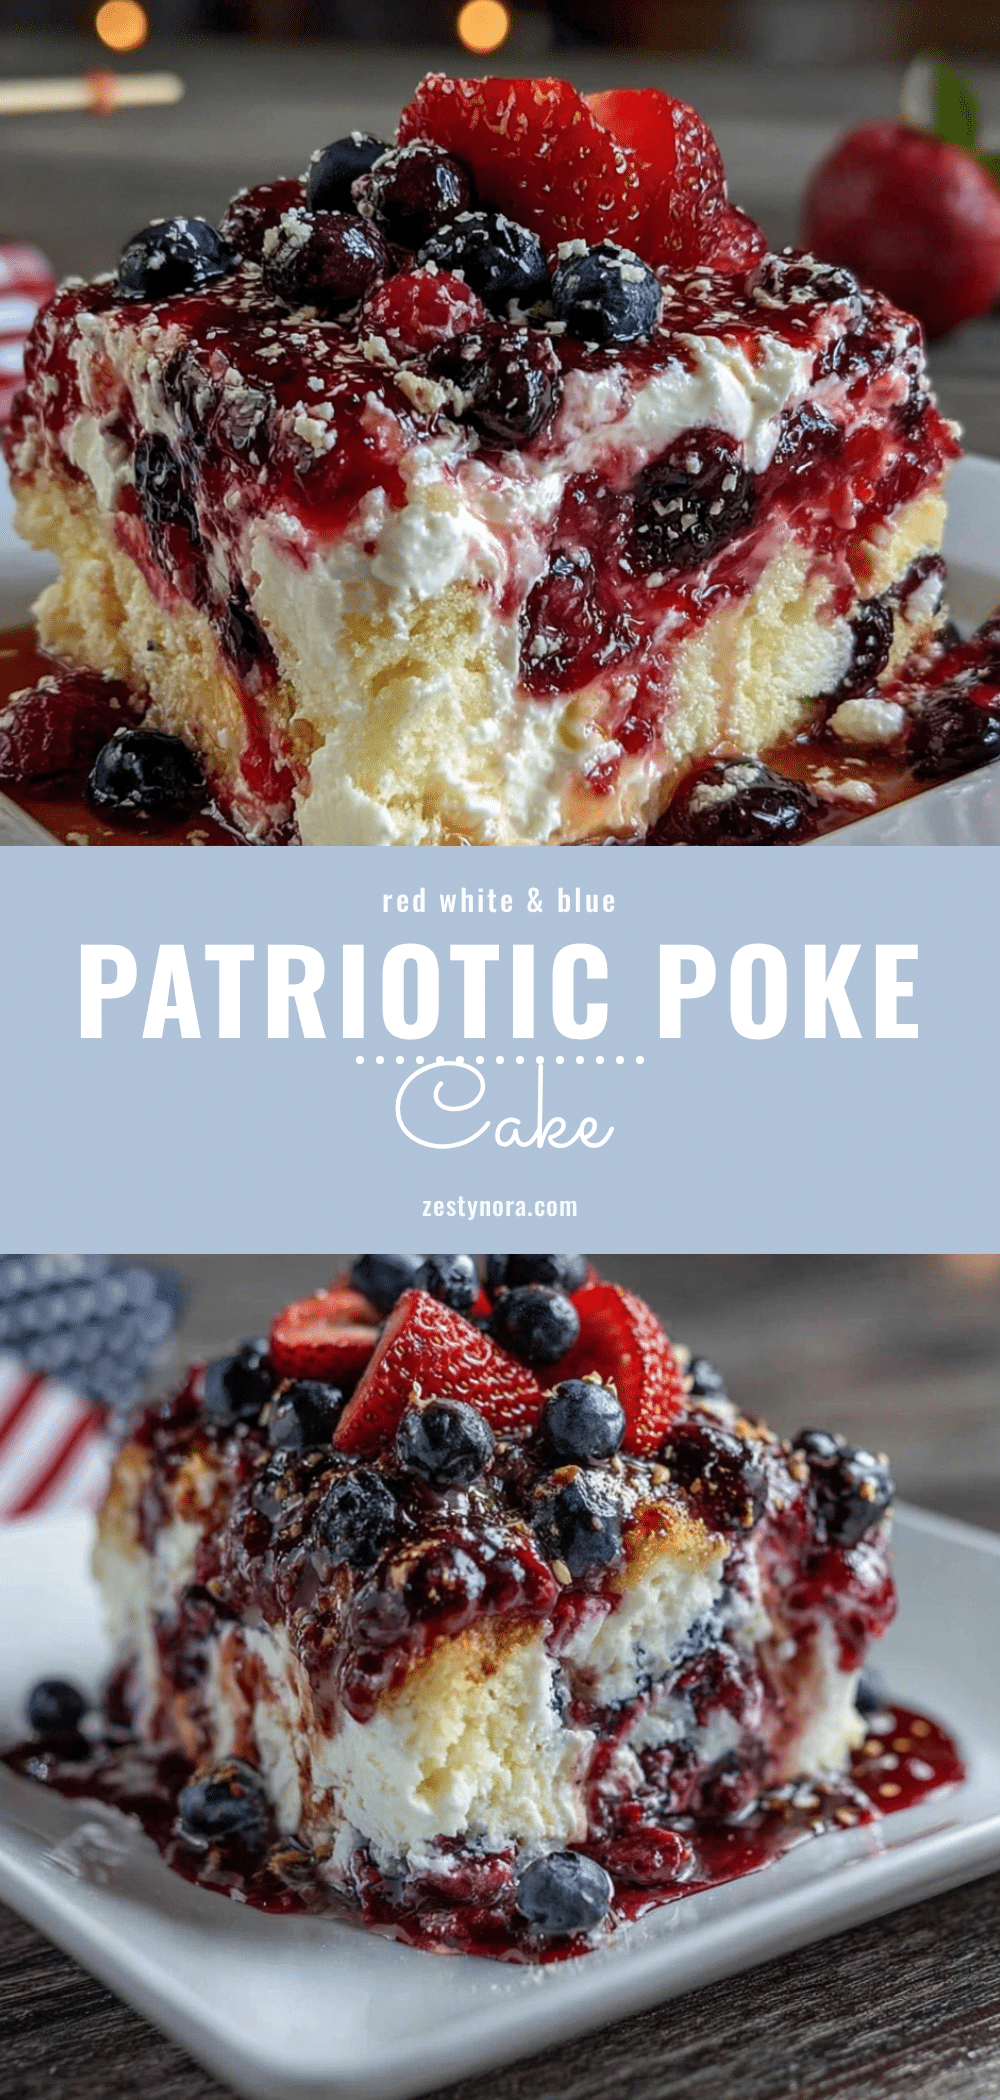
Best Red White and Blue Poke Cake for Labor Day
This red, white, and blue poke cake is the perfect Labor Day dessert—festive, easy, and made with simple ingredients. A boxed white cake mix is poked and soaked with strawberry and berry blue Jell-O, then topped with whipped topping and fresh fruit for a cool, creamy, and crowd-pleasing treat.
- Prep Time: 20 minutes
- Cook Time: 30 minutes
- Total Time: 4 hours 50 minutes (includes chilling time)
- Yield: 12 servings 1x
- Category: Dessert
- Cuisine: American
Ingredients
- 1 box white cake mix (plus ingredients called for on the box—usually eggs, oil, and water)
- 1 (3 oz) box strawberry Jell-O
- 1 (3 oz) box berry blue Jell-O
- 2 cups boiling water (divided—1 cup for each Jell-O flavor)
- 1 cup cold water (divided—1/2 cup for each Jell-O flavor)
- 1 (8 oz) container frozen whipped topping, thawed
- Fresh strawberries, sliced (about 1 cup)
- Fresh blueberries (about 1 cup)
Instructions
- Preheat oven to 350°F (175°C). Grease a 9×13-inch baking pan.
- Prepare the white cake mix according to package directions. Pour batter into prepared pan and bake for 25-30 minutes, or until a toothpick inserted in the center comes out clean. Let cool in the pan on a wire rack for 15-20 minutes (cake should be warm but not hot).
- While the cake cools, prepare the Jell-O mixtures. In a small bowl, dissolve strawberry Jell-O in 1 cup boiling water, stirring for 2 minutes. Add 1/2 cup cold water and stir. Repeat with berry blue Jell-O in a separate bowl. Set both aside to cool slightly.
- Using the handle of a wooden spoon (or a chopstick or skewer), poke holes all over the warm cake, spacing them about 1 inch apart and poking all the way to the bottom.
- Slowly pour the strawberry Jell-O over one half of the cake and the berry blue Jell-O over the other half, letting the liquid soak in before adding more.
- Cover the pan with plastic wrap and refrigerate for at least 2 hours, preferably 4 hours or overnight, until the Jell-O is set.
- Once the cake is fully chilled, spread the thawed whipped topping evenly over the entire cake using a rubber spatula.
- Arrange sliced strawberries on the red side of the cake and blueberries on the blue side. Refrigerate for another 30 minutes before serving for cleaner slices.
Notes
For best results, chill the cake overnight. Use a straw to poke cleaner holes. If you can’t find berry blue Jell-O, substitute blue raspberry or make your own with unflavored gelatin and blueberry juice. For a lighter version, use sugar-free Jell-O and light whipped topping. The cake can be frozen (without fresh fruit) for up to 3 months.
Nutrition
- Serving Size: 1 slice (1/12 of cak
- Calories: 310
- Sugar: 34
- Fat: 12
- Carbohydrates: 48
- Fiber: 1
- Protein: 3
Keywords: poke cake, red white and blue cake, Labor Day dessert, Fourth of July cake, berry poke cake, easy dessert, summer dessert


